Desotodav
-
Posts
1,912 -
Joined
-
Last visited
-
Days Won
14
Content Type
Links Directory
Profiles
Articles
Forums
Downloads
Store
Gallery
Blogs
Events
Everything posted by Desotodav
-
Try this one Brian... http://www430.pair.com/p15d24/mopar_forum/showthread.php?t=26588&highlight=swan+mirror . Plenty of pictures there! Desotodav
-
Mark, try a forum search on 'gearbox leak'. There are 3 threads listed there with all the information that you should need. I've been playing with a similar problem on my truck recently. Desotodav
-
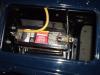
Great job on the radio install Dennis. I've almost finished mounting the 802 radio in my truck. I just need to do a spot of touch-up painting and tighten things up. I found that my push-out (delete plate) was a couple of millimetres smaller than the radio face plate so I had to cut one side just a smidgeon. I'd like to learn more about the speaker that you used - can you post a picture? My install was made a little more difficult as we don't have the "bump out in the firewall" here in Oz like in your trucks over there - well we do but it's on the wrong side of the firewall for our radios! Is the silver bolt shown in your second photo (above the bump out section) the mounting bolt for the rear of your radio? I had to drill a bolt hole in the firewall to mount my radio (the grey square nut is visible in top left corner of my 2nd photo). I am yet to work out what I will do for an antenna. I was told by a mate that I can mount an oval shaped one under the dash, but have yet to look into this. Desotodav


-
Good job on the seat Aussie. The old Singer with the walking foot does a great job. We're fortunate to have one in the family, and somebody who knows how to use it! They are in demand and hard to find. I have an old Upholsterer mate who has been looking to purchase one for years. I'd love to see pic of the finished seats. I'm having my truck upholstery done at present. Keep up the good work! Desotodav
-
Rebuilding the electric wiper motor?
Desotodav replied to B1B Keven's topic in Mopar Flathead Truck Forum
I had my wiper motor rebuilt as it was a bit sticky. It turned out that the factory grease that was used all of those years ago had solidified over time and was no longer lubricating anything. It came out looking good and working much better after the rebuild. I agree that your earth could be a problem also. Desotodav -
Lovely car Joel. Check this one out...http://www.kfxm.com/Detroit/Detroit_Iron.htm there's an interesting comparison for you of that era. There's even a couple of Mopar's there!!! Desotodav
-
Fuel tanks...Square or rectangle?
Desotodav replied to dontknowitall's topic in Mopar Flathead Truck Forum
I haven't found any difference between the 50-55 tanks here Ryan, apart from the sender being a different set-up between 6v and 12v tanks. The 6v one (pictured) had a lock ring affixing the sender, and the 12v one had small bolts securing it. What's wrong with your tanks mate? I have a few down at the shed but they look no better than yours. Desotodav
-
Tom, so sorry to hear the news of Terri's passing. My sincerest condolences to you and family in these difficult times. Take comfort in the thought that maybe she was required to perform special tasks in a higher place. I am sure that she will be watching over you. God bless. Desotodav
-
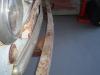
Jason, good advise from Hank on the waterpump. I would have gone that way if we had them readily available over here. I ended up having mine rebuilt and the pulley was a poor fit. $400 and a new radiator later (because the pulley and fan let loose and went through the back of my freshly rebuilt initial radiator) all was well!!! I'm not sure if this helps you with your cab corners, but here's the link to my 51 Desoto truck rebuild...http://gallery.oldholden.com/Streetneat/album73/Davins+Desoto/ The guys did patch my corners from memory but I don't think it made it to the photo stage. Desotodav
-
Leigh, there's no leeway for 'special vehicle' (club) registrations - they all still have to pass roadworthy. You're probably best off contacting the ASRF and getting ideas from them before undertaking any major work as they seem to be the governing body here. Desotodav
-
Ditto... Great looking car Robert. Well done!!! Desotodav
-
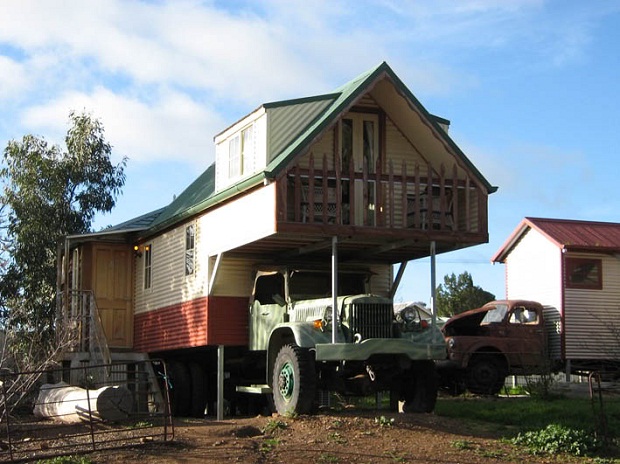
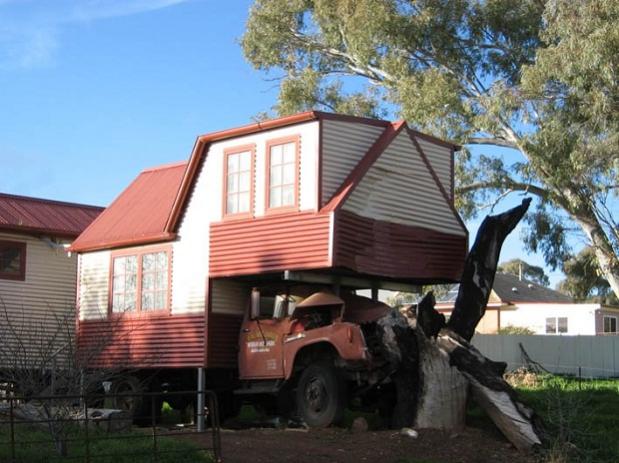
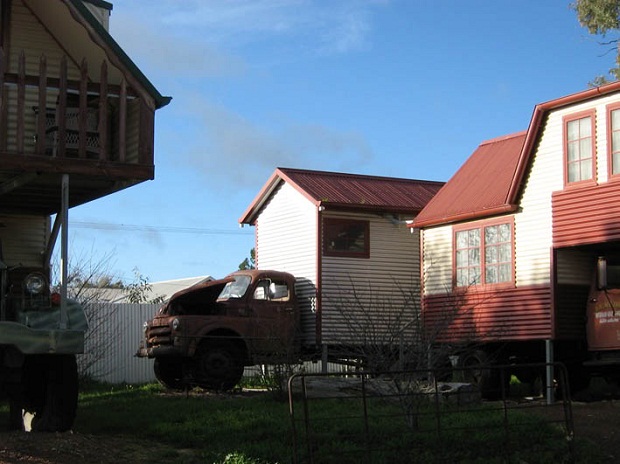
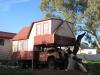
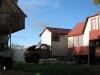
I thought that you'd enjoy these Todd B. The photos come from the HCVC Vintage Truck Forum here in Oz. A member there said that they are set up as accommodation at a truck stop in South Australia. Who knows, maybe the inspirations of your handiwork are far reaching??? Desotodav
-
I thought that cigarette lighter/key trick was a cool idea Hank. I'd imagine that it would work well unless your car thief was a smoker. I have a mate who has a more recent utility truck that has a kill switch activated by pushing in the ash tray. I guess this works in his favour as every time he gets in the car he has to pull the ash tray out to start the vehicle - he's a smoker too!!! Desotodav
-
Front bumper bracket needed for 1953 B-4- B pickup
Desotodav replied to manfromtarsus's topic in Mopar Flathead Truck Forum
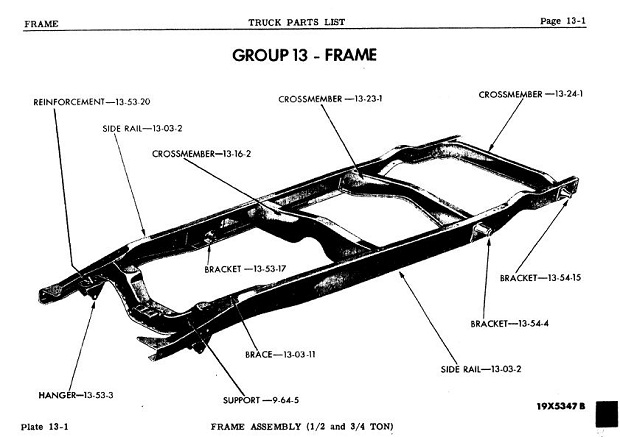
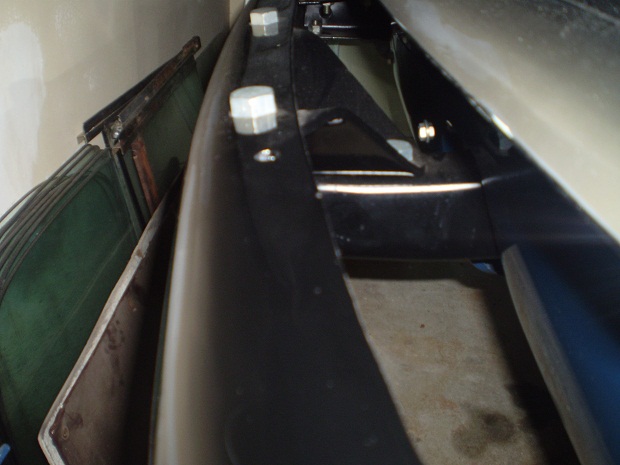
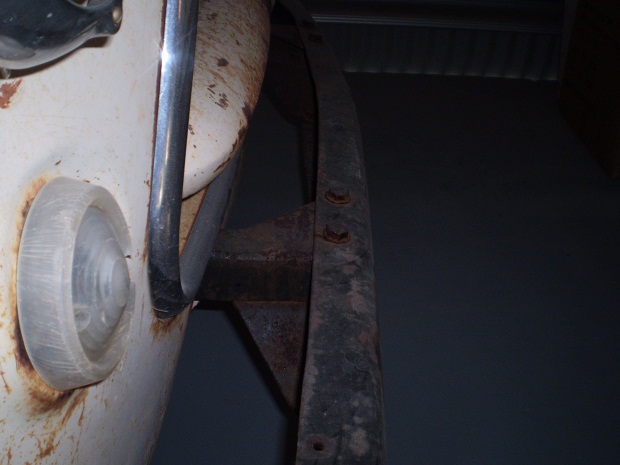
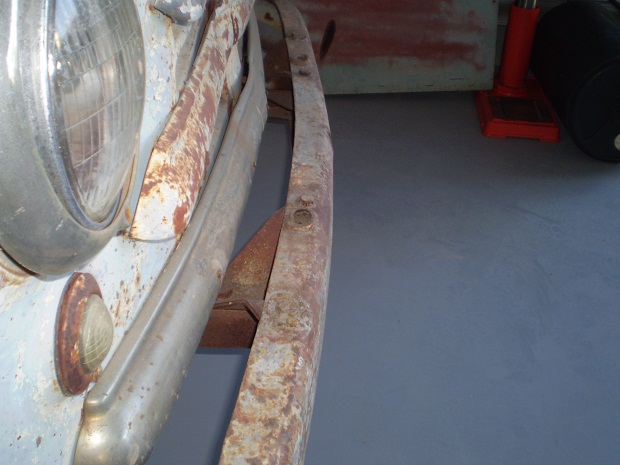
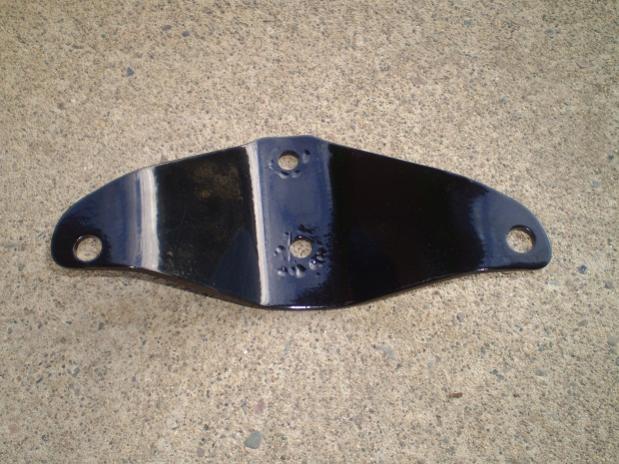
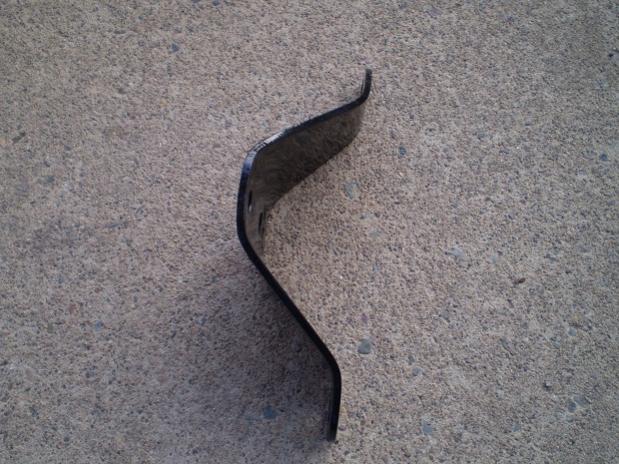
Sorry 'manfromtarsus', I can't see where you are coming from. I'm thinking that you have the angled piece (which is part of the chassis rail) confused for a bracket. I've attached a few photos for you. The bracket in the photo that I attached previously are the only brackets used to attach the bumper as far as I am aware. You will find that there is no room between that bracket and the inside of the bumper for other brackets etc after you attach this bracket with the bumper to the chassis rail. It will fit directly onto the chassis rail (either on top or below the rail?). I checked the previous post as you suggested. The photos that Barry attached showed the front of the chassis rail that had been modified (chassis rail cut off and steel plates welded to it). I'd suggest that Hank's and Merle's photos were a better reference point of the chassis rail for you. My 51 Desoto and 53 Dodge truck/s have the brackets attached to the top of the chassis rail, whilst my 55 Desoto, 48 and 56 Dodge's have the brackets attached to the bottom (as I suspect yours should be). I hope this clears things up for you. Desotodav
-
Front bumper bracket needed for 1953 B-4- B pickup
Desotodav replied to manfromtarsus's topic in Mopar Flathead Truck Forum
I agree with you Joel. Although, my 2 brackets are bolted on top of the chassis rail to allow the crank handle hole in the bumper line up with the crank end. The bottom of my bumper bolts directly to the bottom side of the chassis rail. The brackets have slightly differing angles between the left and right ones - which would account for the 2 different part numbers. I probably have some spares here in Oz, but the freight costs would be too high for consideration. Desotodav

-
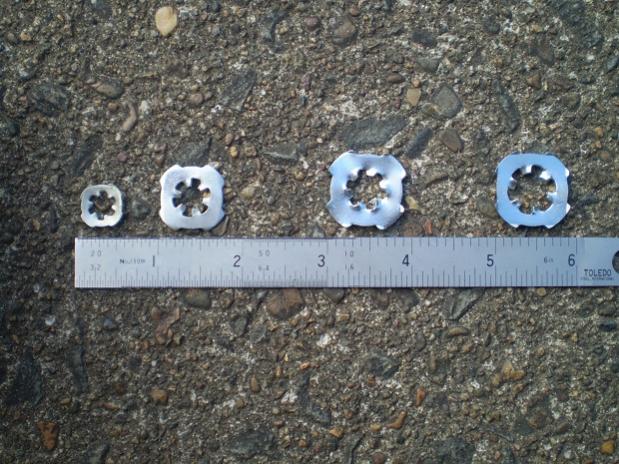
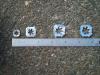
Mark, I've attached a picture of the 4 different washers used for you. They are actually called 'internal tooth periphery washers'. The best range that I could find were at this website http://www.wclco.com/Lock_Washers/Toothed_Lock_Washers/lw30.php , but they have a $100 minimum order so you might have to shop around. I have asked my fastener supplier over here if they have a source as they stock a range of unusual fasteners - I'll let you know if they come up with any info. Desotodav
-
There was a bit of info on the grille bar stripes in the Bunn Bible from memory. I don't have mine here at present but I'm sure someone can fill you in with the required details. Desotodav
-
I love my 6V Optima battery Hank. I ordered mine direct from Optima here in Oz. Unfortunately, ours are a little more pricey here ($285) than yours over there. I have been well pleased with the increased cranking power provided by my new battery. I used a cut-down original battery hold-down bracket to mount the new battery in. I chopped either end down to the width of the battery and then riveted steel channel (the same profile as the ends) to make up the sides for the length of the battery. The support frame is relatively tight on the top of the battery and is held down each end by a long thin bolt (from a modern day battery hold-down kit), with a right angle bend at the bottom and a wing nut at the top. I cut round rubber gaskets for around the battery post/s at the top to ensure that I didn't short out the battery with the metal mounting bracket as it does sit close to the post/s. To each his own mate...if you're happy to run 2 batteries... I say good for you!!! I was actually thinking of hiding a small old Klaxon horn in my spare battery compartment space. I have a mate that restores them so I'm sure that finding one the right size won't be a problem. Desotodav
-
my start up before the coil burned out..
Desotodav replied to dontknowitall's topic in Mopar Flathead Truck Forum
Nice job Ryan...pity about the coil problem though. The progress so far looks great. Keep us posted mate. Desotodav -
Send me an email Ryan and I'll try to help you out. I have some floor panels in the shed. Davin (Desotodav)
-
Good job Mark. I almost expected 'some guy' to be wearing a mask whilst conducting his illegal activities! What an exciting moment. Great video clip/s too. Well done mate! Desotodav
-
Well done Moose. I trust that Mother and baby are well... and that you are recovering from the tiring experience!! Congratulations!!!! Desotodav
-
Mark, I've attached a picture of a 54/55 'coupe ute' from here in Oz which shows the 1 piece windscreen that was carried through for future models. I don't know the owner of the truck, but it certainly is one of the best that I have seen! Desotodav

-
I have seen a parts supplier here in Oz list dye for lights frequently in recently times. Would Chrysler have had dye available as a stock item? Here's a link to their dye listed on Ebay at present.... http://www.ebay.com.au/itm/CHRYSLER-DODGE-DESOTO-PLYMOUTH-RED-LENS-BULB-DYE-/270721823690?pt=AU_Car_Parts_Accessories&hash=item3f084733ca#ht_1487wt_1139 They also have amber dye listed. Desotodav
-
Picture of my mate Arnold's Fargo truck showing bonnet emblem attached. Desotodav