
Leaderboard


Popular Content
Showing content with the highest reputation on 10/20/2024 in all areas
-
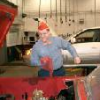
3 years since I last checked in. What's my excuse? Life, crumbling house, kids, learning a new trade at the age of 53. I haven't been doing much wrenching in that time, but I managed to get a few things done. Got my wheels sandblasted, and sprayed my first non-rattle can paint job with an LVLP spray gun and my anemic Craftsman compressor: Not bad, if you squint. Fortunately, they'll be completely covered by hubcaps and beauty rings. Other than that, I've been working on stuff that'll help me to not have to farm out work on my project: refurbed a giant, old drill press that I have no idea how I got by without, refurbing a South Bend lathe and a Sun distributor machine, trying to learn to weld and do body work, etc. Reading my old posts, I have to laugh at my optimism at thinking I'd get this thing on the road quickly. Fool! The more I poke at this thing, the more I find that needs to be fixed. The shiny stainless trim and crappy splash job paint hid a lot of sorrow. Here's what I found lurking under all that shiny trim... I think the mice who used to live in the rockers had something to do with some of this. Really, though, not bad for a 75 year old car from this part of the country, and I'm glad that my attempts at body work will be hidden under stainless trim, for the most part. Gonna have to make some body mounts, and of course, while I'm in there, replace the rubber, and then, of course, while I'm down there, just replace all the body rubber, because, why not...: ...and this bit of hilarity, my left front fender is practically sculpted out of bondo. Fooled me, but apparently that's not hard. I'm pretty sure I can do better than this. Then there's the engine. I started off by thinking I was gonna just send the harmonic balancer off to be remade, and slam it back together. Time goes by, I'm reading too much, and learn that there's this thing called a timing chain that stretches out over time. I learn how to check it, and go out to my wreck and find out that I can turn the engine over by hand a good amount before the distributor moves. Dang. Might as well do that while I've got the rad and balancer out. Last night, thanks to posts on this site, I figured out how to pull the crank hub: Not sure if it's evident in the pic, but some caveman used the old "hammer the snot out of it until it's back on" method, mushrooming the hub near the key, and trapping the pulley on, causing me to think that the pulley wasn't meant to come off. Here's a tip for anyone who might be wondering what torque specs to use for tightening bolts. If you can't find the specific torque specs for, say, the harmonic balancer bolts, don't just use random torque specs that you find somewhere on the internet. Find the torque specs for the bolts you're using, taking into account thread size and bolt strength. Then, you won't have to look for a new part, or learn to heli-coil the old bolt holes. Not saying I did this, or that I'm an idiot, but... Other issues include; rear axle with spun bearings. Repaired, sort of, with shims and loctite, not sure I trust it. Fortunately, have a line on another rear end. Brake shoes with those damn holes drilled in them (see other posts). Sick of rebuilding B+B carbs, 4 hours of driving on the Long Island Distressway and 50 bucks netted me one good Stromberg BXVES and a box of 4 or 5 other old one barrel carbs that I can flip. Stopped fooling myself that the interior was useable as is and didn't smell like mouse pee, going to need to learn to stitch up an interior. Wiring, of course. Thinking back to 3 years ago, when I tried to put it in gear for a cruise down the driveway, the gears would grind---probably looking at a new clutch. Steering box is dry and doesn't hold fluid, that should be an adventure. Bad body fitment is driving me crazy, fortunately one of those Mopar service bulletins deals with exactly that, specifically for my era car. Etc. Gonna keep after it, 4 years later I still feel lucky to have it, and really dig wrenching on it.2 points
-
I had one of those new pumps that locked up after about 15 minutes. Very odd failure and no indication that it was going to happen beforehand. Properly primed, spun freely etc. Knocked two teeth off the drive gear and nicked the cam gear a little. Not the best day... The one I got for the full rebuild this time is fine, no issues. That being said... I always check all clearances myself during reassembly regardless of who did the machine work. I check all bearings, gap every ring in it's appropriate cylinder, check valve contact, adjust valves, etc. Be sure your engine stand is secure and preferably has 4 legs. These are heavy buggers especially once the bellhousing is on and stability is key. Make sure the pistons are facing the correct direction and the rods are in the correct spots. Oil hole faces the cam. Make sure all the rod caps are matched to their attendant rods. Put rubber hoses over the rod bolts as you put them in the block so you don't nick the crank and damage it. I dip the full piston assembly into a coffee can of oil before I put it in the block. Clock the piston rings 180° apart when you put the pistons in. I also do a rotation check after each piston is installed individually to see if there are any binding issues. Prime the oil system before startup, I use a syringe plumbed into the gallery until I see oil at the bearings. Good assembly lube on bearings, seals and valvetrain sliding components. I also plumb in a mechanical test oil pressure gauge. Reassurance that everything is good with a good gauge you can trust. Don't forget the oil relief plunger and spring! If it's a new cam, I put Rev Lube on the cam lobes and tappets along with actual break in oil (for flat tappet cams). New flat tappet cam for me also means prep all ignition, fuel and cooling system for immediate fire up and 30 minute break in run on first startup at 2500 rpm. That oil is changed after the 30min break in and a new filter is installed too. fill the cooling system as far as I can before I put in the thermostat and housing. Helps prevent air pockets and overheat on that break in startup. Make sure you put all the oil gallery plugs back in and sealed. Make sure you coin all your freeze plugs in place. I also seat them in 599 grey silicone myself, but do as you see fit. Be sure the coolant petcocks (both) are closed. Make sure you put the timing chain oil tube back in! Don't forget the oil slinger before you bolt on the timing cover. Center the timing cover seal to the crank. Make a tool or use the crank pulley. Make sure you attach the oil pump transfer pipe back in the correct way or the crank will hit it! Disassemble and clean the oil pickup screen thoroughly if that was not done. I always paint the timing pointer and timing marks on the crank pulley with my favorite bright colors before assembly. Makes tune up work much better later on. Don't reuse any hardware that looks suspect. If it feels funny when you tighten it and torque it, stop and find out what is wrong. Paint everything you want painted now. Replace the water distribution tube and reinstall it with the opening slots facing the valves. Remember to install all the seals. Use your favorite version of thread sealant on all headbolts, manifold bolts and timing cover bolts that pass into water jackets. They will leak if you don't. I personally seal all gaskets. I have never trusted paper alone once something has been apart. Your choice on this, but my rebuilds are leak free. Use whatever sealer you prefer. I like 599 grey. Torque the head in sequence and in steps. Remember head studs have a lower torque than the bolts if you have any studs. Torque them all again hot at the end of your first warm up, they will be loose. Spray copper sealant on the head gasket, one side or both according to your feelings on the matter. That covers most things I can think of. I can reassemble and run in a normal day once all the machine work is done, but each person and each engine is different. I would prefer to spend more time and be absolutely sure it is correct if in doubt. It's just careful work, not crazy complex stuff, but missing a nut or bolt in the wrong spot can end the engine. Just go slow and double check your work. Work without distractions and don't entertain anyone while your doing it. You have the wherewithal to be cautious and ask these questions, and that alone makes me feel like you will do a good thorough job on it. Most of all, have fun!2 points
-
The first 2 years of the flathead have exposed cylinders without water jackets. So the block is more narrow. This is what causes the mismatch you are thinking of1 point
-
I think you are doing fine. My truck is my first project vehicle also. Like you I had to practice and learn to spray with a HPLV gun. And teach my self to weld on other projects, before I felt comfortable welding on the truck exterior panels. I have been working on my truck since 2018. there was a full year one time I never had a chance to work on it. Then this year life got in the way and it was 8 months I did not have time to work on it. I started to work on it a month ago .... then my wife car has been a pita and have to work on it again. .... Think I finally found the issue and fixed it yesterday .... nice Sunday drive today to see if it is fixed. Then can get back to work on the truck. At least I did get the interior stripped out and ready to prep for paint .... hoping to finish painting before the weather turns to cold for it. Maybe it will be ready to hit the road next spring ..... just keep giving it whatever time you can and eventually will get there.1 point
-
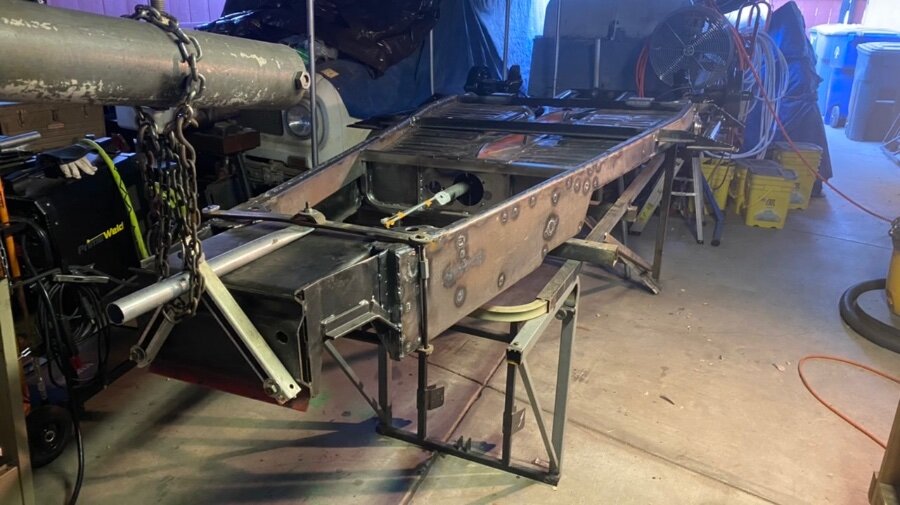
I started cutting away the jig today, and the frame is ready to roll over. It developed about 5/16” of positive camber from full seam welding of the bottom rails. I want a little, but I will probably loose half of that when I weld the top. This frame originally had a crooked sag. More on the driver side, where all the shoddy rust repair had been.
 1 point
 -
https://p15-d24.com/forum/27-classified-ads/1 point
-
Just a few ticks shy of 250k, the starter in the QuadCab went into intermittent mode, so a solenoid contact kit was ordered...went thru this with The Blue Bomber a few years ago, waaay cheaper than starter replacement. Studying my service records, I decided to go ahead and service the transmission, change the rear axle oil, clean+lubricate the calipers, and flush the brakes while the weatherwas nice. Things went as well as expected, no surprises thankfully. Master cylinder was siphoned out, then all caliper pistons were compressed with C-clamps to force more fluid back into the master cylinder for further siphoning. Brake fluid was as dirty as I expected after 3yrs, starting with the RR caliper to get most of the filth out. After the initial bleed, pedal was pumped to get pistons squeezing on the sorta evenly worn pads. Brake fluid was observed to have a few puffs of contaminants during final bleed, with fluid mostly clear on all 4 corners. After a few days of sitting on a shelf, I looked at that brake fluid again...that 1st pass blew out alotta crud, fluid was dark greenish brown with the sunlight through it...the last pass had very little crud, fluid almost pristine, but kinda looked like it had a few drops of water in it. The test drive into town went well. Before I did the transmission service almost 6yrs ago, on a flat stretch of highway, that truck would turn 2300 rpm @70mph; after service, it only turned 2000 rpm. After the sludge blew out of the transmission valve body 18 months ago, the pan magnet had a mushroom of goo stuck to it...now it turns 1800 rpm @70mph, with plenty of low end grunt + highway acceleration, something this old buggy had not done in years. And right as I rolled up to the stop sign at the highway back to the house, the odometer turned 250k...good times1 point
-
It doesn't matter....it'll be finished when it is finished. If someone asks when it will be ready to run, just tell them "Thursday". No need to specify which Thursday. Enjoy your new engine!1 point
-
I have nearly completed seam welding the bottom of the frame. I was just going to skip-weld, but I’m having too much fun. I’ve filled in the skips. Most of the welds are looking like this: Not perfect, but nice enough. But a few times I did this: Welded the electrode right to the steel. This resulted in drilling and grinding and brushing, but fortunately I made about 15 feet of seam welding (in 1” to 1.5” skips) and only screwed up about 3 times. That was the worst one, looking like Hunga-Tonga going off in the Pacific.

 1 point
 -
Although I have never built a complete engine from scratch I will suggest that unless you trust the machine shop completely be sure you check that all the oil and coolant passages are clean and clear. You might already know this and thus can safely ignore my post but I felt it needed to be said1 point
-
I took my time assembling my flathead engine. I checked and re-checked all my work. It was a first time flathead rebuild for me and I took it slow. I thoroughly enjoyed the process. I suppose a flat-rate mechanic back in the day would have done so many rebuilds, he could do it in a day. Not me. I did it when I had spare time. Between my full time job and honey-do lists. Everything that I was unsure of I stopped and researched. Even when I was sure it had it right, but didn’t grasp the why, I stopped and researched some more. I considered my engine to be a self taught correspondence course in flathead rebuilding. I learned a ton. If I recall I dragged the block home from the machine shop in about mid-June. I let it sit all summer. I believe I started reassembly in early Oct. i flashed it up about Jan 1 or so. A very memorable, enjoyable period in my life. Out to the shop to tinker and make a real man outta myself. Lol.1 point
-
Keith’s Garage on YouTube. He’s a member of this forum and did a series on rebuilding a Plymouth flathead. I did my first one not long ago and if I can you can.1 point
-
For Sale ads will cost $4.99 for 30 days and are deleted after 30 days. To place a For Sale ad... First, post your ad in the For Sale Classified Ads The ad will not appear until after payment is made. Next make your payment by purchasing a "For Sale Classified Ad 30 Day Subscription". in the Store When payment notification is completed your For Sale ad will be approved and run for 30 days.1 point
-
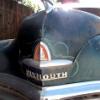
1941 Dodge D19 (series not model specific but all shared same frame) WEIGHTS & MEASURES WHEELBASE 119.5 inches OVERALL LENGTH 202.81 inches OVERALL WIDTH 75.7 inches OVERALL HEIGHT 67.7 inches FRONT TRACK 57 inches REAR TRACK 60.28 inches CURB WEIGHT 3,149 pounds1 point


