40plyrod Posted April 8, 2015 Author Report Share Posted April 8, 2015 I never realized that Don removed his motor to provide a picture of what the motor mount should look like, what a great forum. Don can you show me what the 3rd-4th gear syncros look like. All kidding aside my front motor mount looks like it's shot resulting in a little less clearance for replacing the belt, I guess it's another couple of steps back. Haven't had a lot of time on the Plymouth in the last little while but I did manage to put some sound deadening down in the cab, so I have some pics from that. Also found this universal weatherstripping made by pro-form it measures 5/16" x 1/2" and is sold in a 25' roll for about 10 bucks so I thought I'd give it a try for my cowl vent seal. Seemed to work well. I'm not building a restored car so I also used it for the hood lacing and for the insulator between the 2 inner fender halves. Quote Link to comment Share on other sites More sharing options...
Don Coatney Posted April 8, 2015 Report Share Posted April 8, 2015 Don can you show me what the 3rd-4th gear syncros look like. Here you go. 3 Quote Link to comment Share on other sites More sharing options...
DonaldSmith Posted April 8, 2015 Report Share Posted April 8, 2015 (edited) That was a quick disassembly of the trans! Quicker than Forrest Gump assembling his rifle. Edited April 8, 2015 by DonaldSmith Quote Link to comment Share on other sites More sharing options...
fstfish66 Posted April 9, 2015 Report Share Posted April 9, 2015 the cowl vent seal looks great,,, i have a newer gasket and it still leaks,,, Quote Link to comment Share on other sites More sharing options...
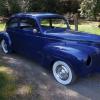
40plyrod Posted April 20, 2015 Author Report Share Posted April 20, 2015 Well spring has hit kinda early here and because I didn't feel like doing too much productive this weekend I decided to throw the seat in the old 40 and drive it outside to wipe some of the dust off it and take pictures. 1 Quote Link to comment Share on other sites More sharing options...
40plyrod Posted April 20, 2015 Author Report Share Posted April 20, 2015 An artsy-fartsy pic. Quote Link to comment Share on other sites More sharing options...
deathbound Posted April 20, 2015 Report Share Posted April 20, 2015 Looks great, nice to have an avatar with color. Quote Link to comment Share on other sites More sharing options...
mrwrstory Posted April 20, 2015 Report Share Posted April 20, 2015 That's just awesome! Love the color! I look forward to seeing it on the road to Victoria in 2016. 1 Quote Link to comment Share on other sites More sharing options...
40plyrod Posted April 21, 2015 Author Report Share Posted April 21, 2015 That's just awesome! Love the color! I look forward to seeing it on the road to Victoria in 2016. Thanks. That's the goal but I'm gonna have to get crackin' Quote Link to comment Share on other sites More sharing options...
40plyrod Posted June 3, 2015 Author Report Share Posted June 3, 2015 I haven't updated in awhile but not much progress has been made. Trying to get our crops cut and new crops planted has really taken much of my time lately so in the last month+ I've only been working on converting my front park lights to turn signals and installing the headlight buckets and bezels. I was finally able to finish this last weekend. Pics Quote Link to comment Share on other sites More sharing options...
40plyrod Posted June 15, 2015 Author Report Share Posted June 15, 2015 Work's finally slowed a bit and allowed me to get back to the plymouth. Spent most of last weekend fixing some of the things that were never fully finished or weren't quite right. The clutch pedal arm no longer make a sound that raises the hair on the back of my neck by grinding on the floor and the electrical gremlins have been sorted out. I couldn't figure out why the fuel gauge went haywire every time I put on the lights and would blow the fuse when I flashed the high beams, apparently having the wires color coded and labeled every 6" is still not enough to stop me from confusing the tail light lead and the fuel sender lead when making a connection under the dash That job was made worse by the fact that I zip tied the wiring harness every 4". I also went around and put bolts in every thing that still needed it, sometimes in the excitement of putting something together it gets one maybe 2 bolts to hold it when really it's supposed to have 6. Not much in the way of pics for those projects but this weekend I finally finished cut polishing the car. When I think of how many times I've blocked this car I'm sure I could now pick it out by touch. . .blindfolded....in the dark! I'm not really that fussy and wasn't trying to make it too nice, I am just trying to fix the best bodywork and worst paint job I've ever done. The problem now that it's shiny is it gets dusty really fast and shows scratches easily. Oh well let the patina begin. Before and after pics 1 Quote Link to comment Share on other sites More sharing options...
Dave72dt Posted June 15, 2015 Report Share Posted June 15, 2015 The before and afters really show the difference that extra time and energy make. Well done. Quote Link to comment Share on other sites More sharing options...
46Ply Posted June 15, 2015 Report Share Posted June 15, 2015 Nice job on the paint! Very nice! Quote Link to comment Share on other sites More sharing options...
mrwrstory Posted June 16, 2015 Report Share Posted June 16, 2015 II can hardly wait to see it. Quote Link to comment Share on other sites More sharing options...
40plyrod Posted June 17, 2015 Author Report Share Posted June 17, 2015 Thanks guys, there are still some flaws in it that I can't polish out, I'm not even sure what caused them, but it photographs well. If I had unlimited time and money it probably would have bee repainted but I want to get hauling my family around in it so this is as good as it gets... for now. Quote Link to comment Share on other sites More sharing options...
Plymouthy Adams Posted June 17, 2015 Report Share Posted June 17, 2015 you get it too perfect..you will not want to drive it anywhere and especially not park it and go away from the car for even a minute.. 1 Quote Link to comment Share on other sites More sharing options...
40phil41 Posted June 17, 2015 Report Share Posted June 17, 2015 I haven't updated in awhile but not much progress has been made. Trying to get our crops cut and new crops planted has really taken much of my time lately so in the last month+ I've only been working on converting my front park lights to turn signals and installing the headlight buckets and bezels. I was finally able to finish this last weekend. Pics What did you use for sockets for the directionals? I tried to do this with my '40 Dodge but couldn't find a socket to fit in the available space. Phil 1 Quote Link to comment Share on other sites More sharing options...
40plyrod Posted June 18, 2015 Author Report Share Posted June 18, 2015 What did you use for sockets for the directionals? I tried to do this with my '40 Dodge but couldn't find a socket to fit in the available space. Phil Phil, the socket wasn't anything special, I think it was just a universal pico dual filament socket able to be pushed into a 3/4" hole. I removed the bracket from the headlight bucket that held the original park light bulb and snapped the pico socket into the park light reflector in the headlight bezel. The whole trick was finding an 1157 bulb with a very small globe. After ordering the wrong bulb at the motorcycle shop a few times I found the right one, the part number I used was 04-1483 not cheap at around 4 bucks a bulb but solved the problem. I think I also used a ball-peen hammer on the headlight bucket to give the wire end of the socket a little more room. I'm not that ingenious though I got most of this from this thread on the Hamb http://www.jalopyjournal.com/forum/threads/my-40-plymouth-coupe.648944/ Quote Link to comment Share on other sites More sharing options...
40phil41 Posted June 18, 2015 Report Share Posted June 18, 2015 (edited) Phil, the socket wasn't anything special, I think it was just a universal pico dual filament socket able to be pushed into a 3/4" hole. I removed the bracket from the headlight bucket that held the original park light bulb and snapped the pico socket into the park light reflector in the headlight bezel. The whole trick was finding an 1157 bulb with a very small globe. After ordering the wrong bulb at the motorcycle shop a few times I found the right one, the part number I used was 04-1483 not cheap at around 4 bucks a bulb but solved the problem. I think I also used a ball-peen hammer on the headlight bucket to give the wire end of the socket a little more room. I'm not that ingenious though I got most of this from this thread on the Hamb http://www.jalopyjournal.com/forum/threads/my-40-plymouth-coupe.648944/ Thanks very much. It was the bulb that I couldn't find the last time I tried this. I'll get a pair of these bulbs and give it another try. Are you running 12V or 6V? Both of my cars are 6V. Phil Edited June 18, 2015 by 40phil41 Quote Link to comment Share on other sites More sharing options...
40plyrod Posted June 19, 2015 Author Report Share Posted June 19, 2015 Oops sorry, never thought to ask you. My car is 12 volts. Quote Link to comment Share on other sites More sharing options...
40phil41 Posted June 19, 2015 Report Share Posted June 19, 2015 Oops sorry, never thought to ask you. My car is 12 volts. No problem. I should have asked sooner Phil Quote Link to comment Share on other sites More sharing options...
40plyrod Posted June 25, 2015 Author Report Share Posted June 25, 2015 Door and window handle question...In the small collection of bits that came with my car were a complete set of door and window handles, these have a plastic spacer and a chrome bezel that goes between the handle and the door panel. I am missing one of these chrome bezels and have dug through the bottom of every box of door handles at every swap meet I've been to since I got the car and still no luck. At the last swap meet I ran into an old friend who has probably forgotten more about old mopar than I'll ever know and I asked him if he had one of these bezels. He told me he didn't because the handles I have are not from a plymouth. Anyone know what these are off? What does the 1940 plymouth handle look like? I was also wondering do the rear doors on a 40 plymouth lock from the inside by pushing the handle forward? I moved the outside lock on my 40 (2-door sedan) from the passenger side to the drivers side. I had to switch parts in the latch but that all works fine now. The problem came when I realized that the drivers door handle doesn't lock from the inside and even though the passenger handle mechanism will bolt to the drivers side it works completely backwards so it won't work without a large amount of modification. My thought is I can maybe miss out on all this fun by either finding an inside handle assembly from a right hand drive car (maybe?) or using one from the rear door of a 4-door. Any thoughts on this? Quote Link to comment Share on other sites More sharing options...
Andydodge Posted June 28, 2015 Report Share Posted June 28, 2015 Not sure if this will help or hinder........lol........you mention that you maybe chasing a RHD handle assembly.........if you decide to do this then make sure to chase only a USA factory RHD setup as those used in Australian BUILT or TJ Richards built bodies have a completely different type of internal door assembly..........the USA sourced ones have the standard USA 3/8" square drive which is what your pics in post # 247 I think show..........however the OZ built, TJ Richards bodies use a 3/4" diameter internal spline on the door assembly with an external spline to suit on the handle itself, these were Oz sourced and used here on OZ mopars from the late 30's thru to the late 40's, Oz Fords 39-mid 50's and Oz GM products late 30's to mid 50's and don't appear to have been used anywhere else.........I have attached a pic of the handles that I have on my Oz 1940 Dodge, these are 1948-56 Oz GM Holden..............I have also attached a pic of the internal handles that my Sth African built factory RHD 1941 Plymouth Coupe used, this was a USA Export car so has the correct 3/8 square drive assembly.........actually what I ended up using on the 41 Plymouth was a set of US 1940 Ford Deluxe handles as they are available repo and are cheap, available and looked fine.........hope this helps.............andyd Quote Link to comment Share on other sites More sharing options...
40plyrod Posted June 29, 2015 Author Report Share Posted June 29, 2015 Thanks for the info Andy. From what you're saying I'm starting to think it may prove more difficult to find the factory RHD setup than modify the ones I have. I'd still like to see how a rear door setup works for locking...maybe an opportunity there. As for the handles at $45+ a piece to rechrome these I may have a look at the deluxe ford handles. Quote Link to comment Share on other sites More sharing options...
mrwrstory Posted June 29, 2015 Report Share Posted June 29, 2015 (edited) As for the handles at $45+ a piece to rechrome these I may have a look at the deluxe ford handles. I've got the full set of Ford handles and window cranks for my '48. Haven't installed them yet. I'd do pics and PN if you wish. There are several options between 40's models, standard/delux and car/truck. Edited June 29, 2015 by mrwrstory Quote Link to comment Share on other sites More sharing options...

Recommended Posts
Join the conversation
You can post now and register later. If you have an account, sign in now to post with your account.