Radarsonwheels
-
Posts
1,232 -
Joined
-
Last visited
-
Days Won
17
Content Type
Links Directory
Profiles
Articles
Forums
Downloads
Store
Gallery
Blogs
Events
Everything posted by Radarsonwheels
-
Even better than just not unhooking it would be to see if it wanders at idle. Check the timing at idle with and without vacuum and if you have a little mity-vac pistol grip hand pump bleeder thing you can hook that up and take a piece of paper and plot the vac.advance curve as you add more vacuum to the line. I had one that was right on the edge of advancing at 750ish rpm- when the idle dropped a little the vacuum would drop a little and then the timing would drop a little and not allow the idle to recover then it would blubber and want to die.
-
*not if you are here in a mobile phone. You gotta be on a desktop to see some of the board features.
-

New '49 Dodge on the block.
Radarsonwheels replied to goingbush's topic in Mopar Flathead Truck Forum
She’s a beauty! I’m guessing the super tall fleetside bed is an aussie thing? I’ve heard of ute’s but always pictured more like an s10 or elcamino -
Dodge b series 1/2 ton.
Radarsonwheels replied to Michael Sams's topic in Mopar Flathead Truck Forum
Looks cherry! I applaud your ambition- I thought mine was too far gone to restore or else I wouldn’t have butchered it. Post some progress shots when you start gettin into it, and good luck! -
Sun Visor Mounting Bracket Color
Radarsonwheels replied to Jocko_51_B3B's topic in Mopar Flathead Truck Forum
Mine was beige/tan too in a red ‘54. -
I think the confusion is where your rack is mointed- if it’s on the axle you for sure need a long slip joint that is greased and strong- you’re depending on that flat to steer and there’s no weld or cotter pins. If it’s a power rack you will probably be ok but manual and parallel parking (steering while stopped) will stress it. Good luck! radar
-
That’s a nope. 70’s cars with ballast resistors had a 12v startup circuit but it had to drop down to 6ish or it cooks the coil.
-
Thanks man It makes doing the dishes more fun with a nice view! I bolted up the troublesome passenger side header collector and that job sucked. If I ever take off these headers to make a new set I will make the collectors bolt up in a better spot. The passenger side is all locked in with three fancy ‘stage-8’ bolts, tabs, & locks. The driver’s side is a nightmare to reach and still holding tight with normal hardware so that side gets a ‘maybe later’ ?
-
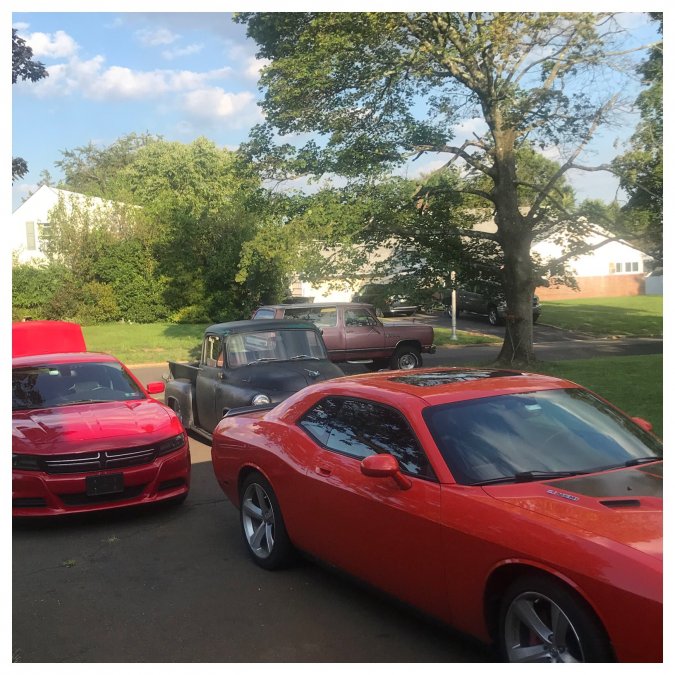
Darn collector bolts loosened up again! The passenger side lost two nuts and sounded a little extra cackly last night when I was hotrodding around. It didn’t come loose enough to backfire on decel but this is the second go-around with these things. I never tried the stage-8 locking deals but they make a collector bolt setup that has tab nuts so once you start the threads you can just tighten the bolt with one wrench. That should be super helpful in my tight bay. Other than that I’ve really been enjoying the truck. My wife traded in her camry for a v6 charger- now my driveway is home to fourteen hundred and twenty two cubic inches of mopar power!

-
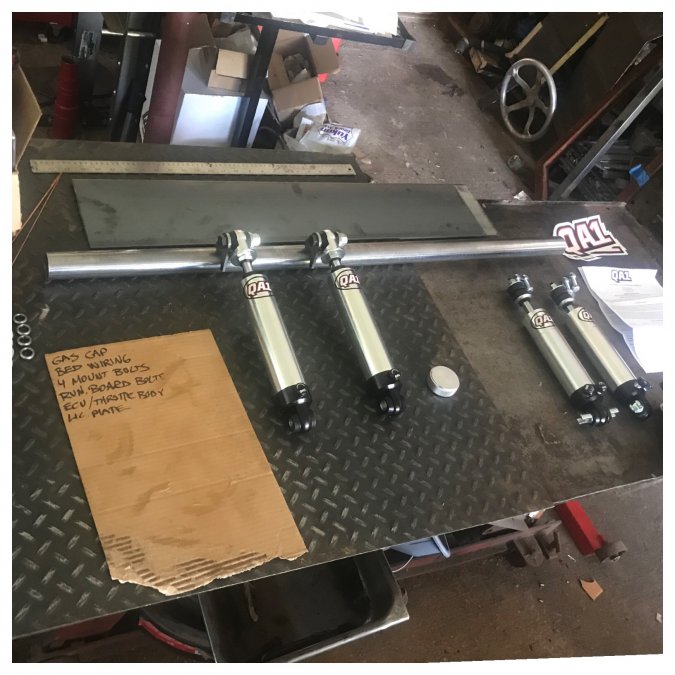
Enjoy it man those parts will never be this clean again
-
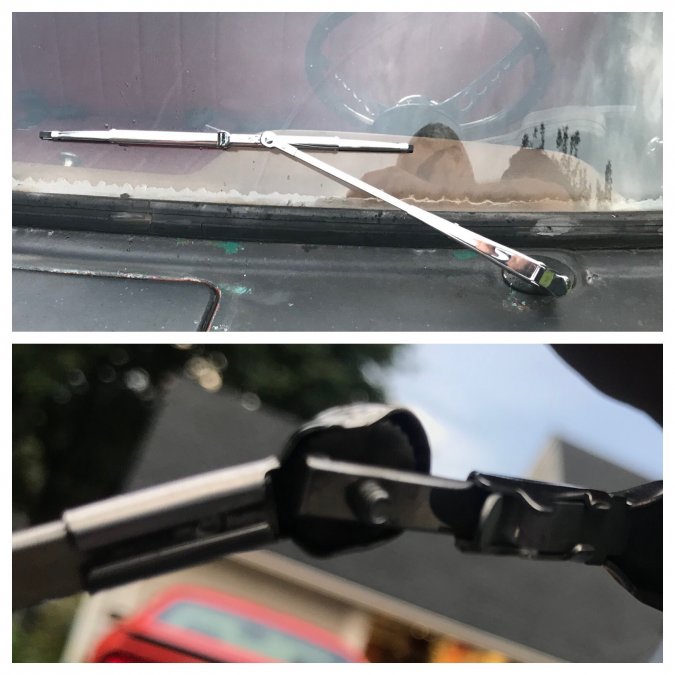
After a week or so driving them the new shocks are a huge improvement. I have them set at ten clicks out of a possible 18 front and back on compression and the double adjustable fronts are set at 5 on rebound to try for a compromise between launching and cornering. I think I will stiffen them up some more until it gets harsh then back them off a little. My new wiper arm/blades came in a few weeks ago and wouldn’t you know the angle adjustment went bonkers the first rainstorm and made them unusable. There’s a small screw that looks like it would set the angle but it barely holds it at rest. Today I took them off planning to solder or braze them and decided to just crimp/swage the adjusters in my big vice. Now the angle is permanantly set and I didn’t even have to burn up the chrome with a torch.
-
Agreed. I ran plenty of motors that used a quart per thousand miles or so and I was happy to add oil once in a while. Now when gas station stops involve checking the gas and adding oil, or when 1/2 throttle results in a spy hunter smokescreen behind you then maybe it’s time for a teardown. My best advice is drive it like you stole it for a while and see if things clear up some.
-
Wow that's a super clean set up!!
-
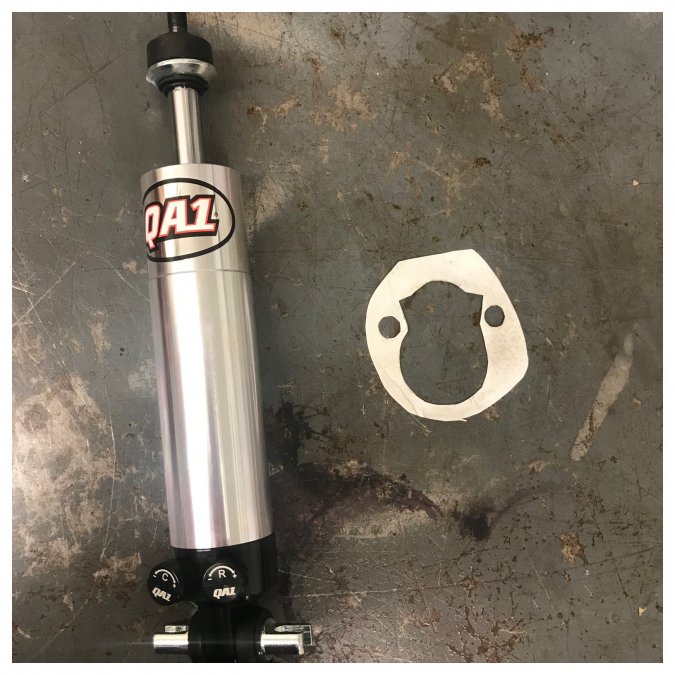
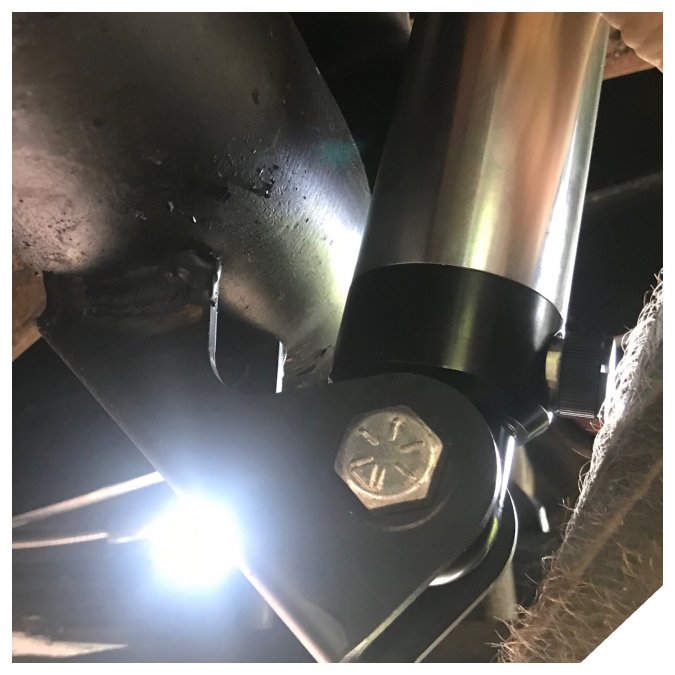
I woke up early and got whittling on my lower control arms to fit the new shocks with 2” bodies and 2 knobs sticking off. The cutting template I made was perfect but needed a little extra due to the angle of the LCA so that the top rod would line up and go home. My first ride it seems much better. It corners flatter, takes bumps a little more firmly, and even does a little mini understated nose lifting 90/10 action with the rear single adjustables set 10 clicks from zero and the rear adjustables set 10 compression and 5 on extension. There are 18 positions on the adjustment knobs. I need a bunch more seat time but I’m psyched. I hate having expensive parts sitting around waiting to be installed.
-
I got the bed mounts torqued this morning, and buttoned up the fuel system, rear lights, running board to tub bolts, and plugged the ECU back in. She still starts! So my pre-welding precautions were enough. I got the rear tires back on and set my ride height for 3” of compression and 2.25” of extension with the current shock placement. I have work tomorrow too but hopefully I’ll get some time tonight and tomorrow morning to start fitting the front shocks.
-
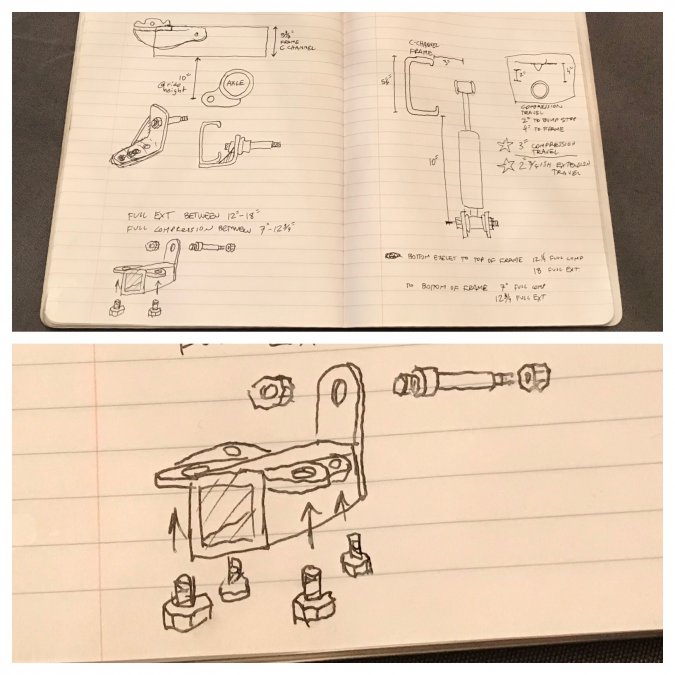
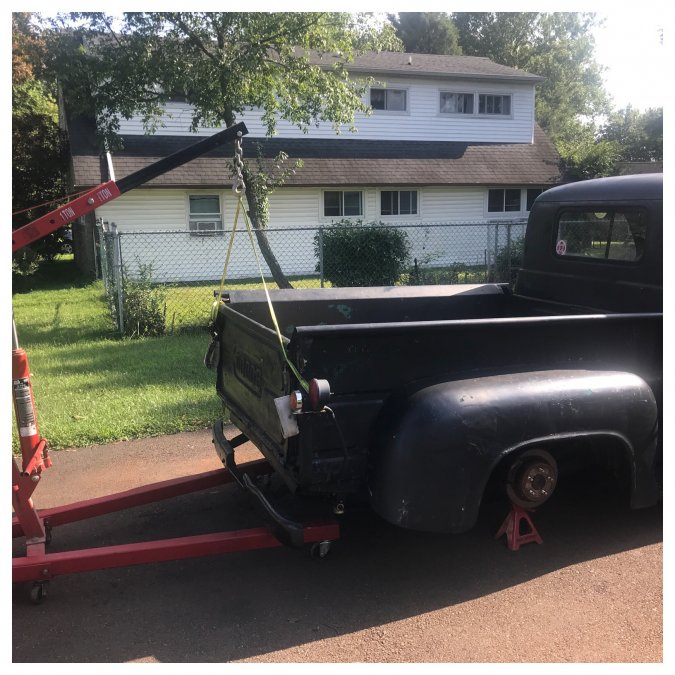
When my help came I had the bed ready to go. The engine hoist holds the back of it and one guy lifts on each forward stake pocket. The engine hoist rolls along for the ride and we set it on stands so the tubs wouldn’t have to take the weight. Got the rears in and the bed set back on in position with the bolts and top mounts lined up and installed. Gotta button up the poly bed mounts in the morning. I also want to install the front shocks. I guess I’ll probably mess with the driver’s window track another day. Can’t wait to feel the difference in handling! I unhooked the battery ground and all harnesses to and from the ECU/ throttle body but I didn’t remove it from the intake. I also kept the welding ground clamp close to where I was working so no electrons would be looking for expensive detours. Fingers crossed it still all works. Sorry for the blurry night time finished pic. The rear upper shock mounts moved forward a ton like 6” or so. Their angle is MUCH better as is their quality. I set them to a 3 7/8” ride height between axle and frame. At that height I have about 2” before getting into the bump stop which has can squish about 1 1/4” before bottoming the shock. That leaves just over 2” of extension so I’ll have to keep the shock adjustment tightish to keep it under control and inside my 5.25” total shock travel.

-
The weather sorta broke and I cleaned the garage. I have some help on the way in a little bit and I’m going to pull the bed. Then it’s upgrade time! I got a CE weld in crossmember kit that will be strong enough to hold coilovers in the future if I want and all 4 QA1 adjustable shocks ready to go. I’ll have to install boxing plates inside the frame to attach the crossmember. The fronts supposedly need minor clearancing of the LCA to slip up inside the spring too. Plus when I got the truck weighed the dude must have rolled down my window way past flush with the door because now my linkage is not hooked up so I’ll have to take the door apart to address that. The passenger window works perfect but the driver’s side has no stop or rear lower track which is fine for now as long as I’m the only one who messes with it.
-
Looks way low slung too his truck will ride higher than mine unless he’s got a dry sump. His motor looks even with the front of the door openings/dash for sure. Maybe he’s gonna raise the floor but not lower the ride height- our cabs are pretty tall inside.
-
Results are in from weighing her! She’s around 3700 wet without a driver & 1/2 tank of gas. So right at 2 tons going down the road. A little piggy but I was more interested in making it strong than I was in making it light. The front/rear bias is great- I’m happy with that. I’m sure I could shave 200 or so if I didn’t have the bed made from one of the densest woods on earth and a full 1” thick. The frame boxing is probably heavy too, along with the leaf springs and 1” .120 wall square tube cab and bed floor frames. I’m still surprised it’s so heavy! It makes me feel even better about how light and quick it feels with the stroker motor. Time to get the suspension under control next with these fancy shocks.


-
Thanks Bisquik. I had stock replacement shocks before on project cars and the stock version of this truck, stiff KYB gas charged shocks, and even tried a set of comp 90/10 drag launching shocks on my old 72 demon. All of them were fun- I like changing stuff around and seeing the personality of the ride change with them. Like changing cams but much less work. These qa1 shocks are not expensive as far as race shocks go but they’re by far the fanciest shocks I ever bought. I think it’s going to be fun trying different stuff- the fronts are double adjustable and single for the backs so I have about a gazillion options. I will say that the racemaster dot drag radials are amazing. I haven’t really floored it while footbraking yet but the 1/2 to 3/4 throttle in 1st gear that used to leave black stripes all over the roads my neighborhood now doesn’t even bark the tires- just throws me back in the seat. I’m even halfway confident that the driveline will hold up now with my forged yokes and overkill driveshaft. I decided to pull the bed and install a new tube crossmember for the rear shocks so it might be a week or two before I can get it set up.
-
Ooooh low blow!! Hahah I guess I need a diamond in the back & sunroof top to go with a gangster lean too
-
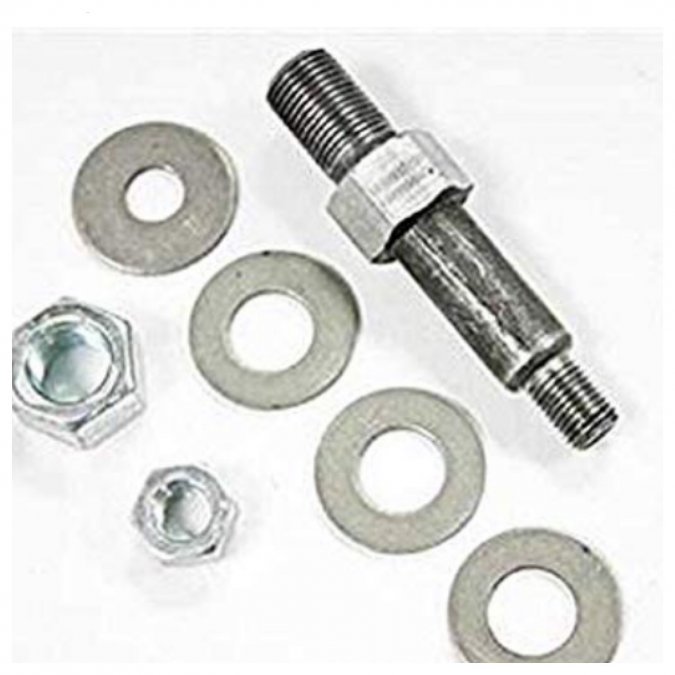
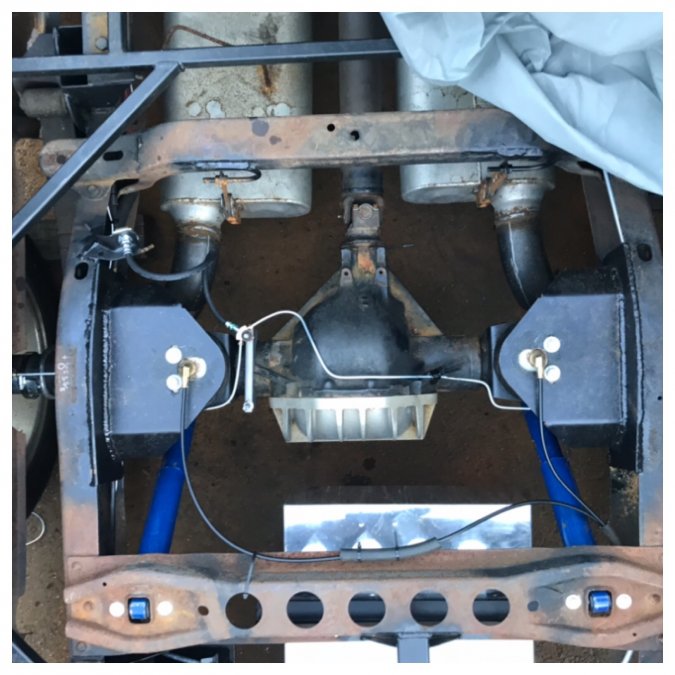
My fancy new rear shocks came in. I mocked them up off the lower mounts- there’s plenty of room to put them in at a much better angle. I am waiting on bolt in mounting studs to show up before I make some bolt in brackets to relocate the upper mounts. I found some matching double adjustable qa1 front shocks on sale for just a little more than the single adjustables so I jumped at the sale price. Those should bolt in with just a little massaging of the shock hole in the LCA spring pocket with a die grinder. You can see how far back the upper mount was on the blue shock in the 1st pic- should work much better now.

-
I keep seeing other B&C series for sale with bowtie motors- I don’t get it- why install a motor that ruins the resale?! Is a 5.9 that much harder to find or more expensive? This is still the most festooned with bad ideas I’ve seen in terms of resale value- I think its target audience already spent their money on a harley covered in spikes and knives with angry skull paint. ...but like I said it does look like somebody was sure having fun!
-
I talked to a tech at QA1 about eye to eye at ride height, total travel, and adjustability and ended up ordering a set of star stocker ts504 single adjustable shocks. I’m gonna wait till they come in to fabricate the new upper mounts but they should have me covered for street & strip from way too soft to way too hard.
-
When I installed the cheap stock replacement shocks spec’d for an 89 Dakota I figured they’d do a decent if uninspiring job and at $15 a corner I could afford to throw away the cash in anticipation of later upgrades once I got her on the road and let her tell me what she wanted. Well now I’m exploring my options for a nice tight street ride and good manners in a launch- especially since I put on the drag radials. What I didn’t anticipate and now I’m bummed because I know better is that once you drop a dakota 8” or so the shock angle becomes so laid back and horizontal that the shocks no longer have good leverage and no amount of cash spent on good shocks will help. With the bed empty it’s a little bouncy but fine for cruising. When I was loaded with 500ish lbs going to the show on Sat. it got a little squirrelly over 50 mph. So I have to move the upper shock mounts forward a bunch. To make that an easy job requires pulling the bed (again) and also the throttle body to protect the efi computer from damage when I weld on the frame. It’s too hot out to do all that lately! I’m also not sure how strong the mounts need to be so I’ll probably over do them a little. I’m plotting on how to make them bolt on to the lower flat of the frame instead of doing all that disassembly I can just fabricate them and bolt them up.