


Radarsonwheels
-
Posts
1,233 -
Joined
-
Last visited
-
Days Won
17
Content Type
Links Directory
Profiles
Articles
Forums
Downloads
Store
Gallery
Blogs
Events
Everything posted by Radarsonwheels
-
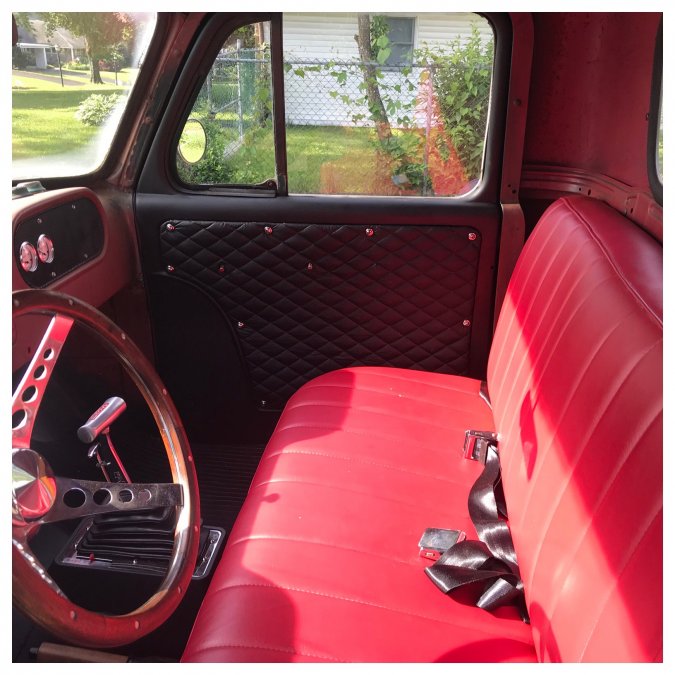
 I had to work today so no transmission install. Tomorrow is supposed to rain but we’ll see. I did get time to finish the door card installation with armrests cranks and handles. I had to drill new holes in the square drives to account for the thicker cards. It feels solid and looks right to me. Now I’m thinking matching kick panels soon and headliner later.
-
I got my diamond pleated vinyl and 1/4”-24 screws in the mail yesterday. I installed the clip nuts and mocked up the armrests to determine the screws angle- looks like 30°. Now I have to finish making the matching angle into the armrests, paint the metal part, final assemble them, and I can install those. Then whenever my cranks and handles show up I can stick those on with the new escutcheons. It’s gonna be pretty fancy looking and might even soak up a little noise.

-
Thanks Ggdad I figured it was something like that. Looking at the Bunn books I always thought mine was kind of a 53 1/2- solidly a C series with bubble tubs and one piece glass but with some B series interior cues (using up leftover parts?) Interesting that you said I have B3 or B4 style- is that like one ton stuff? Mine was originally a 54 3/4 ton longbed with heavy duty spindles, 3 on the tree, & 4.10 gear. I forget the designation C2C or something. If the old handles are rare and anybody needs them PM me- not for sale for free once the new ones are installed and working.
-
When my 230’s starter started to go I worked a half a can of wd-40 thru it and it started working again. I didn’t disassemble it at all. That was over 5 years ago and it has worked ever since. That stuff is more solvent than oil. Mine had been handling 12v for years too. “Turn my key, step on my starterTake you riding in my car” -Woodie Guthrie
-
Wireless Door Lock Actuators???
Radarsonwheels replied to CO54's topic in Mopar Flathead Truck Forum
Cool! Can you post a pic? -
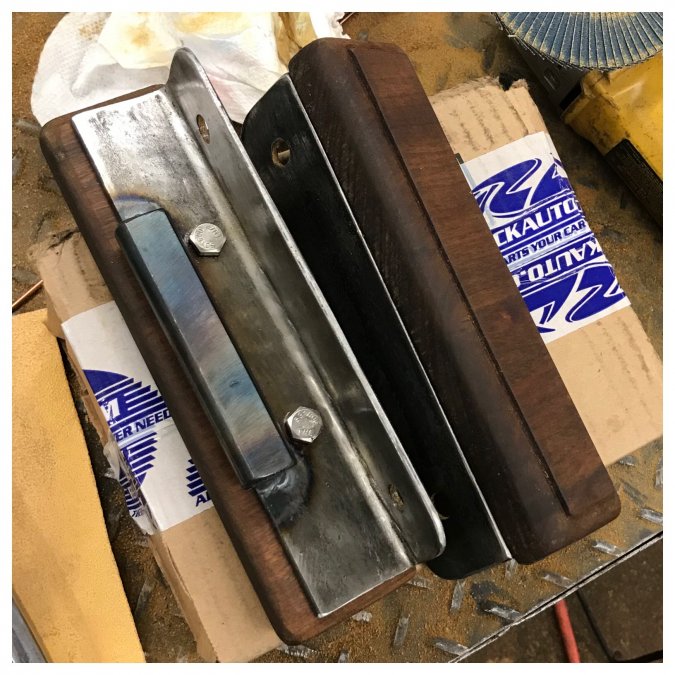
Got a start on the armrests today. I still have a bunch of sanding & finishing work and I have to measure the angle of the screws and make wedges in the brackets. I think they’ll work fine as door pulls and at 2” deep shouldn’t be intrusive. Maybe they’ll even be a comfy spot to set my elbow. Edit: I ended up drilling and tapping the ironwood so no fasteners would show. Also hit it with some penofin. I’m still waiting until my fine thread mounting screws show up to figure out what angle they will sit. I’m still not sure what to make wedges out of. The angle makes it tricky but the 1” thick ipe is easy enough to shave with aggressive flap discs. Just have to hand drill the holes I guess

-
Wireless Door Lock Actuators???
Radarsonwheels replied to CO54's topic in Mopar Flathead Truck Forum
Informed afterthough- search keywords “locking L handle with key” -
Wireless Door Lock Actuators???
Radarsonwheels replied to CO54's topic in Mopar Flathead Truck Forum
I was recently posting on the hamb and somebody said they bought spaenaur locking handles. Google-fu showed me that’s a store not a brand but “spaenaur locking handle” brought up this cheap trailer handle that looks suspiciously close to our handles- two screw mount, 90° arm, and it’s keyed to the handle instead of additional linkages to the lockwork. I am almost inclined to buy a pair just so they match. The compromise you’d make is carrying two door keys- have to mark one to be the driver’s side or forego chivalry when the pass side always needs to be unlocked from the inside. Of course I have no idea if the handles are scaled right for our trucks or look super cheesy or rust out semi-immediately. Sometimes an unusual part will blend right in but sometimes it is glaringly wrong... Interesting though right?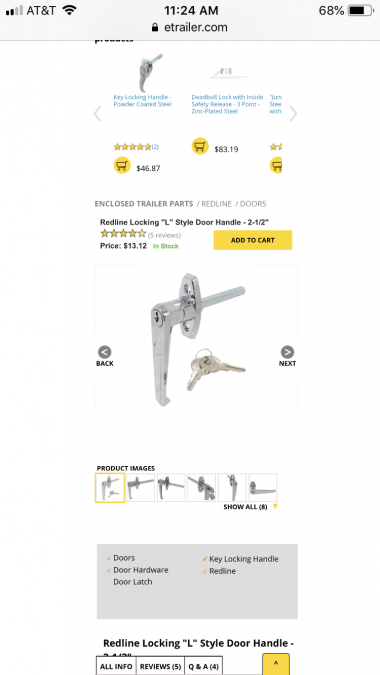
-
Trans is ready to install. Got the linkages, cooler fittings, and torque converter installed.

-
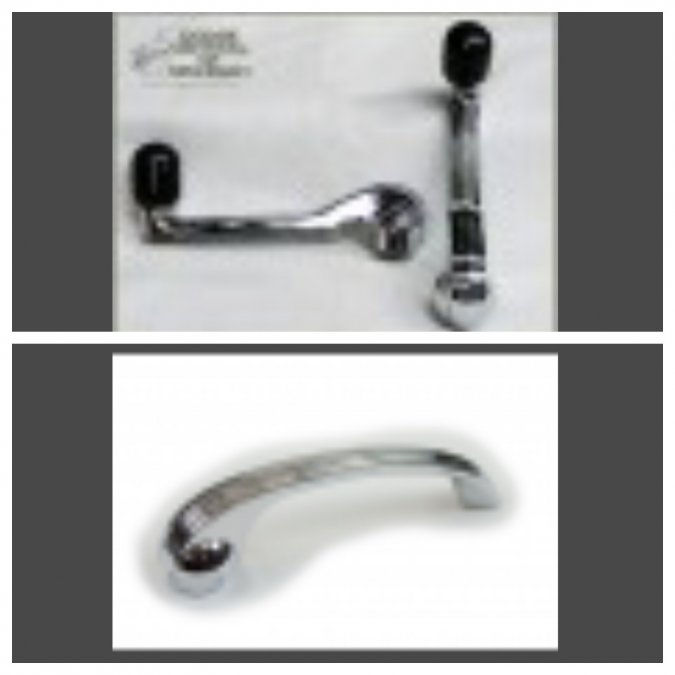
I went ahead and ordered the replacement parts from DCM they look like the bases are slimmer and they don’t have the pin holes all beat out or the roller knobs hanging on by a thread. They’re expensive but not bad like $30 each. Feels wierd to order correct-ish parts from a catalog instead of scouring the earth. This must be what it feels like to own a ford or chevy.
-
When I got home from work last nite I checked them against my handles which are still on the bench. They fit fine over the outer diameter of the square drive boss/flange where the pin goes. They look like they could work without the thin metal retaining washers but I’ll probably keep those They fit nicely and probably reinforce the pot metal somewhat. They are a smaller diameter than the original rubbers- the handle and crank used to butt up to a flat surface and now there will be a relief behind them before the escutcheon swells back out to meet the door. I’m still gonna use them! I’m also looking at the handles and the upper pin receiving area on the square drive is cracking from overzealous opening and probably just age. The driver’s crank handle knob is also super loose and droopy so I am probably going to buy all 4 new ones if they’re not too dear. Also the transmission is all buttoned up on the bench. I just need to install the shift and throttle pressure linkages, stand it up again, and install the torque converter with a wrench on the edge to keep it from falling out.

-
Ox/A torch and some persuasion with a bfh would get you where you need to be? As long as you have enough adjustment in the tie rod end.
-
Ok so I have to ask- “BJ fever”? Is that what they warned the GIs about before shore leave?
-
Wireless Door Lock Actuators???
Radarsonwheels replied to CO54's topic in Mopar Flathead Truck Forum
Yo Eric I saw this topic go by a while back and didn’t have anything to say but I recently had my driver’s latch out to fix the linkage (sheared a pin thru the bar that connects it to the flat bar that goes to the handle). Now I have a little more understanding of the mechanism. I put remote power locks on my ‘73 swinger about ten years ago. It was a cheap rf module from pepboys with a keychain remote and a little solenoid actuator. When I first saw your thread I thought of that but the unlock function on the latch needs the inside handle pulled. The force and travel required for that is a bit much for a cheap actuator. After looking at the mechanism I think a remote lock/unlock could work if it was hooked to the blocker bar/tab instead of the latch opening mechanism. Check out the pic. An extension could be welded to the up-down blocker tab and wouldn’t need a lot of force to move it out of the way to unlock it .
-
Sorry for the nuclear option but can you just swap in a dana or something for around the same $ as an unobtanuim part? Or can your knuckle be fixed? I’m curious about how a knuckle could scrape the wheel- it must be the steering linkage right? Can you post a picture? Are the wheels correct? I’m probably not much help but good luck with it. radar
-
The escutcheons came in today! They look really nice, maybe a little less pronounced deco/beehive than I thought which is fine. I took the box to work and opened it here so I don’t know how they’ll fit yet but the spring loaded setup should outlast a rubber piece by a longshot and look good doing it. I got some steel wool to clean up the cranks and handles and I have to figure out how to tighten up the roller handle on the driver’s window crank. I haven’t even looked at it yet hopefully it’ll be easy without a lathe. My clip nuts for the armrests came in too so I ordered some nice fine thread 1/4” stainless phillips head screws from McMaster Carr. Now I have to follow through with the plans I drew up for the armrests. I’d like to get that done before the vinyl arrives next thursday. I stayed up way too late Thursday night trying to set the endplay on my transmission shaft. I forgot how much easier it is to set the trans standing up on its tail- if the front clutch doesn’t fully engage all the fiber splines it seems good until you bolt on the pump (last piece which seals up the case and sits behind the torque converter) and the trans locks up like zero endplay or worse. I gotta take it apart one more time and add select thrust washers- it’s at .110 now and I think I’m shooting for more like .020. Other than that the trans is almost ready to go. I defeated the controlled load cushion in the front servo, added a billet rear servo along with the blocker shim in the inner spring from transgo, restricted the front clutch feed in the case with a drilled dorman plug, got a reconditioned front drum from A&A that fit five clutches with .082 clearance under an early style straight snap ring I stole out of another core, and put in a 4.2 ratio kickdown lever to replace my stock grandma car lever. I don’t like swapping out transmissions under a car in the driveway but it is super fun to change stuff and see how it changes the personality of the transmission. Kind of like trying out different cams- pulling the radiator and water pump and intake is not so fun but trying it out is awesome. I discovered that the front clutch sealing ring which I replaced on the reaction shaft after snapping one and finding it in the pan on the first trans build was a little tight in its groove so that needs a little fine filing or sanding followed by meticulous cleanup. Not the end of the world though. I have another good pump that I could rebuild instead too.
-
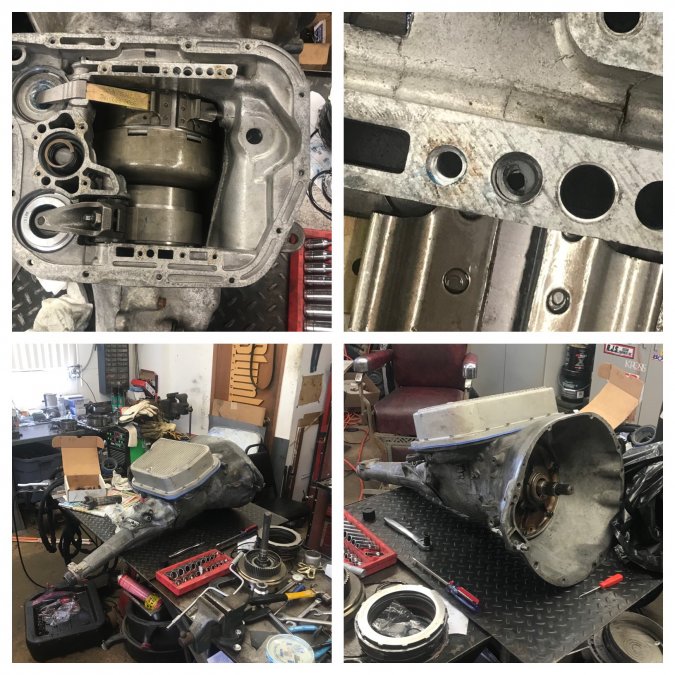
Old trans is all took down. Lotta good parts in there.

-
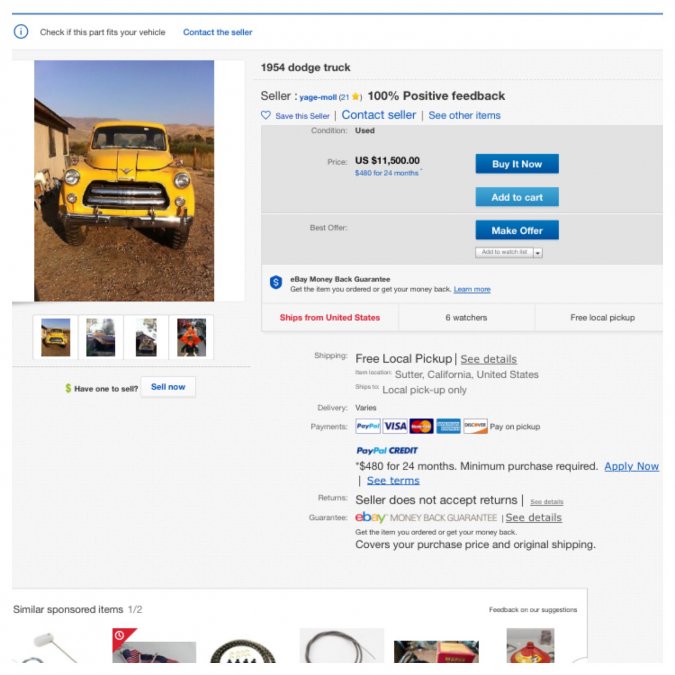
I had to do a double take browsing ebay- this one has a hemi too!
-
1951 Fargo 400cid on Dakota chassis
Radarsonwheels replied to f_armer's topic in Mopar Flathead Truck Forum
Taking a break Farmer? How’s the low deck running? -
Man that red looks like the original unfaded color I keep finding underneath stuff that nobody pulled to do one of the four paintjobs on my truck! I love it man hope your carb works and you get to fire it up again soon. Radar
-
I rebuilt a couple ball & ball carbs and they worked but probably not as well as sixty years ago. I ended up getting a repop weber from the stovebolt website. It had 12v electric choke and needed very little adjustment to make my 230 run like new. It started instantly and had great manners. I liked it so much any time somebody posts on here with familiar carb complaints I sound like an advertisement haha. I hope your pump rebuild goes well but if not...
-
I just ordered four of those bad Larrys- they’re going to look great with the black vinyl and wood armrests
-
Thanks fellas! I wasn’t sure if the escutcheon was the rubber part or the steel part that actually sits over the retaining pin. I really like that beehive deco spring loaded chrome one on there yowza! I got my second door card made up this morning and mocked up/mounted to the passenger door. The diamond pleated vinyl should be here next week. In the meantime I have armrests to make. I got the shattered trans out today. It was somewhere between a nightmare of tight spots and smooth sailing. Not my first rodeo but I never look forward to bench pressing a transmission. Somebody said motorcycle jack and I tried it- wow great idea! I had to shimmy it back to where the exhaust is wider before the bell would drop down but for working alone it was smooth and safe. Autopsy tonight. I’m predicting that other than taking a violent side load when the yoke let go and the driveshaft wedged in the safety loop it is ok inside. At this point I’m only swapping the valvebody and maybe some snap rings pressure plates & little stuff.


-
Yeah the outer skin and bottoms are pretty rough. The driver’s side had a ton of bondo over riveted galvanized. For now it lets the rain out just fine and all the rust is cut off. The door bottoms need smaller drains in them whenever I get around to welding in patch panels and doing body work. Today is not that day though! I drew up some plans for wood topped metal door pulls/armrests. I’m not sure about the wedges. If I end up in the stock location I will need them to angle the bolts up into the clip on nuts. Using that stamped mounting flange is a good idea for strength but if I have to put them on with rivnuts in another spot it will be plenty strong to shut the door and hold my elbow. Gotta sit in there and check the ergonomics.

-
Anybody know if the rubbers under the handle & crank are like a ‘help section’ item at manny moe & jack or something? Mine aren’t petrified but they’re a little stiff and have overspray from several paintjobs.

