


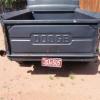
Jocko_51_B3B
-
Posts
429 -
Joined
-
Last visited
-
Days Won
3
3 Followers


Recent Profile Visitors
3,070 profile views


-
The problem turned out to be a tiny oil leak from the brass fitting on the bottom of the oil canister. The rear main seal is OK. Re-did the oil canister brass fittings and no more oil leak. I found out it's possible to reach five out of six rear main seal bolts from under the truck. The top one I can't reach but for good measure I tightened down on the five.
- 4 replies
-
- 1
-

-
- cork gasket
- oil pan
- (and 5 more)
-
New Fuel Pump Failed Almost Immediately
Jocko_51_B3B replied to Jocko_51_B3B's topic in Mopar Flathead Truck Forum
I agree. Just wondering if it could cause the pump to fail. It seems unlikely but who knows? -
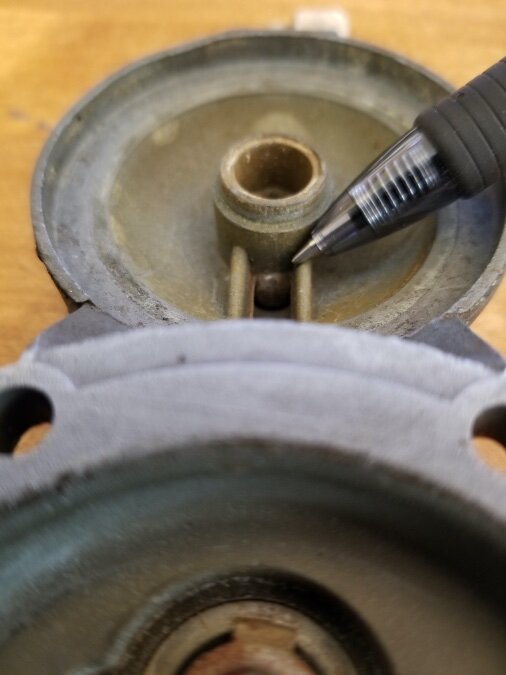
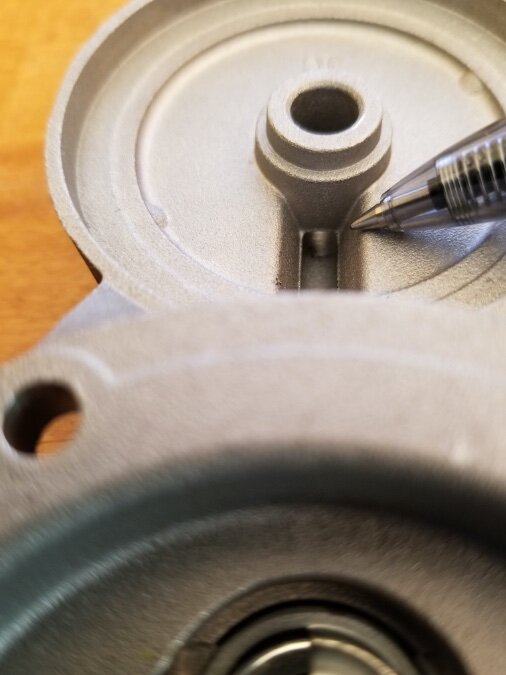
It's probably Chinese so no wonder. It worked for a couple of hours of run time, then stopped pumping. Anyway, I took it apart and compared it with a good old American fuel pump I had on the shelf. As best I can tell the inlet and outlet valves are working on both pumps. The difference I noticed is with a small ball bearing lodged in the fuel channel above the glass bowl. The good old American made pump has the bearing firmly seated in place. The new one had a smaller one but it was loose and finally disappeared as I was fooling with it. It seems to have either fallen out or it is lodged in the inlet channel somewhere. Apparently the bearings are put there from the manufacturer to make sure fuel flows from the fuel line into the glass bowl and out through the screen to the diaphragm area. I'm wondering if that loose or missing bearing in the Chinese pump could cause the pump to stop working altogether. What if I plug up the bearing location with JB Weld? I hate to spend another $95 for pump. Here's the good old American pump with the ball bearing... The Chinese pump's bearing is missing...?
-
I placed the tape on the threads only as you mentioned. I agree about the crank. I'm having the truck put up on a lift this week to double check the area where the seal rides.
-
These are the oil leaks I've had so far and what I did to stop them. Here's my list so far... 1. Copper gasket under T-handle on bypass oil filter canister. This one was the messiest. Started the engine. The gasket was bad and it blew oil all over the place. Fix was easy. Replaced the gasket. 2. Oil pan cork gasket. Small puddle kept forming on the floor. Oil pan bolts weren't tight enough. Tightened all the bolts. 3. Brass fittings on bypass oil filter lines. Again, small puddle on the floor. This one was easy to spot but a small pain to fix. Removed the filter canister and lines. Wrapped the brass fitting threads with three or four turns of yellow teflon tape. The yellow tape is hydrocarbon resistant. White teflon tape won't last. That's why the fittings leaked in the first place. 4. Oil pan rear felt seal. The felt gasket gets soaked and leaks a few drops when the engine is running. I might live with this one for a while. The only fix I can see is to remove the oil pan and replace the felt gasket. For now I'll just check my oil level frequently.
-
My '51 B3B engine seems to be running pretty well. I have right around 115 PSI dry compression pressure and 120 psi wet with only 2 or 3 psi variation between cylinders, but I want to check engine timing, manifold vacuum, dwell, and valve tappet clearances. I assume the engine should be at a specific idle RPM when doing these checks. Is there an idle RPM spec for Mopar flatheads when making these checks and adjustments? I would guess around 500 RPM but I'm just not sure. I don't see a spec in the service manual.
-
Sweeper Clips and Weatherstrip
Jocko_51_B3B replied to Jocko_51_B3B's topic in Mopar Flathead Truck Forum
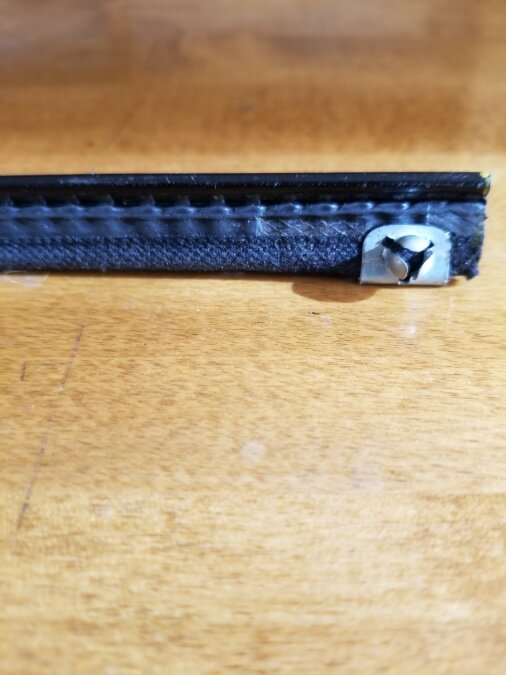
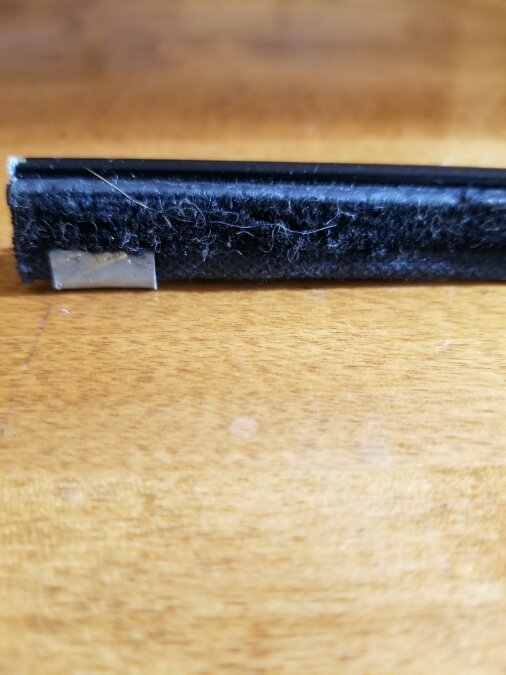
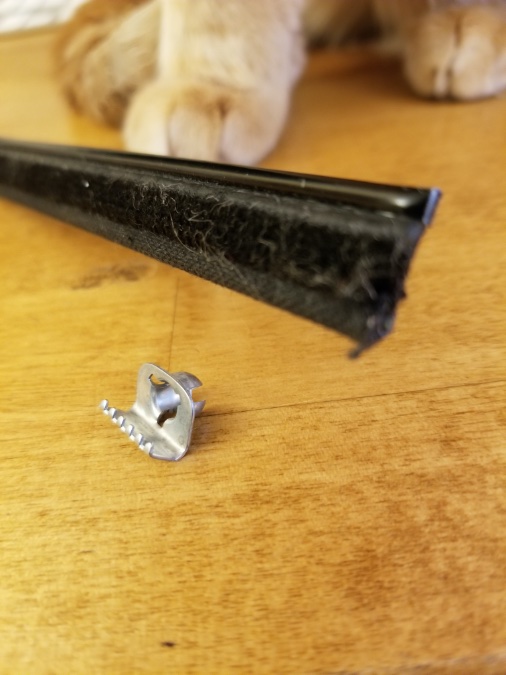
After thinking about it and reading other opinions I believe I did the right thing finally. 1. Metal bead edge up (I think it looks good that way. First photo.) 2. Sweeper clips squeezed around fabric edge, not the metal bead. (Second and Third photos.) 3. Fuzzy side toward the glass.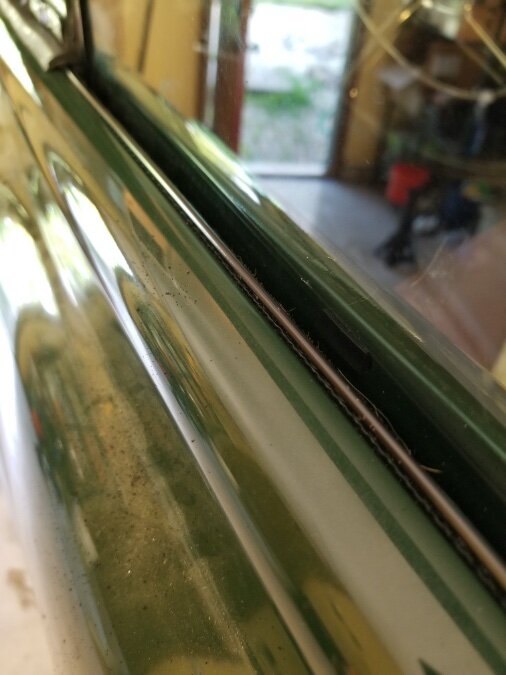
-
ANSWERED Vent Window Swivel Post Replacement
Jocko_51_B3B replied to Jocko_51_B3B's topic in Mopar Flathead Truck Forum
I ended up using 5/32 diameter rivets which fit perfectly. 1/8 would probably work too. The factory placed the heads of the original rivet on the outside of the frame but I couldn't find a rivet setting tool narrow enough to fit inside the frame channel so I placed the rivet heads inside the frame and clinched the rivets down on the outside. From what I can tell this should be OK. I was concerned that the clinched rivet ends would interfere with the rubber seal when opening and closing the vent window, but they are pressed down far enough that I don't think that will be a problem.

- 4 replies
-
- 2
-

-
- vent window post
- vent window swivel
- (and 2 more)
-
ANSWERED Vent Window Swivel Post Replacement
Jocko_51_B3B replied to Jocko_51_B3B's topic in Mopar Flathead Truck Forum
I much appreciate the suggested solutions from JBNeal and ggdad and ggdad's rivet offer. It looks like tubular rivets will probably work best but I checked my own stash first and actually found a small bag of 1/8 x 3/8 long tubular rivets which look like they will work. I also found a tool for setting the rivets! I haven't used it for so long I forgot I had it. So for now I should be OK. Thanks again to both you guys for some needed direction!- 4 replies
-
- 1
-
-
- vent window post
- vent window swivel
- (and 2 more)
-
ANSWERED Vent Window Swivel Post Replacement
Jocko_51_B3B posted a topic in Mopar Flathead Truck Forum
My passenger side vent window has a broken swivel post. I have a replacement cadmium post (in the picture), but neither the black frame nor the post has threaded holes so I'm trying to figure out how to secure the post to the glass frame.. By checking the driver side vent window, it looks like the posts were riveted in with the rivet heads on the outside of the frame. The rivet heads are very thin to avoid interfering with the rubber seal when closing the window. Has anyone had to do a post replacement? If so, how did you attach it to the frame? Passenger Side Showing New Post and Unthreaded Holes Driver Side Showing Rivet Head


-
Looking at the sweeper clips and weatherstrip for the door windows, how should the clips and weatherstrip be installed? Q1: I see the four holes in the door for the clips, but should the jaws of the clips open upward or open downward? (I'm guessing upward.) Q2: When the weatherstrip is installed, should the cloth edge of the weatherstrip be UP and the black painted edge be DOWN or should the black painted edge be UP and the cloth edge be DOWN? In other words, which edge of the weatherstrip is right side up? (I'm guessing the cloth edge should be UP.) If I'm wrong please straighten me out. The original Dodge parts manual illustrations aren't clear and the replacement parts I bought didn't come with any install instructions.
-
bkahler, Sorry I didn't fully answer your question. I bought mine from Roberts three or four years ago.
-
I bought them from Roberts.
-
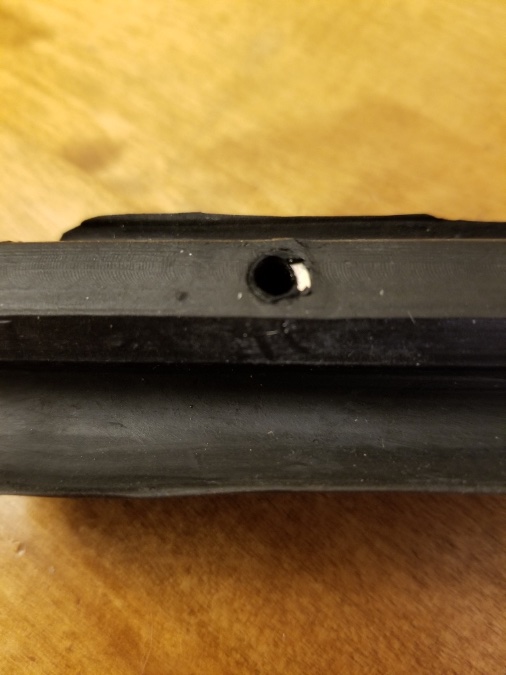
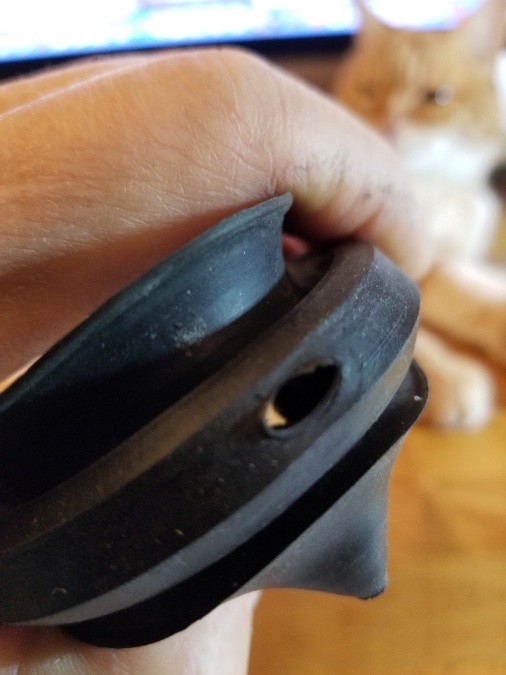
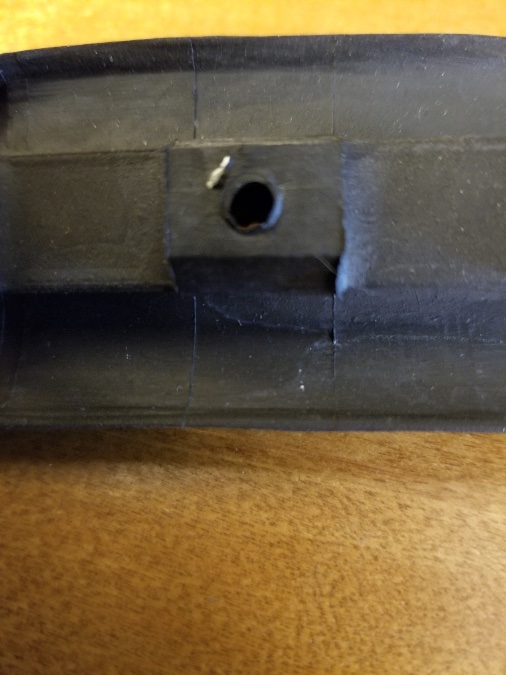
Merle, you're correct. I scratched around on the surface of the seal and twisted the rubber a little bit and I was able to spot the flanges of the sleeves embedded just below the surface of the rubber. The sleeve in the second hole at the top end of the seal was embedded the deepest (approx. 1/8 inch) and was the hardest to see. Thanks again. HOLE AT THE TOP END OF THE SEAL SECOND HOLE FROM TOP END OF SEAL WAS EMBEDDED THE DEEPEST HOLE AT BOTTOM END OF SEAL
-
Fortunately I found (and kept) one brass sleeve when I took the vent windows apart. I forgot how it came out so now I'm wondering about its purpose and location. If someone has a picture showing the exact place to installed them would help clear up the mystery.