


Radarsonwheels
-
Posts
1,233 -
Joined
-
Last visited
-
Days Won
17
Everything posted by Radarsonwheels
-
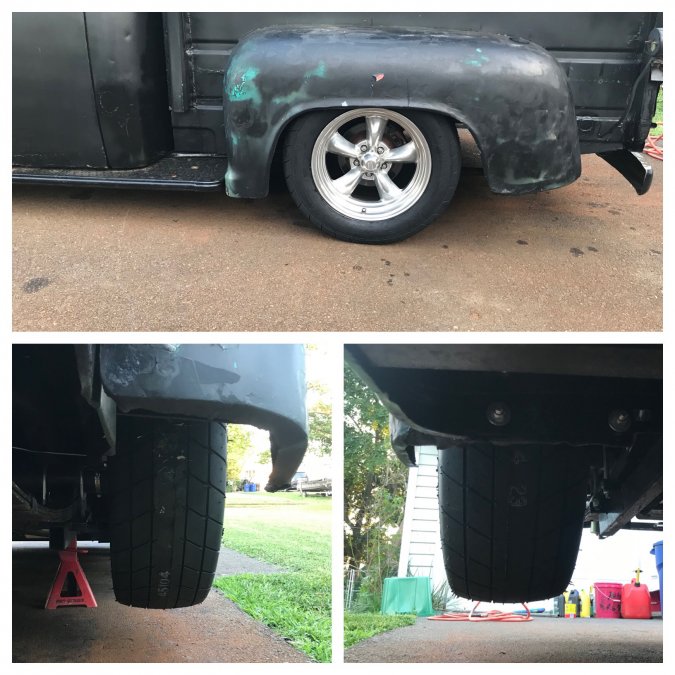
 When I installed the cheap stock replacement shocks spec’d for an 89 Dakota I figured they’d do a decent if uninspiring job and at $15 a corner I could afford to throw away the cash in anticipation of later upgrades once I got her on the road and let her tell me what she wanted. Well now I’m exploring my options for a nice tight street ride and good manners in a launch- especially since I put on the drag radials. What I didn’t anticipate and now I’m bummed because I know better is that once you drop a dakota 8” or so the shock angle becomes so laid back and horizontal that the shocks no longer have good leverage and no amount of cash spent on good shocks will help. With the bed empty it’s a little bouncy but fine for cruising. When I was loaded with 500ish lbs going to the show on Sat. it got a little squirrelly over 50 mph. So I have to move the upper shock mounts forward a bunch. To make that an easy job requires pulling the bed (again) and also the throttle body to protect the efi computer from damage when I weld on the frame. It’s too hot out to do all that lately! I’m also not sure how strong the mounts need to be so I’ll probably over do them a little. I’m plotting on how to make them bolt on to the lower flat of the frame instead of doing all that disassembly I can just fabricate them and bolt them up.
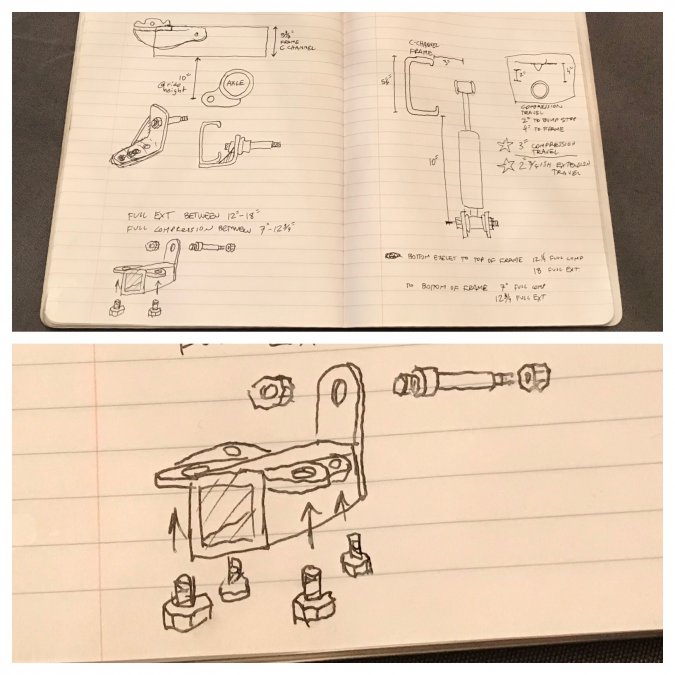
-
10th anniversary party for my tattoo shop was tonite at Neshaminy Creek Brewing Co. My band played and a few others- I went in style!
-
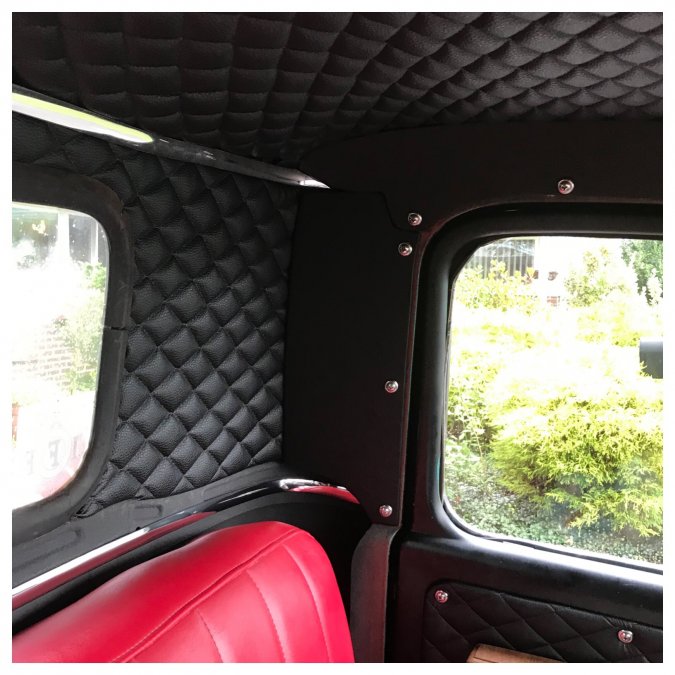
Thanks John! I’m still not sure about the lower chrome strip but it covers the button holes from the stock liner and kinda matches the top edge. I think I will end up making a plain vinyl wrapped strip with stainless screws to finish the bottom 1/2 of the B pillar similar to the thin A pillar ones next to the windshield. I want to keep the little open cubbies in the corners for stashing tools and whatnot. I still haven’t tried the new drag radials- I upholstered all morning and now it’s pouring and I’m at work. Can’t wait. I did get a gps speedometer app on my iphone the other day- my aftermarket speedo and transmission speedo drive gear tooth count were dead on. The new tires are .8” taller so it’ll be off by about 2mph at highway speed which is still acceptable.
-
All done!
-
Didn’t come out too bad
-
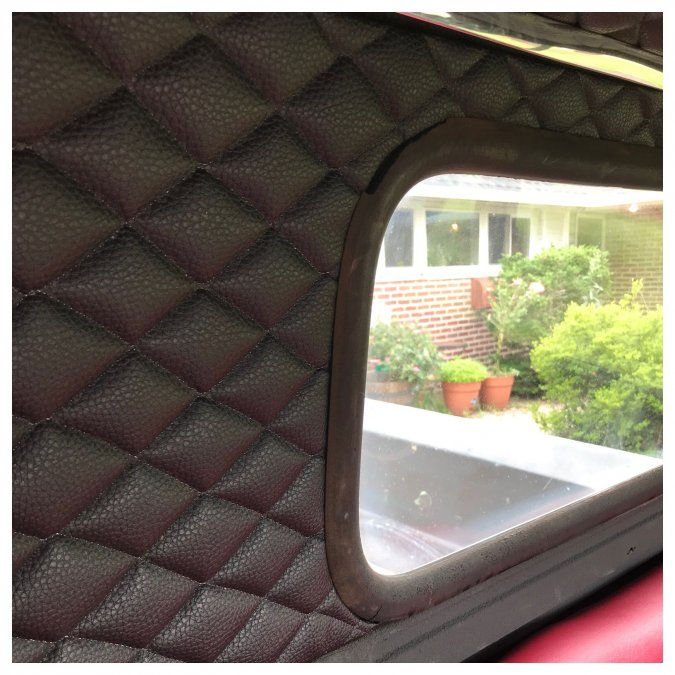
I got the new vinyl panel sewn up in the center with a little french seam and wrapped the rear surround ABS plastic panel in diamond stitch. It came out ok but next one I do I will pick some foam off the panels that glue to the reverse side- the foam is glued but the vinyl is only sewn to the vinyl not glued so it tends to ‘delaminate’ on the back side. I don’t think it’s gonna cause a problem once it’s stuffed into place. Fingers crossed it still fits!

-
Before and after specs on the old & new tires. A little bigger and much stickier compound.

-
New shoes! 275/50-r17 M&H dragmaster DOT drag radials. Maybe I’ll get to use a little more gas pedal in 1st & 2nd gear now. They’re just under 11” wide. Our tubs are 13” wide but without shortening the axle or buying custom 6.5” offset wheels these are the biggest I can fit. They just barely have room to get in there without having to drop the springs off the shackles.
-
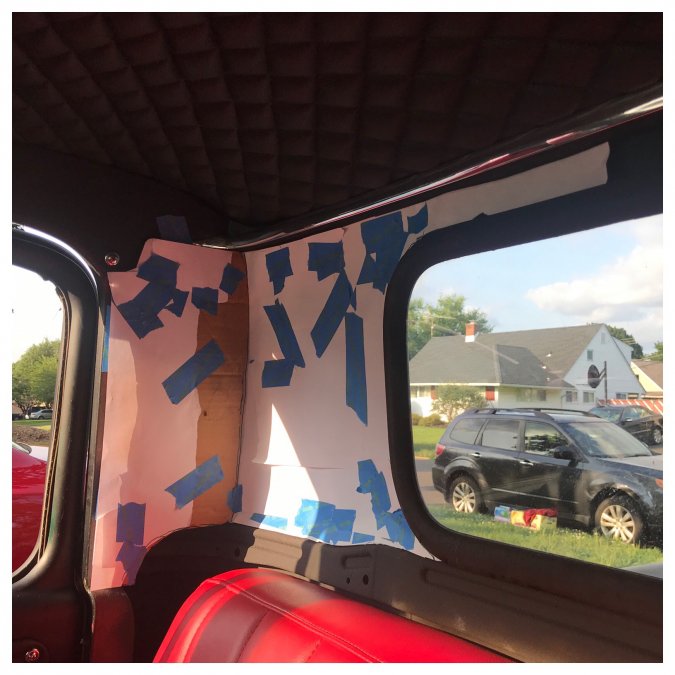
I had a little time this AM between dropping my kid at camp and an appointment at work. I got the rear surround marked, removed, and final trimmed. The vinyl for it is marked and cut but I need to sew two pieces together in the middle over the back window. I think I’ll pick the foam off the back up to the seam before I sew it so it’ll sit flat. Dunno if it’ll get a simple join or a french seam. I also ordered wiper pivot gaskets, bushings, e-clips, wiper arms, and blades off DCM. It’ll be nice to have wipers and they’re already wired up- 2spd electric. Anybody polish their windshield before? Mine has a lot of micro scratches from 70 years of 55mph top speed runs and marks from running with beat wipers that look bad but don’t catch a fingernail. I don’t need perfect but a minor improvement would be nice for night driving- oncoming headlights are more blinding than they need to be. I also bought little square rubber insert caps to finish the square stock that sticks up on the inside A pillar edge. My rockers were far gone enough when I channeled the cab down that I reinforced the new floor structure to the A&B pillars. They have a texture that matches the vinyl. The little things!
-
I had the two vent triangles hand cut at my local father & son glass co. Charged me $50 and threw in some weatherstrip
-
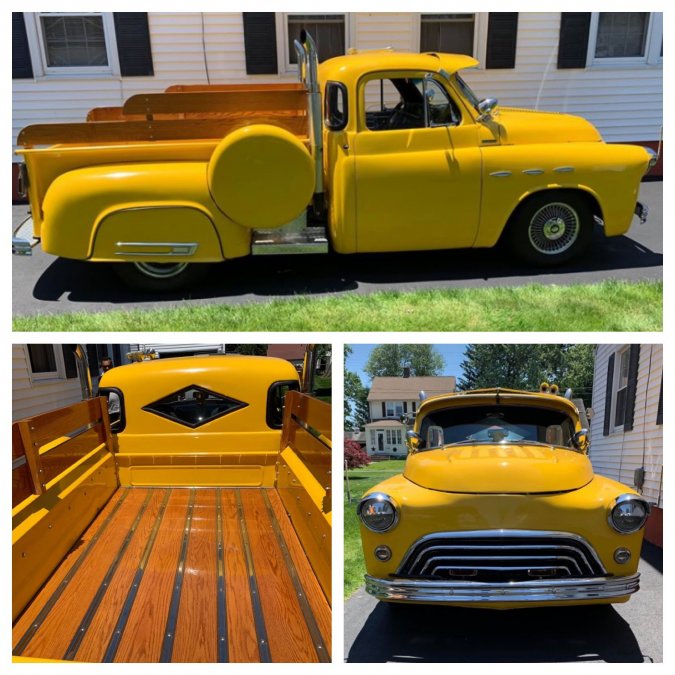
Like I said if I saw it at a car show I’d trash it but if I met the owner there’s a good chance their enthusiasm would be infectious. I don’t see a lot of dodge trucks around (plenty of ‘rams’) not even 80s fleetsides so when I see even a little red or a warlock I get excited. This truck is a little mind blowing- mostly that it’s for sale. I’m guessing it will be for sale for a looong time but you never know. I would offer hundreds of dollars to own it ?
-
So I’m always looking around craigslist, ebay, etc. Look what popped up in Connecticut on FB marketplace! It’s a custom ‘54. I can’t decide if I love it or hate it. There are some neat custom touches and super clean details but the chevy motor is a dealbreaker for me. I also don’t know why they deleted the butterfly hood but it doesn’t look like it’s on there straight. I feel like I would trash it at a car show and be amazed if I saw it in the wild and want to talk to the owner (builder?) In any case it’s something! I also met a dude this weekend (hi Bill) who also has a ‘54. His is clean and original except he also put in a chevy. Yuck. But I get it- he wanted to drive anywhere and tow his airstream trailer and he knows bowtie power. It’s a really cool rig. I showed him the forum- hopefully he’ll join up. Don’t be too hard on him for the wrong motor ?
-
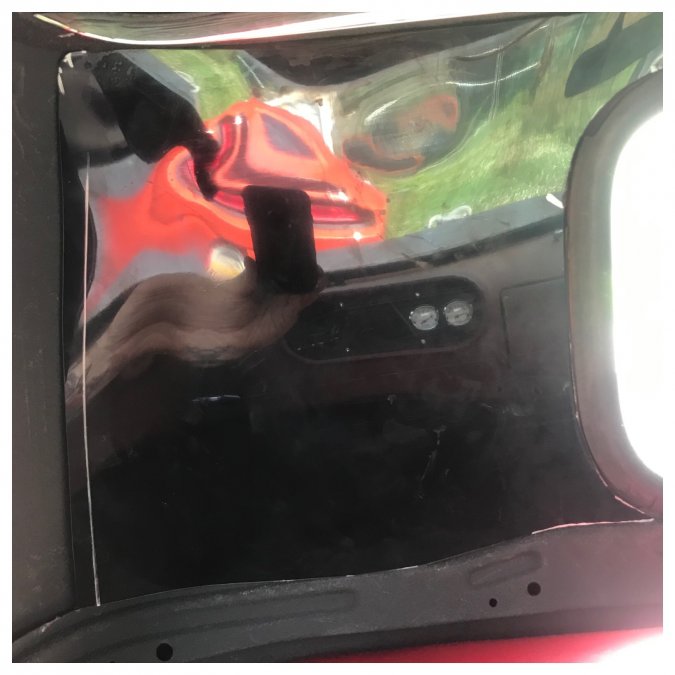
The rear piece is about done in ABS. After I got it trimmed I hit it carrefully with a propane torch and mushed it into the contours some. Gotta clearance it a touch so it’ll fit snug after it’s wrapped in foam & vinyl. Next is wrapping it in diamond stitch then making the plain vinyl wrapped side plates.

-
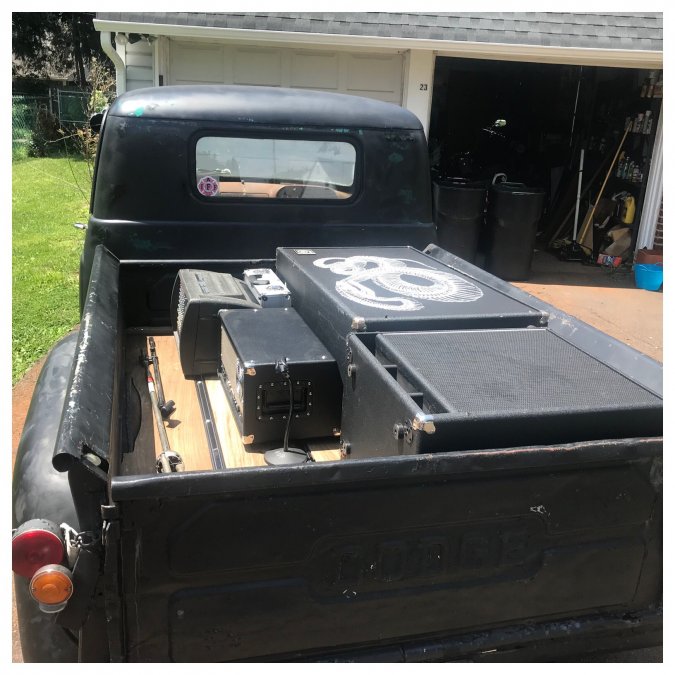
So I went out to get my wife some snacks and filled up my gastank. It was my first time doing the math on a fillup vs the trip odometer- 13.5mpg?! That can’t be right. No way does this thing get better milage than my 318 ramcharger! I’m going to have to pay close attention to this next fillup. I definitely have the trip odo zeroed and a full tank. Got a shot of rear surround pattern making today.
-
Thanks C054 I’m taking a break from making patterns for the interior rear window surround right now. The corner curves are pretty complicated 3d shapes but if I make flats that come back off the door lip like how they support the headliner I’m hoping to be able to pop it in the groove above the window and have it just held in by that and the pressure from the side pieces. Slow progress but the interior is coming out good. My wife even enjoys riding in it now. I also got some M&H DOT drag radials coming- 275/50-r17 and I’m looking at upgrading my $15 munroe stock replacement shocks with a set of rancho 9000 adjustables. Here’s a video of that holeshot I took it and zoomed in and slowed it down on iMovie. The super slo-mo is pasted twice at the end so you have time to watch the front tire and then the back tire. It looks like it tries to hook for a second as the slapper bars and shackles lift the chassis and plant the tires but then I get into wheelspin and it pourposes once before recovering into a steady rolling burnout. It’s a starting place.
-
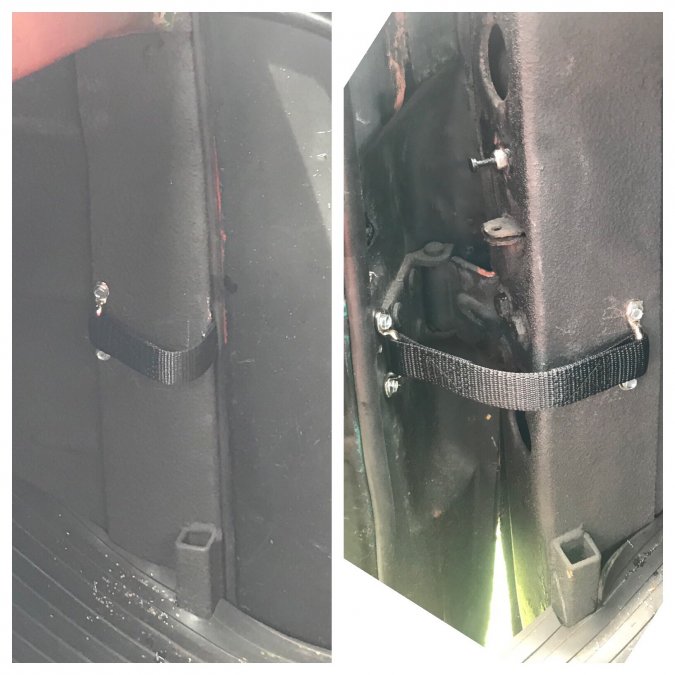
Here are the new door checks. They work great. No more telling passengers to not open the door too far. pics are passenger side closed and driver’s side open

-
Some dumb cosmetics today. I pulled off the ‘70s honda motorcycle mirrors and put a new peep mirror on the driver’s door. It originally had one when I got it but it was too rusty and wouldn’t hold an adjustment any more. The bike mirrors were a good idea but in practice didn’t hold adjustment well and I think they took away from the lines. They actually used to help a little to keep the doors from opening too far but that knocked them out of useful adjustment too. I also finished the ram ornament with a piece of stainless from a harley FLH front fender edge. It isn’t perfect (and too new looking! but I think it looks good. Stainless wears better than pot metal anyway.

-
Totally helps! It looks like the ‘duck bill’ part does indeed have a detent/stay open function? Pretty cool. Thany you for taking the time to make a little video
-
You can mig weld mild steel to stainless it will just alloy and could lose some strength. You’re on the right track splicing in a bit of tubing.
-
Oh and to further clean up and help consolidate this check info here’s the link to the stockers you can get from DCM that Merle took the time to look up for me https://dcmclassics.com/home/615-i-137-55-door-checksstops.html
-
Sorry for cross pollinating the info in this thread with my build thread. I’m going to hack at my hotrod the wrong way sometimes and that’s fine but this thread should stay about stock door checks in general for the searcher that wants to learn. In that spirit- a question: Does the stock check have a detent feature to keep a door held 4/5ths or so open? Like modern cars do? I’m looking at the section of the check right before the rubber on the long side of the arm- looks like duck lips. Thanks!
-
And it matters how you want your repair to look and work after it’s done. Do you need to throw a board on there and drive a dirtbike up into the bed using the tailgate hung from the chains to bear weight? Or just don’t want it to get worse? Is it a farm truck/ working truck? Or a restoration candidate?
-
So do you have a welder? You just have to make a patch panel, stick it over the bad part, scribe the line, cut out the cancer back to good metal that now will perfectly fit your patch, and weld it in with a series of small tacks. The hard part is having patience. You can only grind or weld so much before the heat starts pulling and warping things as it cools and shrinks smaller than it started. Good luck and ask more questions if you need to!
-
Hey! My passenger door is very nice thank you! ...the driver’s door is the one with no bottom
-
Good idea John but no dice. This is the first time she’s had door cards in over 20 years unless you count the scraps under the buttons & screws. And the driver’s door bottom used to be a bondo sculpture hiding riveted galvanized but now it’s just one big ragged hole underneath

