-
Posts
4,739 -
Joined
-
Last visited
-
Days Won
37
Content Type
Links Directory
Profiles
Articles
Forums
Downloads
Store
Gallery
Blogs
Events
Everything posted by Los_Control
-
My original line from the pump to the carburetor is a single flare. All the fittings are for the brakes, vacuum advance, fuel ..... From a quick google search. The single flare is very identical to the double flare. Although they look a lot alike, the double flare is much stronger and can hold more pressure build up inside the braking system. The double flare is a flare that is especially popular in vehicles imported from Europe. And another opinion. Can I use double flare instead of single flare? You'll see double flared lines in automotive brakes, usually in American and Asian models. European vehicles use bubble flared lines, which are similar in safety for high pressure hydraulic lines. If you see single flares on your brake system, replace them right away with double flared lines. My opinion is single flare has worked on my truck for 70 years. Flaring lines can be a bit tricky, you just need to be careful & pay attention .... sometimes no matter how hard you try a flare will still fail. A double flare is same as making a single flare except twice as tricky.
-
I agree with @kencombs theory. While it is very uncommon it is a weak point. If something goes wrong in the process of creating the valve ... Life happens. Last year on drag week Tom Baily hurt his engine .... Was end of the week & still able to drive the 5K+ horse power engine & baby it through the ceremonies on 7 cylinders. When Steve Morris tore down the engine for inspection, the valve head had broken off & embedded itself into the piston. Steve who builds many race engines .... He said he never seen a valve break like that, I think he was more impressed it did not destroy the engine. My only point, it happens. People who build race engines will put it as one of the last things on the list that will break .... but they can.
-
I could be wrong, I think the cartoonist was thinking about a pilothouse when drawing.
-
That is a excellent suggestion. I have never had one done I do not know. I have read in the forums where a few people have had this done. Even on a brand new master cylinder from over sea, leaked from day 1. A stainless steel sleeve installed & now better then new. A sleeved original MC may last the life of the car or at least as long as we live? I can only guess that it is kinda common to figure $100 a hole to have a engine cylinder sleeved. ..... With todays inflation, get a price today & will go up tomorrow. I would imagine a MC would be about the same amount of labor & tooling as a cylinder bore .... comparable in price. Just need to find a shop set up to do it. Possible it may be cheaper, I would not expect it to be any more expensive ..... Just a opinion though. When I was a kid I worked as a mechanics helper at a Texaco gas station. I honed a lot of wheel cylinders doing brake jobs .... master cylinder was always left to the mechanic if needed work. The wheel cylinders depending on how bad they were, clean them up & install new rubber cups. If pitted, we would hone them out & install 1 size larger rubber cups. That was the limit, 1 size larger. ..... If they leaked the customer needed a new wheel cylinder ... hey we tried. My master cylinder is 1 1/4" so I would want to go up 1/16" to 1 5/16" ..... You can see in the photo the cup on the far right. Is all I replaced on my MC. My MC was in good shape, it just needed a good cleaning, & a light hone. I bought a new rubber cup from a local supply store & put it back together & bench bled it. I have a full kit which cost $33 for a backup if needed. The main rubber cup is easy to just substitute a larger one. The cylinder the rubber "sweeper" cup is at the rear of the mc & also 1 1/4" ...... not so easy to replace. If fluid gets too it, & it leaks, you would visually see it leaking out of the rear of the master cylinder. That seal is at the very tail end of the MC, is it pitted & need heavy hone in that area? Will 1 1/4" seal there? I'm guessing all your wear is before that where the main cup rides .... Hone it good, 1/16" larger cup you are good to go. Having the MC sleeved would be the ultimate fix. Rule # 1, Don't get dead! Rule # 2. Play stupid games & win stupid prizes. .... See Rule #1. Use your gut feeling, look at what you have ... make a decision from that.
-
I do appreciate that .... I have a rustyhope kit sitting on the shelf I bought for another project ..... I know exactly what I have with it if I use it. Current project brakes are good. I have asked about this in the past, you are the first that answered that question about scarebird brake parts replacement. Personally I think a original MC if in good shape and usable will be just fine. I believe the braking system on your car is a engineered system? Works fine as is. Now if you have original brakes, & modify the master cylinder .... you have to learn a whole new skill just specific to your brake system ..... I mean applying the correct proportioning valve size to work with your existing brakes. Simply not a one size fits all ... Will take test & tune to make all work correct. IMHO I would update all the brake system & not just a part of it ???? Honestly I'm a big believer in fix what you have, then modify & grow with what you need.
-
While I have no experience with Wilwood, I know they have a excellent reputation. So do many other vendors. Like petronix. If for some reason you have a brake issue on the highway, you pull into Napa & need a part for a Wilwood master cylinder ..... You will get nothing. Same thing with a Scarebird disk brake conversion, They have a excellent reputation .... you are on the highway & need to replace a rotor or a caliper .... you get no help .... A flatbed ride home & wait for parts to be delivered. IMHO, OEM parts have always been more reliable, the replacements of good quality .....readily available than a one off custom car supplier. I just prefer to attempt to make life easy & work harder now so it is easier later. I am no more correct here then @coffeepathsofglory is .... just opinions.
-

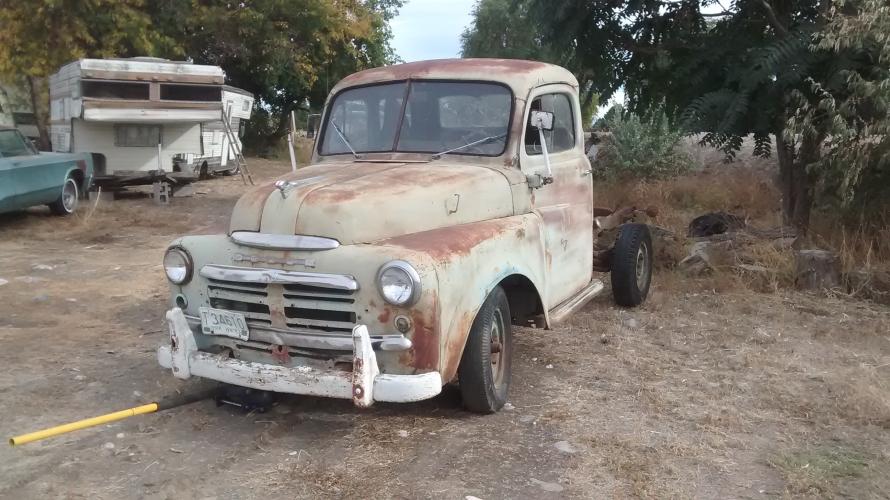
Greetings, proud new owner of 1953 Dodge pickup
Los_Control replied to Wild Jimmy's topic in Mopar Flathead Truck Forum
I love it the truck looks awesome. Just to put things in perspective, when I was a kid 16-18 years old. There was a few 6 volt vehicles running around as cheap transportation vehicles. When the charging system started to give problems ..... It was just common to switch it to 12 volt ..... Cheaper, easier, modern technology. In the 1970's you could pick up from the local wrecking yard a used 12 volt battery, alternator, light bulbs .... cheaper then what a new 6 volt battery or a new 6 volt generator cost. All of this just makes me think of your truck as a survivor of sorts, not a restored truck. So original wiring would fit right in. Original wiring would be cloth covered .... at 70 years old it would be a mess, been several layers of electrical tape to cover it up ..... I would not try to add anything to it. I would be looking at buying a after market wiring harness that includes a fuse box & a spot for a relay or 2 .... There are many available in different price ranges. Then I would be asking questions about installing the new harness. .... There is many people here qualified to answer serious electrical questions, I'm not one of them. These trucks really need very little wiring to make them work. -
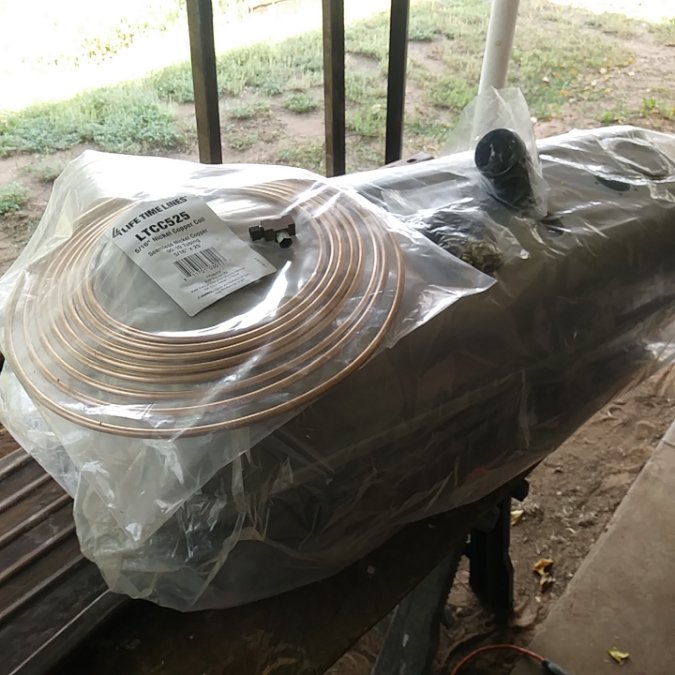
I have been following along here because I suspect I will have the same problem soon also. The original line is a simple hard line flared on the end. I looked at my new tank & saw that a flared line will not work with the tank without a adapter of some sort. .... rolled my eyes and thought that is a problem for another day. I would like to thank @Sam Buchanan for the hint it is 1/4"-18 NPT. ..... I have that tap I can double check. When I pull it back out of the attic for installation. In this area I also would use a good sealant. (pipe dope) A long time ago in another lifetime, I worked around boilers and lots of plumbing. Pipe dope was the sealer of choice. Later on as a remodel carpenter I would use Teflon tape for chrome plumbing fixtures & visible connections under a sink. .... Was clean & pretty. I had to go back more then a few times to redo the Teflon tape because I did not use enough the first time. You use too much & the excess looks stupid & needs to be cleaned off. Pipe dope is messy, will take time to clean off the excess if you care, I never had to go back and redo a joint when I used pipe dope.
-

Coolant Pooling in Intake Manifold - 230 Flathead 6
Los_Control replied to rtferguson39's topic in P15-D24 Forum
Since I'm not a mechanic my advice is worth what you pay for it. I would be tempted to clean up the coolant, put the carburetor back on it and run it for some time in the driveway watching it. Then remove the carburetor again to see if the issue has come back. I can not explain the coolant in the manifold, I also can not explain why there was no symptoms such as rough running or no steam. I have seen many things in life I can not explain .... If it only takes a few minutes to clean it up and run it again .... I would want to prove it was a problem before tearing the engine apart. ..... If nothing else you would get a better idea of how big of a leak it is if it does return? Seems a crack would normally come from over heating or winter freezing. Not from normal driving. That would make sense if a intake port was leaking & the studs enter a water jacket .... seems with the engine running & spray some carb cleaner around the intake they might locate it?- 26 replies
-
- 1
-

-
- engine
- cooling system
-
(and 2 more)
Tagged with:
-

Coolant Pooling in Intake Manifold - 230 Flathead 6
Los_Control replied to rtferguson39's topic in P15-D24 Forum
I would think you could bypass the heater core then disconnect the radiator, plug bottom hose while being creative to add air through the top hose. Could be very helpful finding the problem. Certainly seems like a head scratcher though .... seems there was no indication of a problem before removing the carburetor. Unless there was a issue & you thought a carburetor rebuild would fix it ..... I sure would expect to see steam from exhaust though.- 26 replies
-
- engine
- cooling system
-
(and 2 more)
Tagged with:
-
YAY FREE HORSE POWER!!! I imagine it should run smoother with 1 or 2 more horse power fixing the compression leaks. I am same as @Sniper& never replaced just the gasket .... Same time never found one leaking either.
-
I would think the popping sound may be a indication of a bad valve not doing what it should do. I would also think the last time you pulled the head "fixed" the head bolt issues. In the era these cars were running, it was common to take your car to a Gas station & have a mechanic do a ring or valve job. Sometimes both ... Just depends on the wear of the engine. Often this work was done in 1 or 2 days with the engine left in the car. They use to have boring machines they would mount over the engine & bore out the cylinders to add oversize rings/pistons .... Today we take it to a machine shop & have everything redone .... Back in the day, a valve job was 1 day at the local gas station..
-
I will have to agree with you to some extent ... Napa or Autozone is a little more then 1 hour round trip. Not out of the question but not convenient either. My local parts+ is privately owned by 2 people for decades. The store is combined with the best automotive repair shop in the area. Always busy & mechanics have a door right to the parts store. This store is very profitable. The carquest store is actually Heady auto parts been in business, same building for over 75 years ... They just use the CarQuest franchise today. This store has all the contracts with the city vehicles, The school bus barn, The county vehicles. EMS, Fire department, I know they have a 3 year contract with the company repaving Interstate 20 in this area. ..... Very profitable business. The next issue is our area is oil fields & farm/ranch .... Not uncommon for Charlie to come down & open parts+ at 2:00 AM in his under wear & a robe to sell a part during harvest time. I just do not understand why the regional stores do not supply the lines or at least a replacement such as copper/nickel? Can you imagine how many stores & business rely on these regional warehouses?
-

47 WC 1/2 ton hubcaps 9" or 10"?
Los_Control replied to dgrinnan's topic in Mopar Flathead Truck Forum
What I learned with my B1C & B1B 3/4 - 1/2 ton .... The 3/4 ton trucks used a 15" wheel, while the 1/2 ton trucks had a 16" wheel. .... A 1952 Suburban also used 16" wheels. Just saying the cars used 16" wheels. The size of the wheel changed the size of the hub cap. The 3/4 ton trucks went with the 15" wheel but they were wider also. ...... seems backwards but just the way it was. -
A old trick that might help .... A engine is a air pump ... it sucks air in & spits it out. If you take a $1 bill & lay it over the tail pipe with the engine running .... The $1 bill should be blown straight out from the air flow. If the $1 bill starts flapping or fluttering back & forth, you have a valve issue. Not scientific at all, as a air pump it should be pushing air in one direction ... if it sucks the $1 bill back it is a burnt valve .... just a quick test to give you a direction to start looking at. No idea about the higher temps .... I do not think a burnt valve would cause that. .... What do I know? What does the plug look like on the low compression cylinder? .... If you had a blown head gasket leaking coolant into that cylinder, that plug would look so clean as if it was steamed cleaned .... While the others would be coco brown or dirty with carbon. You have something going on, will be basic troubleshooting .... most likely remove the head for a closer inspection .... The compression on all the other cylinders is really good.
-
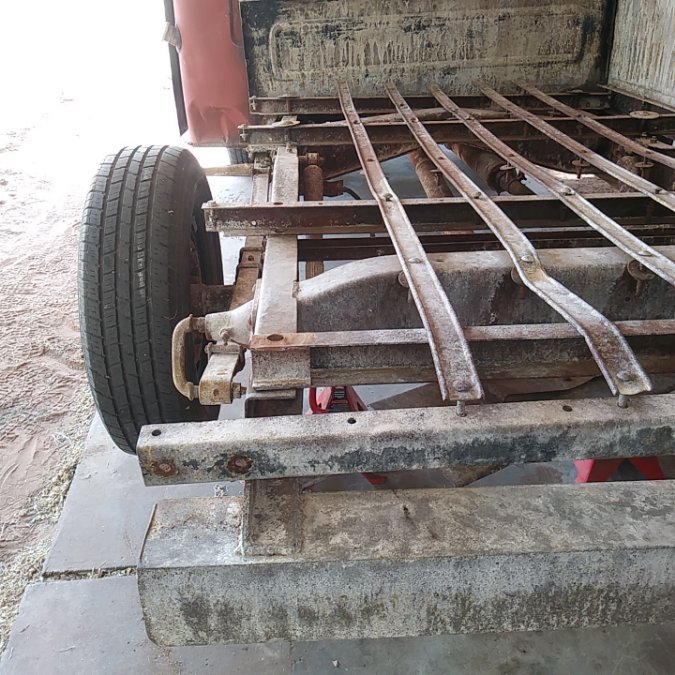
Here is the key ..... how accurate is @Wayaroundit2wanting to restore the bed back to original? I just assume the existing cross members could be used .... making modification of the side slats on the bed sides. Would look original while using home made parts. I have no idea how a 1953 bed is created with what dimensions. I have a 1949 low side & also a utility trailer with high sides. I just checked & both look the same underneath .... Maybe 1953 they changed?
-
I know that Napa auto parts use to do custom color matching of paint, can mix it up and give it to you in a can or a spray can. .... I'm sure many paint stores can do this. The trick is to bring something inside to them to match. I can remove the gas door on my 1991 chebby ... clean & polish it, then bring it into the store for them to match the color. Do you have anything you can easily remove to do this ..... maybe a glove box door, gas flap???
-
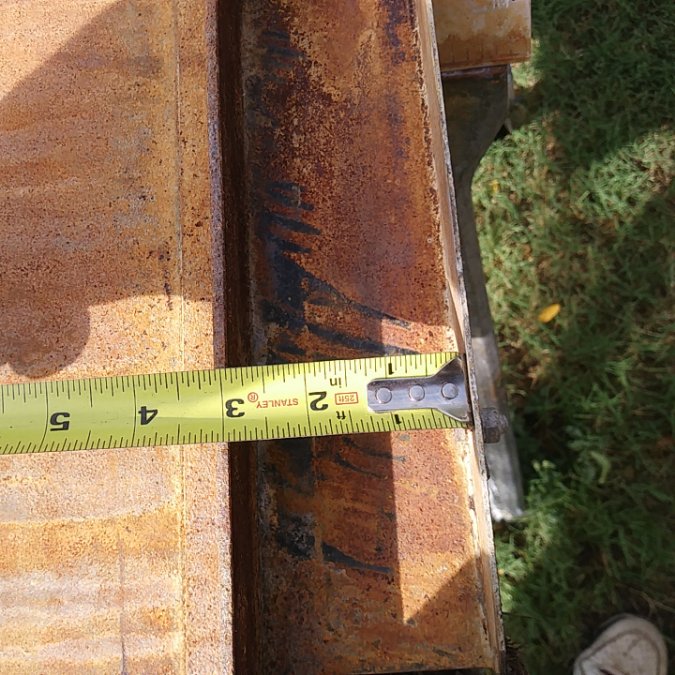
I wonder what would be different other then the height of the sides? Seems some photos of what you have would help. I have a 1949 low side & currently working on the bed. From your post it sounds like yours has been modified. Is the L shaped slat attached to the bed side in original position? M 1949 low side bed the cross members are 2" tall, 5 in total while one is narrower then the rest. The slat on the side of the bed is right at 3" ..... There is a thin 3/16" rubber washer between frame & 2" tall cross member + 3/4" wood floor = 2 7/8". This is how the math works on my original bed. With your modified cross members you may need to adjust the slat height on the bed sides?
-
The pilot shaft bushing is recommended to pack it full of grease to create hydraulic pressure to remove it. I read too much sometimes ..... Seems that applying grease to a bronze bushing may not be the best. Clogs the pores, the grease wears out & no further lubrication. While I have read that applying a light oil to the bronze bushing, it will soak it up like a sponge & supply lubrication for years to come. I'm only suggesting you do some research on it yourself. I really would have to do the same the next time I'm faced with the issue. ..... Only pointing out their is a conflicting opinion.
-
I do not know what the specs are, sure you can find them in a book somewhere. I would think it would be fine, when you tighten it down it will be the pp springs compressed that distance applying the pressure. Then if you removed aprox 1/8" from the disk, it would be worn out & close to the rivets .... destroying the surface of you pp & flywheel. You have compared it to a new disk, you can see the new one would give you about the same distance. I think that a clutch disk gets a lot less wear then a brake shoe. When in use we ride the brakes safely slowing to a stop, causing wear on the shoes. Properly operated, a clutch is either engaged or disengaged. Normally you do not slip the clutch causing wear. So 1/8" wear should give you many thousands of miles. Or years? I almost question changing the throw out bearing. Only because it may be easier to physically check a bearing for condition. A bearing needs to spin freely with zero roughness or noise. ..... If your existing bearing fits this description, it may be better quality then a new one you can replace it with. Another thing to consider is your pilot shaft bushing. ..... With 26k miles on it, it may not be worn out .... something to think about though.
-
If it was my carburetor & I had to use it, I would want to give it every chance I could. They are getting harder to find. My theory is the powder is the way this type of metal rust or deteriorates. We see it all the time on aluminum heads, intakes ... wheels. It cleans up nicely with some sort of soda or bead blasting & polish.... worse cases leaves pitting behind from deterioration. Just something you do not want to see inside of your carburetor with all the small passages. Vinegar has a million uses & a excellent cleaner, it might do the trick. my grocery store stocks a gallon sized jug with a higher acidity rate that is more for cleaning then for cooking. .... I also use it as a mild flush for my cooling system to remove rust/corrosion. I was going to suggest Berrymans to soak your carb in, I soaked mine in it for 48 hours. Mine was in good shape & no powder. I paid $25 for it 2 years ago & used it with 3 different carbs and various parts since then. Today they want $62 for the same item
-

1953 dodge truck dually stake bed
Los_Control replied to Cody pierantoni's topic in Mopar Flathead Truck Forum
@ggdad1951 put you straight on this. The next step is to have your tires dismounted & wheels inspected. The wheels you have are perfectly safe if they are in good condition. ..... The only way to inspect them is to remove the tires. You need a qualified Tire person to inspect the condition of the wheel. For example if the lock ring is damaged in any way they should not install a new tire on it. It could be bent .... maybe serious rust ... often just sandblast & paint & good as new ..... your truck is 70 years old. It is important to find out the condition of your wheels. A true widow maker wheel was 30 years old in 1980 .... Thats not what you have. -

Electric Fuel Pump Mounting Question
Los_Control replied to desmondmonster's topic in Mopar Flathead Truck Forum
I like @keithb7opinion on the subject .... he really does explain well what is going on ..... I also would simply add a electric fuel pump if I had a running driving vehicle. I really am lazy, I would not drop a fuel tank and rebuild a fuel system when I could just add a electric pump ... Call it a day and move on. Since I do need to build the rear tank mount, make the lines .... I think to myself how can I make it the best job I can do .... I'm thinking that adding a return line will take another hour or two .... What if that actually fixes the problem so a booster pump is not needed? This video sold me on the idea. What I do not like in either of the video's is Keith shows the quick fix & mounts the booster pump on the firewall & proves it works .... you will be fine mounting yours near the tank. Tony he shows how to avoid the problem period. .... He claims 95% of the time. Not 100% ..... 2 totally different videos. 1 How to approach it after the problem occurs. Other to show you how to prevent the problem from happening. Neither video shows them as ascetically correct. .... I have a kit I have to put together ..... "I BELIEVE" I can create a period correct looking fuel system with a return line. -
Glad to hear it. I live on a retirement fixed income ... It can be tough to come up with extra money to buy hotrod parts. .... It is possible to spend a few $$ & have a tank cleaned & sealed .... There is a chance it will fail ... the cost is about the same as a new tank.. I would only use this if my vehicle did not have a replacement tank available. A new gas tank is not as sexy as a new set of wheels ... but it is a needed item.
-
I'm a little confused on this one. Auto parts stores are simply phasing out brake lines. Or any metal line like fuel or vacuum. I can understand this if they offered a replacement like nicop. ... But they offer nothing .... Go kick rocks they say! I have a parts + & a carquest in town..... I just can not understand why they are cutting out metal lines without a replacement. My mistake was buying 5/16" to finish the rear .... I forgot I needed 1/4" .... I bought 3 sticks of 1/4" for $1.59. I insisted the clerk made a mistake & he insisted it was correct. Once it is gone they will not replace it. .... I just wonder what the future is for metal lines that all cars use.

