
Los_Control
-
Posts
4,676 -
Joined
-
Last visited
-
Days Won
35
Content Type
Links Directory
Profiles
Articles
Forums
Downloads
Store
Gallery
Blogs
Events
Everything posted by Los_Control
-

Bad brake master cylinder lead to brake switch not working?
Los_Control replied to dsapern's topic in P15-D24 Forum
For a 49-50 chebby truck .... bolt it to the floor board .... soon as you move the pedal the lights come on. If adjusted correctly. $15 on RockAuto. No it is not original, will not work for you if you want a 100 point restoration. I consider it a safety upgrade. If your brakes/switch are working perfectly, probably 10% of the time your brake lights will not come on. If in a traffic jam and you are riding the clutch and just slowly moving along ... put in the clutch and barely use the brakes to come to a stop ... there will not be enough pressure to activate the brake lights. ..... You would have to press on the brakes and do a nose dive to activate the lights. Now if someone following you are not paying close attention and they rear end you .... it could be your fault for no brake lights. So many cars today have dash cams that would show in court your lights did not come on. Sitting at a stop sign and just holding the car motionless with light pressure on the brakes .... no lights again ..... sometimes I might be cruising down the highway and something is going on ahead .... I might tap my brakes a couple times just to warn the guy behind me we are slowing down. Pressure switches work, electrical switches are far superior IMHO. A electric switch will not fix bad brakes ... thats a different story .... I have a choice as to what switch to use .... no question which one I'm using. -
Bad brake master cylinder lead to brake switch not working?
Los_Control replied to dsapern's topic in P15-D24 Forum
IMHO if your brakes are working, you could just split the brake line and install a T and run your switch from there. It just needs pressure. If your brakes work ok .... sounds like you have drove it and not worried about the pedal on them. You bought the MC new in 2016 and has very few miles on it while you work on the truck .... is possible it sat dry or low for a time and got some scaly rust in it that flaked off and is now lying in the bottom of the MC blocking the hole. Possible you can remove the switch, then blow air into the MC to clear the blockage .... then the switch will work until the crud settles back into the same space again. This new of a MC I would not bother with new seals, just clean it out. @Sniper I would have to look at my old one, as I remember it the switch bolts directly to the MC while a single 5/16" line comes out of the MC and goes back 12" or so to a T. Then 5/16" line to the front brakes and a 1/4" line goes to the rear. The switch and the lines are separate. Why I think is possible the brakes work fine, just the switch passage is clogged. -
Bad brake master cylinder lead to brake switch not working?
Los_Control replied to dsapern's topic in P15-D24 Forum
Might be a good time to rebuild the MC ..... or take it apart and put new seals in it. that does not sound right at all ... sounds like some dirt or scale blocking the passage. That also explains why the switch is not working ... not enough pressure to operate it. I just looked at https://www.dcmclassics.com/ I do not see the MC kit. I bought a kit from them a couple years ago and was pretty cheap ... maybe $25 or less. They also just redone their website .... maybe give them a call or email them to see whats up with the kit. Great bunch of guys there and very helpful. Possible you can just disassemble yours and clean it, then put it back together as is and will be fine. For the effort, I would prefer to replace the seals while in there myself. When I got mine put back together and bled them, it felt fine. Then I imitated a panic stop and slammed the brake pedal as hard as hard as I could as if I was trying to avoid a accident. .... Pedal went strait to the floor. Just been honed one too many times and the new seals would not hold. ..... Old worn seals can do the same thing. Thats when I went to the Toyota MC swap and also am going with a electric switch ..... whenever I get the truck wired 🙄 -
Bad brake master cylinder lead to brake switch not working?
Los_Control replied to dsapern's topic in P15-D24 Forum
How are your brakes? If you have a good firm pedal and brakes work fine, there would be enough pressure in the MC to activate the switch. One complaint about a pressure switch, if you are just crawling along in traffic and barely using the brakes, the brake lights may not come on because you are not applying enough pressure to activate the switch. One of the reasons I am going with a electric switch ... when the pedal moves the lights come on .... does not require pressure to activate. If you have power going to the switch, you have enough pressure to operate the brakes .... the switch should activate and send power back to the lights if all is correct. -
The older jeep cherokee or Ford explorer work fine for the swap. I mean older in order to get drum brakes .... or newer if you want rear disk. They do have the same wheel bolt pattern so you can use your stock wheels Seems the modifications would be to remove existing spring perches and weld on new ones .... and install new U-bolts. The rear yoke will be different and will need to get a drive line modified to fit the modern u-joints. If you do not need to stay original, I'm a firm believer in a rear end upgrade. The gears will be quieter. The original brakes are a nightmare to adjust and maintain .... the quality of replacement parts is crap ... brake drum availability is questionable. You need a special puller and a free afternoon just to remove the rear drums from the tapered axle. They have a woodruff key to hold the axles in place .... you could borrow one from your 3.5 HP Briggs & Stratton lawn mower engine if needed. Any real power from a engine will shear the keys off and leave you stranded. The ball and trunion u-joints are a nightmare to maintain or find for replacement. Your original E-brake is almost worthless and attached to the end of the transmission .... A modern rear end has it on the rear axle where it actually works. All I'm saying, for the cost or effort of doing the rear end swap .... You avoid sooo many headaches and expensive repairs. Pay one time and get self adjusting brakes easily bought at local outlets, A strong rear end that will hold up to some real HP. Get rid of the goofy ball & trunion u-joints. I'm only sad because my rear end is in perfect condition and needs no work done to it .... if it does in the future, I will replace quicker then a New York minute.
-
Slant six engine into 53 b/4 dodge pickup
Los_Control replied to Pastor sam's topic in Mopar Flathead Truck Forum
The front sheet metal, commonly called the dog house is designed to be unbolted and removed. The headlight wiring has a junction block so you can unbolt the wiring. Seriously, is not that many bolts and will take 2 guys to lift it off and set to the side .... you will then have access to everything. Lets be honest, doing a engine swap your going to appreciate having all the access to do what you want .... I would not attempt it any other way myself. I took mine off in individual pieces because I wanted to paint it before putting it back together. I then put it back together in individual pieces .... you can take it off in one piece though. I'm a fan of the slant 6, they are great engines. .... so are the flathead sixes your truck came with. Would not be my first choice for a swap though. Like @Plymouthy Adamssuggest, when going through all the trouble .... why not choose something more user friendly and readily available. A straight 6 from a Jeep Cherokee is a great engine, easy to work on and readily available .... just one example. The way I see it though, If you already own the good running slant 6/transmission.drive line ..... all deals are off .... stuff it in there.
-
Aftermarket radiator options ('51 B3B)
Los_Control replied to ktb's topic in Mopar Flathead Truck Forum
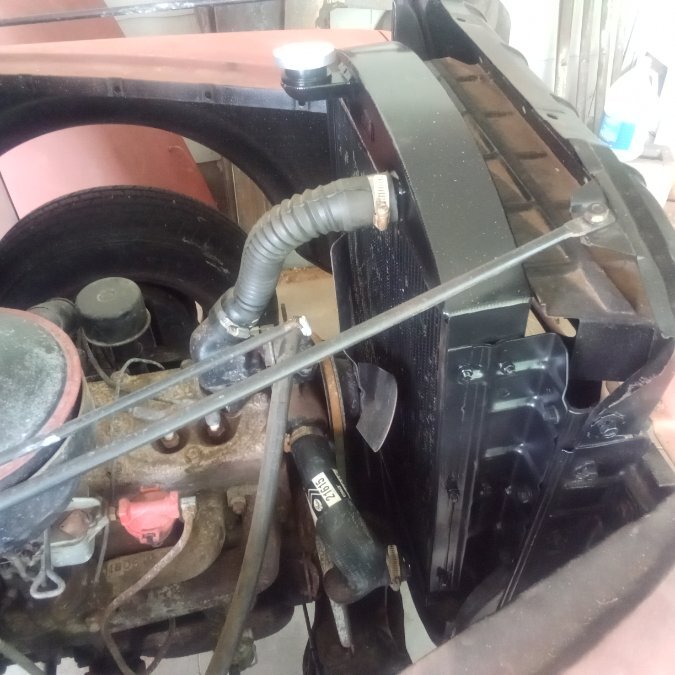
What I did, removed brackets from original and mounted to the radiator .... My concern was I needed to raise the radiator up to clear the bottom radiator hose and this puts the fan cooling the lower 1/2 of the radiator, not the middle .... it works fine.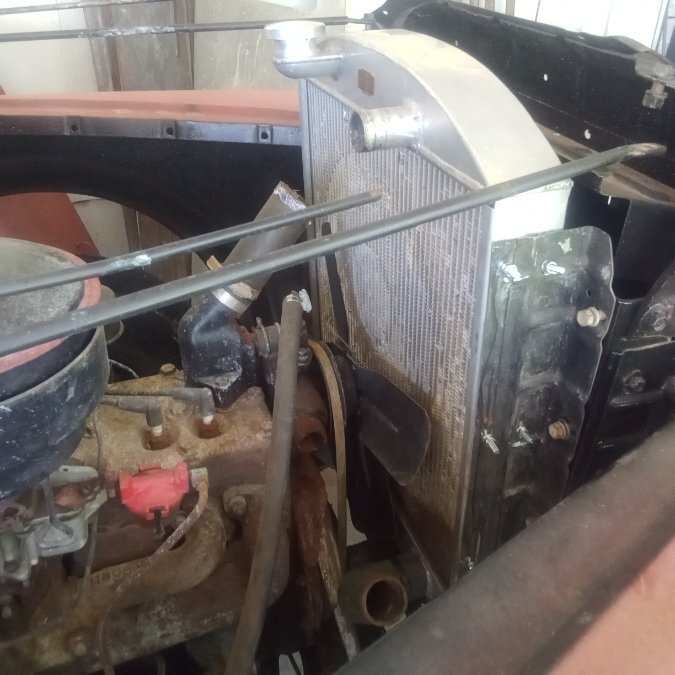
-
Aftermarket radiator options ('51 B3B)
Los_Control replied to ktb's topic in Mopar Flathead Truck Forum
When you buy radiator hoses, the store always lets me go in the back and select a random hose that is correct size and has the correct bends to make it work .... just cut out the piece you need. .... 2nd one may be easier, 1rst one is no problem either. -
Aftermarket radiator options ('51 B3B)
Los_Control replied to ktb's topic in Mopar Flathead Truck Forum
Wonder why you would need mounting bracket mods? My aftermarket radiator had slotted mounting holes in the middle of the radiator .... I removed brackets from the original and bolted to the aftermarket .... works fine. My used $50 radiator is 3" thick all the way from top to bottom .... I believe it is a larger 3 core radiator. The one you show is a bargain price, is advertised to fit your application .... I have never heard a bad word against Champion. I would think it would fit? Because of West Texas and multiple months of +100F weather .... I might check the pricing on a thicker radiator just for more capacity. I would bet the one you show will work fine. I painted mine black, looks like it might be original ... unless you know it should be honeycomb. On a side note, My old one is in the scrap pile, it does have a good tank if you want to spend $1k to get yours re-cored. -
OOOH Lawdy! I luv's me some flatty. I have a 1951 8BA lying around that will be a easy build. It was a fresh rebuild before it was parked .... really just needs cleaned and reassemble it. I had a 51 Ford truck in High school. I just love the way a Flathead V8 sounds. I had some wild idea about installing it into my 1949 Dodge truck .... some nostalgia. The Dodge 6 is a much better motor in stock form ..... does not sound as good as the Ford though. Then I came across a nice 1970 318 with 114K miles and ran good when pulled, needs freshened up and was replaced with a modern hemi. The 318 makes more sense, Still on the fence on what to do with the 8BA ..... Boy the 218 6 sure runs good though. I love the motor/trans/wheels on that Hot Rod .... install a truck body and I would be in heaven.
-
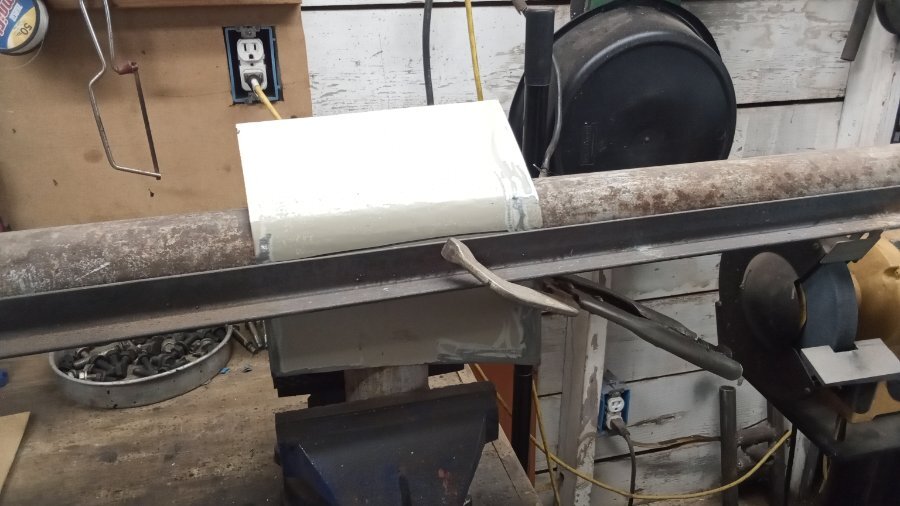
I'm the same way, will try to save something and feel good about recycling. I did the same thing saving some bed rails to use on my truck bed. Turns out bed rails are hardened steel and very difficult to drill holes through ..... All I did is create a future headache for myself. I would play with a few patch pieces to see how the metal welds and if you can drill through it if needed. Seems like old washers had some sort of ceramic coating on them for paint .... I wonder what that does for welding? Cheap and free is not always best.
-
Just wondering if a strict ban is really the best solution? .... I agree with it and stick to it myself. ..... For this forum, I respect this forum and it's rules. Over in the Chevrolet Silverado forum we have a daily chat thread where we all check in and chat off and on all day long and often politics are discussed. There are people on both sides and we disagree often, but we are all adults and get along fine. No moderation is needed to referee. Last night there was a thread in off topic of people watching results as the night went on, still going on today .... I went to bed at my usual time and in the middle of the night I went to the bathroom and checked results. Over on the Dodge forum, there is also discussion there .... I've never seen any moderation needed there. Allpar is a funny place, I'm banned from there because of politics. A particular moderator could not control their feelings on politics .... in a thread about EV cars I made no political thoughts on it, just answered the question asked and gave my opinion on why EV cars were not ready .... The moderator who also was in Canada gave me his own political opinion on the subject. I gave my opinion and backed it up with facts and links to news reports backing them up ... He banned me because he could not dispute the facts. Today in the chebby forum on the political thread was a gentleman from the middle East in Qatar .... terrorist country .... He hates the 47 potus .... the conversation was totally fine .... All I'm saying, if people act as adults .... political conversation is fine and is informative as long as all have a open mind. Maybe @RobertKB would feel better today if he had somewhere he could go to discuss this subject ..... thats why we have a off topic channel for some to choose if they want to participate or not.
-
Sorry for your loss .... maybe it is a good day to shut off all digital devices and go get some fresh air, enjoy life and not get worked up about things you have no control over. Tomorrow will be a better day.
-
Seems like the spitfire has a 25" long block, your car probably came with a 23" engine. The 2" difference means moving the radiator forward. Same time, all Canadian cars came with 25" engines .... no idea why. In USA the larger trucks came with the 25" engine, still had the same engine space as a smaller 23" engine truck. So it was done from the factory ... if you look at your original radiator brackets and the radiator core support, it is somehow possible to just move the radiator to the front instead of mounting it in the rear near the engine. While I have never done it myself .... I have heard there is no real advantage in HP between the 23" - 25" engines, maybe more lower end torque .... just not enough improvement to make the swap worthwhile. If the price is right, it may be worth it. I see mounting the radiator differently, exhaust probably needs modified to match the manifold, probably gas pedal linkage is different. Motor mounts might be the same??? It will work, just lots of little things to work through.
-
Interchangeable Distributors -23" vs 25"?
Los_Control replied to Bob Riding's topic in P15-D24 Forum
I just wonder if it is feasible to just swap the shafts over? -
Also while engines vary in size and shape ..... the stock flat 6 is not terribly smaller then the rest .... The oil pan sits a good 5" above the straight axle on a 1949. The oil pan really should not matter if it is front or rear sump .... really does not come into play if installed above like original is. What little research I have done about installing a 318, you want to offset it 1" to the passenger side just to get clearance from the steering box. Again a non issue. What bothers me on installing a newer 3.9 or even the jeep 4.0 is a great engine and plentiful in the bone yards is wiring them up. I'm clueless on wiring. A manual T-5 would be simple, a electronic controlled 4spd automatic is actually pretty simple if you have the components and the wiring harness .... but there are 2 or 3 small 22gage wires that go in the cab and have no idea what you do with those. Same with the pcm, use the factory engine harness and pcm dead simple .... those silly little stupid wires show up to pee in your cheerios.
-
A833 transmission for my flathead
Los_Control replied to Tony_Urwin's topic in Mopar Flathead Truck Forum
$10 on Amazon -
My thoughts on the /6 .... they are a great engine, they are getting harder to find today also. I originally thought about a /6 because I have had several 60's Dodge trucks with the /6 and love them .... I settled on it would be a poor choice. I think a 3.9 V6 from a Dakota would be a great swap. They have plenty of power and even a Magnum version that produces more HP. I have a older Caravan with the 3.3 FWD, newer came with a 3.8 which is a stroked 3.3. The Dakota RWD trucks have the 3.9 All these Dodge V6's are known to go 300K + miles with basic maintenance. Will require extra wiring with the computer .... should be pretty simple if you have the engine/trans wiring harness and computer from the donor vehicle. While my original 218 is in good condition, I did pickup a 1970 318 for future use. The 360 is basically the same block and the newer replacement for the 318, should be plenty of them around and make a good choice. 318/360 has been done thousands of times and work well .... just a better choice then a /6 IMHO All deals are off if you already have the motor/transmission then go ahead and use what you have.
-
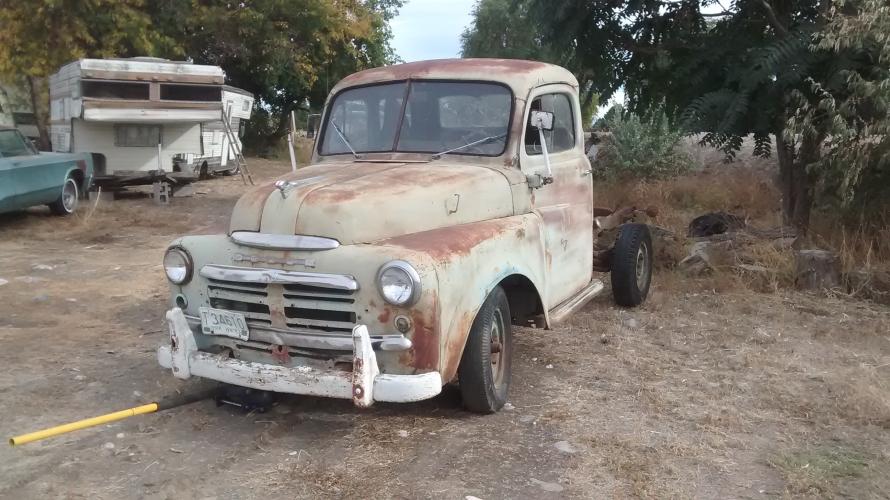
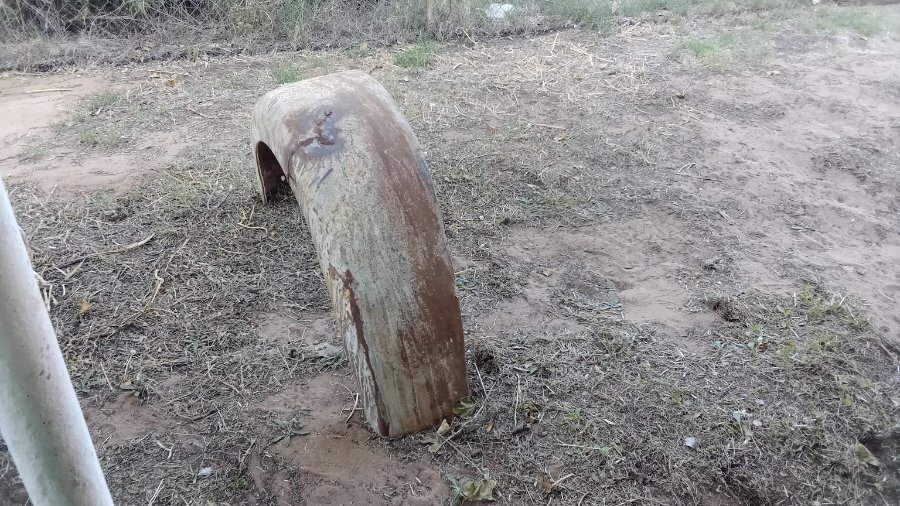
Wanted to add that I do not plan to remove every little ding .... I'm getting the main stuff, fixing a bunch of the little stuff ... all the while looking at dings to save and call character .... it is a truck and I plan to daily drive it and use it like a truck. If you look back in this thread we can see I did some work on this cab corner and it has some putty in it. Yet I left 2 dings and call them character .... I could have and still can fix these .... I'm fine with them. If you look up at 2 O'clock there is another .... I took out 50 dings in the back of the cab, I left 10. Just looks natural on a old truck to me .... The bed rail needs replaced on the truck ..... whatever ripped this fender and smashed it flat, bent the rail also. I think this damage might have retired it from a company construction truck. Not worth fixing. From that point the truck belonged to a night watchman that sat in a guard shack at the entrance to the construction company. People remember seeing the truck parked there all the time. My only point is, If I make the fenders too nice and take every ding out of them, they will not look right for the truck. Work smart, not hard


-
Agreed, honestly I would be happy to learn just one way to work metal I'm just stumbling through the repairs on this truck, I have not done it many times in the past ... Now I can say I've done it once before. The first fender I did wrong by trying to work it out with one patch .... while just having simple hand tools. With the right tools it could be done. It really does not matter though, it still worked out in the end and the finished product will be fine ... it was just more difficult because I had to make pie cuts in the metal to get it to go the way I wanted it to ... it was stressful wondering if I was going to get it ..... just metal, in the end it worked out. The 2nd fender was no stress, I looked at it and knew what I needed to do and did it in 3 patches and it was just easier to get to the same place as the first fender. So anyone reading that is still learning, like myself ... just dive in and do it, you will learn from it and next time will be easier. If it turns out bad, just cut it out and try again .... just metal and time.
-
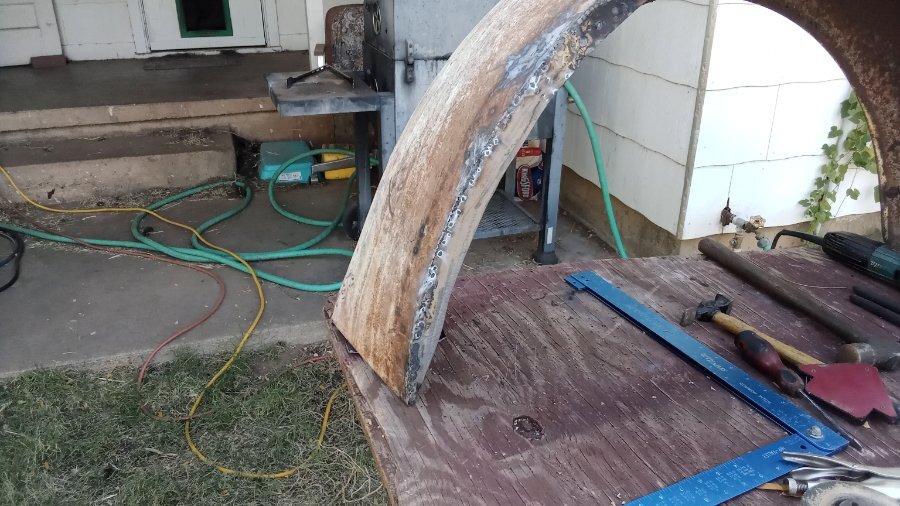
Making progress .... first I rebuilt the mounting flange. I specifically rebuilt the better fender first, so I could use it to make templates from. Then I rebuilt the mounting flange on the fender. It was pretty crazy at first, I could not believe the fender was that far off from the template .... I spent the rest of the day just getting the fender to match the new patch panel. I then spent a few hours the next day making a 1.5" flat strip to follow the fender and welded it in as a L shape patch. Then I made a longer piece shorter then the original and doubled up the mounting .... Way over kill but the bracket will not break off again. Today welding in a complicated patch went a lot easier, knowing today what I did not know before, I made the patch in 3 pieces. So it is going a lot smoother then the first fender patch. When I look at this photo .... I just wonder how many beers it will take to get this to paint. What was a solid mess and should be called scrap metal .... will be put back into service. For over 5 years I have been having nightmares about fixing these fenders. I find that once the rear mounting bracket of the fender is put back into shape, then the middle section repaired. The rear tail that was smashed flat wants to come back to original shape. So thats two fenders roughed in, they will never be perfect, but good enough.
-
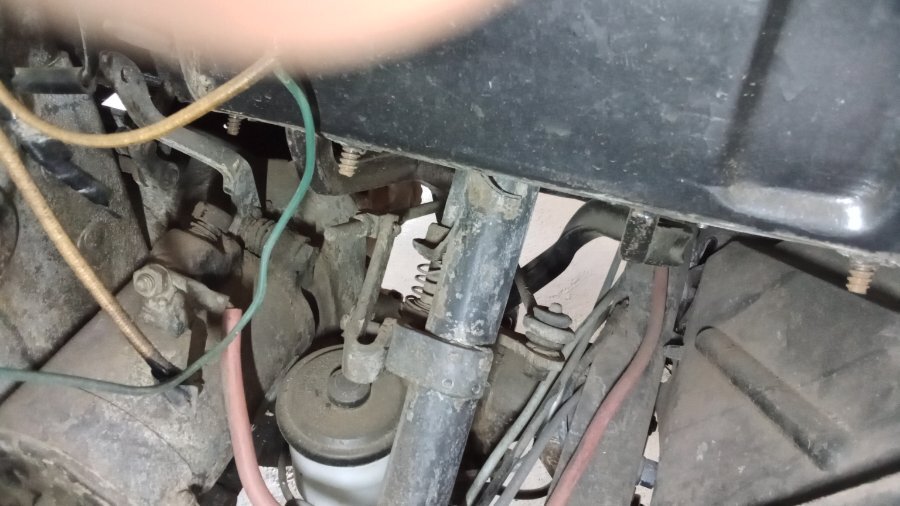
My truck is really a 1949 that identifies as a 1950 .... In 1950 was the first year for the 3 on the tree shifting. So it is possible some changes has been made over the years. Your photo actually shows all the possible pivot points better. .... Every small amount of wear at each point, gets magnified by the time it reaches the actual gear shift lever. Just check all pivot points and see if any of them you can remove play from them. On my linkage, the two adjustment nuts, one was loose and backed off 1/2" So there was 1/2" play in the rod right there. Because the threads had been destroyed from the nuts being loose for years, I used a stack of washers to take out the play and then tighten the nuts down. There are better ways to fix that. If the brackets round hole is wobbled out, you might need to remove the bracket and weld the holes up ... then re-drill correct size. I have seen cases where the rod actually wore and the round hole was fine. Same time it is possible your linkage may be fine, just needs a adjustment and will work perfectly. Usually at this age there is some wear and it needs to be addressed.
-
I'm thinking you have too much play. You should inspect the linkage good and see where the play is coming from. With the 2 rods, the one on the left has 2 adjustment nuts on it .... one just locks in place and holds the other tight. If they are loose you will get play there. On the right it has a rubber bushing on it ... if that is worn out or missing, you will get play .... The other end of the rods I think are just held in place in a round hole ..... If the holes get oblonged out from wear .... that will cause play. What I would do before trying to adjust anything, I would look for where the play is coming from and eliminate it. That may be all you need to do. I think if you have a 1/2" of play at the end of one rod, will be 1" of play at the end of the shifter. Because of the distance. Since you keep ending up in 2nd gear, I would be looking at the rod that controls the up/down motions
-
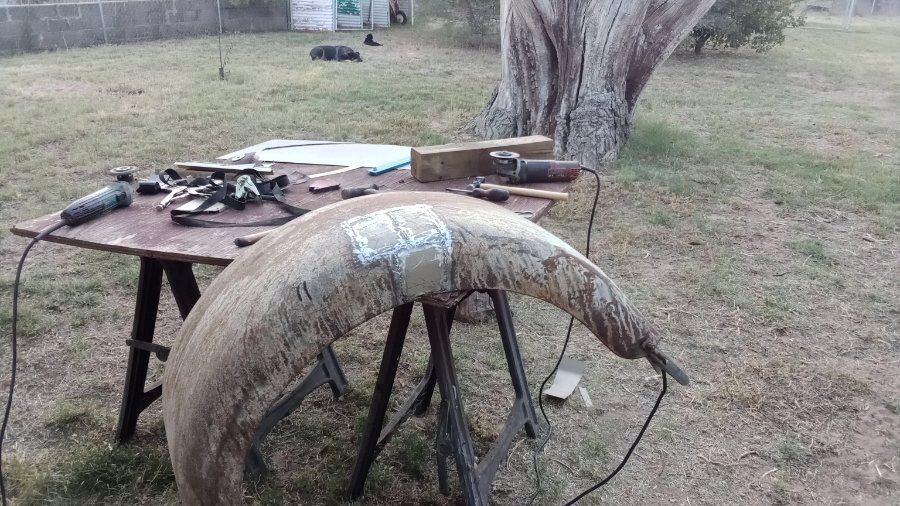
Right now I'm ready to get started on this one and get it to the same level as the other one This fender was in worse shape then it is now, I spent a minute with it a few years ago just so I could move it around without folding in 1/2 ..... Trying to get that proper curve back in would take a real body man .... I'm a carpenter Lets see how this one goes .... I can be patient and go tap tap tap all day long, lets just get the major work done first so I have something to tap on.

-
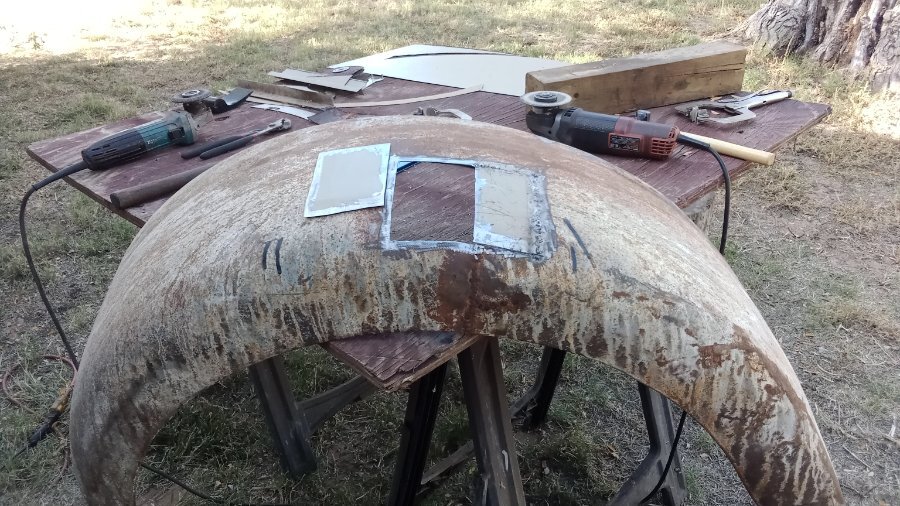
Well, lets just say I'm diving in head first and hoping for the best. 🙄 First thing, I believe that since it was a construction truck .... the damage is from heavy equipment loading/unloading on the un-paved job site. Just too many damaged areas on the bed that was not caused by a normal fender bender on the road. So I would not use old construction equipment from the 40's to load the truck .... That would prevent the 3rd tear. I Had high hopes of welding the one crack up, then to cut the other repaired crack and grind to original metal and repair it properly .... I spent a 1/2 day on that and quickly switched to making a patch for it. That was getting me close but not very far ... I just could not get the right curve, even using different diameter of pipe. This is where I ended up with my home made patch. I was careful to repair the original edge so I did not have to recreate it, beyond my patience level. Then I used the patch I started to make, I had to cut it into 3 pieces and install them separately. Same time I had to put in 3 different pie cuts to get the metal to conform to all the different shapes going on here. There is no question I'm a self taught noob that only has welded in some simple patches in the past .... this is by far the hardest I have ever done. It is no way close to being finished, it is roughed in and now will take much patience with a hammer and dolly and tap tap tap .... weld weld weld grind grind grind ... I will get it close enough to match the existing bodywork on the truck.