

Los_Control
-
Posts
4,986 -
Joined
-
Last visited
-
Days Won
43
Content Type
Links Directory
Profiles
Articles
Forums
Downloads
Store
Gallery
Blogs
Events
Everything posted by Los_Control
-

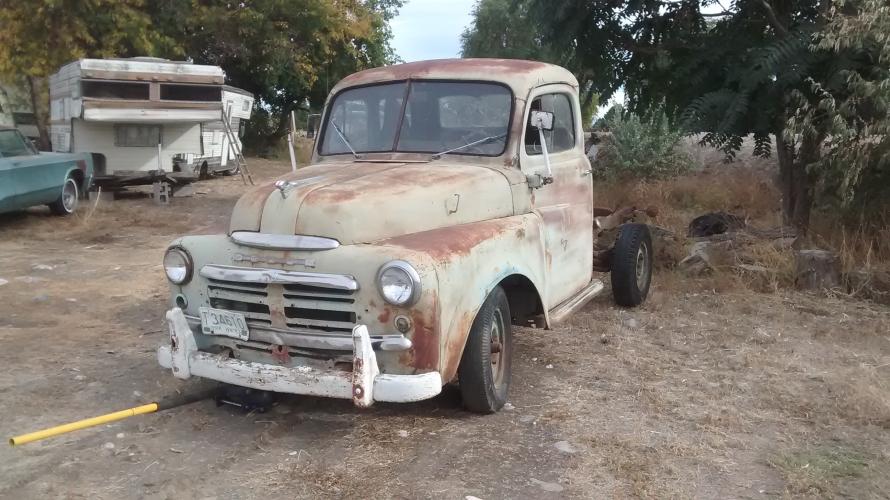
512 cid C series on Dakota chassis- build thread
Los_Control replied to Radarsonwheels's topic in Mopar Flathead Truck Forum
No, I mean you are getting so close to starting this truck up, because of all the hard work and effort, I know you been researching all along. I totally expect this engine to run perfect after it is started. Then you going to need to buy gas It will next want several clean changes of oil I only have a guess at how many sets of rear tires it will want The list just grows ..... and it all starts with connecting the final wires. One could ignore and look the other way and not connect that wire .... once connected, you simply can not unconnect it. Like seeing a beautiful woman naked, once you see it, you cant un-see it. Only if we were wiser and never looked at a beautiful woman .... telling ya buddy, you connect those wires and there is no going back! -
512 cid C series on Dakota chassis- build thread
Los_Control replied to Radarsonwheels's topic in Mopar Flathead Truck Forum
I would be careful with that wire .... next thing ya know, will be trying to start the beast ...... oh what a tangled weave that path produces ? -
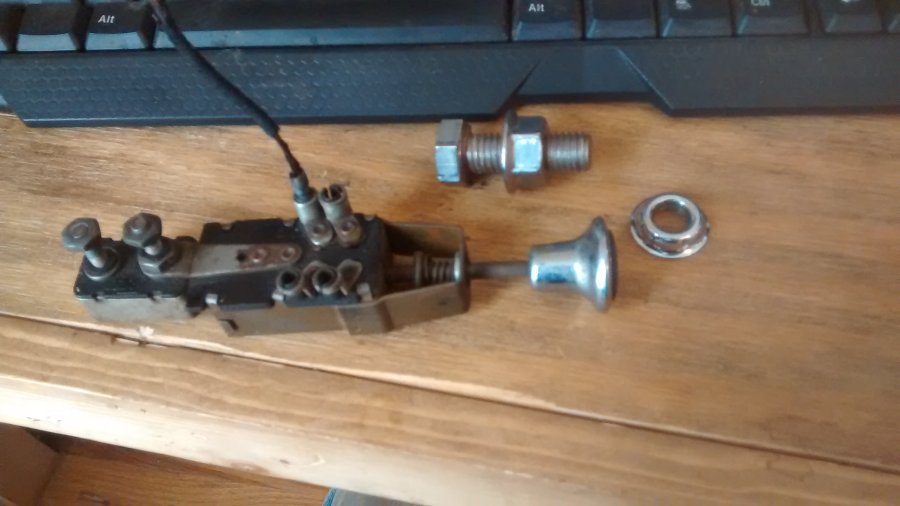
headlight switch bezel thread size?
Los_Control replied to Los_Control's topic in Mopar Flathead Truck Forum
I had the switch completely disassembled, was only the case, the carriage and the push pull lever in the acid. You can not disassemble it any further though if it is rusted together. I was not thinking the acid would eat the potmetal. As it sits, is completely oiled and greased and functions fine, just no way to mount it. I put it back together as to not lose the pieces -
Just curious if anyone knows the thread size on these switches. My headlight switch was frozen with rust, I ended up disassemble and soak in muriatic acid. This fixed the rust issue, but it literally ate the pot metal threads the bezel attaches to. Seriously, wife fixed me a sammich, I put the switch in the acid, went to eat my sammich and 15 min later came back to check and it was already to late. I have a idea, use this SS bolt and nut, cut and grind it down to fit, drill out the center .... If I am lucky, it will work ok and just be a few hours time to create. Would be a lot easier if I could get a bolt with the same threads as the bezel, and just use the original bezel instead of trying to re-create one. Is always the option of just getting a new switch also. I did take the bezel down to Ace hardware, I spent time trying to locate correct thread size, came close but not right, probably have to order online.
-
The worst part about the widow maker, is a visual inspection, you just cant visually tell if they are properly locked in position. You relying on feel and sound, and a hope and a prayer. I have seen old timers put these wheels together, take their time and they really know what they are doing. Wheel lying flat on ground, they put a few pounds air in it and monitor the middle where it locks together .... if one side lifts higher then the other, you let the air back out and smack it some more with a hammer. When you get 5 pounds air in it and all is equal, you move it to a cage and finish airing it up. One time they got the tire completely aired up, He was standing behind the wheel pushing it out and he was now inside the cage, and the wheel let loose outside the cage. He naturally stood up and jumped back when the tire came apart, knocked himself out with his head on the cage. At this time, I was running a service truck for the tire shop, 18 years old and fixing semi truck tires out on the highway. I did not know how to change these wheels and always brought them back to the shop to be fixed. The example above with the wheel coming apart out of the cage, that was the last widow maker our company worked on. That was 38 years ago in Las Vegas NV, most other shops already stopped working on them also. Just a stupid design to begin with. As a general rule, if the wheel is low on air, probably safe to air it up. Is safer if it is bolted down on the truck, If the tire was flat and rolled around on the truck flat, I would not attempt to air it up. Where with the split ring, you can look and see you got them right where you want them. You air them up to 10 pounds or so, use your BFG on the ring and see it is set properly, then air it up. Is only when kids get careless and use rusted or bent parts or not pay attention that they get hurt on these wheels.
-
I really cant see well enough from the photos, your wheels are either a one piece split ring. This means it is a solid ring with no split, actually a little bit oval shaped and has notches to use pry bars to remove. Very old school and you may not find someone to change them. Or they really look like true widow makers to me. The back side of the wheel is a ridge, and the wheels actually separate into two pieces from the middle. These were very dangerous when they were new, if they are old and any rust they are suicide to work on. They earned the name widow maker for a reason. The military wheels have a nice wide lock ring on the front and they have a split in them. Is a common wheel and pretty sure still in use today. With them apart you can see how they attach to the wheel. I can not tell from your photo if the red side of your wheel, has a ridge for a solid ring to hook to. If they do, you may be able to go to a truck stop and get them changed. With the fresh paint, they look solid to me and why I think they are widow makers. But it could just be the paint.
-
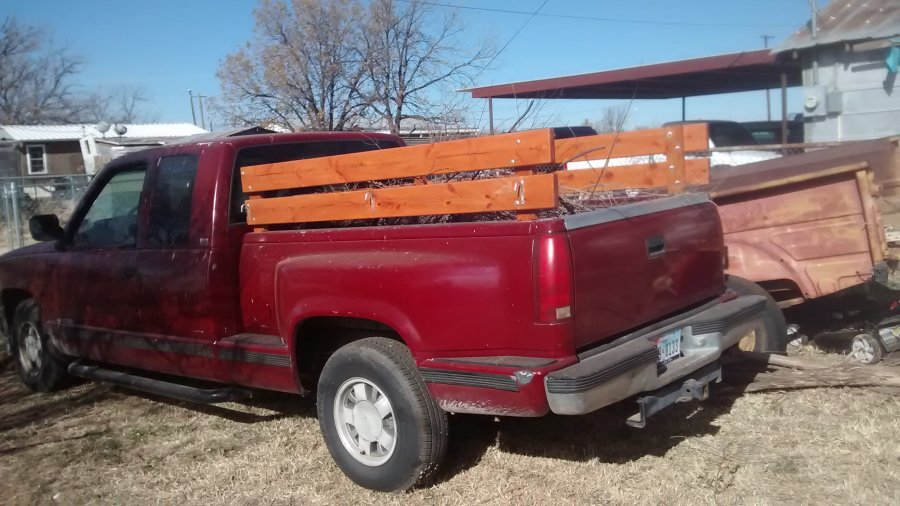
I plan to do the same with my 49 as I did with my chevy. The side rails slide into the stake pockets, I only put the side rails on when I plan to haul something. Otherwise they sit in the shed. I admit that it is a compromise and not perfect, but in a few min I have tie downs, without adding any holes / hooks permanent. Thought would add another photo, I use door hinges to hold the front section to the sides. I just pull the pins to separate them. I use my plastic hammer to drive them in to assemble. The sides do not flop around while driving, would break the wood first before they would pull out of the stake pockets. Unless you get 4 guys and lift equally on 4 corners. Driving conditions would not recreate that. Oh look, we caught a hound dog in the wild

-
20 is the rim size, that tells everyone they are tube type rims, same with a 22" rim. A 19.5, or 22.5, 24.5 these are tubeless truck wheels. They are not split ring and a solid one piece wheel. If you still have 20" rims on your truck, good chance they will fit. If you have anything else, they wont fit. I would agree with this guy, but need to know what size exactly you now have on your truck.
-
I have a friend in Anchorage, he just posted this on facebook ..... Alaskans have a sense of humor. I really hope Mother nature is done there.

-
Depending on how old your coolant is, it may be time to refresh it. I can tell you when I opened my petcock it was plugged and not even a drip came out. I removed it from the block, and on the bench was very easy to work it back and forth and clean it. Then re-install it. In fairness, my coolant system was also clogged, not just petcock. Just saying, do not count on it to work when you need it, unless you maintain it. When it comes to battles, you pick the time and place for them to happen.
-
What I like about it, American ingenuity, just kids having fun, living proof we will get old, but we do not have to grow up. Obvious the idea came out 100 years ago, nothing new ... but seeing people get creative and having fun, we need more of it.
-
The modern points for different cars I have dealt with, they supply a small packet of clear grease to lube the points. Am told if you do not lube them, the nylon wears quickly ... worried if you do lube them, throws grease on the points and no fire. Sigh!
-
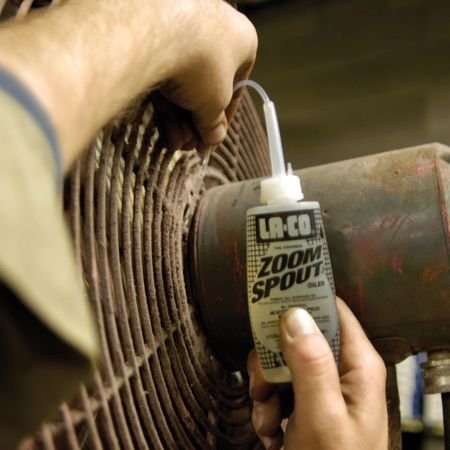
May also interest you to know there is a similar cap on the backside of your speedometer, a few drops there while you are at it. Look for a zoom spout oiler, will help a lot. The petcock you show is to drain the coolant from the block, use it when changing your antifreeze
-
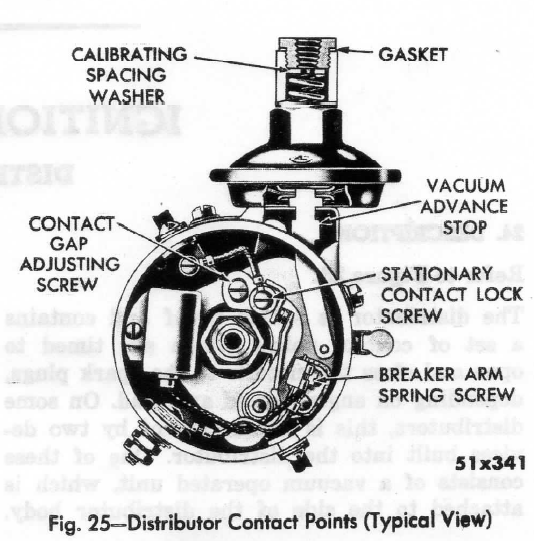
There is a small oil cup on the outside if the distributor. On this photo it is not labeled, but you can see the cap right above the words "breaker arm spring screw" Just lift the cap and add oil there, no need to remove the distributor cap as it is on the outside.
-
-
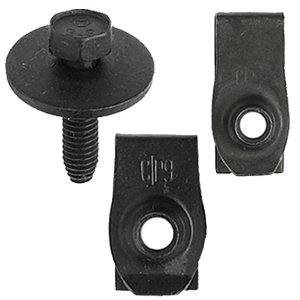
Must be a name for them, my dodge truck is held together by the same bolts. The toe boards use this bolt with a metal clip style nut. The spring clip attaches to one piece of metal, in this case the floor of the cab, then set the toe board down and the bolt screws in to the clip on the cab floor. Hope that makes sense I do not have a loose clip without opening up my sealed bolt pouches. I am missing several of these bolt and clips myself, have not searched online for them. My inner fenders use this method along with the center hood section. I think they are a very common bolt for dodges. I also think the clip style nuts are handy for the toe boards where you only can reach one side at a time. When I put my inner fenders back on, I will replace with a common nut/bolt. They will last longer and give me 10 extra bolts/clips to use elsewhere. A quick google search for body bolts should get what we need

-
Personally, I would ask the cat and see what it prefers. I have no actual experience using these portable shelters. I watched a neighbor tear one down today, bet I could make a offer and get a good deal on one. The issue is what you use to cover them with. A real honest to good canvas would cost a fortune. I bought a blue tarp recently, just opened it up yesterday and think I will put it straight in the trash .... what crap! Think I will stick to old fashioned stick built myself.
-
2 wires from heater motor is like my truck, 1 wire is grounded to the dash, 1 wire goes to the switch, like PA said, be sure and run the hot wire off the ignition switch to prevent a oops moment. Correct me if I am wrong, I think you need 3 wires if you were to have a 2 speed motor.
-
This looks just like the dimmer switch in my 49 B1B, two lugs on the High beam side one going to the high beam indicator. One thing I am wondering about as I muddle my way through a re-wire, Do I really want to keep the factory dimmer switch with the bullet end wires, or replace it now. I suspect it may be hard to find a replacement. Suspect replacement will use the screw terminals instead of bullet. Something for the op to consider if re-wiring is needed, which ends to use.
-
I am not sure what differences between a car and a truck would be, if any. This is a pretty good link and gives a good schematic for the trucks electrical You may be able to use it to trace your existing wires. Then I have to wonder about your existing wires. Is it original cloth wiring that probably needs replaced? Or has someone else already replaced it, ran the wiring the way they wanted? .http://dodgepilothouseclub.org/know/wiring_harness/wiring.htm
-
My First Car -- P15 1947 Plymouth Deluxe
Los_Control replied to NickPickToo's topic in P15-D24 Forum
Have to agree, was several cars I drove, was simply the under-coatney that held it together and on the road. I really think all should pay attention here .... never leave home without your under-coatney! -
need bolt pattern and size for spare tire/wheel
Los_Control replied to djohn's topic in Mopar Flathead Truck Forum
B1C has a 5 on 5 bolt pattern. Lot of older larger gm cars had this pattern, pretty sure my 1991 chevy truck has the same, I have not pulled the wheels to verify though. 1955 Packard also had this same bolt pattern, in case you see one of them at the junk yard. You might want to check the bolt pattern on existing wheels. My 1949 B1C had the front hubs or axles changed, and now has the same bolt pattern as a B1B 5 on 4.5" To measure the wheel it is much easier to have the wheel off and face side down. Measure a bolt hole from the far left side of the hole, across the center hole to the middle of the next lug bolt hole. Yours should measure exactly 5" While a B1B would measure 4.5" A typical chevelle or camaro mid sized chevy would be 4.75" The 5 on 5 bolt pattern you need would be a large GM like a 70's Buick Riveira or a Lasabre, really not that common today in a local pick a part. I think my 91 chevy truck is the same, but it has aluminum wheels like most other cars you will find in a junk yard today. Maybe others have more ideas on wheels that would fit. Your 3/4 ton B1C has oddball wheel size. A B1B with 4.5" bolt pattern will accept wheels from a jeep, ford explorer, ranger, rambler, mustang ... very common. -
I have seen several, but believe most I have seen came from a auto parts store back in that era. My uncle has several that fold up and sto away. I think some may have came from a emergency roadside tool kit. But if yours is a mopar item, I would think it a keeper for sure.
-
plymouth was wood, chrysler/Desoto was steel Just kidding, no clue.
-
1940 Chrysler Windsor Coupe brake conversion
Los_Control replied to dangulo's topic in P15-D24 Forum
I feel a song coming on here

