

johnsartain
-
Posts
358 -
Joined
-
Last visited
-
Days Won
6
Everything posted by johnsartain
-
What should I be looking for as far as a heater switch, heat control and defrost control? Pictures would be nice as well as any offers if you have some you would part with.
-
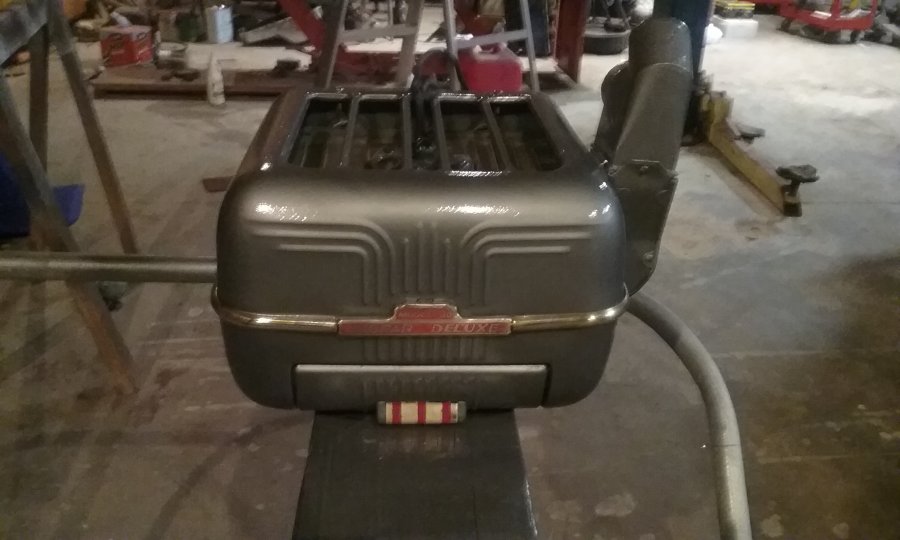
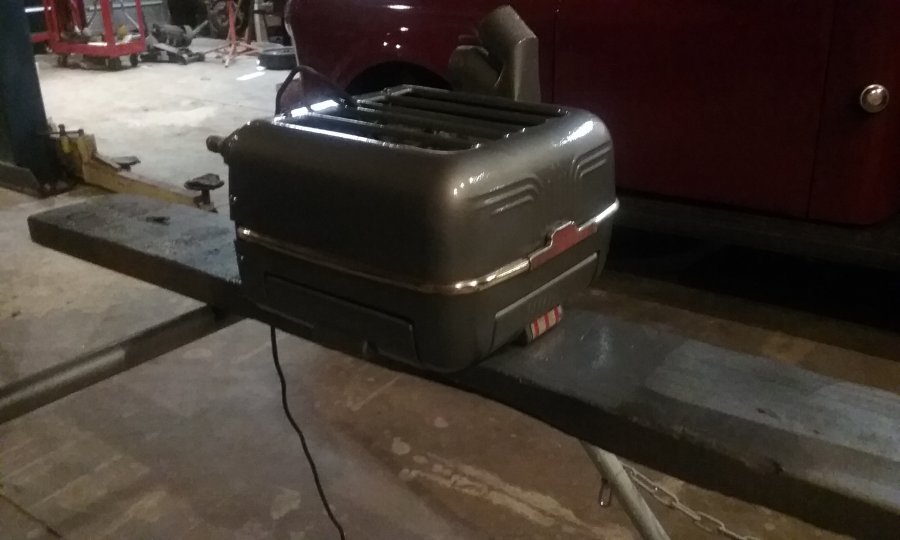
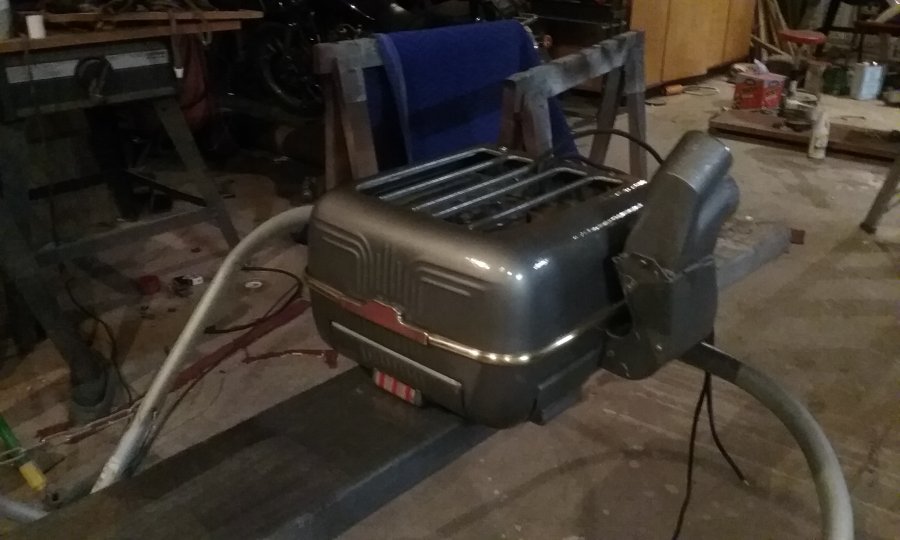
Tonight I finished restoring a Mopar Deluxe Model 36 Heater. The paint color is a bit different from the factory beige, but it works better with the interior of my truck. After pressurizing and testing the heater core and motor, the case was painted a Hammertone Dark Silver. The band was seriously lacking in the nickel/chrome finish that came from the factory but there was plenty of brass to brighten up and clear coat.
-
Tonight I finished restoring a Mopar Deluxe Model 36 Heater. The paint color is a bit different from the factory beige, but it works better with the interior of my truck. After pressurizing and testing the heater core and motor, the case was painted a Hammertone Dark Silver. The band was seriously lacking in the nickel/chrome finish that came from the factory but there was plenty of brass to brighten up and clear coat.

-
It could likely drop the bottom out of your oil pressure particularly at idle. That might not end so well. The relief valve is stuck closed keeping full oil pressure in the oil gallery. If it were stuck open (as could be simulated by removal of the spring and piston) that would cause a low oil pressure condition. Low oil pressure can result in starvation of oil to the crank shaft journals and bearings. There is a oil hole in the top of the connecting rod at the crank journal which squirts oil onto the cam lobes, low oil pressure could mean there would not be enough oil flow to lube the lobes. Possible repercussions could ultimately be camshaft, crankshaft, bearing failures. The real and only solution would be to figure out why the relief valve plunger is stuck or sticking and un stick it. I am dealing with the same problem except I can't get the plunger out. I figure you could replace the plunger and spring and it be OK. For me I have to figure a way to get it out and clean it or replace it. I am open for suggestions if someone has a cure for me.
-
My interference issue was at the back(brush end) of the starter. Where you have a plug for the oil gallery is where my line for the oil filter connects. below that is the return to the pan via the back side of the oil pressure relief valve where the return line connects. That is the line that hit the back of the starter. I don't see the oil filter on yours, Paul. Have you relocated it?
-
Counter Clockwise. Normal threads. Righty Tighty - Lefty Loosie.
-
No problem, I actually have both starters. I bought new for both, 350 for the MCH 6101 and 205 for the MCH 6106. I may switch over at some point and go with the key start. I knew from my own experience about the clearance issue as the first starter I had was the 6101. I had problems and found out i had the wrong flywheel ring gear on the engine and it wouldn't mesh with the starter. I bought the other because it was actually the correct starter. Both have the same diameter, tooth size and number. and will interchange with the exception of clearance with the oil tube. Just be careful getting the starter mounted that you don't damage the oil tube. I removed mine and made another that had a little different curve to it but it still touched the flare nut and fitting while mounting the starter. I bent the fitting and had to replace it. To keep from bending it again, I screwed a flare nut without tube in while mounting the starter, I tightened the fitting and turned the flat of the fitting toward the starter, and replaced the nut with the tube afterward. It still hit but it wasn't as bad and was easier to get mounted.
-
Ebay page says it's a MCH 6101, There is quite a bit of difference. The MCH 6106 has a lever engaged bendix. The MCH 6101 has a centrifugal spring loaded bendix. There is some interference on the 218 and 230 engine where the rear of the 6101 starter hits the oil return tube from the Oil Filter. It's really a tight near impossible fit but it can be forced. the MCH 6106 is about an inch shorter. If you are wanting to go with a key start, then the 6101 is your starter but you will need a 6 volt solenoid for your 6 volt system or 12 volt solenoid if you're daring to use the starter on a 12 volt system. At $40, my guess is you're looking at a core but at a fair price.
-
That's some good stuff there, basically brake cleaner, not sure of the price in bulk but a spray can (CRC Brakleen) is $3-4 a can.
-
Even if you use a solvent type of cleaner you have the option to use diesel fuel as the solvent. The flash point is quite low as compared to most solvents and it cleans quite well. I've used it in mine for some time with good results, maybe not as good as parts washer solvent but much less expensive. There is also low odor mineral spirits.
-
If you want brand new and try these guys where I bought mine from. http://www.filterspro.com/detail.cfm?part=2027675 $204.61 with the core charge included in the price. O'reilly Auto carries it as well under Part # 91-06-1821 but their price is $75 higher.
-
I have wondered about the complexity of something similar for the B2B. the Compressor, dryer, and condenser from a donor vehicle would be the easy part. Fabrication of the interior ducting is likely to be the big issue. Fabricating a system where the air flow is mixable from heat in the winter to air in the summer, and all the variations in between could be tricky.
-

'48 B1B Glove Box spring connection points.
johnsartain replied to James-48-B1B-108's topic in P15-D24 Forum
Reg, does the spring go through a cutout in the glove box, the fiberboard part?I can't tell from the photo. Sort of important since I am making the glove box. -
I'm the only one with John in their handle, maybe some of you other guys are named John as well. If you were referring to me, the oil filter is mounted to my engine, its the larger black canister on the left side of the engine.
-
'48 B1B Glove Box spring connection points.
johnsartain replied to James-48-B1B-108's topic in P15-D24 Forum
If anyone can get some detailed pics, James and I would be appreciative. Mine was so rusted it literally crumbled. I could see how it attached on the door, but there was nothing left of the other end. Even the paper glove box was rotted. -
'48 B1B Glove Box spring connection points.
johnsartain replied to James-48-B1B-108's topic in P15-D24 Forum
Here is one I made. I used a stainless spring steel blade from a cheap Ace Hardware paint shield and bent it to the correct shape. I got these dimensions from B1B Keven. I would have bought one had I found it and still will is the price is ok.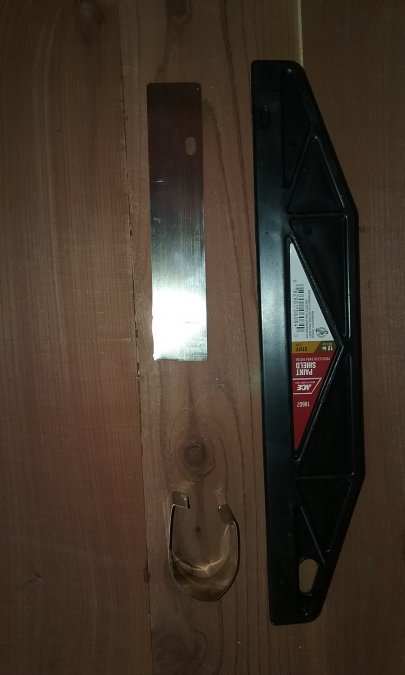

- 14 replies
-
- 1
-

-
- glove
- compartment
- (and 3 more)
-
'48 B1B Glove Box spring connection points.
johnsartain replied to James-48-B1B-108's topic in P15-D24 Forum
I heeded this answer too. is there a cutout in the bottom of the glove box for the spring to get under there? I wasn't sure that maybe it was trapped between the door hinge and that flange. Glad you cleared that up. -
right next to the door pillars
-
What is the worst that could happen? They split or rip and you have to glue them anyway!
-
If you can find a lumber mill you can get rough sawn 4/4 (four quarter) boards. The lumber will still likely have a lot of moisture content and you will need to let it dry for a while, but then you can install it rough sawn or plane and sand it to a nice finish.
-
There is a rubber piece that DCM Classics sells that seals out the draft. Their part number is DA-140. It fits underneath the floorboard and only seals when the pedal is in the up position. In order to install them they have to be cut and placed on the pedal and then glued back together with weatherstrip adhesive. I haven't really seen anything else. Others may know of something better.
-
How do you install a brake return spring?
johnsartain replied to Iowaboy's topic in Mopar Flathead Truck Forum
You need to pick up a set of these, they will come in handy. https://www.harborfreight.com/7-piece-brake-tool-set-188.html and/or these https://www.harborfreight.com/drum-brake-spring-pliers-kit-3-pc-63303.html -
You got it! I can send a pic when I get home but that a few hours away. Not 2 piece rims but more the center is riveted to the outer rim. The term "2 piece rim" i believe refers to the larger truck tires that have a detachable outer rim that is removed to facilitate removal of a heavy truck tire from the rim.
-
Yeah, that's just the way they did it back in the day. It allowed new rims to to be riveted to the old centers. back in the day people liked to repair everything rather than just discard a good part. Hence rebuild kits for the water pump. No one today would think of rebuilding a water pump when it so much easier to get a new or re-manufactured one. Builders and remanufactrers can get the parts but they are not available on the consumer market for othere than antique or classic vehicles.
-
It's totally possible that the paint or powder coat is thick enough and has them sealed, eventually they will leak and the rivets will be to blame. It may only be a slow leak but a leak none the less.
