-
Posts
358 -
Joined
-
Last visited
-
Days Won
6
Everything posted by johnsartain
-
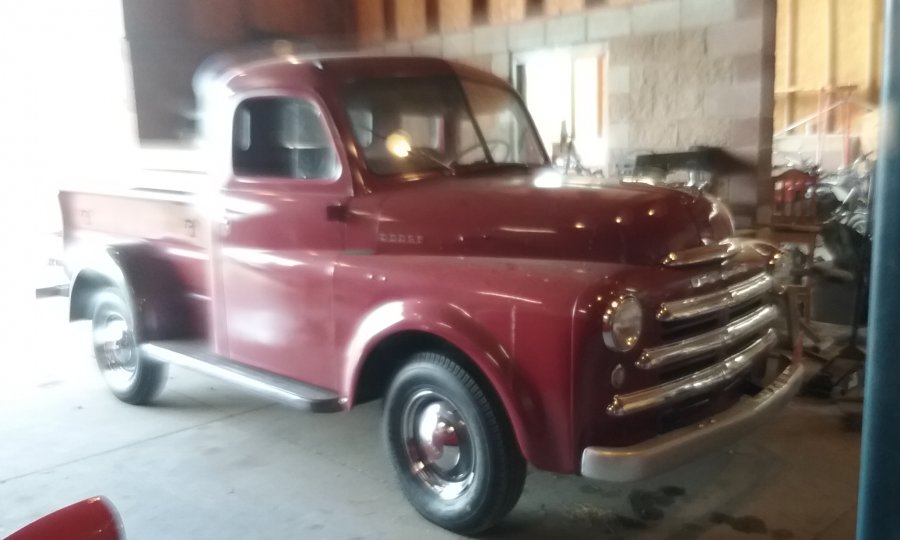
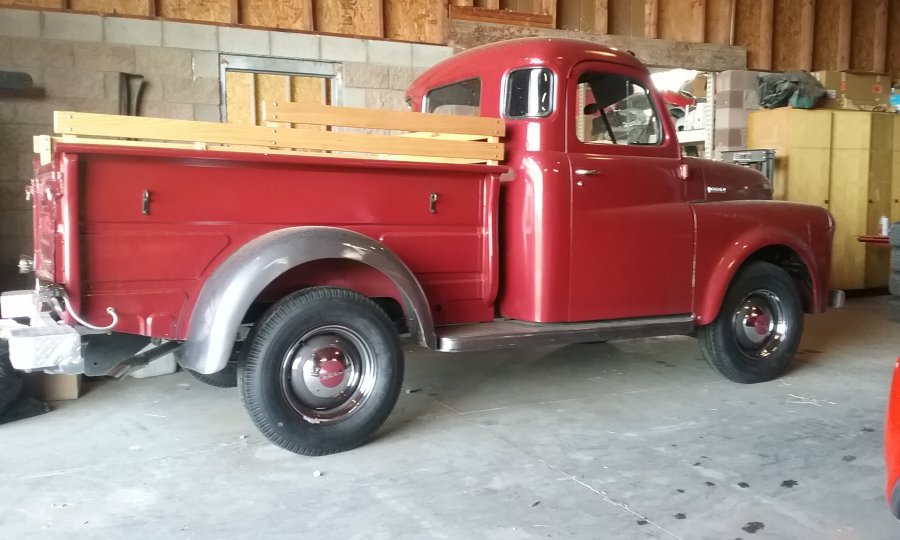
There's something to be said about the original set of wheels. Even though the mags had a modern look, it still wasn't quite right in my opinion. I finally broke down and ordered the hub caps, beauty rings, and tires. I painted the wheels the same as the running boards and here you have it. So here is my truck back to original form with the exclusion of metallic paint and my preferred paint scheme. At some point I will look for a set of tires to fit my 15" X 6" mag rims that have the same diameter or close as the 6.50-16's.
-
I can work that out, fairly easy, the radio is easily isolated.
-
I was considering setting up a XM Sirius Radio in my truck. Looking at the radio and the adapter, I noticed the adapter put out 5 Volts. This got me to thinking about being able to hard wire it to the trucks 6 volt electrical system. I am just not so sure how steady that 6 volt would be as I have seen on the site that some gen's and alt's put out a little but more. I have a 6v - 12v inverter but was just curious as to what other may be doing. maybe someone has or knows of a device that could simplify this without the inverter. Maybe even add a usb jack for charging cell phones.
-
side panel fixing on truck bed
johnsartain replied to thrashfit's topic in Mopar Flathead Truck Forum
I'm not sure about your truck, but the bracket on my bed side was on top of the wood bed. There were three cross members and the back rail at the tail gate. For each of these rails a bolt went trough the bracket, the wood, and then a hole in the end of the rail. -
I remember the old GM Diesels (Converted gas Oldsmobile 350 blocks)from the 80 would have glow plug problems and people would useether to crank them. The lands between the piston groves and rings would break. That was an engine that should have never been.
-
The motor may have been rebuilt before, possibly without removing the ring ridge at the top of the bore. This typically will break the top ring on every cylinder that the ridge wasn't removed. On an engine that has sat a while it is possible that rust scraped from the cylinder walls will accumulate under the ring ridge and cause the same problem in a engine that was once running. Here it depends on the general shape of the engine, depth of the ridge, amount of rust. You may not break any rings, could be one, two, or more.
-
1953 pilothouse guage conversions
johnsartain replied to bergy's topic in Mopar Flathead Truck Forum
Not sure but you may have some problems with a stock 6V Pos ground radio, running 12V Neg ground. You can step down the voltage but the polarity for the radio will be the real problem. -
I had a 218 that was stuck. I drove the locator dowel pins back into the bell housing a bit, then removed the bolts and slipped the bell housing off from around the flywheel clutch assembly. You could also remove the crank, flywheel, and clutch as an assembly. My engine was so rusted it was beyond using MM Oil or anything to loosen it up. You may find that depending on the condition of the cylinder bores that all you have to do to get it to turn is remove the timing chain and gear. For whatever reason, folks just love to remove the hood and air cleaners and leave the engine exposed to the outdoor elements for years. I never could figure that out. It totally rusts up the entire valve train.
-
I guess thats the thing. If you take it apart, replace them, and re-torque the main cap
-
Underneath the front main cap are two groves that come out at an angle.The o-ring is just the size to fill those groves and act as an oil seal at the point where the cap meets the block. You would have to remove the front main cap to get to it. If you do not plan to remove the front main cap and are sure that the ones you have are not leaking, then you won't use it.
-
Running them on backward, spread the cut/castellated part a bit, enough it was easy to thread onto the manifold stud. Tapping it would have worked equally as well but I didn't have a fine thread tap. I found that when I looked at the nuts, they seemed to be closer at one end of the split which meant to me that they had been formed that way for a tight fit. Running them on backward was just enough to spread it back to allow it to start on the stud.
-
A few pictures of my 51 B3B project
johnsartain replied to bosworth's topic in Mopar Flathead Truck Forum
What parts did you use for the cables from the brake handle to the turnbuckle, I am looking to do the same. -
I had to run the nuts on to a same size stud backwards first then they were able to start the right way.
-
It is much easier if the dog house comes off first. Disconnect the wiring at the terminal block next to the radiator. Remove the two nuts from below the radiator support. Remove the bolts from the mounts next to the cab, two large one two small ones next that come out of the side behind the front wheels. Remove the two bolts that attach the splash shield to the fender. There are two inner fender extensions that have two bolts each on each side (Triangular shape). This should have the dog house ready to remove. As far as the motor removal, that's your choice as to whether you remove with or without the bell housing. I have done it both ways, I prefer leaving the bellhousing in the truck. The only drawback to that is you have to remove the flywheel before removing the engine. On mine there was interference in the casting when removing the flywheel but a little grinding took care of that, more like a bit of flash on the casting interfered with the flywheel teeth.. I couldn't quite get the flywheel past the bolts. When removing with the bellhousing attached, there is some difficulty getting the pedals from under the cab so some people tend to remove the collar holding the clutch release yoke and then remove the pedals before pulling the engine.
-
1950 plymouth 218 oil pressure relief valve
johnsartain replied to Notg15's topic in Technical Archives
I used a 1/4" pipe tap chucked in a 1/2" drill. I didn't care what happened to the drill as I had to peck it on the end with a hammer to get the pipe tap to bind in the relief valve. Once it bound up and started spinning the valve, it was a matter of pulling back slightly on the drill while it spun. I tried the nipple extractor route, but I didn't have any luck with mine it was frozen solid. The metal that the relief valve is made of is very hard. I was to the point that I was considering using a welder to attach a welding rod to the valve and then using a slide hammer to pop it out. I didn't have to go that far. I was worried that there may be too much heat or there may have been an arc that welded the piston to the block. I have another block I want to build for a backup engine. The screw plug over the relief valve is frozen in its threads and won't come out. I have tried heating it and wrenching it several times with no luck. Any suggestions here? -
Thanks Mark, I got around to looking and there is a screw in the hole for retaining the lock. I'll have a look at your thread for ore info
-
Just curious as to what size set screw (thread) is used to retain the door lock on a 1950 B2B. I was not the one who removed the lock and I can't tell if the set screw is still in the door.
-
If the locks use the same key blank, any locksmith could replace the pins so that the same key would work both locks.
-
I still do that if cash is tight, but if I have extra. I get the tool. Besides I live about 20 MI from town out in the AZ Desert. I don't buy a lot of parts from the parts houses anymore, I just order them and get them shipped in. I have plenty of vehicles so a break down or repair isn't a big deal.
-
I did too, I bought the OTC one, but that is just me. many people have good luck with the overseas ones. This one has some good reviews and some bad ones.
-
I'm sure the one on Amazon is a overseas product at $41, but for someone who may only use it a few times in their life, why not? Rental would cost as much from O'Reilly Auto parts would likely be as much if not more and then you would have to bring it back. If your like me, you would rather have the tool anyway.
-
Make it easy on yourself, the right tool for the right job https://www.amazon.com/TruePower-20-2029-Universal-Hub-Puller/dp/B012P0QV5K
-
That looks like the same MC I have but it is hard to tell. The pictures that pflaming had showed the clevis rod and a rubber boot but they were small and didn't show much detail In this link: I think I'll hit him up for more details and maybe a better pic.
-
Hey guys, I am looking to use a Cherokee master cylinder on a 1950 B2B truck. I will have to fabricate the brake rod, as i don't have one. I was looking for pictures or measurements from someone who had already made the conversion and whatever modifications they had to make. It appears like there may be a possible bit of alignment or binding issues ahead. Of course, if there is someone out there who has one to sell, that will work too.
-
aftermarket radio and speaker installation
johnsartain replied to bluefoxamazone's topic in P15-D24 Forum
The problem with modern radios does have to do with the grounding if your vehicle is positive ground. The choice may be necessary to switch to negative ground, or as busycoupe suggests mounting the radio in the glove box and keeping the radio isolated from the ground. Transistors do have issues with revered polarities letting the magic smoke out. I have to say I like the idea of converting a stock radio to modern specs. Any idea of the cost?


