thebeebe5
-
Posts
530 -
Joined
-
Last visited
-
Days Won
4
Everything posted by thebeebe5
-
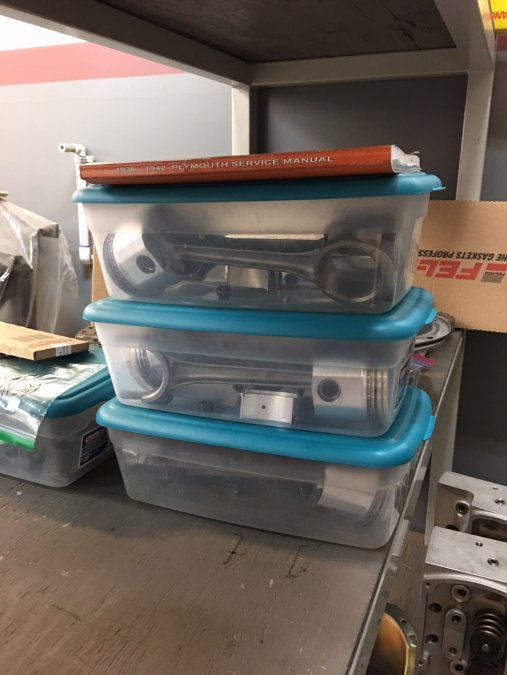
The assembled pistons rods and rings will be stored until I have the rms in hand.


-
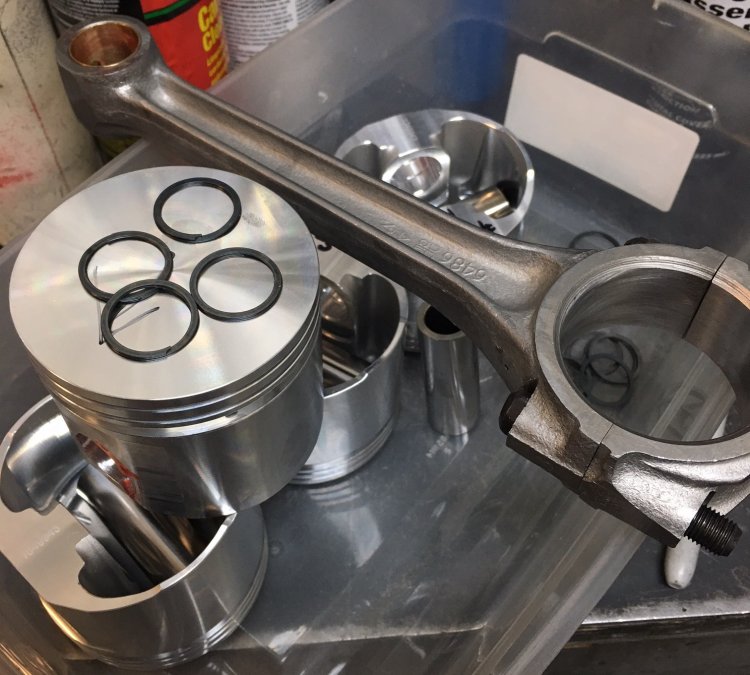
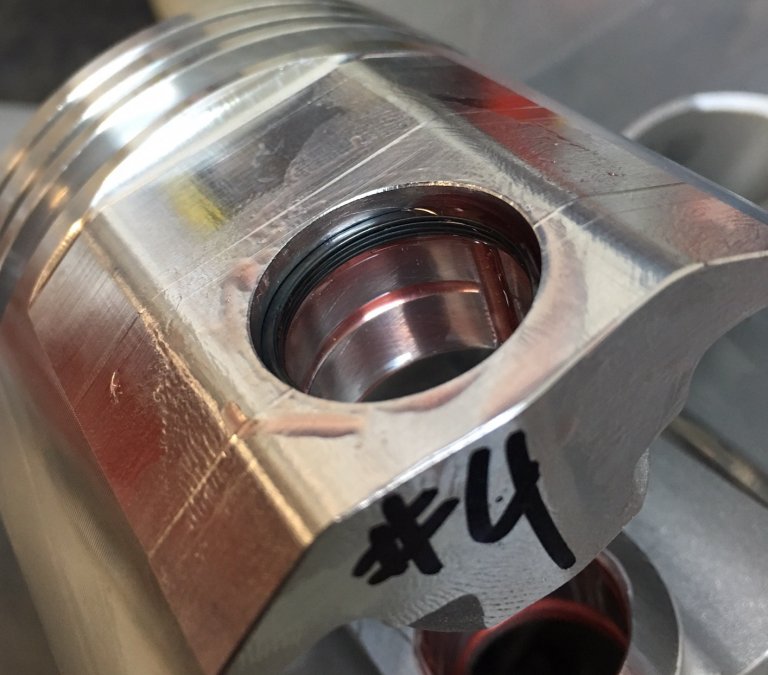
Today's progress... pistons mounted to rods and rings installed. I'm awaiting that neoprene rear main seal so I can't finish the bottom end until it's in place. No worries. Plenty to do. I marked all my piston tops with an arrow pointing forward so that when I install I'm sure all the oil pee-holes are oriented correctly to lubricate the valvetrain. Installed double spiral locks in one side of the piston, oiled the contact surfaces up well with Torco engine assembly lube and slipped the pin in, then spun in two more spiral locks.

-
Thanks, mate!
-
Thanks @Andydodge. I find it interesting and am happy to share. Hopefully its interesting/informative/useful information for someone. Yeah, was a touch of pneumonia that had me down. I'm 99%+ now. And I mentioned adding a turbo to a pal of mine that rolls a 800hp 55 Chevy and he laughed and said I never would, so I'm laying the groundwork . I'd like to finish the motor and dyno it, then head back to the shop and add a small unit for roughly 5lbs boost at the most. I'm not wanting to get the nose in the air, but I do want to see the look on his face when I cruise up next to him and give it gas and he realizes that I really did!!
-
Perfect. Thanks.
-
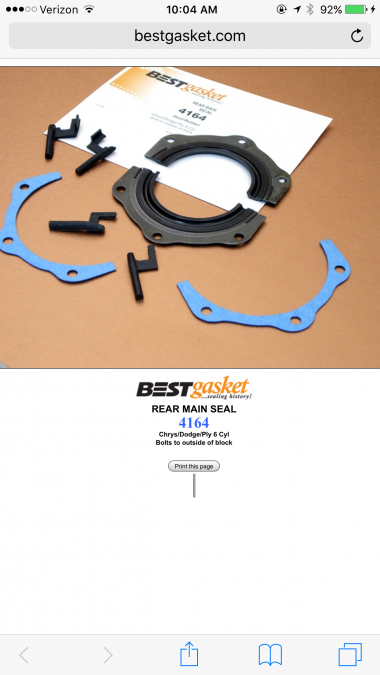
First, does anyone know if the 218 and the 201 share the same size rear main seal journal size? Second, does anyone have experience with this Clevite neoprene replacement RMS? Pat isn't real thrilled with the FelPro seals I have and recommended a company called "Best Gasket" where he gets the rope seals for the Ford flatheads he does. Guess they're a more stout version.... and in searching for a Mopar equivalent this Clevite seal popped up.... edit: whick looks very much like this neoprene outside-the-block Best Gasket version... http://www.jegs.com/i/Clevite-MAHLE/695/JV1346/10002/-1
-
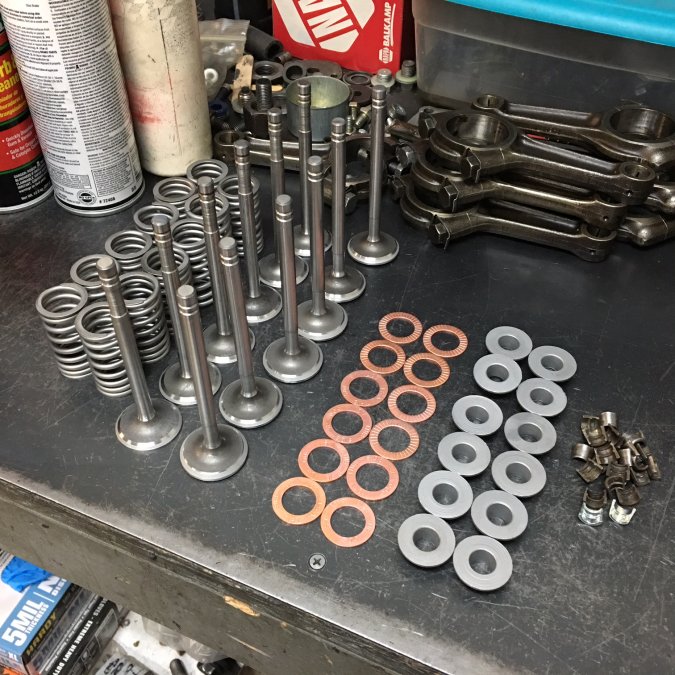
Been away for a while, mostly due to health issues. Spend some time in a hospital, got out and feel quite recovered so I went to the shop Saturday and got the valves and springs installed. That's all I got done besides more parts cleaning prior to the rest of the bottom end assembly hopefully next Saturday. And had other cars to work on, so not too much Plymouth time. Installed NOS replacement valves and reused the springs that were in the motor as they were on the money per the manual. Lost one of the original keeper halves but had ordered a few extra in anticipation of, so all good. Shimmed springs 0.060" for about an additional 7lbs spring pressure in case we do install a turbo at some poont which is the plan. Anyway, not much progress is still progress. I'm getting there....

-
I have used Damper Doctor twice in the past and will say he does fine work. If indeed you have (or need) a two piece damper where the center hub is joined to the outer portion of the damper by a rubber vibration dampening compound and you want an original remanufactured I can heartily recommend his product.
-
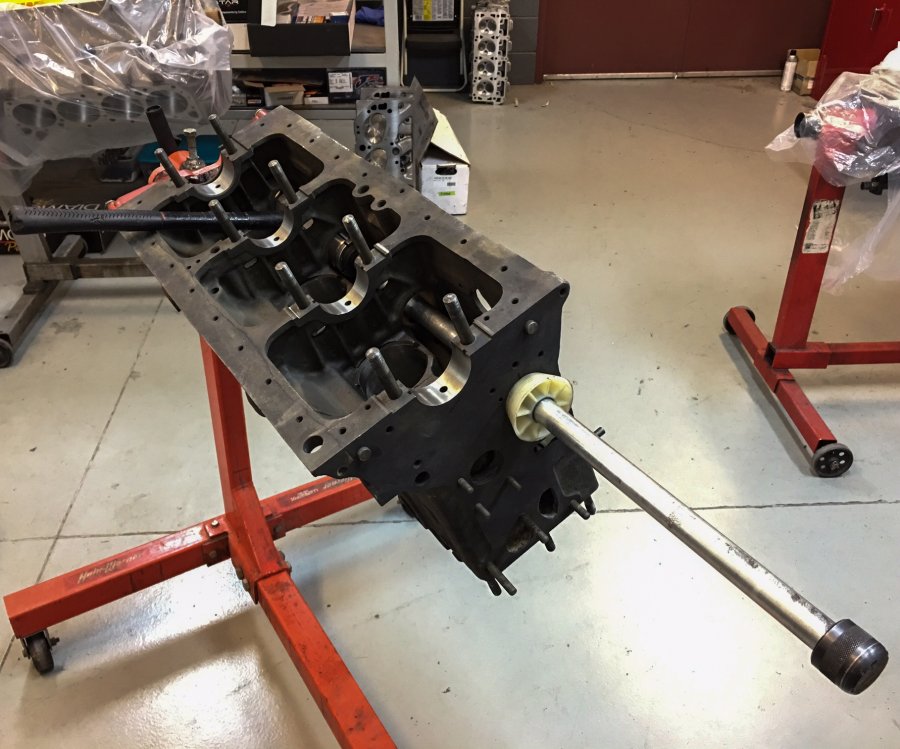
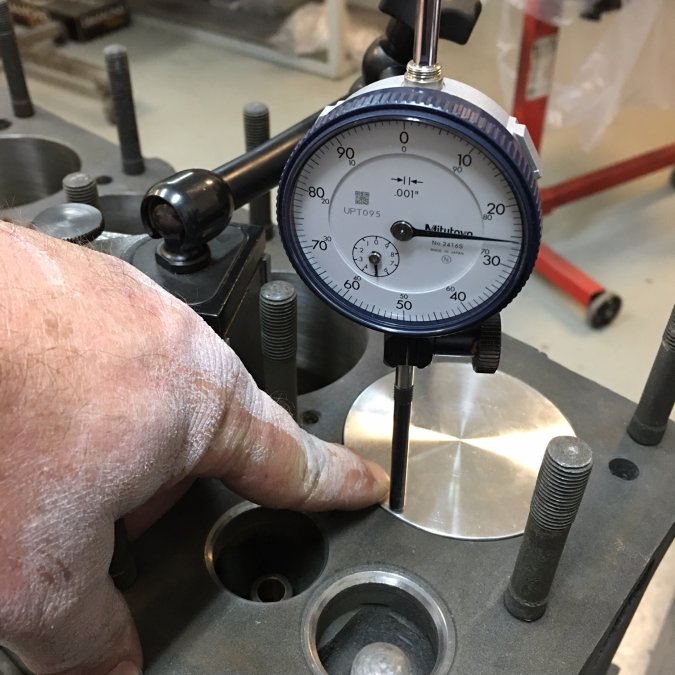
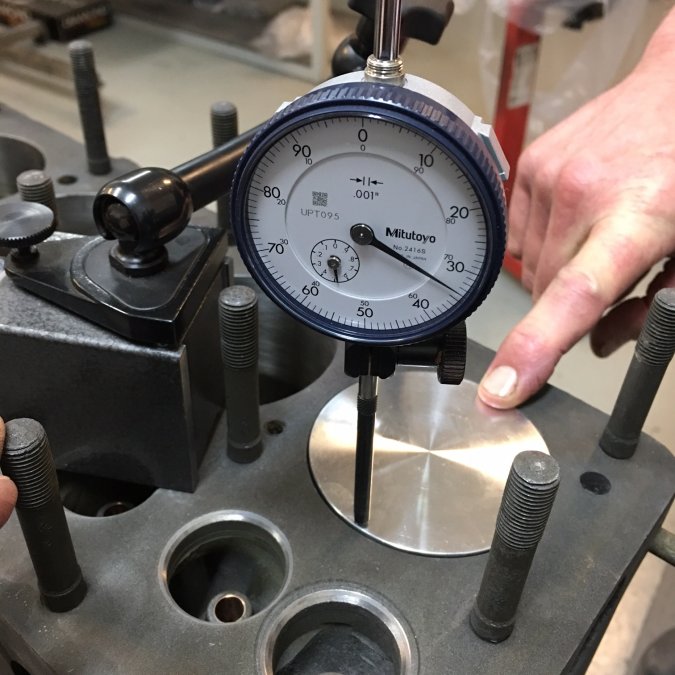
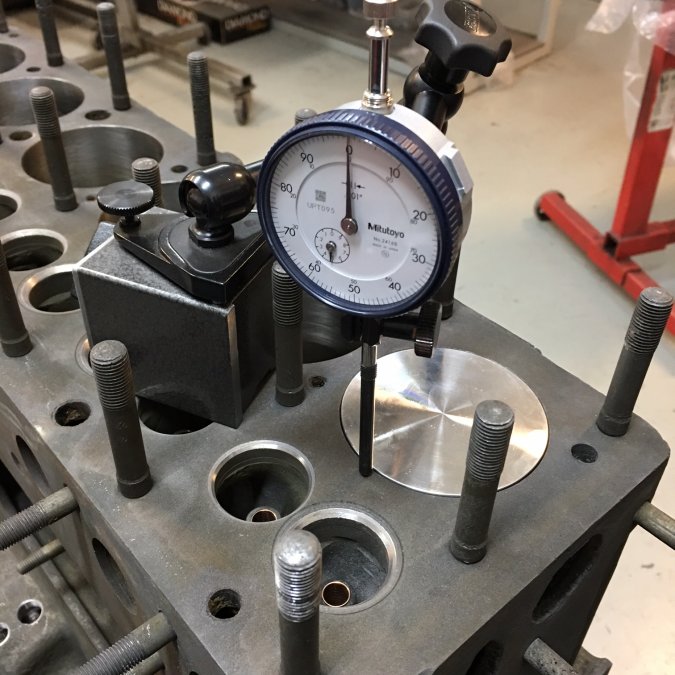
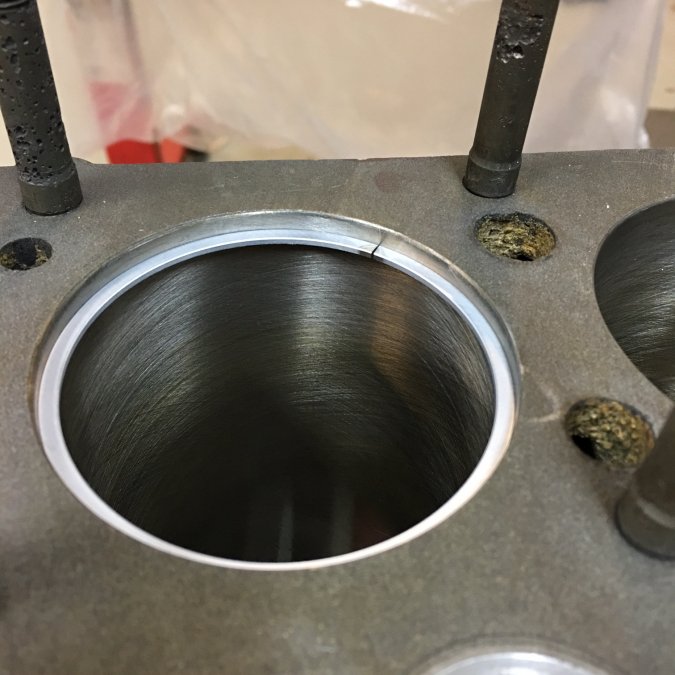
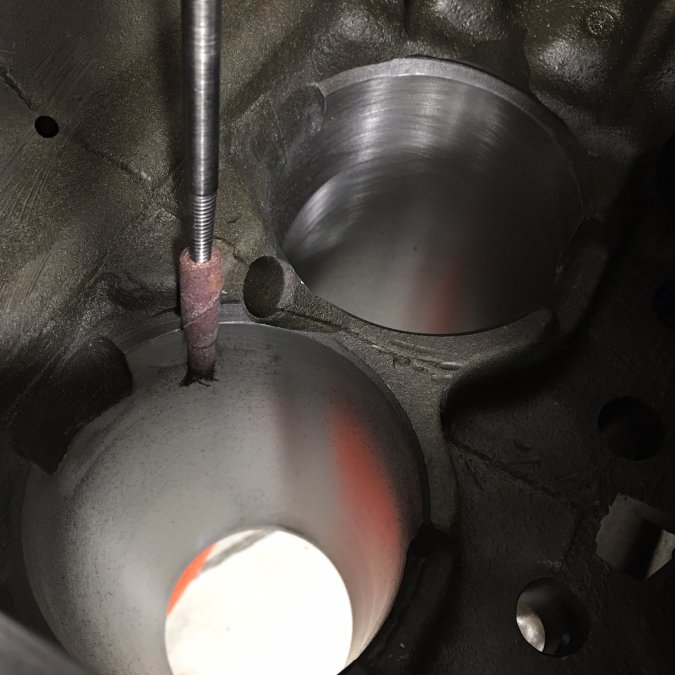
Then move the indicator over to the piston edge at the center of the pin and rock the piston by pushing down and then up while making note of the measurements. Recall I had these pistons made to stick out of the block to gain a small SCR bump as well as a better quench. Measurements were 0.025" down and 0.0335" up. Add the two numbers and divide by 2 to get the actual deck, which in this case turned out to be 0.02925". The deck measurement for piston #6 was 0.028", so the deck is not perfectly square, but that's a really minor difference and not something I'd want to try to correct for this build. Things are looking good so far! Sorry for the multiple posts, but I'd like to upload the best quality pictures I reasonably can in case anyone's interested.
-
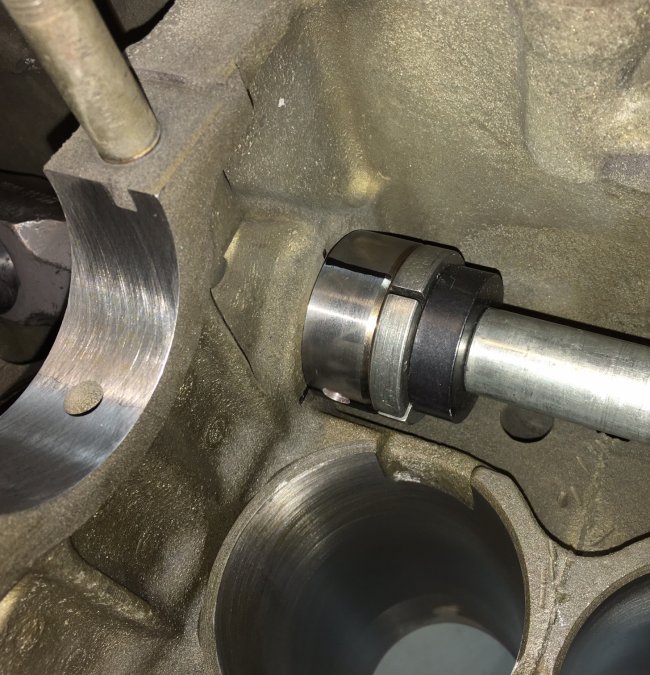
To check the deck I assembled both #1 and #6 pistons onto their respective rods and installed their bearings. Noticed a tiny dimple in one of the bearings I used.... It was a simple matter of smoothing the raised bearing material with the outer edge of half of a broken ring Pat keeps on hand for just such situations. He'll also use it to scrape cam bearings if needed to acheive adequate cam rotation with some stubborn installations. It's a handy tool to keep around. The measurement is made without the rings in place so the piston can be rocked on its wrist pin to make the deck measurement accurately. Using a dial indicator on a magnetic stand set the needle to zero.

-
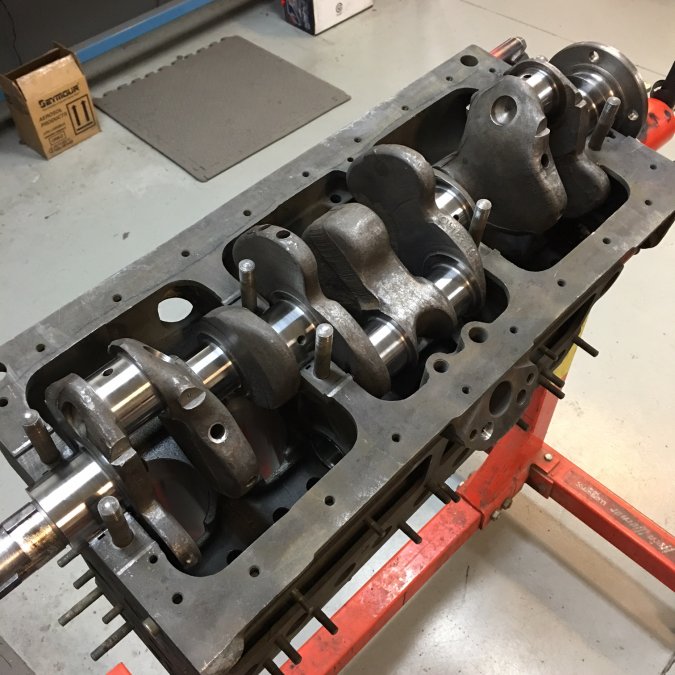
I also mark each ring for its respective cylinder. Once the rings were done I had just enough time to check the deck height of my pistons. Got the bearing top halves installed and lubed (since I'll be rotating the crankshaft for the measurement), and also snugged the maincaps with their bearing halves in place and a good supply of assembly lube on all surfaces.
-
Then on to gapping rings. Piston manufacturers will have recommended ring gaps to be followed based on bore size. I use a piston inverted in the bore to push the ring in nice and square for an accurate measurement. Gapped my top rings to 0.015", second rings to 0.017" and oil control rings to 0.015". Unfortunately two of the top rings came out of the package with a gap already at 0.018"- 0.019", so they'll be replaced. I should have time to visit Total Seal on Monday and get what I need.
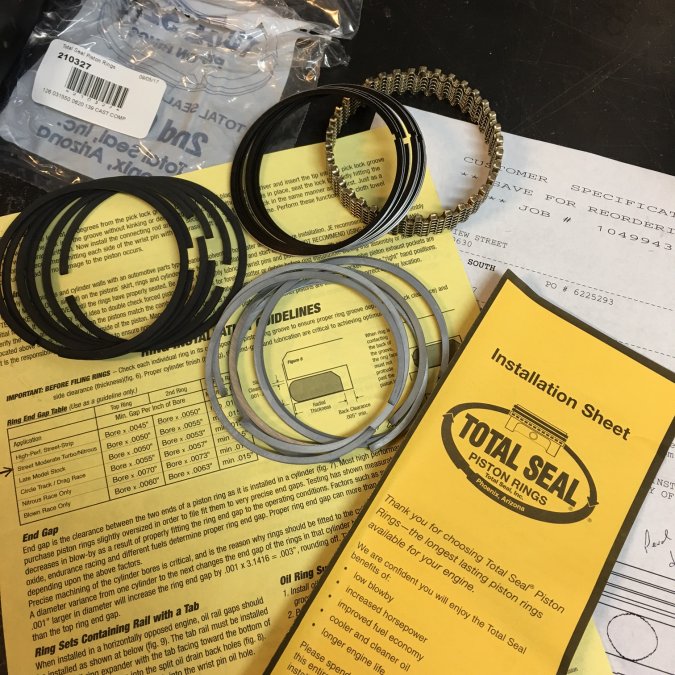
-
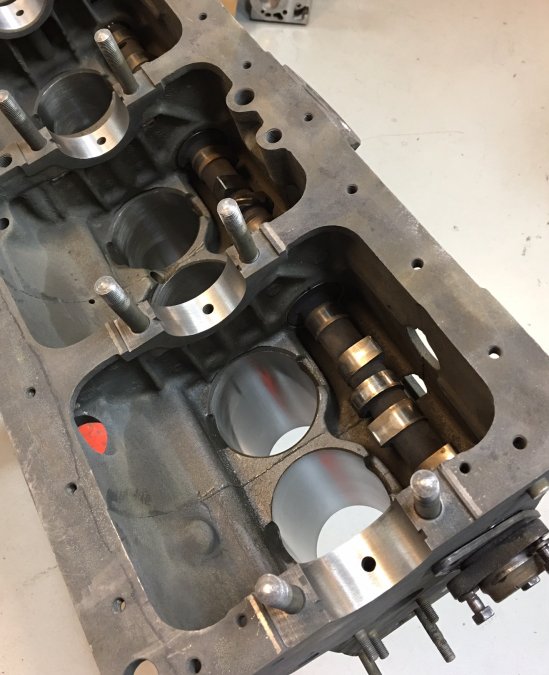
Finally feel like I'm getting somewhere on this build. First thing today was cam bearing install. Mark the bearings for oil hole orientation and drive them in carefully with the cam bearing installation tool. They're stepped in size with the smallest diameter bearing rearmost. Cam bearings can be a real PITA sometimes and moreso with certain engines, but these went in beautifully and the cam turned textbook perfect, with no noticeable binding.

-
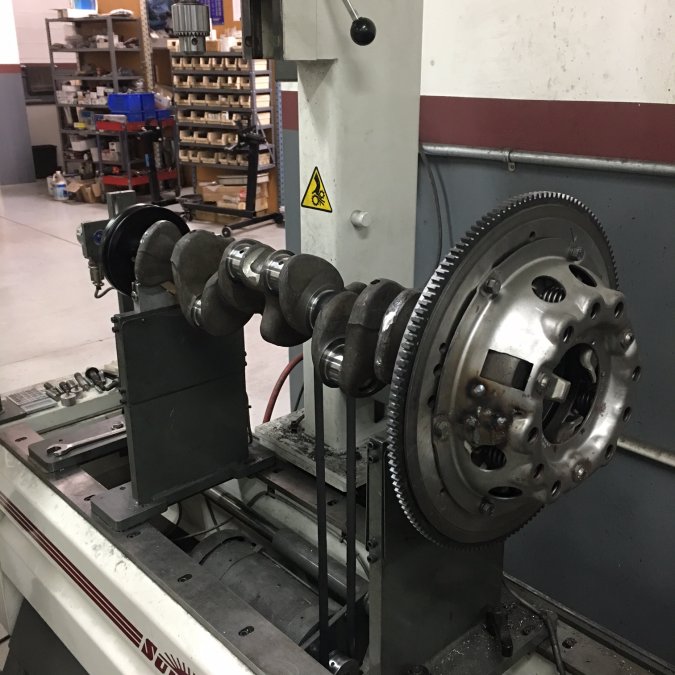
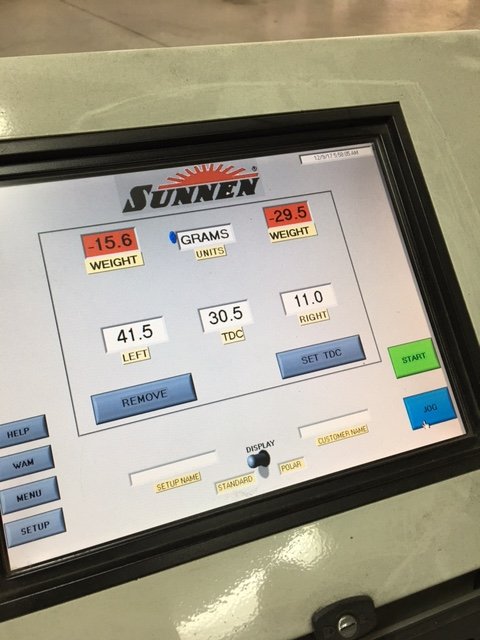
Took me all day (it was my first try at balancing a rotating assembly) but am happy with the final result. I started with the crankshaft alone and got that to about .2 g front and back. Added the flywheel and did the same. Added the front pulley and ended up at .7 g and .1 g front to back. Installed the clutch which needed 30 g of weight added. My final numbers were. 07 g out at front and .01 g at the back. Definitely better than what that little engine was running on in the past I'm sure. A great day of learning!!!

-
I ordered a replacement spring from Bernbaum and it came with an aluminum gasket similar to what I use for my Honda engine oil and transmission oil changes. I haven't installed it yet and can get a thickness for you if you like.
-
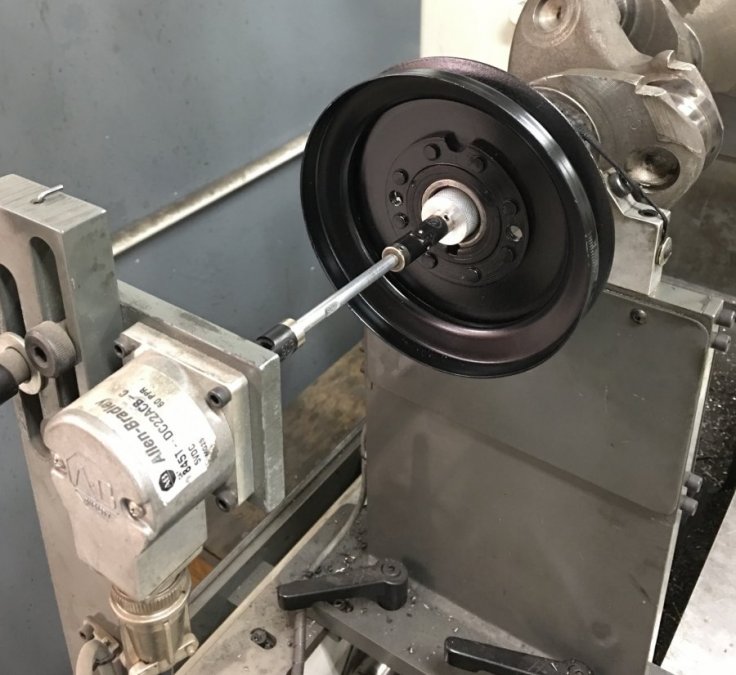
Got as far as checking the flywheel for proper fit and getting a fixture made to accomodate the pully hole so the Sunnen balancer knows the crank orientation. It's bigger than any fixture we've needed to this point. Need to either add or remove about 30g at the back and 15g at the front. Will have to wait til Monday.
-
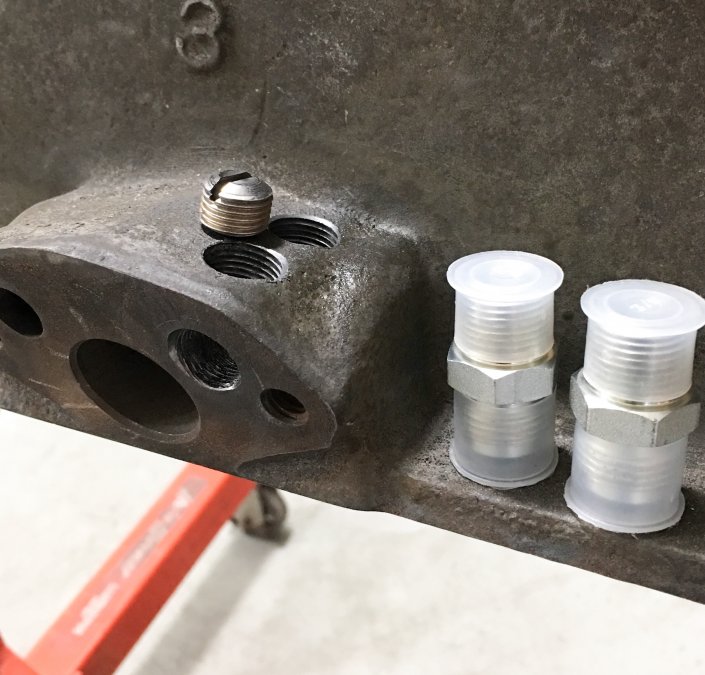
Not stripped. And really the only threads that will matter are the ones between the send/receive holes where the plug will reside.
-
My first crankshaft balance today. Should be a learning experience...!

-
Planning a small blow through for my 201 rebuild. Will add info here as we get started. I'll be interested to see what others have done. Have seen youtube videos and have some ideas already.
-
Nice looking work...!
-
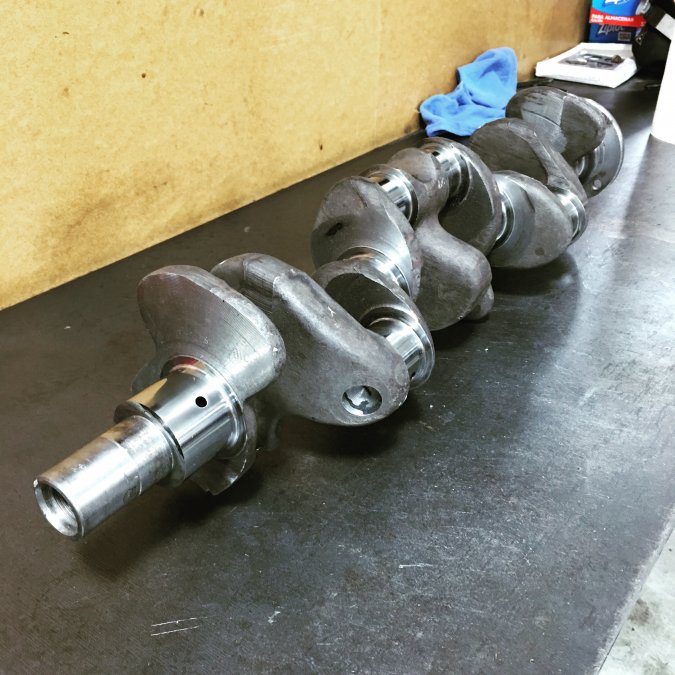
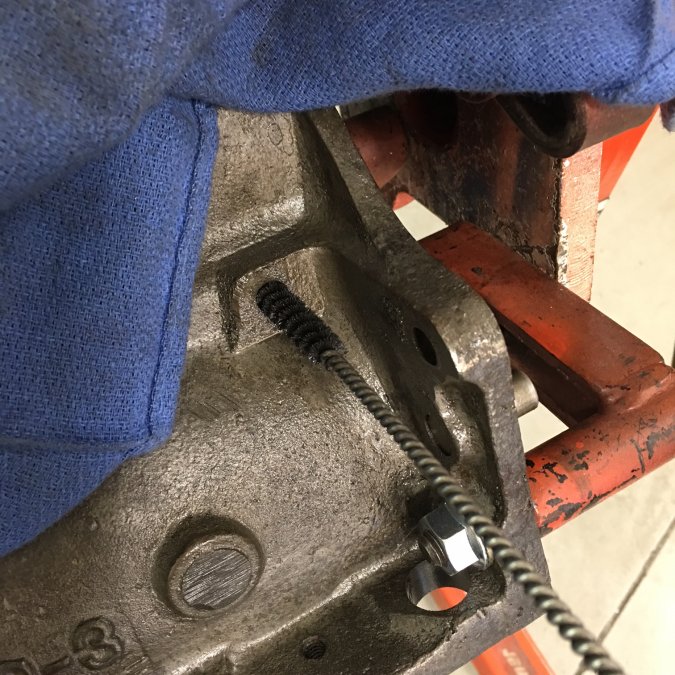
Got the crankshaft back from the grinder. They hit the specs on all journals within 0.0003", so pretty happy there. Will have oil clearance of 0.0018"-0.0021". Need to have the main machinist look at the crank though. Journal 6 didn't completely clean up. There's a slight blemish mid journal. I'll trust his opinion on weather to run it or get a 20 under bearing for that rod and have it re-turned. Also, got the oiling mod complete for full flow filter. Will be installing 3/8" AN fittings and probably mounting the adapter right to the oil pan rail behind the oil pump boss keeping things nice and compact.
-
Have a picture? I've been using a vintage unit without issue for a year now. Works just fine.
-
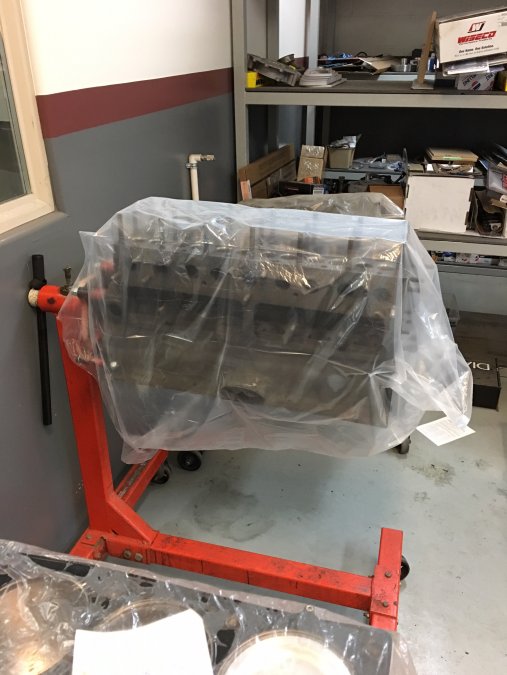
Then it got bagged and parked in the assembly room fun stuff starts next week!!!
-
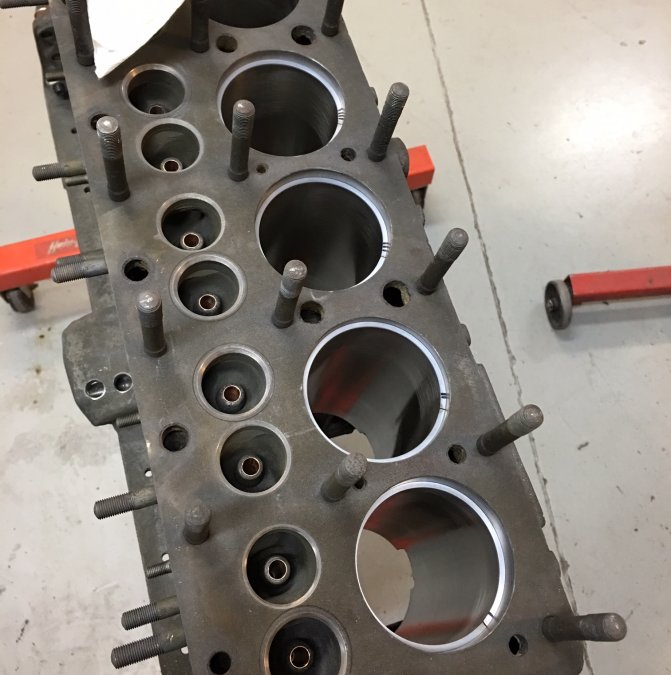
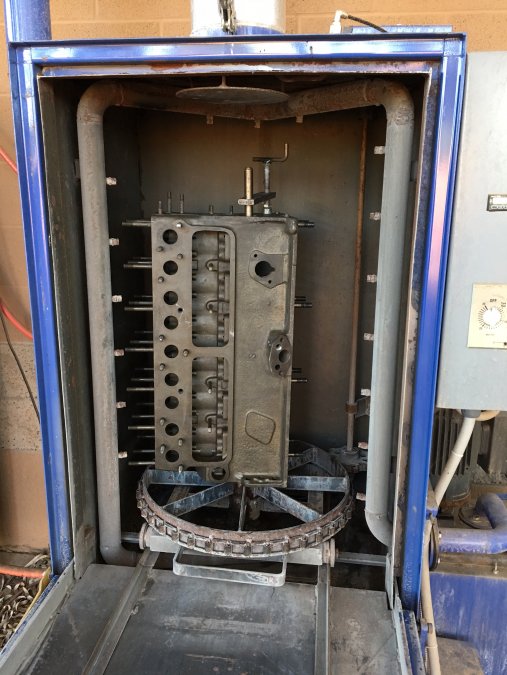
Yesterday's efforts. Some time went into helping reinstall the carburetor on the boss' FJ60, but while I wasn't doing that I was deburring cylinders, main bearing saddle edges, drilling for a full flow oil set up and thoroughly cleaning the block. Once all the nooks, crannies and oil passages were scrubbed out with brushes it went into the parts washer for a 30min auto cycle hot wash and then got thoroughly blown dry.
-
Wow. 150. That's what I was wondering.... just a topic of conversation in the shop this am. Thanks @martybose!