-
Posts
530 -
Joined
-
Last visited
-
Days Won
4
Content Type
Links Directory
Profiles
Articles
Forums
Downloads
Store
Gallery
Blogs
Events
Everything posted by thebeebe5
-
Ford did the same on some Paxton supercharged cars from the 60s.
-
Blow through will be easier for me to execute.
-
Already o-ringed the theottle shaft. Don't want aerosolized fuel sneaking out there. Not too worried about a little leak around the choke shaft. It's pretty tight, but a little loss there won't be a major concern.
-
Nope. Blow through. Not a fan of draw. Working out a plan now.... there are ways.... there have to be ways....
-
I plan to run the original 1" bore BBR1 on my 201 with a turbo, assuming I can get it jetted satisfactorily. If it's not up to the task I'll start looking at other options, but hopefully I can open up the circuitry enough to keep the AFR where I need it. I'll be updating your turbo thread as we move the engine into that second stage.
-
Nice work. I will say that if you are replacing brake hardlines that the new NiCopp alloy lines are a dream to work with. Did my whole '37 with the stuff and it made the job so much easier.
-
Yesterday and today: Finished the carb. Just needed to pick the rest of a broken brass valve screw out of the choke shaft and run a #3-48 tap through it, then replace the screws with new ones. A little locktite after install and it's ready. Also fixed the choke spring up onto a jig and bead blasted it, then hit it with some gloss black. Bead blasted the bellhousing. It's not quite finished here, but I ran it through again and gave it a clear lacquer coat and removed a broken motor mount bolt. Chased all the threads prior to final blast and paint. Today got the manifolds hung with a couple of nuts just to locate turbo oil return, had Brian weld the return bung in and after a thorough cleaning installed the pan after checking oil pickup clearance (which was right at 1/2"). Partially masked the block for paint, and there it sits. Paint will have to wait. I'm done in....
-
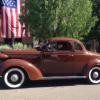
Danny Kaye went to jail in a '37 Plymouth coupe
thebeebe5 replied to thebeebe5's topic in P15-D24 Forum
-

Danny Kaye went to jail in a '37 Plymouth coupe
thebeebe5 replied to thebeebe5's topic in P15-D24 Forum
-
Think that's not a bad price at all. Good work costs $$, and a good shop will back it up too. Let's see it on the road soon!!
-
Might be the case. Everything on google was "where to buy". One thing I did find discussed bore sizes that went from 1" (mine) to 1.25" and then eventually to 1.5". Not sure how that correlates to the model number on the air horn. Still researching. If I can't jet the small carb to be happy with that turbo by drilling the jets (from a wide band standpoint) I'll be searching for larger bore bigger main jet units from later models and using one of those. Either an adapter to the original intake manifold or just get a later model 23" intake. It's quite possiblenwe end up making both a nee intake and exhaust set of manifolds, and if that's the case I'll see if I can adapt a Stomberg 97 to it. But that's way down the line. I'm just thinking ahead in case and wondering about options...
-
Well, if you'd be so kind, please post a link, for I am not finding the same information. I get lots of used carbs and parts for sale in my searches.
-
Same. It's all new to me.
-
Been trying. Wondered if there was knowledge here on the subject.
-
I have a 439s. Do other numbered carbs like a 514s and 592s share things like main jets, accel pumps etc? Is the difference in venturi size?
-

Danny Kaye went to jail in a '37 Plymouth coupe
thebeebe5 replied to thebeebe5's topic in P15-D24 Forum
You can have your cake and eat it too you know. Coker does a nice stock size wide white that looks like a bias, but is indeed a radial. All the radial benefits and great looks too. They're on my '37. Love em. -
That's what the fellow said. That compressor side was on the shelf along with about 40 others back in the warehouse. When I balked at the size he said "we do this one as a custom. It's same spec as the larger unit and produces the same power. It's an extra $100 because it's not generally available unless someone orders one". I have no idea why he had that one available. He just started picking up other components for the guts and then asked what hot side we wanted. Then we picked a wastegate and paid up. I did get a "jobber" discount because my buddy's shop buys all their turbos there. Was a $975 bill though. I'd hoped not to spend that much, but didn't want to risk a cheap chinese knock off from ebay at $200-$300.
-
Picked up the turbo today so we can mock up and locate oil return to pan prior to final oil pan install and engine paint. It's a Garrett .48 with a "B" case compressor side (smallest Turbo Direct makes for a T3 application, and it is a custom size, so of course more $$...). Will use a separate waste gate and a 5psi spring.
-
Of course it was for witness protection in the movie "Wonder Man", but he still got hauled in by the cops in their old Mopar.
-
Update: I put the gasket into the hole and pushed it all the way down with the piston. It seems to fit okay. Near the top it seemed all bunched up until it was all the way home. In retrospect it is probably just fine. Will run it as is.
-
Yeah, I thought the same, but that gasket shore don't fit that hole.... I'll see what I can do. May need to call the supplier for a smaller one. Or visit a local carb rebuild shop to see what they might have.
-
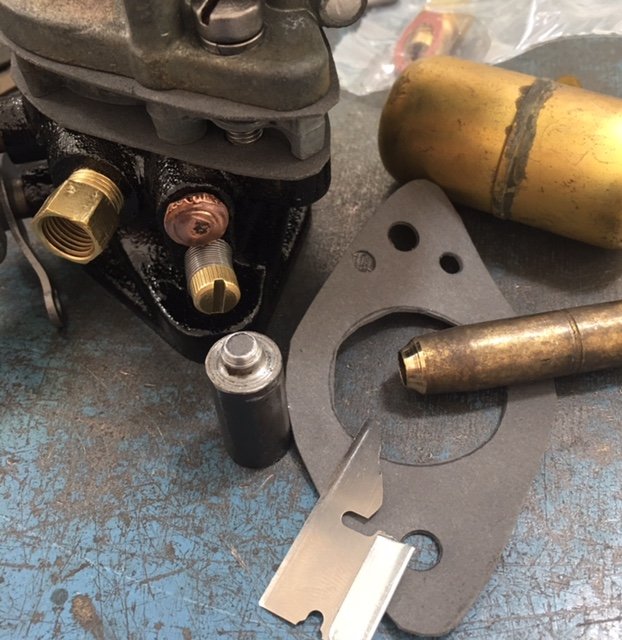
Nearly done assembling this carb. I have a question regarding a "step up piston" gasket installation. When I disassembled this carb the old gasket was around the spring. Wondering just how the new gasket is installed though.... the one I have won't quite fit into the hole to go under the piston without folding or bunching up to some extent.... Does it go on the piston or under it....? And i wonder if it's the wrong one for the application if it doesn't quite fit the hole....
-
WELL, I didn't have any of those things So I improvised. I had tin snips so I made an exact duplicate of an X-Acto knife And I have a lathe handy and lots of scrap, so I made punches. Punched one hole too close to the edge, so I had to make another gasket. Hand tightened screws with one gasket under the insulator and trimmed the inner to flush. Sanded the spacer on a block to get it straight (had done the carb and base months ago already) and put it all together. Hope it's good enough.
-
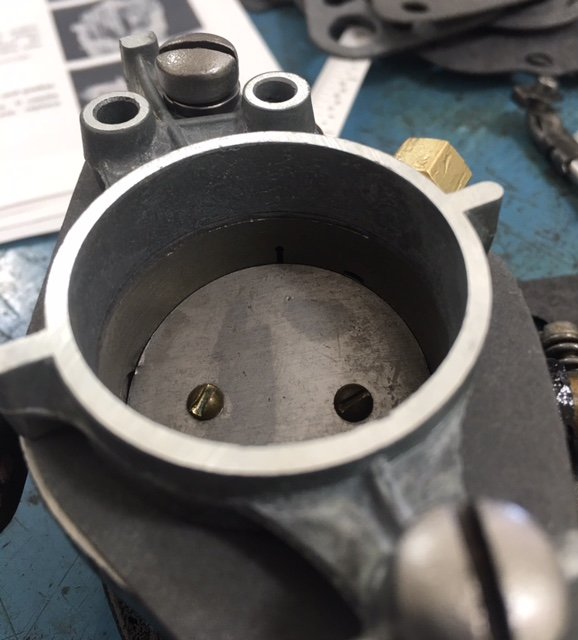
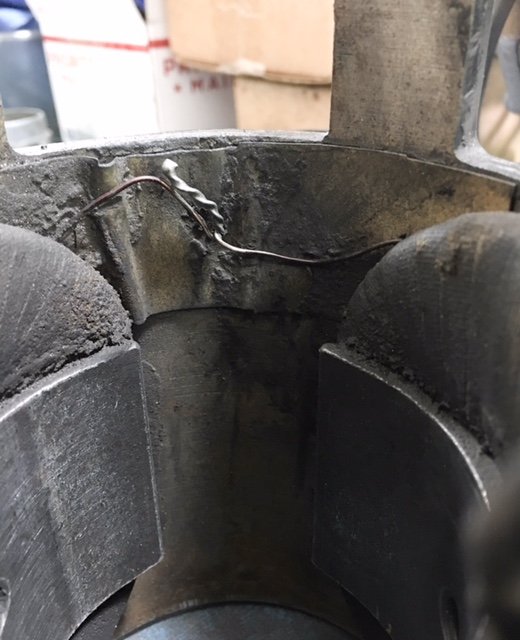
So, last weekend started getting sick. Didn't get a whole lot done but clean and paint bits and pieces, but did manage to reassemble the generator after having the field coils rechecked by Denny at Copperstate Alternator and Starter in PHOENIX. He sold me proper brushes (the ones in it were way too small) and a sealed bearing and other parts, then tested it for me the first time I reassembled it. He found the field coils were "grounded". I hate failing.... But everything is a learning opportunity, right? That was months ago. Now that the motor is pretty much done I went back to the generator, disassembled and carried the case over to him. He checked the coils and found there was no ground. His recommendation was to make sure the assembly screw passed behind the wire, rather than over top of it (meaning not allow the wire to be parked between the screw and case). Said just make sure there's no contact with the armature and it should be fine. He also said that when they assemble these old generators they use heat shrink tubing to help avoid the wire contacting the screw grounding the coils which was likely my problem. Thought I'd pass that tip along in case it can help someone else. Today I'm attempting to reassemble the carburetor. It's a 439 BBR-1. Got a kit from carbkitsourcedotcom. First obstacle? The insulator gaskets (all three different sets) are too large. Everything else looks like it will fit though, so I'll make my own. Any tips or tricks would be well received!!
-
As far as the pump goes, if it doesn't get the job done I'll address it. If anything I'll have the original Mopar pump fitted with a different impeller. I didn't even know something else was available. Regarding the 3/8" fittings, the ID was quite a bit smaller than the pick up tubes when I started that route, and once realized I decided to upsize. Also, if memory serves, the oil galley plugs on the side of the motor are only 1/8" NPT. And I don't think the big ones at either end of the block are accessible when the motor and trans are installed. Or are they??? I can't recall, and haven't tried the bellhousing on the motor to check.... I only used a speedysleeve because there was a fair amount of wear from the old rope or leather (or whatever material the old seal was made of). Probably just from contaminants on the seal, but wear none the less. Didn't want to be pulling it to fix a leak after getting the car on the road.


