


Tooljunkie
-
Posts
977 -
Joined
-
Last visited
-
Days Won
2
Content Type
Links Directory
Profiles
Articles
Forums
Downloads
Store
Gallery
Blogs
Events
Everything posted by Tooljunkie
-
Old engine still in truck? and front fenders Still on? as i sit here pondering what i would do, im thinking i would see if the engine Cross member from a newer (70’s) chassis could be cut to fit between your frame rails. it may be possible to make it bolt in. the 318 has to be dangling in the engine bay in order to design mounts And crossmember. Getting driveline angles correct and clearance is important.
-
Thanks for the link!If my springs werent worn through so bad i would consider it. $250 in parts without springs by pricing it. In US dollars plus shipping puts me near the $500 mark. I think i can come out spending less and have a little quieter ride.
-
My plan is to have a new pair made,reversed eylets and new urethane bushings installed. Then a new rear hanger/shackle fabricated with another urethane bushing in that. To do away with the oddly threaded parts. It will be similar to the front suspension On my power wagon. downward curl on eyelets will lower it some, and the new front spring mounts will also be lowered. also will be boxing sections of frame to stiffen it as well as another cross brace at front spring mounts.
-
I think you need a voltage reducer for it to work. Havent tried yet, but im going to experiment with a usb car adapter. Reduces 12 to 5 volts. may be close enough.
-
A hudson truck. Like it. like the lines.
-
I have a buddy that uses this method quite often. Almost tempting to get one for the shop.
-
My new motor mount arrived in the mail,$48.00 with tax and shipping. pretty good i think. i have all the front sheet metal off, will be pulling rad and cradle so it will be easy to get at.
-
Hey! so i started on my front end, 51 Fargo F01 1/2 ton. front springs. Rear eyelets are worn, the threaded sleeves are worn. Looking for replacements and finding nothing. my present plan is to have springs made,larger eyelets to accept larger bushings and to build rear shackles to carry a frame bushing as well. Seems cost will be similar if i find oe type parts or upgrade to some rubber in suspension. your opinion and or suggestions greatly appreciated. thanks in advance.
-
Many good old mechanics have moved on. I wasnt fortunate enough to have a mentor in the automotive field. Many i knew were long retired. my education was service manuals, lots of reading. back to the oil filter,a gallon of oil is cheap,and after i scrubbed the pan clean after it sat for 30 or 40 years i decided i would change it often. The filter housing was beat up and wouldnt seal so i made an easy decision.
-
Single strand of copper wire will work harden just from driving it. Then it becomes brittle and will break. The fine strand wire in my opinion would be best. The wire used on heater cords is my favorite for any place where its subjected to lots of twisting or flexing. Like in a door jamb.
-
Im thinking the bell wire you used is a single strand? it wont last. It will need to twist somewhat.
-
Cant beat wix. Hastings is up there too. baldwin is another. napa gold is made by wix. oe mopar, oe ford. i deleted my bypass oil filter,and will change oil as i see fit.
-
Think it works on toyotas, some engines turn in the loosey direction. Im not doing it. But i own real tools.
-
In waiting for my seal and gasket set to arrive, so i can address the same issue. Mine dies not have a balancer, big bolt and a pulley with 2 threaded holes. With a harmonic balancer puller you remove pulley By pulling with bolts in threaded holes. Then the cover bolts and lastly the cover. Knock out old seal and drive in the new one. I glue gasket to cover,grease block side of gasket and loosely install cover. Push balancer/pulley on so seal will be centered and snug a few timing cover bolts, pull pulley off and finish snugging cover. Re-install pulley and tighten crank bolt. That should cover it.
-
Wow. Awesome collection. A lifetime supply of parts. Impressive.
-
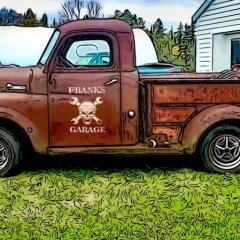
Not a picture of my truck per se, but of some completed work last weekend. King pins,brakes and replaced all the tie rod boots. always a step forward. 51 F01 Fargo. Next is address spring bushings and some frame repair.

-
I left nut threaded well on to shaft. stacked up some nuts in the deep socket to fill the space. Pulled wire up through nuts so i wouldnt damage it and whacked on socket a few times while supporting wheel. Popped right off.
-
Dirt in carb, or weak fuel pump. Another is a crack in fuel line. water as mentioned and depending where gas filter is located that could be plugged as well.
-
I just did my front wheel seals on the Fargo. Old stock leather. They soaked up oil instantly. They were thirsty.
-
Axles, pinion or all 3?nos oem seals should be soaked in oil before installing. some of those older axle housings had a couple seals on axles,and a grease fitting to fill the void between them. Gear lube should be 3/4” to 1” below fill port. also if it has a vent, make sure its not plugged.
-
Flathead 6 not starting in colder weather Plymouth & Desoto
Tooljunkie replied to Tim Larson's topic in P15-D24 Forum
My 218 started in minus 26 celcius a couple weeks ago. i grafted a 318 2bbl carb with automatic choke and 12 volt conversion. also 10w30 oil in the crankcase. it takes 5-6 pumps on pedal to get it to fire.. -
My 51 fargo has them too,i trashed one as well. I split it. when i re-assembled i wrapped a spring around it and snapped it back into place. Seems to be holding.
-
My understanding the new ones sold now are knurled and you push the king pins in. I wouldnt know for sure unless i saw a new set. the set i got was new old stock,army surplus believe it or not. Some writing on the box dates it to prior 1966. if your bushings have worn right out,and into casting then you will need to get involved with a machine shop.to resize spindle for larger od bushings.
-
I borrowed it from a friend. i found them all over on the web,amazon and ebay. most any parts store can source them. KD tools distributors can supply. the small one came from a machine shop supply house.
-
Here is what i felt was the only way to get away from the wheel bolts. Drill out the 1/2” holes to 5/8” and press in studs. I felt they were going in a little tough so i touched em off in my lathe. Was concerned the oversize part under the head would crack the hub. Ground the lathe cutter to miss the knurled part. big question is now,do i have any wheel nuts,as that never crossed my mind when i bought the studs... part number is on box,leaves 1” of stud to work with.


