Tooljunkie
-
Posts
977 -
Joined
-
Last visited
-
Days Won
2
Content Type
Links Directory
Profiles
Articles
Forums
Downloads
Store
Gallery
Blogs
Events
Everything posted by Tooljunkie
-
Bypass is to prevent overheatinG in the the thermostat sticks closed. Will also purge air as cooling system is filled. My 51 has a similar housing. its looking awesome! Like a piece of jewellery!
-
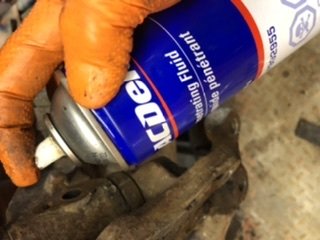
Heli- coil will likely leak. However, a nut-sert will not. But it woukd taje some effort to make it flush at pump mounting surface.
-
No problem. I will wait until the last blizzard of the year to go trudging around to look for them. if i come across them in my travels i will put them in my shop where they will never be seen again... right beside the stubby flat screwdriver i have been missing for months...
-
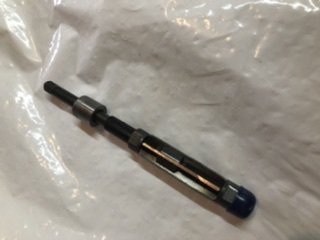
Better photo of reamer, the small one i used and the larger two as examples of what is your typical king pin reamer. on the small one the two collars with wrench flats are your adjusters, one way expands, other reduces diameter.

-
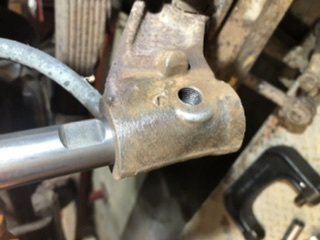
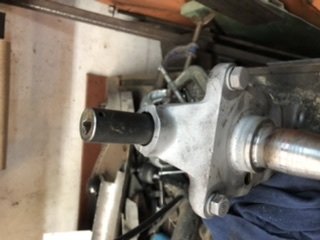
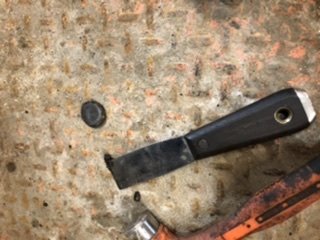
As you can see, there is a flat on king pin, has to line up with lock bolt in axle. Retainer to hold lock bolt. also i need to mention there are shims, go above or below bearing, to take out vertical movement in knuckle. end caps drive in easy with a socket, mine are staked in.


-
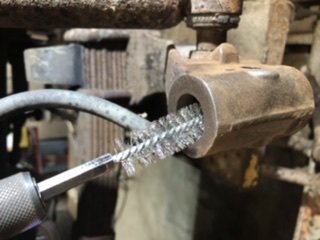
Reamer was a little short,but i managed. A proper reamer for this .873 king pin isnt all that easy to get for me. And i think my snap on dealer’s kids have both graduated, so he doesent need any more money from me. the sleeve is a guide i used to keep reamer true,only took a couple minutes on the lathe. the reaming went easy, started with setting reamer so it just fit, and gave both bushings a single pass to true them up. then adjusted reamer 1/2 a turn larger and repeated until old pin was starting to fit. Then i adjusted reamer 1/4 turn larger until new pin fit. It goes in snug, so a few rounds without adjusting it until pin slides through with a light push. take your time, too much and you will go beyond the .001 clearance needed. A light honing with a brake cylinder hone may finish it up if you are really close. pack thrust bearing with grease, clean truck side of knuckle and assemble. Shell on thrust bearing should face downwards to shed water. a few pictures and im done. i didnt have a clue,and the videos didnt explain the reaming process at all.

-
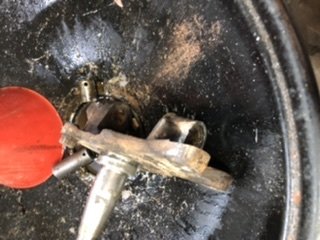
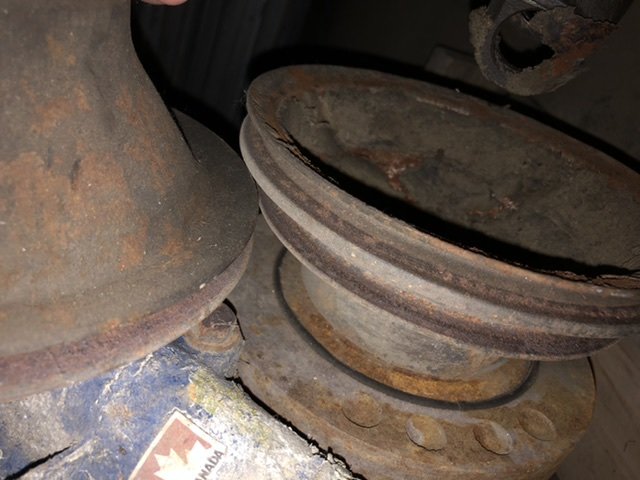
I found a socket the size of the outside of bushing, and they drove out with ease. pressing in with vise? Fail! It went crooked. Using a hammer and socket i drove it in. Its in but im not happy about how it got there. Second one i used a good c-clamp and a few light taps on the screw top and it went in easy. A little oil on bushing as well. used a very thick washer to push bushing so it was even with shoulder inside.

-
I may have those mounts kicking around, dont rush out and buy them. They are yours as i have no need for them. May need the insulators, but they are cheap. I dont go to wpg often,maybe once a month.
-
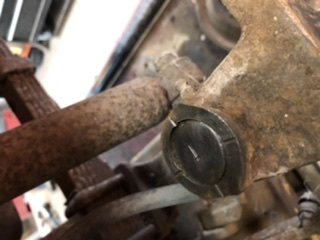
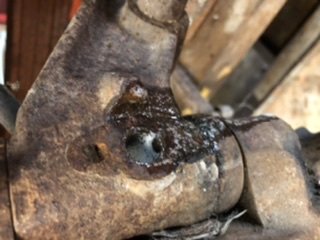
Pry out top and bottom end caps, two lower bolts for steering linkage should already be out when brakes and backing plate was removed. Bend retainer and remove lock bolt from the center piece. A little penetrating oil and let it soak. i used my ball joint press, reason for pushing pin up is i wanted to save thrust bearing. I destroyed the one on other side. in order to get things moving i applied some heat, propane is enough to do it without harm. was considering my bottle jack but for safety reasons i chose not to. pin came out fairly easy, had to use a couple sockets push pin as the screw would jam in the bushing. 15mm shallow, then a deep.


-
Ok, my version of king pin repair. will submit a few photos, but pretty much self explanatory. I will leave out the basic stuff like jacking and blocking your vehicle,and all safety precautions.im sure if you have the willingness to take this on you are also prepared to protect yourself.


-
Curious,where abouts in mb are you located? Lac Du Bonnet for me.
-
Got the Fargo back into the shop, pulled the left spindle again and fitted my first pair of bushings. Machinist buddy had a reamer and we figured out a bushing to ream it true. is a tad short but does the job. will start from scratch on right side tomorrow,will try to photograph every step. stay tuned. Frank.
-
I think the 904 is quite stout even for a truck, and you will have less modification if any to the firewall. im putting a 904 in my 65 Barracuda as putting in 727 requires floor modification due to its larger size.
-
My 80 power wagon on 35’s is a real dog on the highway,i used it for years to plow snow,in low range. if truck is retaining original gearing,it should pull pretty good. A donor k frame or truck chassis that carried a small block would aid in the swap. things like cooling are easily dealt with. Cable shifter is easy.
-
As promised. This is a 75 318 w/power steering. Another goofy picture,but there is almost no room between the 2.
-
I dont know whats on my 318 in the quonset,if i remember i will take a picture today. if i was more organized i would have a pile of pulleys in one place. next summer im stripping an a-body, and the k-member is complete with mounts. could always cut the cross member out of one of my 70’s donor trucks too.
-
Just bought a bluetooth adapter,never thought to test it with an amplifier. I tried it on my shop stereo, and it works great. its about the size of a deck of cards. May have to consider setting it up in my truck. i used a booster/equalizer in my boat years ago,just plugged into my earphone jack. The eq was stowed away so all that was exposed was the cord.
-
time flys when you are having fun. i just discovered the 49 i bought is actually a 51. I never thought about the parts issues when i bought it back in september, but with my parts background i recalled the go to guy for everything i needed.
-
Just found this thread,i got a nos king pin set from a shop in winnipeg. Very knowledgeable guy. will be attempting this in a couple weeks, likely over christmas break. He had king pin set,axle seals dust caps,brake hoses,wheel cylinders and a couple frost plugs i needed. has a front motor mount, but couldnt find it. so, you want me to post the process here, or start another thread? i figured something out with the brakes and adjusting,as i dont have the measuring tool and my new relined shoes wont work with the adjusters where they were. clean the adjuster pins so they rotate easily. Use a pick in the cotter pin hole to turn the adjuster to your preference. My preference is just a slight rub as drum rotates, and it will wear in after a couple applications. looking forward to communicating with you all to learn and share our experiences.
-
Wow! nuf said.
-
6 volt pumps are available. pos ground doesent matter,as the mount is isolated and you have 2 wires to connect any way you need.
-
Question answered, i should have checked it sooner. 1951,not 1949. will see if there was any difference in u-joints.
-
Awesome. Thanks. Its bent.
-
Ok, now i really havent run any numbers to actually confirm the year. Previous owner advertised it as a 49. But the u-joints are held in with u-bolts as in the 1310 series. If that’s the case, Bonus! Easy to adapt and simplifies my diff change. thanks for the info! next is running my serial number to prove without a doubt what year it is.
-
Thanks, photos look straight. the rod that connects left wheel to right wheel. Going to see a supplier for parts on saturday, he may have a good one i can look at,and if needed i will pick one up.