


lostviking
-
Posts
789 -
Joined
-
Last visited
-
Days Won
7
Content Type
Links Directory
Profiles
Articles
Forums
Downloads
Store
Gallery
Blogs
Events
Everything posted by lostviking
-

First try at using a paint gun
lostviking replied to lostviking's topic in Mopar Flathead Truck Forum
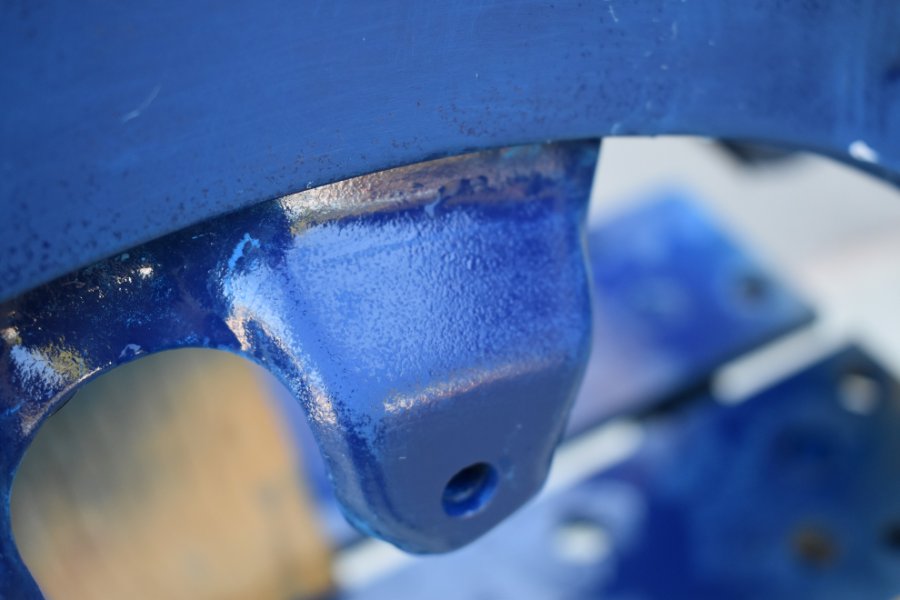
Got lucky with the paint, it cured. I did some wet sanding today to see how it might come out...remember, this isn't going to be finished, the bike is Rootbeer brown. This is just to practice with the paint and gun before working on my truck. I didn't sand the mount points at all, so you can see what a mess I made of the spray out. But, after some 320 and a bit of 600, it doesn't look bad. I think that a bit of 1000 and 2000, plus some polish and the paint would look better than what is on the truck now. I learned from my many mistakes on this job, but it was my first ever, so I'm OK with it.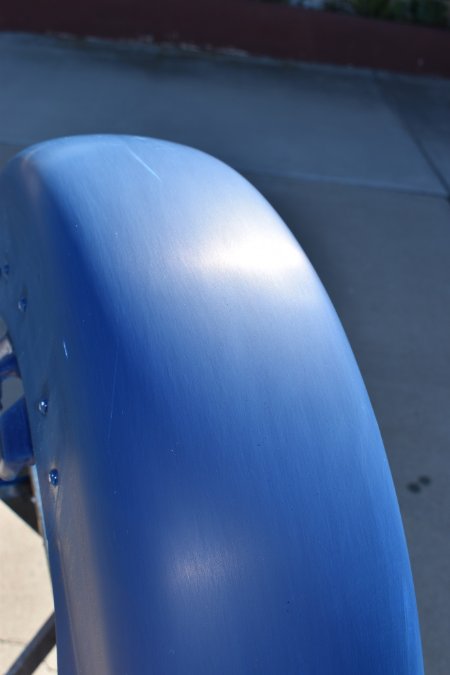
-
First try at using a paint gun
lostviking replied to lostviking's topic in Mopar Flathead Truck Forum
I'm using and Eastwood LT100 I believe (still at work). I set the pressure with the trigger pulled. I'll play a bit on the large sheet of cardboard I use to set the gun. Thanks for everyones input. -
First try at using a paint gun
lostviking replied to lostviking's topic in Mopar Flathead Truck Forum
I'm leaving for Thanksgiving in Texas tomorrow, so I won't be touching it until next weekend at the earliest. I will probably have to strip it completely due to the poor ratio's as Ken pointed out. I'll leave it in the sun and see, but I'm not confident. The motorcycle fender was never going to be this color anyway, it was just something to practice on. Good choice I'd say. They don't really recommend reducer at all, and then a max of 10%, so I think I probably just sprayed it too thick and maybe didn't wait long enough between coats. I pushed the 10 min wait due to inexperience and not reading enough. I see now that it won't start to gel in the time it takes to paint it correctly. Lesson learned. Eastwood says to hold the gun a bit closer to the surface than I expected from my YouTube college classes They say about 6 inches, but I am at work, so I'll check that again. I sprayed at 20psi, but that's the lower end of the range for the gun. I'll up the pressure a bit also. I'll also turn down the paint adjustment. I'm sure I had it too high and pushed too much paint. Rushing into things without reading isn't normal for me, but I guess I got excited about having a painting window with the weather. It was mid to upper 60's and got into the lower 70's right after I sprayed. Even though it was mostly a disaster, I at least got a feel for the process. It's not scary anymore, but I do need to read and do it correct next time. -
First try at using a paint gun
lostviking replied to lostviking's topic in Mopar Flathead Truck Forum
OK, I see the problem, it was me. I was supposed to mix 3:1 paint to activator. It is drying fine, but isn't the activator also supposed to make the paint flatten out and give it the shinny surface? I should have looked it up again today, rather than rely on memory. I did for the gun setup...not the paint. 8:1 was the enamel I didn't use Oh well, live and learn. I'll sand it tomorrow and then repaint with the correct ratio. -
First try at using a paint gun
lostviking replied to lostviking's topic in Mopar Flathead Truck Forum
I only used the lacquer thinner to clean up and test the spray pattern. I have the correct hardener and reducer from Eastwood. I bought it all together. I mixed it 8:1 paint to hardener, and used the hardener for lower temps. I didn't have specific information on how much reducer to use though, so I was thinking I left the paint too thick. Area's along the rounded sides of the fender where the paint was sprayed thicker flattened out, but other area's there is a big of roughness. I waited 10 mins between coats, starting with a fairly thin coat, then two thicker ones. I thought that I've read you do a tack coat first and then cover and finish with a wet layer. I used a mixing cup that has the ratios printed on it. I used the 8:1:1 and that was paint, hardener, reducer. Definitely started with a small object that I can sand easily and fix Thanks for the comments. -
Preparing to spray parts of my truck, I purchased an Eastwood LT100 paint gun. I'm using single stage Eastwood poly for paint. Not wanting to mess up the truck while I learn, I painted a motorcycle front fender. It was mid 60's today with no wind. I didn't use it this time, but I bought a popup screen room tent to spray the truck fender in. When a friend sprayed my other bike, we used one and it worked out pretty good. No "stuff" in the paint and they are fairly cheap. Anyway, amateur here. The paint is fairly pebbly looking. I figured with several coats, I can wet sand it. But why? Too thick and not enough reducer? Too cold (65F)? The gun worked great. I watched a few online vid's on setup and when I sprayed some lacquer thinner through it the fan seemed perfect to me. No bulge, even width, wide and even deposit of lacquer thinner. I think the gun was setup well, so the finish is something in my technique. Regards and have a great Saturday.
-
Getting my 46 WD15 repaired and back on the road
lostviking replied to lostviking's topic in Mopar Flathead Truck Forum
Had the day off, so I worked on the truck a bit. Jacked it up and put the rear on stands. I removed the wheels to get access and torqued the u-bolts on both sides. Reinstalled the wheels and torqued in steps to 110lb/ft. Rear ready. Jacked the front up and put it on stands, then took off the Jeep wheels. The offset just wasn't enough, and I couldn't put thick enough spacers on and have and stud left. Moved the tires back to the stock wheels. put the adapters on...torqued in steps to 110lb/ft. Put the wheels on and did the same stepped torque. I marked the studs and lug nuts with a paint pen. I won't be taking it apart for pictures this time around. Now if I can bring myself to get the painting done, it will be ready to drive again. Believe me, several short slow trips and rechecking torques everywhere. I bought a screen room popup. That's my "paint booth" to keep "things" out of the paint. It's been getting colder here, for San Diego, but hopefully there are a few more days over 70 so I can paint. It's always the things that I've never done that take the longest for me to get started with. Gotta get over that. -
They sell them at RockAuto. That's where I got mine
-
Getting my 46 WD15 repaired and back on the road
lostviking replied to lostviking's topic in Mopar Flathead Truck Forum
Finally got around to doing something to the truck today. I pulled the bottom two leaves out of the spring pack. Pretty easy to do, I had the new center bolts. I am surprised by the results. Just looking at them in place I didn't think they were that thick. The U bolts previously just barely were long enough (ish). There weren't any threads sticking out. Now I've got a full 3/4 inch of extra thread. I feel pretty good about that. Jumping up and down on the rear bumper it still feels pretty firm, but them maybe I've lost weight From the side I think it's noticeable, but I guess I should compare pictures. It seems to just sit nicer now, without having it's rear up in the air. Have a nice Sunday everyone. -
I'm at work or I'd look at the wiring harness myself, but how are they grounded? If you can run the ground side to your turn switch and then through a flasher, it won't care. As I recall from fixing my switch, the terminals push into a female connection on the switch. Maybe it just pulled loose. It's been quite awhile since I looked at that though. Is there a round "bullet" on the end of the wire?
-
I looked the the manual for the Delco 10SI alternator you mentioned. As I see it, the only connections you should be using, per the wiring diagram you attached, are the OUTPUT lead to the Amp meter and the ground leads. Those, as I think others have stated indirectly are only there for a better ground signal to the alternator. They were never intended to carry all the return current. As previously stated, get a heavy duty ground strap from the engine to the frame/battery. I would probably just use the frame myself as you have that done already. BUT you need to connect the engine, which is the ground for heavy currents from the alternator.
-
Same here. 3/4 ton rear. Can't even give it away.
-
Noisy tappet that keeps loosening
lostviking replied to minicooper's topic in Mopar Flathead Truck Forum
Forgot that fact. But, can the adjuster be removed? That's all he needs to do to fix this. -
When you mount the 440, or really any engine. the carb mounting surface is flat, but the engine and transmission are about 2-3 degrees down. That is the way it is supposed to be. If you mounted the engine flat, the carb would face downhill to the front. Not good. Again, the transmission angle is supposed to be the same as the pinion angle. I put my new perches on the rear and centered everything up. Then I measured the trans output flange and matched it with the pinion...I tacked the perches like that then pulled the rear to do the full weld. I used a 95 Jeep Cherokee rear. the u-joint in my stock driveshaft (46 WD15) was the correct size to just bolt up.
-
Pinion angle should be the same as it is now, unless the pinion sits at a different height. Which it might. Measure the angle of the u-joint flange face on the trans, and match that at the pinion. You can buy a mag mount digital angle gauge for about $10 like I did when I swapped my Jeep rear into a 46.
-
Noisy tappet that keeps loosening
lostviking replied to minicooper's topic in Mopar Flathead Truck Forum
If you compress the spring and push the valve all the way up, isn't there enough room to remove the lifter? I've only disassembled one motor, and it was awhile ago now. Can't remember how tall the lifters are. Loctite and teflon tape probably won't work. I'd try wrapping a small strand of copper wire inside the threads and then screwing it back together. The copper should deform and fill any gap. If you try Ken's method, don't form too much of a ridge, or you just cut more metal away. It's not a bad idea, it's actually how some lock nuts work. -
I rebuilt the stock vacuum wiper motors and will be reinstalling them. I'm going to add a small vacuum pump and a tank, so that when vacuum is too low, I still have full speed wipers. A check valve and pressure switch will enable to pump when it's needed only. I know it's not really "original' but I like the look of original and I can hide the pump and tank.
-
In order to do what you describe, you would need to add a LOT of circuitry to switch circuits using one voltage, but be switching circuits at another voltage. I can figure out how to do it, because I'm weird like that...but it wasn't easy or something I would have ever done. I just wanted to see if I could. It is frankly a mess. Listen to Merle and just do a 12V conversion. It's not hard, so why create needless and unproductive complication?
-
Sorry for not answering. By the time I got home I forgot about your question. I see you got a good answer already. Tim
-
I did some searching because I didn't know if the gauge was measuring voltage or current. I found an excellent thread with a great explanation of how the gas gauge works. https://www.stovebolt.com/ubbthreads/ubbthreads.php/topics/100645/6-12-volt-fuel-guage-sender-theory.html
-
Getting my 46 WD15 repaired and back on the road
lostviking replied to lostviking's topic in Mopar Flathead Truck Forum
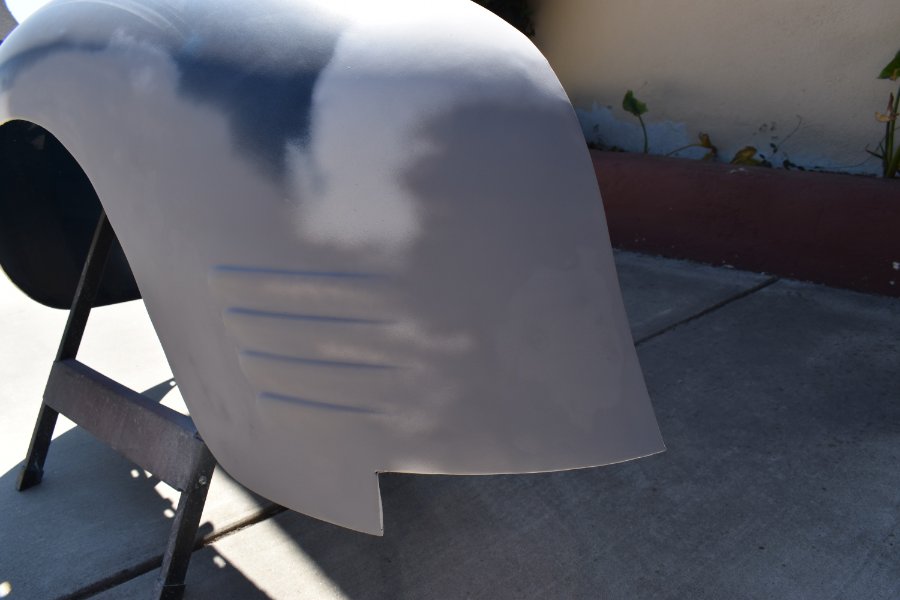
Back out today to wet sand everything. This time around I also used a tiny amount of glazing putty on some paint chips in the original paint. The entire fender is sanded, so I covered it completely in primer. There are two small spots I think still need a touch, but it's almost ready to sit and wait for the weather to break. Not only is it humid, but we are having a major heat wave for the next week. Even just sitting and wet sanding left me soaked. Drank lots of water. Hopefully be painting soon. That running board is never going to be perfect, and I haven't done anything since I flattened it back out. I've got a fend and the lower door and cab to get color on. It will have to be off for that anyway, so I'll look at ways to get it closer to looking nice again. Enjoy your weekend everyone. -
Me thinks she would be wrong. The gas gauge cares. Tim
-
I'll try to remember to check when I get home. I have one of them off right now. Tim
-
Getting my 46 WD15 repaired and back on the road
lostviking replied to lostviking's topic in Mopar Flathead Truck Forum
It's been almost a month of hot muggy weather. Humidity in the mid to upper 80%. So I've been working on making the fender as smooth as my skills can get. There is no heavy layers of bondo anywhere. The thickest is maybe .060, because I am a nit picker. Here is how it looked today. I think it's almost ready to spray. Of course right after I hit it with primer, I saw a small area that could use some glazing putty. Nit picker extreme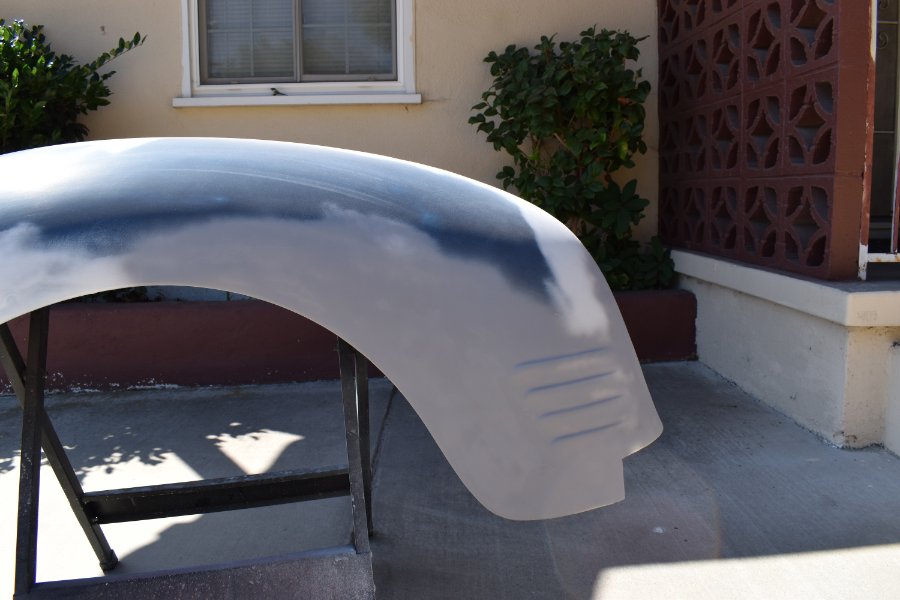
-
If patients completely fails, because it takes time to free some bolts, make sure you center punch it and use a Kobalt drill. A smallish one. You just want a hole through it, not to drill it completely out. That should relax the "fit" a little and help you get it moving.
