-
Posts
787 -
Joined
-
Last visited
-
Days Won
7
Content Type
Links Directory
Profiles
Articles
Forums
Downloads
Store
Gallery
Blogs
Events
Everything posted by lostviking
-
Getting my 46 WD15 repaired and back on the road
lostviking replied to lostviking's topic in Mopar Flathead Truck Forum
I used a contour tool. I just need to transfer the manual contour to a CAD file. That means measuring the contour at specific intervals to plot a curved line. I have the equipment at work, but they are doing an upgrade, so it's offline right now. Using a caliper and trying to do that by hand just didn't work. -

Getting my 46 WD15 repaired and back on the road
lostviking replied to lostviking's topic in Mopar Flathead Truck Forum
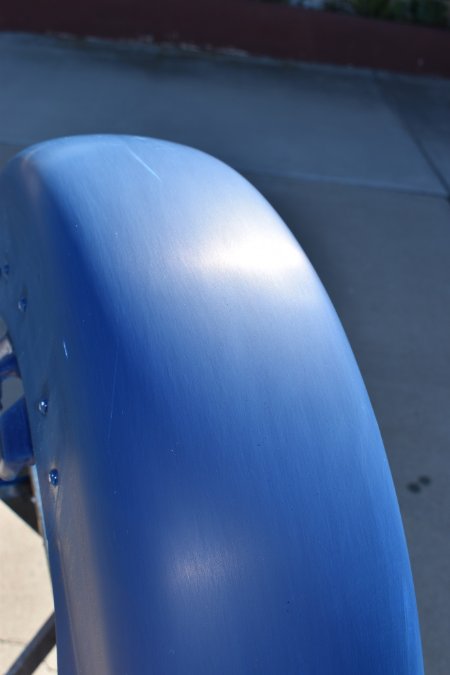
Was out of town for two weeks scouting retirement destinations. Couldn't afford to retire in CA even if I could still stand the place. Started wet sanding the fender yesterday, all by hand rather than using my DA. There is enough orange peel that I needed to knock it down with 320 at first. I have the fender attacked to a work stand, but it moves around too much for my liking. New plan. I sanded, compounded and polished the first few inches towards the truck. Plenty of paint on there to get is nice and smooth. I'm going to attach the welting and the fender filler using some flush head aluminum rivets. After that my plan is to put it on the truck and put all the bolts in like it's done. That should hold it steady I think. I can mask the welting and fender filler, as well as the mating surface (to avoid messing them up). Then I can sand the whole thing, compound it and polish it. Even the places I'm not too proud of are still better than the paint on the rest of the truck, so once I get this done I'm ready to brave the roads again. Round the block, retorque, round the block, retorque. I'm going to be extra paranoid this time around. The running board won't be done, but it is mostly back in shape. I need the 3D coordinate measurement system at work to get that contour gauge profile into a CAD file. Measuring it by hand just wasted a bunch of 3D printer time. Something else I plan. The wood blocks that go under the running board force it to hit the bottom of the cab on my truck, since they can't be put in after the running board is in place. I plan to cut them into two pieces and slide them in one at a time to take care of that problem. I don't really see any issues with doing that. Since they won't be so long, I can pop them in easily enough...I think. Have a great Memorial Day everyone. Remember, it's not for us vets that came home, it's for those who didn't. -

Getting my 46 WD15 repaired and back on the road
lostviking replied to lostviking's topic in Mopar Flathead Truck Forum
Took the day off today to paint the fender. Mostly looked OK wet. There were a few places the filler must not have sanded as smooth as I thought. I blame old eyes. I didn't use primer sealer, I know, but I must have just not felt the rough spots. I put enough paint on I think I can sand it out. We'll see. I used twice the paint I thought it would take, but even though I was putting on heavy wet coats, I didn't get any runs. I did learn that I should have gotten the fender higher off the ground, but I had to work with what I have We'll see how it finishes. I've been looking at my work, and the old paint. I don't believe they did any color sanding at all, so at least mine is smooth. -

Getting my 46 WD15 repaired and back on the road
lostviking replied to lostviking's topic in Mopar Flathead Truck Forum
Finished the area below the door today. Not too bad actually. Now I need another full coat of darker primer on the fender, then wetsand it with 600. I'll maybe do that today, maybe tomorrow. Next week, weather permitting I'll get the inside of the fender painted. I want that to cure a full week, and I'm not going to even worry about any sanding. Once that is nice and hard, I'll put it in my screen pop-up and spray it. There is a light dimly appearing. Update: Added the primer, wet sanded and washed the fender. One more spray I hope of color and I can wet sand, compound and polish. Then install the proper welting and fender filler, and hang it back where it belongs. Woo hoo. -

Getting my 46 WD15 repaired and back on the road
lostviking replied to lostviking's topic in Mopar Flathead Truck Forum
Thanks everyone. It's not terrible. I'm just making sure the metal is protected. I'm not mixing paint to color match, but bought the closest Eastwood single stage poly I could find. That's why I never expected it to match. The only time it will have a really good paint job, is when I pay to have it done. Fender is ready to go, so it's the next item on the agenda. I have a pop-up screen room to paint it in, so at least I don't have to worry about "things" getting in the wet paint. It's also a lot of curves, so I will be doing the wet sanding by hand. That's how I did all the primer and base/clear sanding on the fuel tank. I like doing it that way personally. The running board is taking a bit more time. I tried a number of test prints of my pattern, but measuring it by hand from my contour gauge wasn't working. The measurement device at work is getting a software update, and the guy who normally runs it is out on disability right now. I need him to give me a good reading on the gauge, then I can get the hammer and anvil parts made for me. Once I do, and it works correctly, I'll publish the drawing here so anyone who needs it can have a set made. -

Getting my 46 WD15 repaired and back on the road
lostviking replied to lostviking's topic in Mopar Flathead Truck Forum
-

Getting my 46 WD15 repaired and back on the road
lostviking replied to lostviking's topic in Mopar Flathead Truck Forum
I was able to sand the drops out without damage. I used hard rubber blocks and 320 then 600. Surprised I didn't mess it up. One thing is for sure, at some point "a mans gotta know his limitations". Paint is definitely mine. It is better than the old paint, mostly I've got transition lines between the paints, but I never expected that not to happen. I need to use some more swirl remover on the door, and do the section of the cab right under the door. But it's going to end up having to be "good enough" until I can afford to pay someone who knows what they are doing to repaint the whole truck. The reflection looks dull, but it's mostly the garage floor, as you can see by the bottles and my pant leg. I know I can shine it better, but I've decided it's good enough to drive again...once I finish below the door...oh, and paint the fender in the bed. Nobody will be calling me Rembrant. -

Getting my 46 WD15 repaired and back on the road
lostviking replied to lostviking's topic in Mopar Flathead Truck Forum
Mixed up some more paint, masked off and sprayed. One extreme to the other...too slow, or too close, runs. Then I panicked and decided I could use the tip of a folded paper towel, you know where that led. I got four pretty heavy coats on. It's the area of the cab right under the door and the bottom 6 inches or so of the door. I'll see what happens when I go to wet sand. If I can flatten it out that would be great, if not I'll be going for lesson three next weekend. If you learn by screwing up, I'm becoming a scholar. -

Getting my 46 WD15 repaired and back on the road
lostviking replied to lostviking's topic in Mopar Flathead Truck Forum
I had the day off today, so school was in session again. The lesson was why you can't "fix" a bad spray. Because you can't. Long before I got the pebbles cut down, I ran out of paint in spots. I suppose I could have tried to touch that up, but reality struck, and I put a 320 disk on the orbital. I didn't take all of it down to primer, but I did expose enough getting the pebbles to disappear, the the only recourse is another spray. I hope I learned something the first time, we'll see :). I'll make that final coat a smooth shinny one, so I can wetsand it lightly and then go to compound. Yes, it's harder than it looks, so those of you who are good at paint, my hats off. Call it ego, but the places I spray I want to look better than the old paint job. I think I know I was just too paranoid about runs, so I put the paint coats on too thin. It's probably easier to get rid of a run that smooth the gravel over the whole thing. Failing forwards -

Getting my 46 WD15 repaired and back on the road
lostviking replied to lostviking's topic in Mopar Flathead Truck Forum
After getting something to eat and resting a bit, I went back out. It won't match. The area's I just did are getting direct sun, and it's pretty easy to see if you are looking. The truck has had a 20 foot paint job since I bought it, so I'm OK with the mismatch, until I can get the whole deal painted. That isn't at the top of my list of ToDo's though. Presentable and not gonna rust up due to only primer are my goals. Then some behind the wheel time for a change. I'm still undecided which shade I like better, but then I do have that gallon of the new stuff -

Getting my 46 WD15 repaired and back on the road
lostviking replied to lostviking's topic in Mopar Flathead Truck Forum
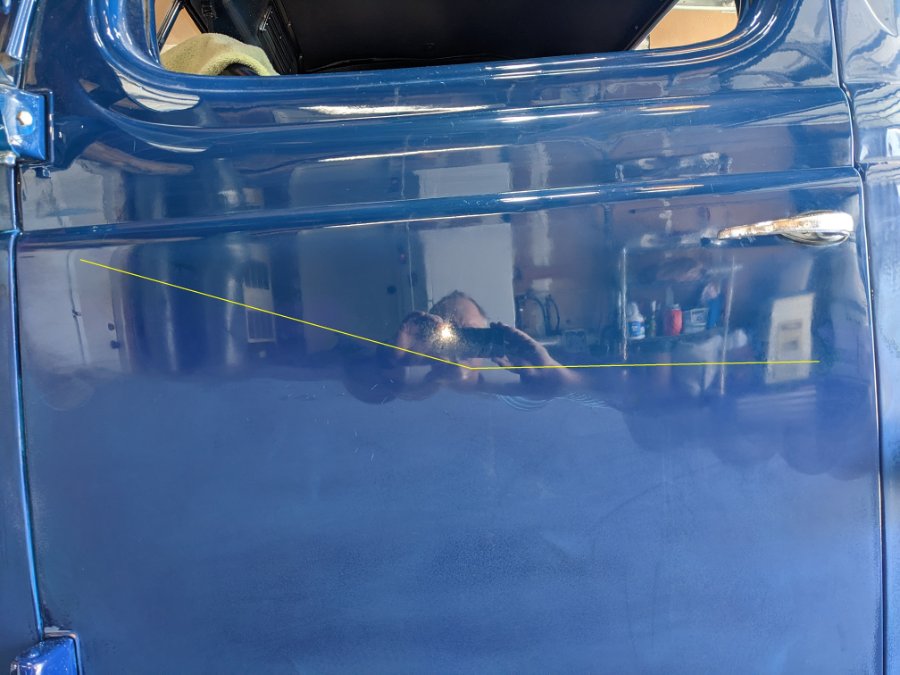
Went out to wet sand today. What I proved is I'm not so good at doing that with my orbital. I tilted it accidentally in a couple places and now see primer half moons. I also had one high spot, primer again. Kind of bummed, but I can touch it up when I do the fender I guess. My bigger concern was the mismatch in colors and what that would look like. I was sure I had 5 inch foam pads, maybe I do somewhere, but I couldn't find them. I used a 3 inch pad on my drill instead. I used only Maguiars 105 Ultra compound so far, just so I could see what the transition looks like. In this picture, the color transition is about an inch or so above the yellow line. It's not as bad as I feared. In fact, it's not bad at all. It seems to show up a lot more in the picture than in real life, because I wasn't sure looking at it, but in the picture I could see the transition and the need to smooth it better. Anyway, I have 5 inch pads coming as well as more compound. I think it will be very presentable, even with my limited skills. Everyone have a good Saturday. -
Not really, it's been a minute. I usually check online and look at shipping as part of the cost. Whomever has the best deal gets the money.
-
When I contacted Scarebird, and asked, they told me I didn't need any residual valves. I don't believe there are any in the PV2 proportioning valve, but check as I'm not sure right now. Either way, you do need a proportioning valve, like the PV2, if you are disk/drum.
-

Getting my 46 WD15 repaired and back on the road
lostviking replied to lostviking's topic in Mopar Flathead Truck Forum
Went out to start the wet sanding and found out two things. First the only disks I had started at 1500, second they are dry disks Ya, I used a couple anyway. I did some 600 hand work also, but my arms get tired fast. I switched to the air tool, and it still worked OK, but you can imagine it takes a bit more time. I could have finished it all up using the dry disks and just let them fall apart (the velcro backing separates from the sandy side), but instead I ordered some 5 inch disks from Amazon. They will be here tomorrow. If I get them early enough, I'll continue. I did get one of the transitions blended enough to see what it will look like. You see the difference well enough, but I can live with it for now. Still trying to get the contour of the running board duplicated. It's harder than I thought to measure the points on the contour gauge. I think I'll just take the gauge to work and ask the QC guy's to measure it with the digital measurement system we have. It does 3D, so they should be able to give me the contour plot. Have a great Saturday everyone. -

Getting my 46 WD15 repaired and back on the road
lostviking replied to lostviking's topic in Mopar Flathead Truck Forum
I've got the running board pretty much back to shape, but that outer face...it isn't going back into shape without some creative thought. So I bought a contour gauge and measured the shape of that face. The "fingers" on the gauge are .0515 inches thick. I sat at my desk with a caliper and measured those guys and entered the dimensions into Solidworks, then drew a spline along the dots. I got a coworker to 3D print a test piece for me. After testing it on my good side, I'll create the inner shape by offsetting this pattern the thickness of the metal (.080). Then I'll send out a have some metal ones made. My intent is the make a die and anvil about 1 inch wide. I'll build a heavy duty press and use a 7000 lb jack to press the shape back into the metal. The ones you can buy new don't have the shape on the outer edge, they are just smooth. Not good enough. Maybe I'll sell them the design later -

Getting my 46 WD15 repaired and back on the road
lostviking replied to lostviking's topic in Mopar Flathead Truck Forum
Thanks. I'm learning from my mistakes, even though I did just learn...I think the last "wet coat" wasn't thick enough. I think I was too paranoid about causing runs, so the surface was never wet enough to flatten out. I'm guessing, but I think that's what happened. I believe I've got more than enough paint thickness to sand it smooth, but it I end up having to spray again I'll get it right that time for sure. The wife likes the color, which has a definite violet tint to it. I'd rather it didn't and better matched the truer blue color on the truck. I wish I knew for sure how to mix something to get that violet to go away. But then as I keep saying, the whole truck needs to be painted again to get it really looking good. So this is all just school for me. Anyone know how to get rid of the violet? Maybe mix some other colors into what I have to tone it down? Enjoy for Easter everyone. -

Getting my 46 WD15 repaired and back on the road
lostviking replied to lostviking's topic in Mopar Flathead Truck Forum
Well I finally have some warm dry weather, so for better or worse...the cab got painted today. This time I mixed the paint properly I masked off well outside the painting area, then put a tack coat on. Waited 10 mins, then a wetter coat. Step and repeat through 4 full coat and the 10 oz of paint I mixed up. I'm going to let it sit for a few hours, then remove the masking. I'll see about 600, 1000, 3000 wet sanding next weekend. It's heavier near the bottom and gets thinner going up. By the level of the gas filler the blue was never sanded through, so I'm hoping it feathers while I'm sanding. The whole truck needs a paint job, so I'm just trying to get it good enough to drive around in. Cheer. -
Los_Control mimics what I did also, just that I have disks up front. You don't need the prop valve with all drums. It keeps the rears from locking up before the fronts. I've heard from 3/4 to 1 inch for the rod. I just cut off 1/2 tested and then had to cut a bit more off...easier than welding it back on. For the metric/ASE brake line fittings, I bought the correct fittings (ASE in my case) and epoxied them into the master cylinder. That's the brown looking material you see right by the alum/brass edge. I used Armstrong A12, because I trust it for just about anything. I didn't need residual valves because of my PV2 proportioning valve. I believe you will need them on your setup.
-
Not sure how you got away with that, if you were showing repo plates at the DMV. They are not legal and the code for YOM specifically states that.
-

Getting my 46 WD15 repaired and back on the road
lostviking replied to lostviking's topic in Mopar Flathead Truck Forum
Crawling along the floor a bit more, towards the finish line. Went out and bleed the brakes today. As I suspected the garbage brake line install by the PO, with all the nice "s" bends, was probably trapping air. With the new straight single piece, I was able to get a firm pedal just pushing with my hand. Check. I also got the last two tires put back onto the Dodge wheels. I'll just sell the Jeep ones. I put the adapters back on, torqued to 110 ft/lbs, then the wheels torqued to the same. Now I just need some dry air to paint, oh, and more work on the running board. It fits, but it's a bit wavy. Good Saturday to all. -

Getting my 46 WD15 repaired and back on the road
lostviking replied to lostviking's topic in Mopar Flathead Truck Forum
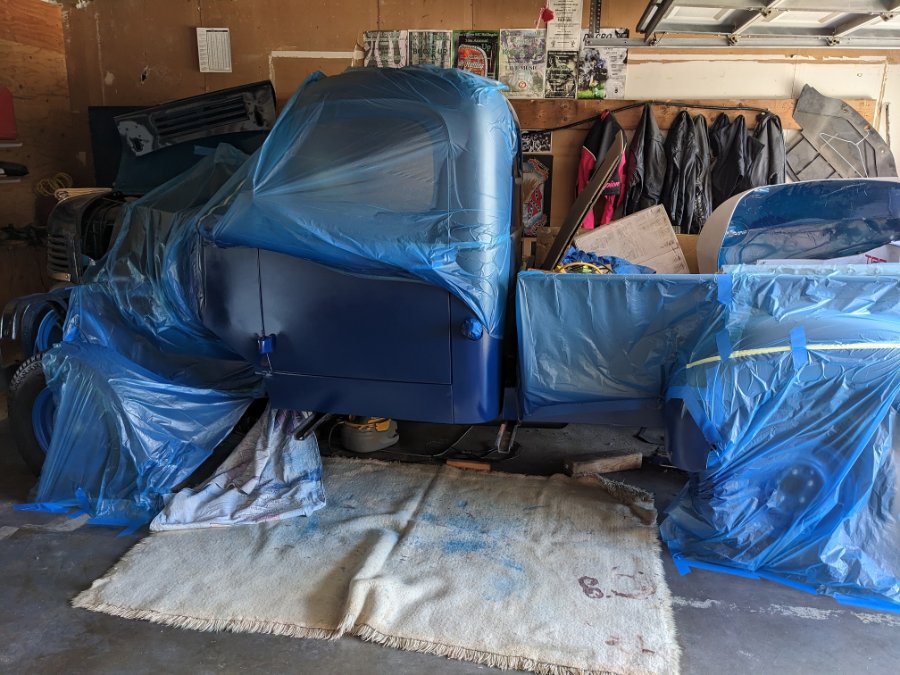
Hello everyone. It's been a very long time since I did anything worth speaking about on the truck. Mainly just needs painting done, so winter stopped all that. There was one other thing I've wanted to do, since I did the brake upgrade. The previous owner spliced countless short lengths of brake line, all 1/4 in to plumb the truck. I had already replaced all of it, except one length that led back to the rear. It too was multi-piece, and for some reason, he did about three crazy "S" bends in the tubing. I guess he didn't want to just cut it to the proper length, but then nothing else he did to the brake lines was right, so why not. I checked to make sure I had the correct flare nuts, then straightened out a sufficient length of 3/16 NiCop. I pulled all the old line out and sent it to it's just resting place, then fed the new line into the stock location, and securing straps. I had to open them a bit to get the old out, and left them like that. I pulled the line out the side up front so I could work easily and put a nice double flare on it. Secured that to the PV2 proportioning valve, and slipped the line into the securing clips along my way to the back. Bending the line along it's path, I made sure I had enough line, then cut it to length. This time I had to lay under the truck, but no big, I put another flare on the line and secured it also. By this time brake fluid was just starting to drip from the master to the end of the line. I'll top the master and let it gravity fill for awhile, then go back out and bleed the brakes. Hopefully one last time. Spring is coming, I've got everything I need to paint...just need good weather. I even bought a popup screen room to paint the fender inside. Enjoy the weekend. Mine has been good so far. -
https://dcmclassics.com/dust-and-air-seals/784-rw-124-fender-welting-25-.html
-

First try at using a paint gun
lostviking replied to lostviking's topic in Mopar Flathead Truck Forum
Didn't do any more sanding, so only 600. On the truck I'll go to 1000, 2000 and maybe 3000. I have all of them. Today I just used some Maquiars Ulta cut compound and 3 inch foam pad, the some Maguiars X20 scratch remover. I wasn't expecting spectacular results...just wanted to get an idea how the paint buffed out. Not too bad either. It's better than the rest of the truck actually. You can see the unbuffed part at that bottom. Some higher numbered sanding would have gotten the top to bottom scratches out completely. But, it's going to get sanded off and painted with the correct color eventually. I think I like the single stage Eastwood poly. -

First try at using a paint gun
lostviking replied to lostviking's topic in Mopar Flathead Truck Forum
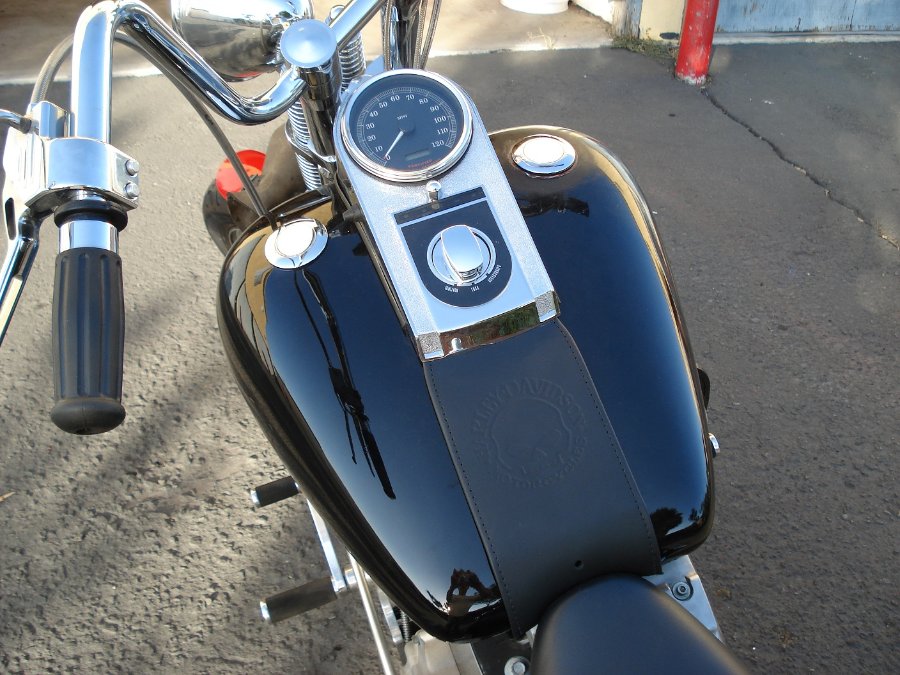
Got lucky with the paint, it cured. I did some wet sanding today to see how it might come out...remember, this isn't going to be finished, the bike is Rootbeer brown. This is just to practice with the paint and gun before working on my truck. I didn't sand the mount points at all, so you can see what a mess I made of the spray out. But, after some 320 and a bit of 600, it doesn't look bad. I think that a bit of 1000 and 2000, plus some polish and the paint would look better than what is on the truck now. I learned from my many mistakes on this job, but it was my first ever, so I'm OK with it. -

First try at using a paint gun
lostviking replied to lostviking's topic in Mopar Flathead Truck Forum
I'm using and Eastwood LT100 I believe (still at work). I set the pressure with the trigger pulled. I'll play a bit on the large sheet of cardboard I use to set the gun. Thanks for everyones input.


