-
Posts
787 -
Joined
-
Last visited
-
Days Won
7
Content Type
Links Directory
Profiles
Articles
Forums
Downloads
Store
Gallery
Blogs
Events
Everything posted by lostviking
-
It should. The hubs use 5x4.5 bolt circle. I can't remember right now if the lug nuts came with the kit or not, but are just standard 1/2-20.
-
TRICO windshield wiper vacuum motor.
lostviking replied to Fernando Mendes's topic in Mopar Flathead Truck Forum
The paddle has two metal plates, with the sealing material between (on my model)...then riveted together. You can see the remains of some in your picture. That sticks out all around new rebuilt paddle. If this is not a tight fit to the sides, or if the edge is broken, the air can go through and not push the face of the paddle. If that happens, it is either very weak or does not work at all. -

TRICO windshield wiper vacuum motor.
lostviking replied to Fernando Mendes's topic in Mopar Flathead Truck Forum
I'm talking about the sheet of material that you rivet between the metal plates to make the "flapper". Yours look to have been cut, and the edges are not straight. Mine had to be folded over a bit to get it to fit back into the motor body. That made a very tight seal. I don't see how what you have in the picture can seal against the body walls. I have a fresh kit, it I can find it I'll post a picture of the part I'm talking about, with a ruler next to it. The kits I purchased were for a early Ford, but looking at the parts online I could see they were a match. Mine are of course for a Dodge truck though. If you do a search on ebay (I just did) you can find Trico wiper motor rebuild kits, they all show the "sealing material" that I'm talking about. It is tan colored in the pictures. It should be quite a bit wider than the cavity inside the motor. If yours drop right in, they won't seal at all. -

Getting my 46 WD15 repaired and back on the road
lostviking replied to lostviking's topic in Mopar Flathead Truck Forum
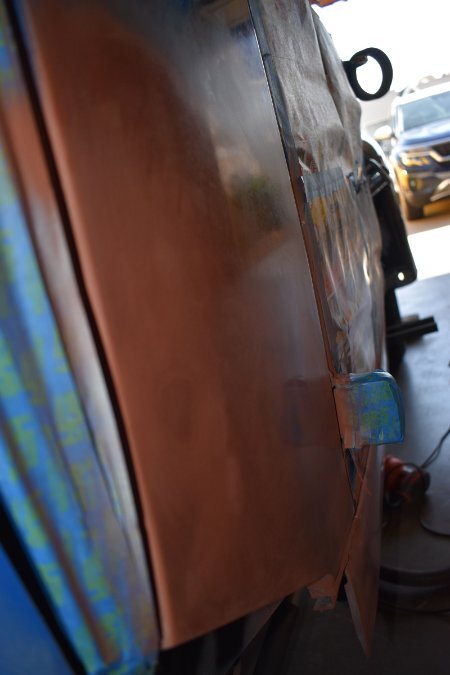
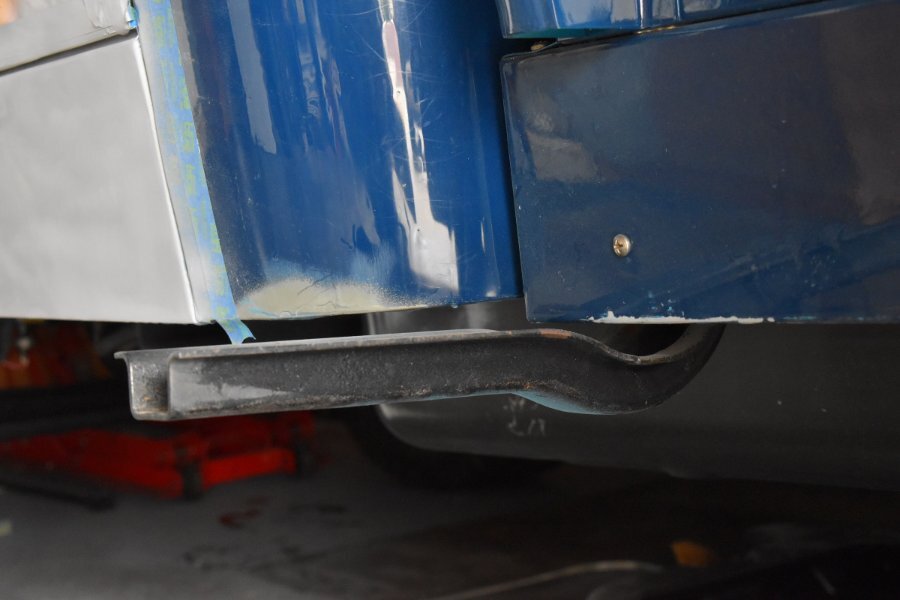
Have everything I need to paint now, but weather. It's been, if you can believe it, wet in San Diego on the weekends. It's not raining, but the humidity is much higher than normal. We've had a couple spring storms move through over the last few weeks. So, I've been working on the fender. I'm learning as I go, and I do have an out if I can't get it nice enough...but I'm still giving it a go. Here are pictures of the lip right down by where it meets the running board. It was torn loose and only held on by the very front. The fender was folded under from the arch all the way down to the running board "flange". I've been using a number of hammers, dollies and small C-clamps...even vise grips, to move the metal back into place. Once the bottom edge was pretty good, it was time to weld the torn metal back together. I'm a novice, but with my welder turned basically as low as it goes, I've been able to get a bunch of spot welds along the seams without burning through. It was pretty mutilated around this area, so I've had to crawl under the passengers side to get an idea of where things needed to be. Now that they are one again, I can fine turn the metal with more hammer and dolly work. -

TRICO windshield wiper vacuum motor.
lostviking replied to Fernando Mendes's topic in Mopar Flathead Truck Forum
It should blow air or suck it in if you move the wiper arm manually. If it doesn't, then you do not have a seal on the flapper that moves inside the body of the motor. It's as simple as that. The new "gasket" material that comes with a rebuild kit is much larger than the cavity in the motor body. I had to fold it over, but this is what creates the seal. Like I said last time, yours do not look correct to me...they look like they were trimmed with something. -

TRICO windshield wiper vacuum motor.
lostviking replied to Fernando Mendes's topic in Mopar Flathead Truck Forum
If you put your finger over the pipe hole, does it push air in and out when you move the lever. If it does then the motor is not the problem If it doesn't, then you don't have a seal around the wiper paddle. The wiper sealing area in your picture look damaged. Mine have very straight defined edges. Your look like they were cut irregularly with something. Also, if you just change to new gaskets, why the white stuff? Is that some kind of sealer. I didn't need anything like that. Perhaps it got into a passage and is blocking something. -

TRICO windshield wiper vacuum motor.
lostviking replied to Fernando Mendes's topic in Mopar Flathead Truck Forum
I've purchased and used two rebuild kits. What's the question? -

Getting my 46 WD15 repaired and back on the road
lostviking replied to lostviking's topic in Mopar Flathead Truck Forum
Thanks for the advice. I feathered into the old paint about 4 inches. I'll wet sand using up to 1000 before I do the color. And using the old running boards is a great idea. -

Getting my 46 WD15 repaired and back on the road
lostviking replied to lostviking's topic in Mopar Flathead Truck Forum
Haven't done more than hold the paint dab on the lid up to the truck. It's about as close as my eye's will tell me actually. I wonder if that is the same paint as was used. I'll know better when I spray some, but I need better conditions...and I'm not completely ready yet either. I still need one quick connect nipple for my hose and I haven't bought the lacquer thinner or wax/grease remover. I can get them all, just have to go by the store. I can only do things like this on the weekends also...wife has to put her car outside This weekend it might rain again, so that's a no. I can get everything I still need though and maybe do some more prep work. I've been using the weekends I can't spray to beat on the fender. -
There is a list of companies here that make parts. You should check their websites.
-

Getting my 46 WD15 repaired and back on the road
lostviking replied to lostviking's topic in Mopar Flathead Truck Forum
I've sanded area's, so its is single stage. I'll check the paint with some lacquer thinner. Thanks. I picked up the HF McGraw compressor yesterday, but we moved it on its side...so I left it sitting upright in the garage until today. I plugged it in, opened the tank and ran it for the 30 minute break-in period. I am shocked at how quiet this thing is. Its not silent of course, but you can stand 6-8 feet from it and talk in a normal voice. You couldn't do that with the old Craftsman unit. Wow. I hope I get a lot of years from it, time with tell, but the reviews have been very positive. Starting a year or more ago at least. What I've seen in the reviews, they recommend it over the very similar 20-gal oil lubed one from McGraw. Not to mention I really like the idea of 175psi tank pressure. Regulated down to 40 or so, that should give a nice cushion before the compressor has to kick back in. I've got a friend who has a paint and body shop. I'm going to talk to him about finishing the fender for me. I moved most of the metal back into place, but he'd be a much better person to take the waves out. I'll see what he wants to get it to primer. Raining today (morning) in San Diego, so nothing to do with paint today. Have a good Sunday everyone. -

Getting my 46 WD15 repaired and back on the road
lostviking replied to lostviking's topic in Mopar Flathead Truck Forum
I started to change my mind after rechecking my facts...but I listened to the reviews again between the Central Pneumatic and both the 20 gal oil lubed and 21 gal oil-free McGraw ones. The oil free is 5dba quieter than the oil lubed 20 gal McGraw. It's run time due to the 175psi tank pressure is way longer, even running an impact gun. I think that the oil lubed vs oil-free is an ongoing debate, but these aren't the same designs that came out even 10 years back. -

Getting my 46 WD15 repaired and back on the road
lostviking replied to lostviking's topic in Mopar Flathead Truck Forum
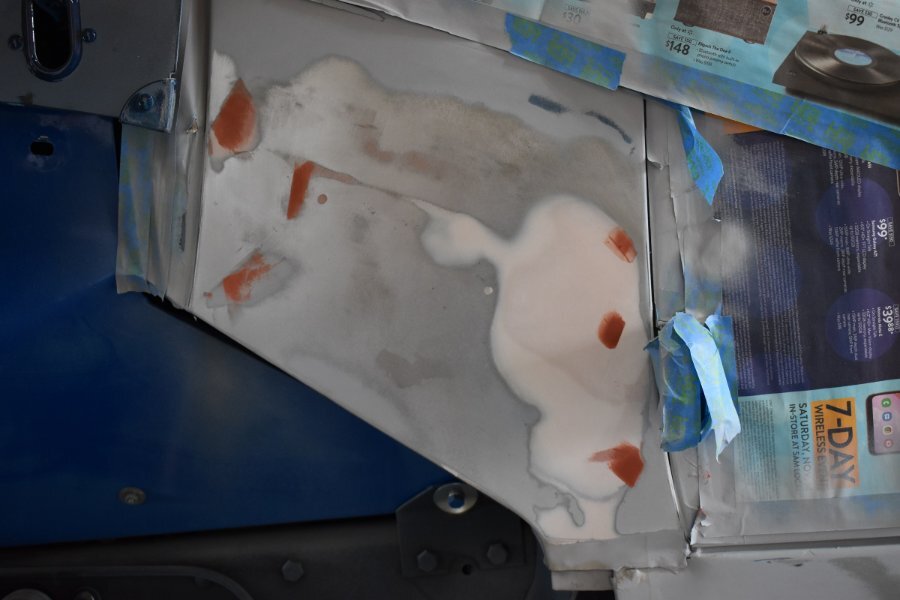
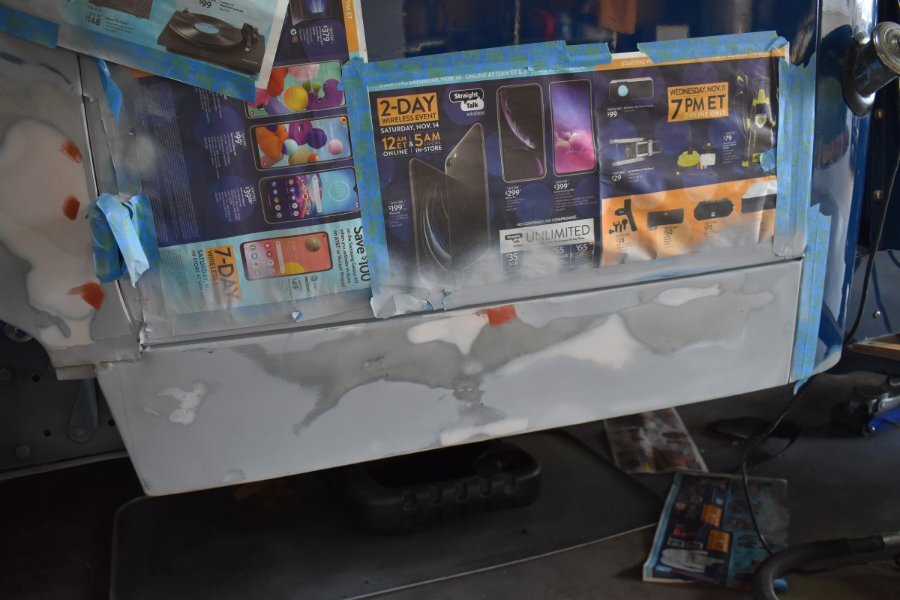
Looking at those last pictures, it does look like there is still damage at the lower left, but that is just the older primer layer showing through. It's flat. I went out and did the first 320 wet sand this morning. Almost perfect, so I dried it well and put another layer of sandable primer over it. I'll wet sand with 600 next. My new Eastwood Concourse gun arrived yesterday. I already had the inline filter/dryer and small regulator. I put it all together and pumped up my poor little compressor. I had a 3 gal external tank connected to it to give it some "run time". Not going to happen. I could have gotten through with several waits, but I don't think so. It would never keep up when the real painting starts. I'll be picking up a McGraw 21 gal oil-less compressor from Harbor Freight. It can more than keep up. 175psi tank pressure, more than enough SCFM at 90psi and a LOT quieter than the old one. My little craftsman is over 10 years old. I'll service it (oil lubed) and leave the external tank off so it gets to pressure faster. It will now just fill tires for me. Nothing much else going on today. I still need some primer/sealer, something to clean and reduce with (Acrylic Enamel) and the basics like cups and strainers. Wasn't planning on throwing color at it today. I bought 1 qt of Restoration Shop marine blue acrylic enamel paint off Amazon. The color dab on the top of the can is a darn good match to the truck. Won't know for sure how it does until it's on, but it you've read my accounting of the paint job, you know the whole truck needs to be repainted anyway. It will get more of the same, fenders and running boards will get black. Have a good Saturday everyone. -
I think the springs go under the escutcheon, then you have to push that down to get the pins in to hold the handles on.
-
I'm married, so I've been wrong before. That was how it looked from the wiring diagram. I do bow to people who know for sure. I was guessing that what looked like a connection in the diagram actually was one. I thought my brake lights worked with all the switches off, but again, no battery to check it right now. Thanks for setting me straight.
-

Getting my 46 WD15 repaired and back on the road
lostviking replied to lostviking's topic in Mopar Flathead Truck Forum
Couldn't wait, so I did some final primary sanding today. I didn't have any 320, the next finest I had was 1000. So I burned a few disks. Came out pretty well. I'm sorry that the depth of view isn't great, but the surfaces are smooth, flat and ready for color I think. My new gun will be here today, but the paint won't. Some time next week. I still need reducer anyway and some basics like filter cones. I can do the math, so I'll use some medium sized plastic mixing cups we use at work. They can hold around a pint and are marked well in OZ and ml. I'll just divide the amount of paint I intend to mix by the total ratio added up, like 4:3 for instance means I divide by 7. I hope the paint is as good a match as it looks on my PC. LOL. It is marine blue acrylic enamel. I have no idea what he painted the truck with previously, just that it is not base/clear. We'll see if there is any reaction. I hope not, but obviously, worse things have happened, and the truck needs to be completely repainted anyway. I only bought a quart to start with, which is way more than I need for the cab repairs. There are some deep paint scratches on the door that could stand to be fixed, so I'll sand that a see about blending it in. The only thing I know I'm good at is seeing the details and I'm pretty good at wet sanding things, the buffing them shiny again. Have a good Sunday. -
Did you try a web search...autolite 670662?
-

Getting my 46 WD15 repaired and back on the road
lostviking replied to lostviking's topic in Mopar Flathead Truck Forum
Thanks Ken. I did some more reading and figured that was only going to be good for clear coats. I purchased this one: Eastwood Concours LT 100 with a 1.3mm tip. It still only requires 4.5cfm@30psi to run it. My compressor is small, only 3.7 @ 40. I do have a secondary 3 gallon tank connected to it though. I'll have both tanks full at 125psi and regulate down at the gun to 30. I think it will work well enough. I can still buy a slightly higher output compressor if I have to, but I think this will work. It doesn't run too long before both tanks are full so I don't think it will be running non stop. With the small cup I'll do the cab, then maybe two fenders at a time. I've never owned any air tools, so I never needed a bigger compressor. We'll see. -

Getting my 46 WD15 repaired and back on the road
lostviking replied to lostviking's topic in Mopar Flathead Truck Forum
New Saturday, so a bit more progress. I went out today and hit all the damaged area with 220, blending into the cab area above the damage by maybe 6 inches. I masked it all off and resprayed with regular sandable primer. While it was wet I look along the surface and was very happy to see it flat and true. I will still need to hit the transition into the old paint better because I can see a faint line along some of it. I'll do that with 320, maybe tomorrow. I also did some beating on the fender again. The worst of it has been move close to where it should be. I'm no body man, and YouTube might have the facts, but skill is something you acquire over the years. I'll keep working at it. It was good to see the dents reduced today so that I could actually see the change. A lot more work though before its ready for primer. I still have to weld some tears, but I'm sticking with one thing at a time. As hard as it is to fix the fender, there is no way I'll be able to do any useful with the running board. I'm glad I can buy new ones, metal ones, at a reasonable price. I know someone who does paint and body. I might take the fender to him and see what it would cost to get it done right. Been looking at a paint gun also. There is an Eastwood one with a 1.0mm tip that works at flow my compressor can keep up with. Its a touch up gun, so small can...but I'm only going to paint the parts of the cab you've seen, and the fenders/running boards. I figure I can get away with smaller batches of paint. I wanted to go black, but...we'll see how smooth the fender comes out. Might have to just paint everything blue again. I do like the color of my truck. Just have to match it now. -
Checking the wiring diagram in the shop manual, that everyone should own...the panel light switch is fused by the 30A fuse on the main light switch, but like the brake lights it does not require the light switch to be on. There is a common bar, B and R on the switch, which feeds them both. Since the brakes must work whether the head lights are on or not, the panel lights can also be turned on without the head lights. I'd just go check, but my battery is out while I repair my truck.
-

Getting my 46 WD15 repaired and back on the road
lostviking replied to lostviking's topic in Mopar Flathead Truck Forum
Thanks for the information Ken. I'll probably get them. I need to find a gun that is "good enough" for my abilities, and the fact that I'll use it for this job and probably never again I've been looking at some recommended for small compressors. I found one that only needs 4CFM @ 20psi. I figure I can regulate it down to 20 at the gun and run the compressor and tank at 125. That way hopefully I can keep up. I have a very small compressor with one of those portable tanks as an external accumulator. Not hoping for a show truck, just one that doesn't have all the runs, drips, lakes and other errors this one does now. I can always add more storage on the supply side. The biggest parts that will get shot at one time is a fender. -

Getting my 46 WD15 repaired and back on the road
lostviking replied to lostviking's topic in Mopar Flathead Truck Forum
Fairly happy with the results now. Did some light sanding today and another coat of high build over the trouble spots. After it dried I sanded locally, and when I was happy I blocked the whole area until the highest points broke through. Talking very mini mountains here. I covered the whole area with red oxide colored regular sandable primer this time. Probably won't do anything more today, but next week I'll start a bit of wet sanding. It's in pretty good shape right now, but I need to get rid of the sanding marks and move to much finer sand paper. Then I'll see how close I can match the paint. I'm thinking about just buying a small paint gun, since I don't have anything now. I really don't know so I need to do some reading. Anyone like to make a suggestion I'm open. I'll be doing a blend on the cab, plus repainting all the fenders and running boards. When my bike got painted I did all the body work and primer, and my buddy sprayed the base and clear. I did the finish work. Doing it that way it came out like a mirror...not doing that to the truck :). Just want a close matching single part paint. I'll use the same method we did then, screen room tent and a clean deck. The side of the cab will be done in the open, but the fenders and such will be done inside the tent. For the gun, I don't want to be mixing too much paint at once. I also need to be concerned about how to clean up...California. -

Getting my 46 WD15 repaired and back on the road
lostviking replied to lostviking's topic in Mopar Flathead Truck Forum
Another part that got bent, was the rear running board bracket. It was bent upwards some. I'm pretty sure the front will need a similar fix...but this is what I did to the one still riveted in place. I placed a jack stand under it to give it a point to bend at...clamped a 6 foot 2x4 onto it, and bent it back some. It might not be completely flat, but I didn't want to go too far and have to bend it back. I'll see how it compares to the other side once I remove that running board. -

Dual single carb linkage, planning stage
lostviking replied to lostviking's topic in Mopar Flathead Truck Forum
There are more than 1 WA-1, mine are WA-1-413S carbs. -

Getting my 46 WD15 repaired and back on the road
lostviking replied to lostviking's topic in Mopar Flathead Truck Forum
Much better results. The bondo is very thin. After sanding with 80 grit I needed just a touch of glazing putty to get it done I think. From here a sand with some 220 and a coat of high build primer. From there it's just sand it smooth and primer. I'll see about a top coat that is close to the rest of the truck. Then, back to work on the front fender. The PO used some kind of blue felt like material between the fenders and body. He glued it to one side. I don't know what the heck he was thinking. I my mind, that's just asking for rust when the felt collects water. Needless to say, I'm removing it. As I was cleaning off the front of the rear fender where the running boards attach, I found a inch long or so crack in the fender. He just ignored it!. I'll be welding it closed when I get around to that. I intend to repaint the rear fenders black since I'm doing at least one front...and the running boards. I'm going to replace them both and sell the one original good one. The repops are smooth and don't have the diamond pattern in them, but some non-skid should work just fine. Waiting for the glazing putty to dry so I can sand it all once more before I primer it and stop for today. Enjoy your Saturday!


