-
Posts
2,555 -
Joined
-
Last visited
-
Days Won
83
Content Type
Links Directory
Profiles
Articles
Forums
Downloads
Store
Gallery
Blogs
Events
Everything posted by Sam Buchanan
-

My 1951 Plymouth Concord Barn Find....what have i done?!
Sam Buchanan replied to Logans51's topic in P15-D24 Forum
I suspect you have a freshly rebuilt engine. The fact it wasn't in a vehicle probably means it has no mileage. Good score! -
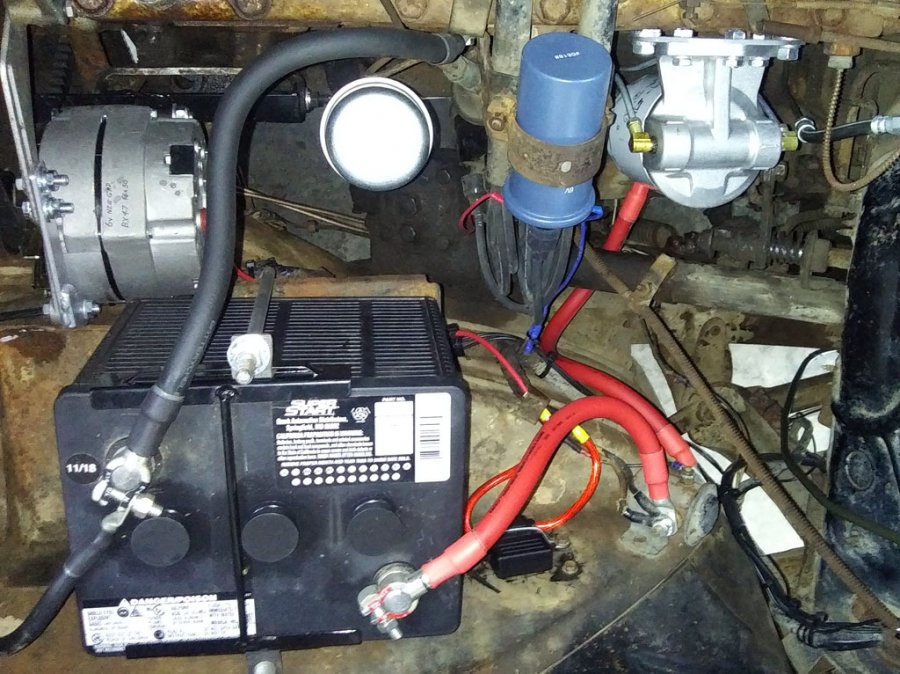
If what you have is working well then that's all you need. The only point I will make in regard to your post is that 0 gauge cables are not expensive and are readily available. I used this vendor and had my custom-made cables in about a week. Two battery cables, a chassis ground cable and a starter cable were $40 shipped to my door. https://www.batterycablesusa.com/1-0-gauge-battery-cables-0-awg
-
I think metal lines would be more prone to vapor lock than rubber lines. See if you can get your filter farther from the exhaust manifold, having it that close is most likely heating the fuel.
-
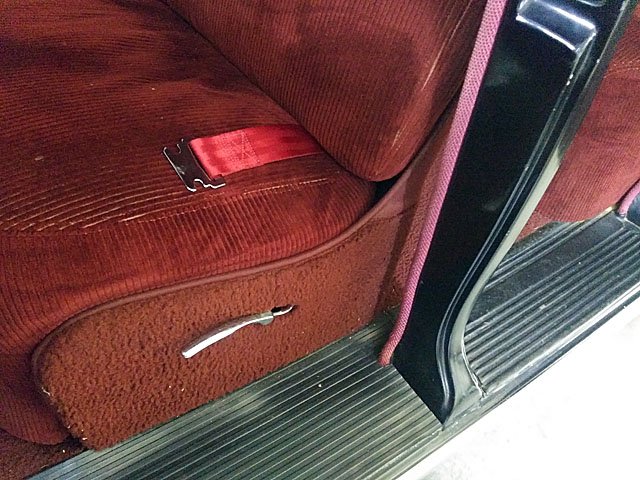
To assist someone who isn't concerned with originality, here are the sills I made from running board rubber. The front is the new one, the rear either original or a reproduction. I can't find the eBay vendor where I bought the material but here is something similar. https://www.ebay.com/itm/200416841509?hash=item2ea9c64f25:g:-FsAAMXQ9MVRhdZx I bought material wide enough to split to make two sills. The original, rusted metal sills were removed and aluminum sheet riveted in their place. The rubber was glued to the aluminum.
-
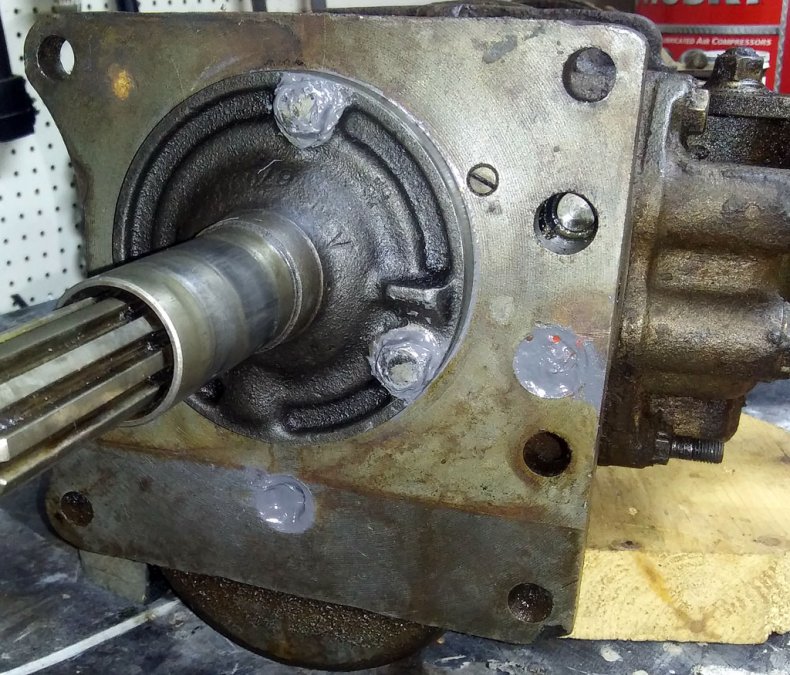
I wanted to make sure the cover didn't leak so went bonkers when sealing it back up with fuel tank sealant. The large gasket should seal the bore the shift rail rides in but I took extra care sealing the gasket in that area. It worked.
-
I run the cheapest 87 that has been contaminated with ethanol and my '48 P15 is happy. More importantly I usually only put in 4-5 gallons to keep the gas fresher. There are no problems with mixing different octanes in the same tank.
-
I'm not worried about the switch, I have a method for quickly bypassing it. Guess this goes back to my aircraft building background where we try to eliminate as many single-point failure modes as possible. But the most dangerous single-failure point in our cars is the nut holding the steering wheel....... ? This guy had it figured out a hundred years ago: You know you've achieved perfection in design, not when you have nothing more to add, but when you have nothing more to take away. --Antoine de Saint-Exupery
-
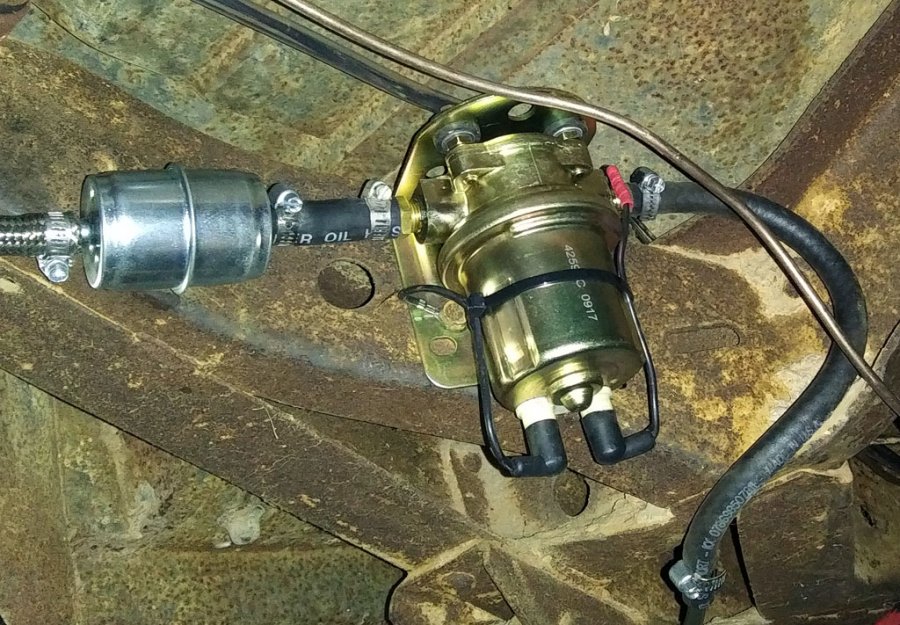
The switch is Ford but there are also generic ones available. Here is the Ford switch I used: https://www.ebay.com/itm/233966503511?fits=Make%3AFord&epid=1817778782&hash=item36797d8657:g:uLIAAOSwzIVZcyS4 I have mixed feelings about the inertia switch, not fully convinced it is really an advantage. It creates a single point of failure in an electrical pump only system. I wired mine with male-female connectors where if it fails open I can unplug the wires and replug them bypassing the switch but it has been reliable so far. If in a minor accident, just reach over and turn off the key and the pump stops. If in a major crash in our old car......it probably won't matter...... I eliminated the mechanical pump...why keep it?
-
Same here except no dash switch. Pump is located on frame near rear axle. The polarity of the car makes no difference, a pump can be wired either way. The inertia switch is a personal decision, I ran the pump for a year before deciding to install one. Mine is on the firewall.
-
All of the classic car policies I've had have been based on agreed value with no funky clauses....that is why I buy them instead of just adding the classic cars to my daily driver policy. I'm one of those OCD types that actually reads the policy. ? I'm not familiar with policies that have stated value or some rinky dink definition of agreed value....I wouldn't pay anything for one of those.
-
Rich, go back and reread my post carefully. I said "due to one being actual cash value and the other agreed value". The F150 (a 2013 pickup truck) is actual cash value and the classic car policy is agreed value. I am very clear on how these two coverages apply. The following is a quote from the definitions page of my policy: "Agreed Value means the value of the vehicle at the inception date of the policy that you and we agree on. You agree that we may change this amount when the policy is renewed to reflect current costs and values." I'm thinking Agreed means......agreed. Now, if a fire consumes my garage and it is evident that the engine, fenders, and all running gear had been missing from my car at the time of the fire and were nowhere to be found, the insurance company would most likely have issues with my claim. But that is an extreme example and doesn't reflect usual protocol. They expect the car to be in at least as good a condition as it was when I submitted photos to them when the policy was written. They actually told me my requested agreed value of the TR6 was lower than market value and incouraged me to increase coverage, which I did with no additional premium. There are some conditions placed on value of spare parts lost/damaged, values may be reduced due to depreciation or wear. This may be what is causing some confusion in this discussion. But there are no statements amending the agreed value of the vehicle in my policy. I just don't see the problem here.
-
Well...this is interesting. I pulled my SafeCo auto insurance policy for the F150 and laid it next to the American Modern policy I buy from Heacock Classic for the Plymouth and TR6 and the liability and medical coverages are nearly identical. There is a difference in how comp and collision is covered due to one being actual cash value and the other agreed value but I don't see any gaps in coverage for the classic car policy. The Heacock policy has towing coverage which my F150 policy doesn't have. I assume the lower premium for the classic policy is due to restrictions on storage and lower mileage (risk exposure) expected with the classic cars. They probably also assume I'm less likely to use the P15 as a battering ram on the idiot who pulls out in front of me than I am with the F150. ? If Hagerty has gaps in their policies anyone with one might want to take a close look at it....but I suspect it is similar to the policy I have. ?
-
I purchased a driver's side glass for my P15 from this vendor: https://www.sandersreproglass.com/ The glass fit perfectly, was shipped securely and I think the price was very reasonable. I got the pencil grind on the edges.
-
One more suggestion....once you get the carb working nicely move that fuel fliter away from the exhaust manifold. When the manifold heats up the filter you are likely to see vapor lock problems.
-

Converting Air Filter from Oil to Paper
Sam Buchanan replied to Sam Buchanan's topic in P15-D24 Forum
The main reason for my "metallic disk" comment was the implication not to use some sort of plastic-like material. It would function fine on the filter until exposed to high temp which could make it distort and lose tension holding the element in place. Yep, purist will prefer the oil bath filter. But I really like having a modern, maintence-free for all practical purposes, filter element that doesn't detract from the original look. It's good to have options. ? -

Converting Air Filter from Oil to Paper
Sam Buchanan replied to Sam Buchanan's topic in P15-D24 Forum
I agree and I've never had a backfire with my car. But can you say with certainty that a backfire will never happen? -
The carb won't "fill" with the engine stopped because the fuel pump only functions with the engine running (unless you have an electric pump). You may not have run the tank dry this morning. You may have experienced a clog in the fuel system or a failed pump. Take the fuel line loose at the carb and put it in a bottle. Disconnect the hot wire from the ignition coil and crank the engine to see if a strong stream of gas is flowing from the pump. I can't explain the white smoke.....losing a head gasket and fuel pump at the same time would be quite the coincidence.
-
This was with the engine running or off? What are you describing as "when it stalled"? The engine lost some power or it quit? You may have a fuel flow issue. The loud bangs may have been backfires as the engine ran out of gas???
-
Maybe I'm just dense, but I don't have a clue what the above quote means.........
-
Our phones in conjuction with common Google photo editing are incredible image takers. I recently finished a road trip to Utah color country and southern Colorado and my phone was the only camera this retired photographer used.
-
Check the manual to see if those three retainer bolts have o-rings or seals of some sort, thinking I recall they do. If those seals failed and disappeared that could explain why the bolts were loose.
-

Converting Air Filter from Oil to Paper
Sam Buchanan replied to Sam Buchanan's topic in P15-D24 Forum
The Kohler filter I used sure looks like a rebranded Wix 42221. The paint can lid is a good tip. Anyone considering this conversion should use a metallic disc so a carb backfire can't distort the lid. -
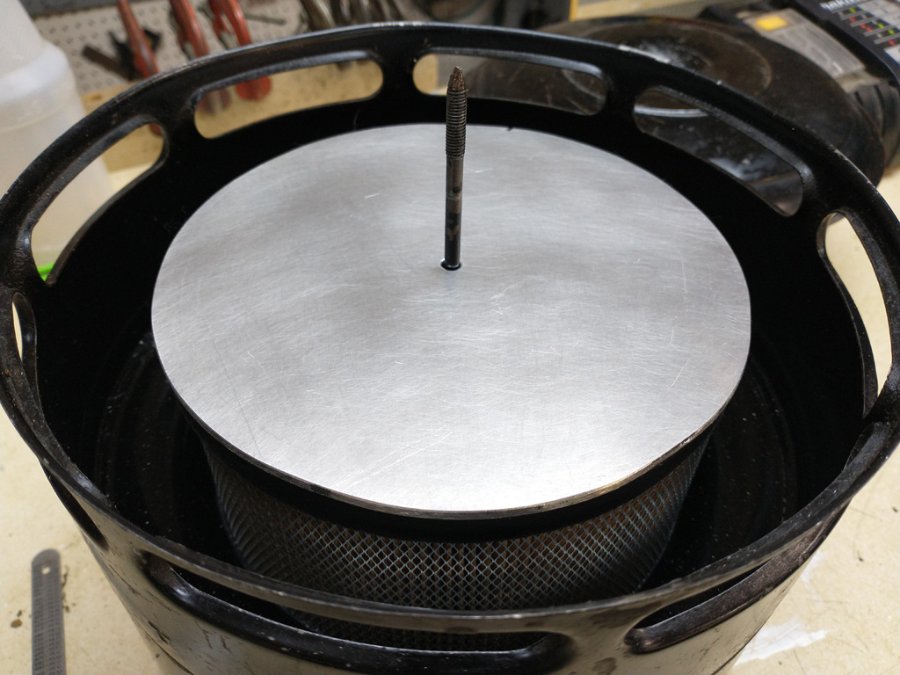
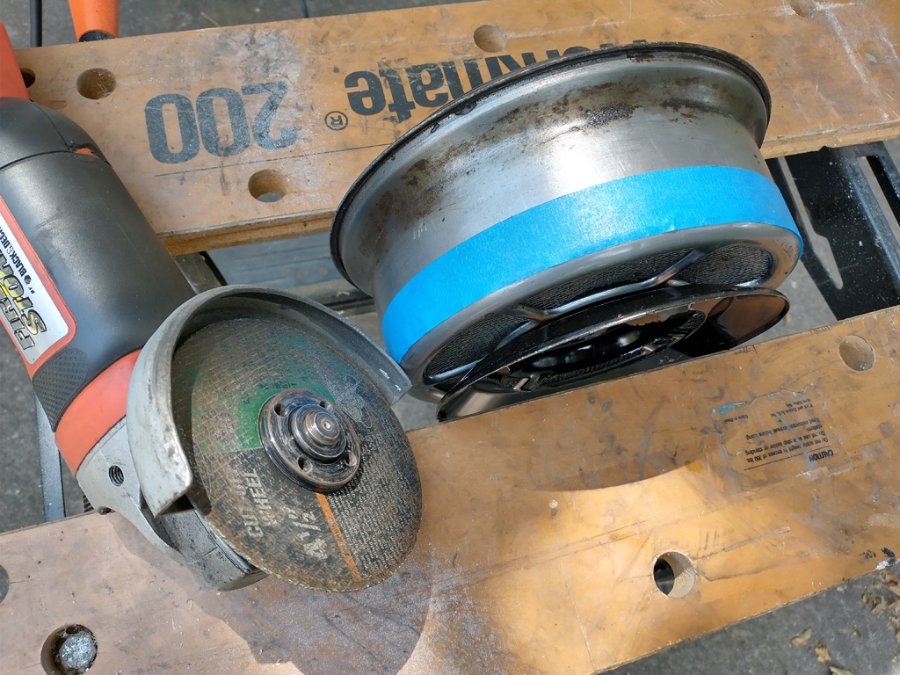
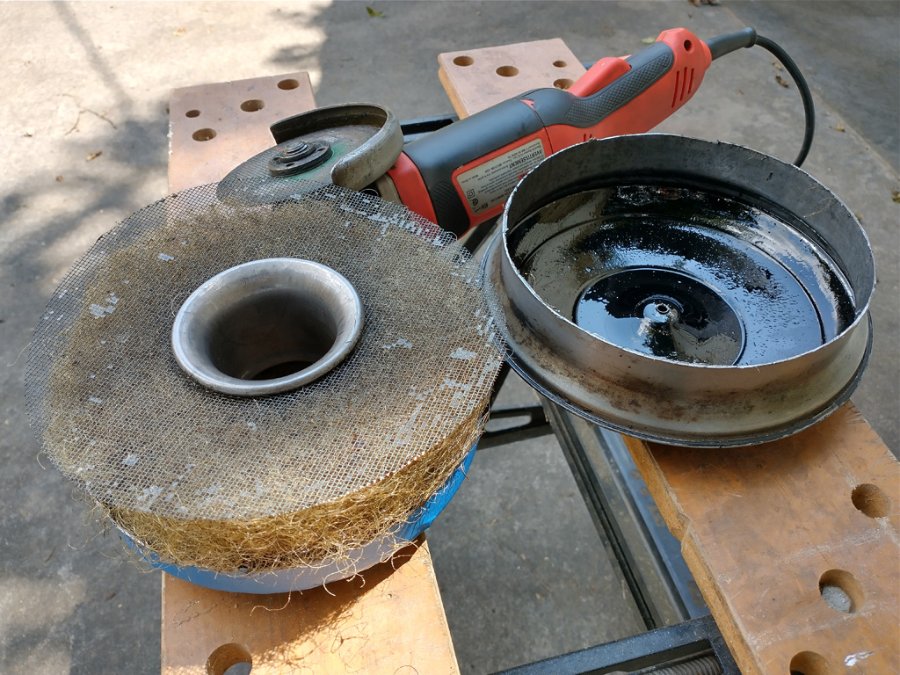
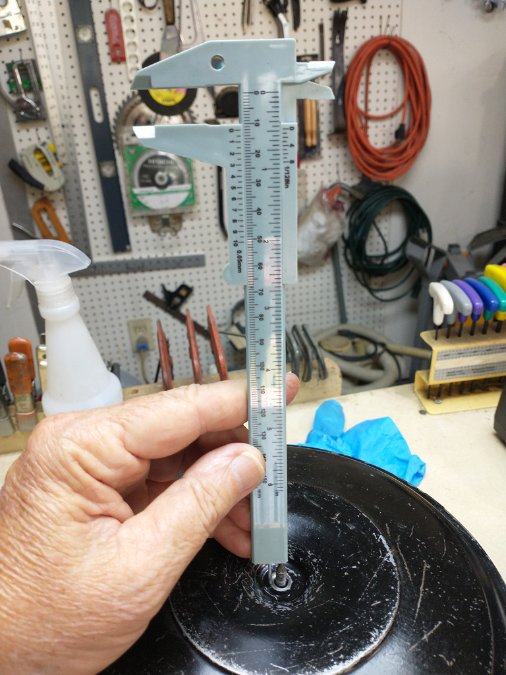
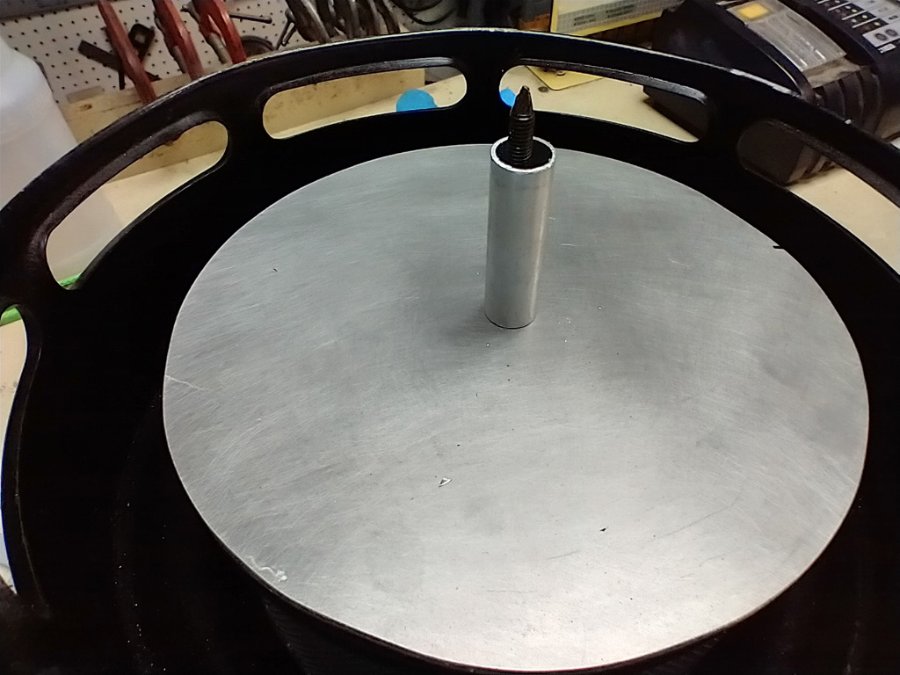
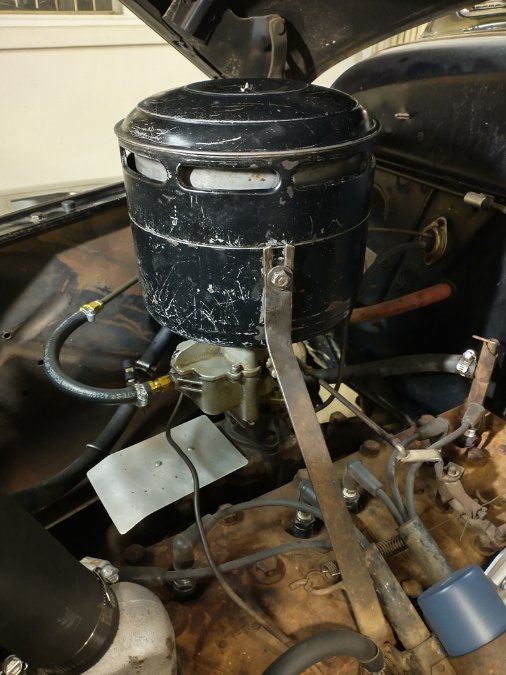
Since my P15 doesn't spend any time on dirt roads, and the oil-bath filter is sort of a pain to service, I decided to convert it to a paper filter. I did a lot of searching in the forum archives but the threads I found were several years old and most of the photos can no longer be accessed. I took photos of the method I used in the conversion so current and future members will be able to get ideas about how to do the conversion. We need a filter element that has the proper diameter to drop into the recess in the bottom of the lower filter bowl. The height of the element isn't critical, I suspect if it is at least three inches high it can accomodate the torrent of air roaring down the throat of the one-inch bore of the carb. ? At my local family-owned auto parts/lawn equipment dealer I found a Kohler filter for some sort of lawn machine that was a perfect fit. A cap for the filter was cut from 1/8" aluminum, but any metalic stock would be fine if it is fairly stiff. The top half of the old filter must be modified to accomodate the new paper filter. I used tape to establish a cut line on the upper bowl. The cut-off wheel easily cut the bowl and the old fiber element was set aside. I put the modified top back on the lower bowl, made sure it was fully seated and took a measurement of the protruding end of the stud. The top was removed, the wing nut run down to the measurement I had taken, and another measurement was taken of the space between the bottom of the nut and the filter cap. This indicates how long a spacer is needed to fill the gap between the cap and filter lid. The top lid was placed in position, the wing nut run down snug and the new, oil-less filter assembly installed back on the carb. This mod retains the original appearance of the filter, nobody can tell there is a modern paper element inside. A test drive proved the P15 is happy with its new filter and it should be good for many years of maintenence-free filtering.
-

My 1951 Plymouth Concord Barn Find....what have i done?!
Sam Buchanan replied to Logans51's topic in P15-D24 Forum
Good advice. I started out replacing fuel and brake parts piece-meal but would have been far ahead (and saved a ton of shipping fees!) if I had just ripped out the entire brake and fuel systems and replaced everything first time around since it all got replaced eventually. Save all the old parts so you can remember where everything goes and take a bunch of photos before removing anything. Like the old Fram commercial used to say...."You can pay me now or pay me later". ? -

Tail Light Reflectors (cheap but effective!)
Sam Buchanan replied to Sam Buchanan's topic in P15-D24 Forum
My first thought was the aluminum tape but I didn’t have any in the shop. I really think bending the reflector into the parabolic shape improves its performance….but I didn’t do any comparisons. Anyway, it’s a simple mod if you happen to have the lights apart.


