
Leaderboard


Popular Content
Showing content with the highest reputation on 06/23/2021 in all areas
-
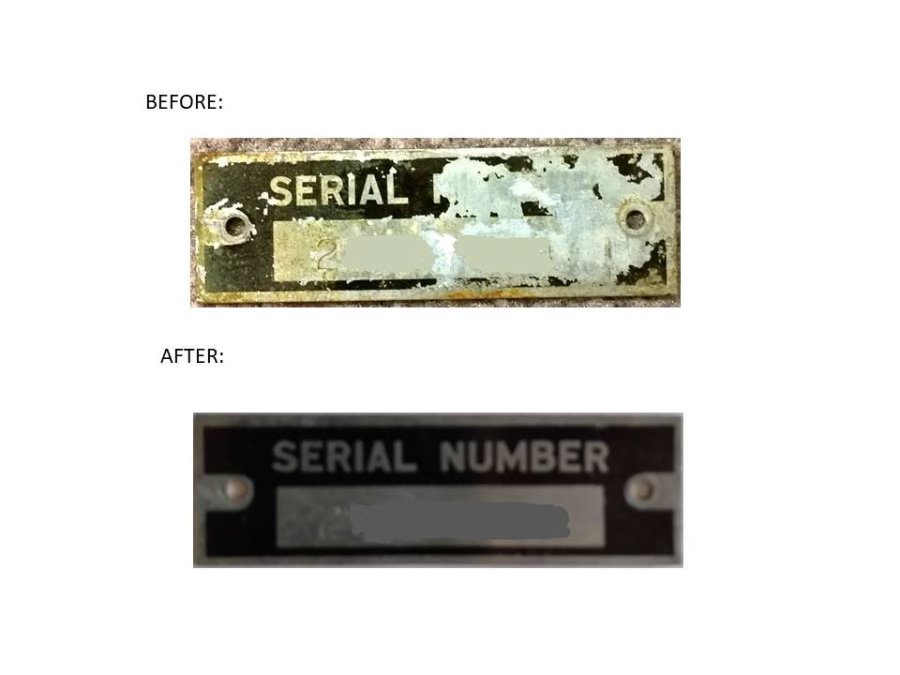
Here are before and after pictures of the P15 Serial Plate restoration:
 5 points
 -
5) Use a paper cutter to cut out all the decals using the guide lines. The guides were designed to match very closely the size of the plate for ease of installation and centering on the plate. 6) Preheat oven to 300 F 7) Put decal in water for 10 seconds ? Leave decal out water for 45 seconds 9) IMPORTANT NOTE: Do not use the glue that came with the paper. For some reason the glue causes the decal to not bond properly to the plate when baked in the oven. 10) Place decal face down on plate 11) Remove paper from decal and carefully center decal on plate 12) Carefully rub the decal against the plate to remove any air bubbles that might have formed. 13) Place the plate in the 300 F oven for 2 minutes 14) Remove and inspect for bubbles in the plastic film. Carefully use a pin to puncture the bubbles which will allow the toner on the decal to “seat” on the metal plate when put back in the oven. Gently press down on the bubbles. 15) Place back in the oven for 12 minutes. It might be good to check the plate again after 2 minutes to recheck for bubbles. 16) Remove from oven. 17) Under hot running water, carefully remove the film from the plate. Peel the film up at 90 degree to plate at a moderate pace. 18) If the plate is not satisfactory, use Brake Clean to remove all the black toner from the plate. Repeat the above process. 19) If the plate came out OK, you must do a final cure of the plate. Preheat oven to 400 F. 20) Place plate in oven for 15 minutes. 21) Inspect the plate. Minor imperfections can be touched up with Testors Gloss Black paint (#1147)3 points
-
I have been looking for stainless steel fender welt for a while and when I did find it was way over priced. Dennis Carpenter ford restoration parts has it made up and looks great and is priced right. I know we are Mopar people and don't like any other bands of parts on our cars, but this a after market part done right. Dennis Carpenter 800/476/9653 part # 48-16070-SS1 point
-
Julian's rod shop has a how to on fender welt installation. Thier's are vinyl but the process is similar. Also a 3 or 4 inch loop of masking or painters tape every six inches or so on the non bead portion allows for easier adjustment as you tighten the fender bolts, gives you something to grab onto from under the seam instead of pushing down.I found working from center out alternating ends worked well for a snugging sequence. Don't forget British car parts places also as Austin Healey, Triumph, and MGA used stainless bead welting also. It's a bit thinner so a bit easier to form. I used a tapered pint beer glass to help form the compound curve at the rocker panel ends.1 point
-
Didn’t realize their value. I have two sitting on the shelf.1 point
-
if the curve is a bit sharp...the stainless will tend to roll a bit due to the split in it for the spline1 point
-
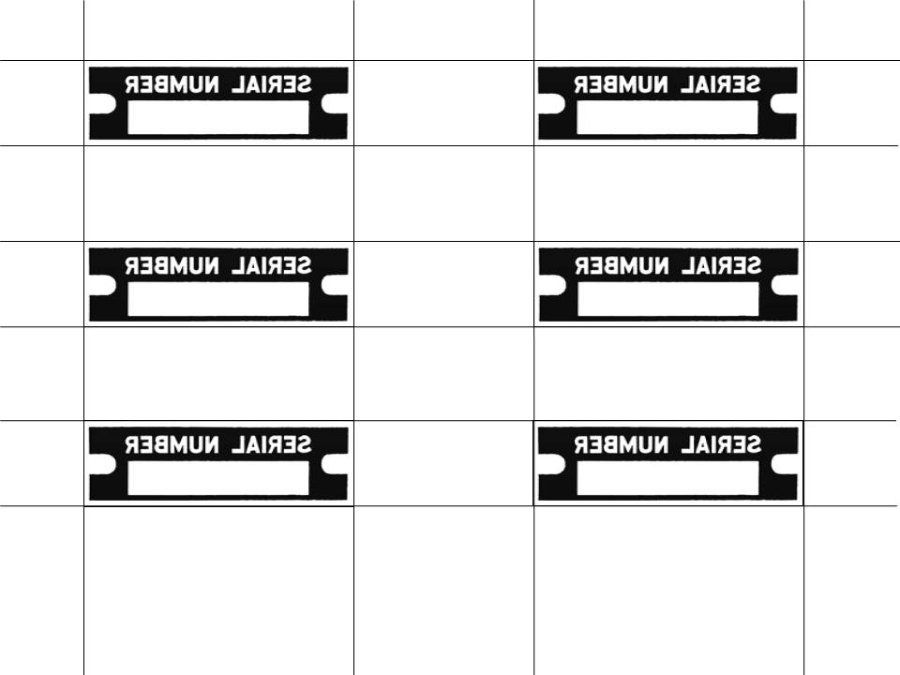
4) Print below form on a Laser Printer. Make sure you set the printer for glossy heavy weight paper (120g to 185g) and manual feed. There are 6 decals so you’ll have extra’s if you make a mistake and need to do it over again. Note the image is reversed, since the decal will be going on the plate face down.
 1 point
 -
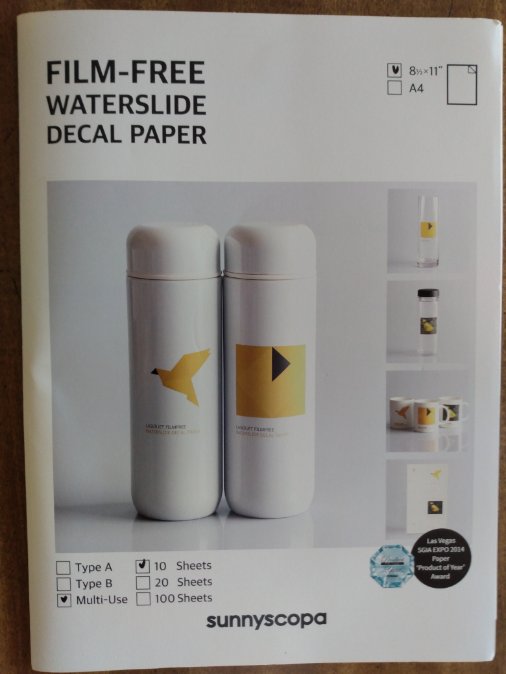
3) Obtain Sunnyscopa Film Free decal paper for Laser Printer. Unfortunately ink jet decal paper does not work, so make sure it’s for Laser. I bought mine from Amazon. Pictured below is the package.
 1 point
 -
Old age sucks,and unfortunately there is only one cure for it.1 point
-
Booger, Yes, that vacuum port is there and working.1 point
-
As Rich says, get a parts book and look up the number. There is a chance that I have that number in the "standard parts" section of my online database: https://www.ply33.com/Parts/group181 point
-
Well I checked the Flywheel and everything was tight and did not appear damaged. Clutch and Bell housing was also good. I did see gear oil had splashed a little around. So I am going with pulling the transmission. It has to be it. I trouble Shot everywhere else. The tranny is about 10 years old and I bought it used. It had a high clutch and the throw-out spring broken. It drove okay though. Maybe it damaged something else or the previous driver could not drive non-synch tranny. Its leaking in several places anyway, so I guess a rebuild is in order anyhow. Thanks everyone for your awesome advice. I let you know how it turned out. Cheers Curt1 point
-
Odds are this is facing each and one of us as we age and or meet up with unfortunate events.....I wish you good health, peace of mind and extended sympathies for the tough decision to sell and go to the next phase of life. Do not bow out of the community. Knowledge is the key to participation, not ownership.1 point
-
The cab over with the lift rig needs more info. Wonder what it's job was?1 point
-
Saw this today and it made me think of tom’sb2b only made me think of him cause he does landscaping, lol.
 1 point
 -
sounds like a fun fishing adventure......been a long time since I been fishing.....since moving inland some 250 miles....I do little fishing...salt water is always fun fishing....like the usual sea breeze you get while out cranking a little bait...1 point


