All Activity
- Past hour
-
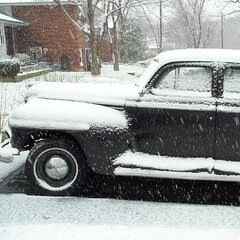
what is impressive is not that the Dodge is transporting them but the manner they were stacked..stayed in place while some poor slob lashed the chains with the binders...secondly who was the poor soul tasked with the release of these binders.....
- Today
-
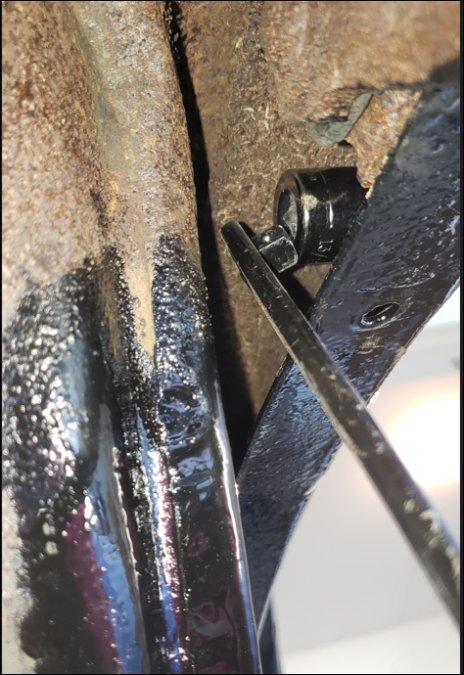
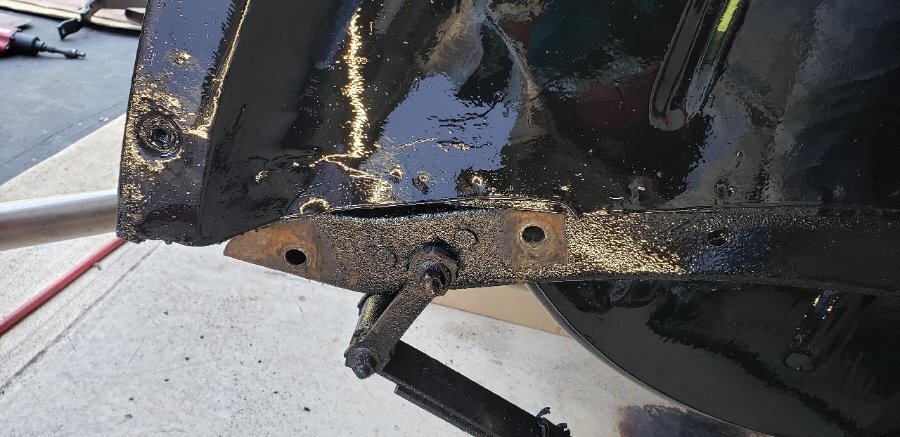
Just an update on getting the bumper bracket bolts off. You're correct in that there was just enough room to get the job done on the spare tire well side. I was able to slide a socket up onto the bolt an then use a thin serpentine fan belt tool to hold the nut while using a breaker bar on the other side (see picture). 3 of the 4 bolts came out fine, but one bolt snapped in half.
-
@Ivan_B Yeah I'm just guessing on the mileage. When looking at the odometer it looked like it had rolled over and the pedals were very worn. I don't know for sure though. I paid 2k for it. Looking back on it it does seem a little pricey for this considering the engine was locked up and the floors are bad. The body is in good shape though.
-
@keithb72.0613 I believe. I measured but forgot to write it down. That's below spec though...
-
Pretty impressive!
-
Seriously? For a 50-s engine with no repairs - it is probably done. Very sorry to hear that. I am just curious, how much did you pay for this car, $2-3k?
-
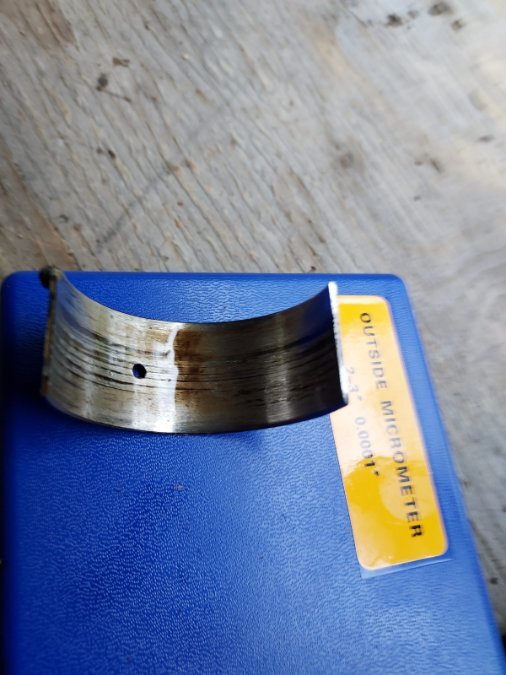
Out of curiosity, what did #2 journal OD measure?
- Yesterday
-
I meant to ask what engine do you have in there? Also wanted to know your plans on relocating the rear forward. About 30 ish years ago my father and I converted a carnival truck to a dump and moved the rear up about 6’. Used the cut off frame rails to make a hitch. Drilled all the holes with a 1/2” electric drill motor. Took some layout work but turned out fine with no tracking issues. My 76 year old neighbor just replaced the Frame rails on his tri-axle dump and drilled all holes by hand as well(did one rail at a time) and turned out perfect.
-
After repairing the structural damage to my friend's 5x10 trailer, next is repainting this relic from the 80s with Rustoleum and foam brush. We have been dealing with alotta rain so this li'l trailer is back outside as higher priority projects are in the barn. Tongue, bulkhead, top rails, and tail ledge were wire cup brushed, washed in Dawn + water, dried off with a towel during a 6 hr sunny afternoon, then the breeze ran across it as I stirred clean metal primer...1st coat went on in the shade nice'n thin, smooth to touch when checked 24hrs later. 2nd coat was applied in shade with winds 10-15 mph, and by 24hrs later, it had dried a little rough so I buffed with wet scotchbrite pad and towel dried 2x. It kinda felt like that primer was drying on the brush cuz of the wind as brush dragged a bit on the surfaces...I'm guessing the rough texture was teeny dried balls of paint that the brush was rolling off of the 2nd primer coat as it was skinning over rapidly due to the gusty wind. It did not take much effort to buff them off, and the 1st coat of Hunter green went on smoothly thereafter...though the skies spritzed for a few minutes right as I was finishing. That precip beaded up on the horizontal surfaces after coating, so it looks like I'll be wet sanding before 2nd top coat. The trick here is to move fast with the brush without slinging paint all over creation. Trial and error has taught me to dip foam brush 1/4 into paint then dab globs of paint quickly in parallel stripes to the desired brush strokes in a manageable area, then tip brush back and forth to spread those globs around until brush just starts to drag. Putting paint on too thinly with house painting brush strokes will not cover well as brush will drag unevenly. Dipping too much paint onto the brush makes a mess and the foam will deteriorate faster, pulling off of the handle because of the extra weight. With more use, the paint eventually wicks up the foam...I grip the brush by the foam at the base of the handle, kinda like an ink pen, and by the time paint starts to get on my fingers, I know that I do not have much time before the foam might start sloughing off into the paint I'm trying to spread around. It's looking like I'll need less than a quart each of primer and green paint to finish this trailer, which tallies to a 50 buck paint job with no overspray to deal with...I can live with that
-
I bought a bunch of rubber O-rings at Habor Freight in a kit they sell, and found a couple that fit the windshield arms. Bob Drake also sell these garments may also have the clips. (800-221-3673) (www.bobdrake.com))
-
Here


-
I reckon it has to do with elimination of metal-to-metal contact to minimize vibration in the driveline, which could have an abrasive effect on the mating surfaces...over time, this might result in the bolts holding things together having reduced clamping force...that could be problematic. The other side of the coin is the thin paper gaskets isolate the vibrator in the engine compartment horn so it will actually work properly. I believe more modern powertrains eliminated the paper gaskets as material technology and manufacturing methods have improved over the decades.
-
Bad news guys. I was measuring each journal and I got to #2 and I think the bearing is spun. I think the tab is broken. The crank has two score lines going around it and they get pretty deep on the top of the journal. The crank is toast it seems. Pics below. So I could either drop the crank and maybe get it machined, although my measurements were on the low side of normal so idk if any more can be ground off? Or, put a new engine in. I don't have a hoist or engine stand and I'm doing this in my back yard. The car is on plywood but other than that it's just grass so it would be hard to move anything lol. That's the news. I'm not surprised honestly. The engine seemed pretty worn out. Big ring ridges at the top of the cylinders and it probably has close to 200k miles on it.


-
Hey! I'm from Germany too. Got an 1950 Imperial.
-
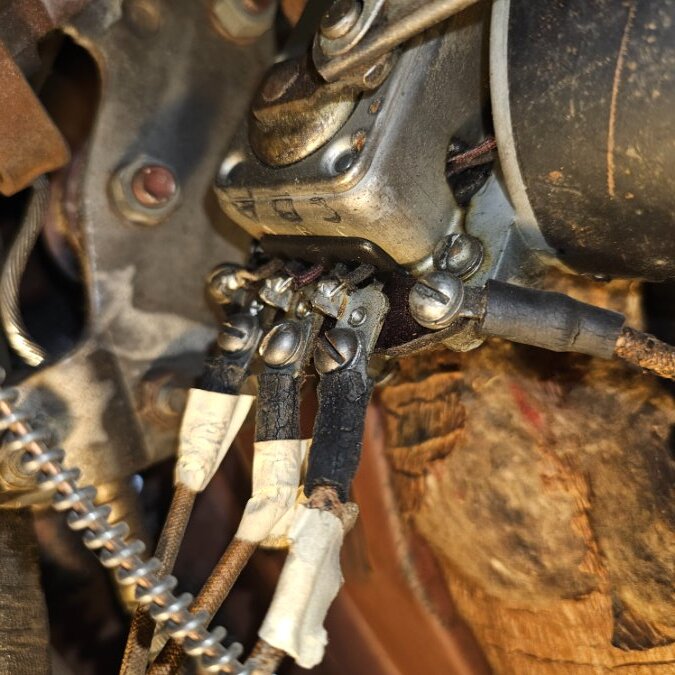
In the picture going from left to right the contacts are marked as A, B, C. Go to your service and parts book for your car adn then go to the wire diagram. It will show you which wire is connected to your wiper switch and the power source. If you do not have these basic two manuals then you will need to have them so that you can understand how your car is wired and how to fix items that need repair. each of the wires will then connect back to the wiper switch and each terminal is also labeled as A,B or C. you will have to trace the power source from the switch. Rich Hartung Desoto1939@aol.com
-
How to operate R-10? Non-Electric Overdrive...
Booger replied to bamfordsgarage's topic in P15-D24 Forum
Those of you who are lucky enough to have an R10 OD should have the Randy Rundles Garage Tech. -

Ist jemand aus Deutschland in diesem Forum?
GTfastbacker replied to Pearsebln's topic in P15-D24 Forum
41 Dodge Business Coupe located near Leipzig Joe -
The truck engine has a 3 3/8 bore and the stroke appears to be 3 3/4. assuming I have a piston at BDC. All I can make out on the head is D140 over 1139403, not 100% certain on the 3 and 0. More to follow on the combine engine when I get her home which will be in a few weeks. Cheers
-
Found a key switch the fits in the dash for 12v. Also on a 39 the wiper motor power feed wire is witch one on the terminals on the engine my shop manual has colors but my wires don't lol
-

How to operate R-10? Non-Electric Overdrive...
kencombs replied to bamfordsgarage's topic in P15-D24 Forum
Well, IMHO factory with a mod or two is the way to go. There is a way to implement full auto with an override that allows an electrically operated downshift without a full throttle lunge. Especially handy when anticipating the need to pass or before actually lugging down on a steep hill. Much better for everything to avoid full throttle whenever possible. Simple switch that mimics the throttle switch. -
Beautiful cars I'm not to worried about originality engine wise based on this car being swapped with a newer 53 dodge engine.so I decided to get am 12volt conversion the eventual engine swap will need it regardless.im thinking I may just put a switch to the alternator exciter wire and the coil without the key. Also trying to figure out witch wire from the sending unit to put the 6v seltep down in
-
This is a no go. The Ford drum is .48” too deep. So the shoes hit the edge of the drum .5” before the face hits the hub. Spacers maybe, but would need one that is hub centric for the wheel and hub. Plus long lug bolts… Back to Rock with this… bummed out… Steve
-

How to operate R-10? Non-Electric Overdrive...
Loren replied to bamfordsgarage's topic in P15-D24 Forum
In my mad mind there is only one way to operate an Overdrive, that is as the factory intended. The thing is called Automatic Overdrive for a reason. It works so well without drama when installed properly I just don't understand why anyone would jury rig one, except ignorance of how to wire one properly. I've never stopped looking for easier cheaper cleaner ways to do it right. Throttle switches are way over priced from suppliers who think they have you over a barrel. At $125 I think that is obscene. I found a seller on eBay who had hundreds of military surplus bus door switches that do exactly the same thing as the reproductions and even looks the same for $6.50 ( I bought 10 for gifts to friends ) The reproductions are really floor switches for Ford products anyway. The MoPar switch is smaller and fits on the carburetor. Those can be had from the Studebaker guys for around $35 but you need to make a simple bracket and rig a lever on the carburetor throttle ( or find an Overdrive ready carburetor ). My latest and greatest find is a small switch with a pull cable from a Nash/AMC for $21. I really like this one as it is so clean and simple. Since you connect it to the lever that comes from the foot pedal its action is really smooth and effortless. You can change carburetors and manifolds without re-engineering how you trigger the switch. Then there's the relay, another obscenely priced item at $125. If you have changed to 12 volts one of the little Bosch style cube relays will work nicely for about $2.50. I like my 6 volt cars and found the same thing made in Germany for 6 volt for $18, but I am told the 12 volt version will work with 6 volts if you get the high amp version. The last thing is how to wire it. If you have a shop manual there's a description which also has the color the wires should be in there. Seems to me the only valid reason for not having a shop manual is illiteracy ( trust me I am not joking on this. Literacy is still a major problem especially in auto repair ) I have found that sometimes the Plymouth manual is short on an explanation and photos so I have all the MoPar manuals for the era of my Plymouth. But then I love shop manuals. I am the person your Mom told you about who reads technical manuals for entertainment. lol Anyway that's my two cents. If it works as intended you are not dependent on "Driver technique" and you can let anyone drive your car ( but why would you let anyone drive your car? ) -
if you cut through the entire cable and then cut the internal wires to short then you might have a pbm with getting new wires attached to the switch. I stil have the 6v positive grd wire system in my 39 Desoto. Also remember that if switching to neg ground how you need to connect the wires to the coil. The switch in your 39 Dodge is just completing the electrical circuit to provide power to the coil and then to the dizzy. I have owned my 39 Desoto which is a sister car to your 39 Dodge for over 35+ years. I have not switch to an alternator and still have the 6v gen and starter. Might consider converting to a 6v positive grnd alternator and then use a converter to power anything that you need for 12 volts. This is a lot cheaper and then you still have the originality for your 39 Dodge. Just my 39 cents worth of input. Rich Hartung Desoto1939@aol.com


-
I see that the question I was thinking of asking was already answered, years ago. Since it’s so thin, what is its purpose? I installed my transmission more than 40 years ago, and do not recall if I had that gasket. So wondering if I should pull it back out, and make sure, or make one. Was the thickness possibly determined by some sort of run-out measurement? (I know, I should look in the manual...)