rb1949
-
Posts
770 -
Joined
-
Last visited
-
Days Won
4
Content Type
Links Directory
Profiles
Articles
Forums
Downloads
Store
Gallery
Blogs
Events
Everything posted by rb1949
-
Good reason for cruisin'. Time to enjoy, nice job. Don't let drool marks stain the paint.
-
Bowling sounds better.......at least the ball comes back to you. Sorry, nothing convincing yet. Obvious truth, you're removing something that won't be re-used. (rubber) Hack it out.A razor knife would stay sharp for about 6" on this hard stuff. Cutting on the outside seems wrong, the trim is in the way. I do believe pushing the glass out is correct. Re-install is done using the string on the inside. Some say easy, some grunt. No pictures of the trim yet to visualize. Not even some for sale. None of the limited 49'er's here are joining in with experience. But enjoying and learning from the conversation. There has always been a tip or clue here to get the job done. Edit: already read the Steele tech sheets. This stainless trim is not coming out, no matter how easy they say. But it does say put back after glass is in.
-
Already worked on horn problems, and the relay on the firewall. The armor wire goes to a box on the fender well. Might be something called a circuit breaker/resistor, part of the ignition/tranny circuits. Have the owners manual and a copy of a shop manual, but it doesn't cover everything. Looks like the e-brake should illuminate the map lite and turn signal indicator bulb. Nice out, get busy.
-
Still on hold. Yes, the trim looks nice. Still can't 'see' what I up against as far as how it fits. Spaced 'tabs' that go into the rubber? Lots of lubricant. Poke it in the rubber before or after. (before seems like it would help hold the rubber in place, especially on curves.) Hesitant tackling a DIY, then having nowhere to take it should it be a problem. Old posts had people getting glass cut for a fair price, but not here. That old hard rubber would take a week to cut out. The debate continues. Any input welcome for the novice.
-
The instruction that came with it described how to remove the steering wheel and replace a SWITCH.(??) My words above are what I found on how to turn the key and press the little button, and if that was the proper method for changing the cylinder. Process confirmed, thanks. But this is a weird '49!! Better leave cable wire alone and grumble. Now curious, that wire goes to a box on the inner fender well, what's that for? (It's next to the turn flasher). Will have to learn when entering vehicle in the dark to turn light switch and illuminate ignition! Better test each one of those lamp sockets now, that makes 6 of them back there. Small #55 bulbs. Another delay. Hey, also noticed the e-brake also has a switch on it. Another light somewhere?? Lot of goodies in there, lotta questions. Tired of fixing, anxious to assemble. Hope for successful follow up report.
-
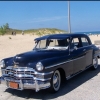
Wish Ol' Mr. Chrysler could see it now.
-
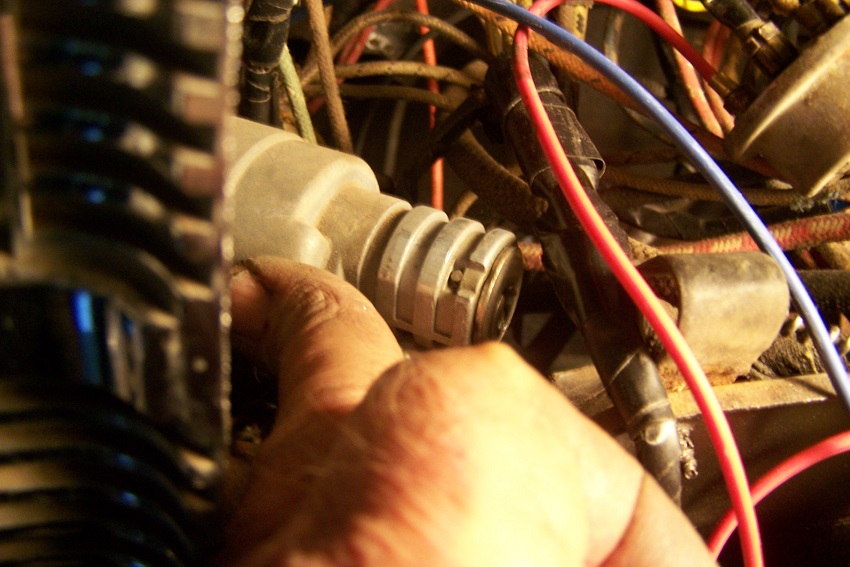
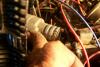
GOT IT!! Not until I drilled that dang hole larger was I able to actually look up there and SEE the Phillips screw. The E brake handle had been getting in the way, preventing a straight shot to the screw. So must have an original switch. Stubby little thing, a few turns and it fell out. Finally, now I can provide a tip to the 49 Chrysler people. Do not REMOVE the screw, just loosen it. The screw is in a slot, not a hole, to slide the switch in and out. The screw is in the switch during reassembly, once in the slot, just tighten. Thank God for that idea. I'll also retract my statement about no armor cable. It's there. I was looking for cable, but it's only a short piece coming thru the firewall grommet. Can some human, with common sense and no Chrysler engineering mind, please post a logical reason/purpose for this cable??? For one wire??? It is insane. Wish it were easy to just chop it off. OK, now yank on everything to get it pulled out to a workable location. Almost time for the Grand Finale. Help PLEASE. Remember I've never done any of this stuff. I'm replacing the cylinder, not the switch. The new one is here. Directions tell how to get a switch out of a steering column?? HA. Nothing about changing a cylinder. There is a button to press. The button is about 11:00 position? Same on new cylinder. Picture of mine is attached. Turn key to "run" only and press in button and cylinder comes out(?) Try to position key in new cylinder in similar position and slide in place? Button holds it in. Your wisdom and experience is highly appreciated. 4 Band Aids yesterday, only 2 today. Will look like the Mummy soon. If this last item is successful, should be able to start reassembly. Then you'll be able to see my new paint too. Edit: forgot, a bulb to light the switch. And what makes this bulb light up to see it?
-
What vehicle is this? You were able to get flat glass cut? Nobody here will cut, say it's cheaper to buy online. And nobody will do the installation on a '49, it's "too hard" because of that exterior stainless trim piece. They want "quick and easy" jobs to make money. Where's the people that don't mind working?
-
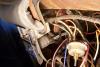
Best I could see from the backside there is no screw up there on the bottom of the switch. Options.....it's not the original '49 switch?? If not, what the heck is holding it in there. I only see regular wire to it, no special cables. Here's the pix if that helps. Plus there is one of those tiny push in bulbs next to it. What good would that do? Still annoyed, and another band aid.
-
Sorry, this is not easy. I have poked up in there with a Phiilips and have yet to feel any screw to turn. Obviously can't see a thing up there by looking in the tiny hole, so don't know what I looking for anyhow. Remove the screw. How on earth would you get it back in?? Thought about removing that tiny section of chrome dash piece which the switch is attached to. But there is probably a screw in the far upper left, impossible to get to. Ordered a cylinder, may not get to use it. I'm annoyed at the moment.
-
It's attached to some kind of bracket?? There is an access hole underneath, but the switch is mounted at least 1 1/2" above this hole.Not close as your picture shows. Can't see anything trying to look up in the hole. Loosen screw, don't remove it? Could insert a screwdriver up and try to feel if it grabs a screw. Not finding anything pertaining directly to the '49, which has a lot of weird things. Wishing for the way to just release and slide the cylinder out the front. Replacement cylinders are cheap, entire switches are not. edit: spotted photo indicating that is the access hole to loosen a "screw. Guessing it may not be a bracket, but a molded part of that dash piece on the back side.
-
Chasing bones can be as frustrating as an old car project, or just as rewarding.
-
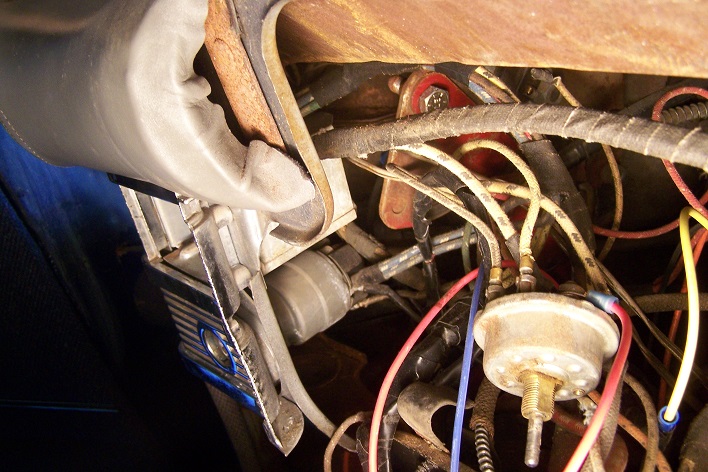
Back again. Partial re-wire seems to be working, Got detoured by repainting the cluster housing, and then the dash (in the car). Also repainted all gauge needles. Spiffy! Had to drill screws to get vent flap out for new rubber seal and drain hose. Would like to replace ignition cylinder, but switch is hidden enough so can't see anything. No bezel holding the switch in? There's a trick to this I'm sure. Any experienced clues or photos welcome. 4 band-aids on scraped fingers.
-
Are these worthwhile? https://www.carpartsdiscount.com/catalog/chrysler~windsor-series~49.html?3593=314519
-
Learning as I go too, same wet project on a Chrysler. Search for and order the rubber flap seal. Decided it was better to remove flap to replace rubber. Remove linkage rod. There are 4 screws inside the flap, behind the screen holding it to the hinge. Only loosen, do not remove. Mine were stuck, and had to drill them out. Flap & Rod will lift out. That's when, by accident, I noticed the 2 nipples in there, but no hose. Had no clue what it was for, learned it was the cowl vent drain, the lower one an elbow going thru the firewall. Installed piece of 1/2" ID plastic tubing. Longer tube outside to drain down. Will check rod adjustment so flap closes tightly. Best we can do trying to keep water out and enjoy the flap fresh air. Report on your progress.
-
Holy Cow, no Mr. Mopars around here for windshield help. No locals cut glass. Cheaper to buy online. No comments yet on anyone else having that exterior stainless trim. One reference that knows how, won't do it because of that trim piece. Too much work(?) I would probably screw it up big time. Could opt for rubber only, and pitch the trim. The newbie is frustrated.
-
Reviving an old topic, a newbie like me did NOT know anything about a cowl vent drain tube. In replacing the cowl vent gasket on the '49 Chrysler, it was by accident I noticed 2 metal nipples in there, but no hose to attach them. A fellow member tipped me off what it was for. A plastic hose has been installed. Next will be a piece of hose for the elbow coming out the firewall to drain down. Strange discoveries, but we learn as we go.
-
Good number for a used car. You're next?
-
A reply from somewhere else......... There is a simple way to get the 12 volt meter to work on the 6 volt ignition system. It requires a battery from a motorcycle, dry cell from a light, whatever has 12 volts. Connect the power wires from the tach/dwell to the 12 volt battery, then, add a ground wire from the 12 volt battery to the engine, and connect the sensor wire form the meter to the negative post on the coil. read dwell/rpms, set accordingly. The power supply from the 12 volt battery will NOT interface/interfere with the 6 volt system. The ground wire from the 12 volt battery to the engine proper only completes the READ circuit on the meter, the two different voltage systems remain separated. Dwell meter/tach reads correctly when connected in this method.
-
There is a 5 Guys here. Never been. Brain fart, it was In n' Out, not Hot n' Now. Couldn't remember earlier, FudRuckers (sit down). I always get 3 White Castle Sliders to eat in the car on the way home from morning doctor appt.
-
Car projects keep you busy overtime, so we occasionally dash out to get a burger at the fast food joint. We've got the usual BK, McD, Rally's, Arby's, and infamous White Castle. For some reason I always bypass Wendy's. I remember Hot n' Now from out West. We don't have a Sonic within range. For 50 years, there is still a Hot Dog Drive- In, carhops and tray on the window. What's your preferred place and choice of burger?
-
Something mounted in the floor seems like it would get in the way more than it would be used. Unless it were close to a wall. Get classy and install an electric winch on the back wall?
-
Bouncing up to 70-80 sure feels good, and lots of outdoor activity, including the car. Poked some tomatoes & peppers in the garden back in April, doing OK despite some cool evenings. Finally ready to transplant some tomato seedlings. Beach season is sneaking up. Can't wait, stocking up on beer.
-
File Name: 1949 CHRYSLER INSTRUMENT CLUSTER GASKET File Submitter: rb1949 File Submitted: 07 May 2016 File Category: Instructions, Manuals & Templates This is a PDF template for the one piece paper (fiber) gasket for the 4 gauges and odometer housing that mount to the rear of a 1949 Chrysler Instrument Cluster. I believe 1950 used the same cluster. Made to keep dirt, dust, etc. from getting into the gauges. Cut with a sharp instrument to avoid 'tearing' the material edges. Punch the screw holes slightly lager than the screw. Print the template at 100%. Click here to download this file
-
Some 49 pictures. https://www.flickr.com/photos/cwededekind/7441051784/in/photostream/