


James_Douglas
-
Posts
1,923 -
Joined
-
Last visited
-
Days Won
23
Content Type
Links Directory
Profiles
Articles
Forums
Downloads
Store
Gallery
Blogs
Events
Everything posted by James_Douglas
-

Fluid Drive, Conversions, and some thoughts on it.
James_Douglas replied to James_Douglas's topic in P15-D24 Forum
Of course I could...but...I do not want to go to any kind of floor shift and the electric power steering assist makes a column shift a non-starter. Hence a push button 727. Also, for the weight of the car I was interested in the gear splitting that the GV unit gives you. Just an overdrive is what I have now so why bother for just that. Also the 1963 and 1964 727 has a REAR pump on it so it will compression stop going down a hill. The real nail in coffin however was the technical discussion of the thrust bearing issues when these engines were subjected to higher off the line torque of a torque converter. Lastly, one more thing. Since we will be driving this car a lot of miles...gas mileage is an issue. A non-lockup converter is going to slip about 6% while a fluid coupling is going to only slip 1% to 2%. If we do a lot of miles...better mileage with the fluid coupling. Of course with the 5000 pound weight, I would have liked the torque multiplication to get the thing moving...but...I guess people will just have to wait as a slooooly accelerate! Everything is a compromise and in the end I felt the benefit for the costs did not win out. Not to mention my back sucks and that would be a fair amount of work. James. -
Yep.
-
Fluid Drive, Conversions, and some thoughts on it.
James_Douglas replied to James_Douglas's topic in P15-D24 Forum
Learn something new every day. Any photos of the parts it takes to do this? James. -
A couple of areas. 1. The main shaft is such that second gear rides up against a machines lip in it. What happens is the face of that lip wears and when you put the gear on even with the thickest snap ring you can find it can be out of spec. The shafts are near impossible to get. What I did was take a NOS second gear down to San Jose to a company called Babbitt Bearing Company (they no longer do Babbitt). I had them Industrial Hard Chrome the rear face of the gear so that when in place the clearance fell at the low end of the specification. The second gear has been quiet as a mouse. 2. The balking ring in the OD. The ring and the part is slides on works by friction. Over time the ring digs a hole into the balking gear. When that happens the friction is no longer within specification and the OD shifting can get flaky or just not work. Mine was junk from the seller who kept trying to tell me everything was fine. You can go read my 15 years old post on that. I purchased new ones from Frank Mitchel is cost about $400. One could weld up the gear and then have it re-hardened over in Oakland at Garner Heat Treat, Inc. The ring is another story as any heat would really screw it up. I would have that hard chromed to build it up. You could have the gear hard chromed to fill the groove as well. The issue with the gear and the ring is that the "Surface Finish" is all important to the friction the factory used to make this part work. One would have to test a spot that did not wear to get the surface finish profile so that the final profile was the same. I will be rebuilding my spare OD soon and I will have to deal with both of the above again. Everything else is fairly straight forward. Remember to pull the little plug cups on the case where the dentent balls ride as dirt gets in there and makes the shifting hard. My "rebuilt" unit had not had that done. Good luck, James.


-
I got one 15 years ago from someone I will not talk about...it was junk inside and did not function. I went through it myself, replacing a half dozen parts that were out of spec and it has worked every since just fine. I live in San Francisco out off of Lake Street. I also have a place in Winters and I have a lift up there... Yep, driving in this town is so much fun in an old car!
-
Hi All, After looking into my specific needs for the upgrading of the 1947 Desoto Suburban, I have decided to not change the current arrangement of using a Fluid Coupling, the Three-Speed and the Borg-Warner overdrive. I had thought about buying the plate from the Gary Stuaffer to use a Torqueflite in the car as the push button version with a rear pump would work well for my cross USA needs. However, I ran across an interesting article that has lead me to abandon that idea. Buried in the SAE Conference Presentation when Chrysler came out with the Powerflite the lead Engineer stated that they purposely picked less stall speed on the converter as they had issues the engines thrust bearings failing. It is interesting to note that when they came out with the Fluid-Torque drive that they changed the design of the rear main bearings and insisted that all Fluid-Torque drive cars get the new not the older designed bearing. The SAE presentation did not go into much detail other than to state the increased offline torque was hammering the bearing. With my heavy car, I don't want to go there as this car will see us through as out MAIN car and also driving around the USA in retirement. Yes, there are some things that I could do to "help" the thrust bearing issue, however that plus the other issues in my specific case tell me to leave well enough alone. The total costs to convert, and do it will all new parts in a first class way, was starting to hit in the $7K to $9K range. A fully new 727, plus the adapter, plus a custom torque converter to make sure the curves work for a six, plus the Gear Venders Overdrive and then all the fabrication and welding. In the end the Benefit-Cost ratio is not there. Yes, I would get better off the line acceleration and 6 forward gears to match the torque of the six and the weight of the car going over the mountains. The cost to do it "correct" is not worth the benfit. Since my three speed is all but new with about 50K miles on it, I suspect it will last a good long time. I also have a complete second three speed with a known good Borg-Warner Overdrive. I can rebuild that one and put it in a crate. The big issue is the fluid couplings. I do not want to get hung out someplace with one leaking or failing when we driving around the USA. I also have the '49 to keep on the road. So, instead of spending a fortune on changing a system that works...I am going to invest in making a jig so that I can properly rebuild two or three fluid couplings. What I am doing is securing a NOS late type sleeve and other parts to the fluid drive seal assembly. I am talking with my machinist about spending the time to draw the things up so they can be made in his CNC. I am talking with American Graphite about reproducing some new manufacture Carbon Seals. I am talking with a couple of spring companies on making the spring. The seals and gaskets are not going to be an issue. We are going to make up a jig so that the fluid couplings can be cut open and the bearing replaced and then welded back together while maintaining the alignment. I think that I would rather spend my time and money on this path then the conversion path. James.
-
Potential brake adjuster mod? Would this work?
James_Douglas replied to Slickster's topic in P15-D24 Forum
There was a company that made a kit that would do that. With a slot and also a cam in place of the spacer...I have one I got off ebay years ago... -
You really need the tool or you have to make a jig yourself. If the shaft is not exactly where it needs to be then... The lower control arm will be more forward or rearward. Even a little bit and it will cause the spindle upright at the bottom to move with it. What that does is change the angle of the king pin so that the "range center" of the castor adjustment will move. I am fighting this exact issue on my 1949. In my case, I want to move that "range center" so I can have more castor adjustment in the direction of more castor. The best thing to do it so make sure that you get this correct. James.
-
Are you near San Francisco or in San Francisco? I live in SF and I have been driving my 3-speed with BW overdrive (fluid coupling AKA Dodge arrangement) for about 15 years and 50K miles. In the end, I rebuilt the entire unit myself. The re-builder I got it from screwed up the job. If you decide to go through it yourself, feel free to reach out. James.
-
Good luck with the oil leak. What kind of gets my goat up is that Best Gasket when asked what is the ID/OD shaft tolerance for their rear main seal told me they did not have one. WTF? ALL seal engineers design a seal either for an exact shaft size or a size range. The fact that when asked I got such a bull **** answer does not bode well for confidence in their sealing products. Like I said above, in my case I has an NOS crankshaft. Checked by the crankshaft shop. It has leaked a lot since day one. I tried changing the seal two more times. It did not help. Going forward, I will try a rope. However, it takes skill and time to do a rope seal correctly. If the folks that did your engine did not catch that the lifter adjusting nuts were not tight...then one would suspect that their Q&A on the real seal may not be up to the task. James.
-
This is covered in old threads. Search for them. Also, valves have been known to head a head shaved too much.
-
1953 Dodge Coronet Convertible Top Color
James_Douglas replied to CaptainGTX's topic in P15-D24 Forum
Call and ask Bill Hirsh's son. He may have a book with the codes and if anyone has gray he would. I can tell you that the off white color, which my '49 had, is no longer available anyplace. Bill said he sold the last yardage he had and know one else had it either and I looked hard for a year. One other thing to note. Of the three or four convertible top companies out here NONE of them often have the "correct" pattern for these cars. Let me tell you why. When research my '49 I talked with the Grand Daughter of the only company out there that is still "family owned" who manufactures tops. She told me the following story. ***Back in the 1960's when competition was tough all the top companies did what they could to "simplify" the top designs to make the tops less expensive so as to maintain market share. People purchased based on price and just wanted a top that worked. The little details did not matter. She then went on to say that most of their patterns in the pattern drawers were the last generation pattern. Sometimes, though not very often, the original factory pattern is in the bottom of the drawer and they can see the differences.**** She did not have the original factory pattern for mine, just the later revised version. So be weary of claims that they a have "the pattern" for your car. In my case, I had the factory photos (actual photos) of a 1949 Desoto CV and we scanned them at very high density. We could clearly make out the stitch lines. In the case of the '40's Chrysler's and Deosto's the top dipped down on the side and was not a smooth line from the rear to the sides. Her pattern did not show it. Also, in 1949 only, the entire rear window zipped out as it had 2 zippers. None of the patters show that. My car was a family car and the shredded top factory. In the end I found a shop that does custom tops literally from scratch here in the San Francisco Area. They do all the high $$$ stuff for Roy Brizio Street Rods. When all was said and done the top came out fantastic. It also only cost perhaps 20% more than the cost of a kit and a shop installing it. I went black as I think it looks better. Good luck. James. -
I have seen people put them on the hub and something is behind it and the hub and it does that. 1. Pull Radiator. 2. Remove the little bolts holding it to the hub. 3. Start Engine from dad cold for 30 seconds and see if face of hub is running true. (you can bend some bailing wire and have it just on the face with a little bit of clearance. If the hub hits the wire, then the face is messed up and you need a new one) 4. Place pulley on and bolt down without balancer. when dead cold again do same as above. If not running true, it the wire will run and leave a mark. Take off and bend to true. Do this until it runs true. Then put on balancer. If that moves sent it out to be rebuilt or replace it. James.
-
There is nothing that is a direct bolt in replacement. That said, unless the worm and roller in the Gemmer Steering box is really shot, and that happens but not that often, these boxes are fairly straight forward to rebuild. The hourglass shape of the worm was designed that way to allow the box to be adjusted for any wear in the worm and roller. Often I have seen perfectly good steering boxes tossed out because people do not know how to adjust them. Even some shops. If the worm and roller is bad, they often come up on eBay or the various vendors have them NOS. Since the work is pressed and swedged onto the steering column shaft, sometimes you can find a gear but not the correct shaft. People find a replacement worm gear and then have the new worm welded onto the old shaft. There is very little reason to change the box unless you are building a hot rod and need the space. James
-
Even when you do all that it is no guarantee. In my case on the '47 Desoto Suburban, the head was NOS and lightly milled to make sure it was flat. The deck was decked. I used ARP studs. Torque was done by the ARP book. After about 50K miles of San Francisco city hill driving plus running back and forth to Winters California on the I-80, it ate a head gasket. This engine was set up at 8 to 1 compression. The gasket was one of the better than "Best" MOPAR NOS gaskets with the extra copper around the sealant holes that Best does not do. I used copper coat spray on the gaskets and let it hang for 20 minutes before I place it. For my 265 engine. I am going to have a solid copper gasket cut, at a fair cost. James
-
I wonder if my IND-265 engine has a chain or is direct...I have pulled the head and it looks like there is almost no ridge in the top of the bore. It is STD. But, after your post, I wonder about the cam and gears... James

-
I cannot remember how many times I had said the same thing on this forum. That is one of the basic things people NEED to know before they pull a transmission on one of these cars. I, like you no doubt, wish people would read first before they start to take things apart. I have seen a LOT of cracked carbon rings. The poster who started this thread should go over to the imperial club site and read how these things work. There are ZERO rubber or other seals in a fluid coupling. The only seal is one made from a solid block of Carbon and a micro-polished steel ring that it rubs against. Do what I said in my last post, do what Dodgeb4ya said about making some small wood wedges, but a slit on the end of the wedges and run a long piece of bailing wire around them to hold them in place. Once the trans is back in, cut the wire and fish it out and rotate the coupling and take all the wood wedges out. If you pull the trans every again, put in the wedges and pull them tight with new bailing wire. ************ If the carbon seal is cracked...you are screwed and will have to find a seal and someone with the tools to change it. Here in Northern California, I have a full set of the fluid coupling tools. James.
-
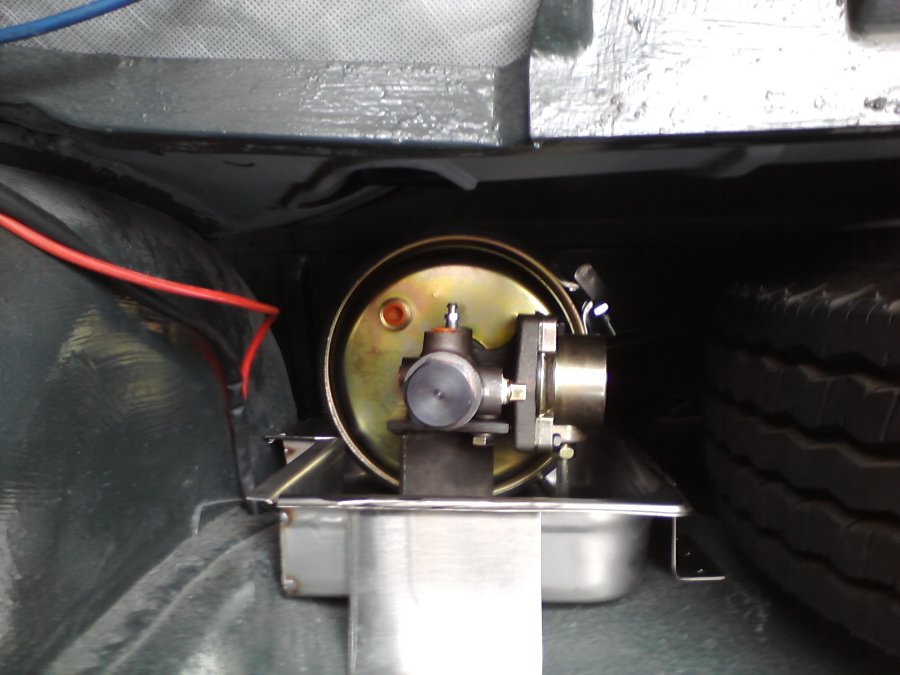
I just tossed out two complete sets of the under the floor boosters. I got them complete off of some car in a yard. The problem is that the MC in those corrodes real bad and to rebuild them is darn near impossible as parts are hard to get. Lots of aluminum in them. Go to the Ford Thunderbird parts guys and get the Midland Ross Remote power booster that they sell. It is darn near the same one that Chrysler used on the 300's when they have the cross ram manifolds. They put it under the fender on my 64 300K Ram Induction car. I used that booster on my 1949 Desoto. That was about the only major change from stock I did on it, with the 4 wheel disc brakes. The dame thing stops TOO good. A couple of things to note. ALL the power brake cars in those years used a different brake pedal arm (below the pivot pin) and a different push rod going into the MC. Different pedal ratio. Again, on my '49 I used one from a 1952 power brake car, a chrysler if I remember. I cut and welded a stainless over pan and mounted the thing in it on the trunk next to the spare. If the thing leaks, the pan will catch it. I have a black plate in the trunk to hide it and nobody, not even the concourse judges ever noticed it. If you use a remote power brake booster, you cannot use a split M/C. James
-
So, Does this happen when the cable is pulled out to disconnect the overdrive? If yes, then also remove all the wires from the OD unit and drive it and see if it still happens. If yes, then something inside is FUBAR. The other thing...could it be that the parking brake if rubbing? heating the thing up from the that on the rear. give me a direct email address and I will email you a couple of BW service PDF I have... James.
-
Help with Fuel Sending Unit and New Fuel Tank Install
James_Douglas replied to Stargrinder's topic in P15-D24 Forum
Be advised....be strongly advised... I purchased one of the new sending units from a guy on ebay. Looked great. The problem is that the thing leaked a lot via the "rivets" they used to pull the parts together. When you fill the tank on my 1947 Desoto the fuel level is above the top of the tank. So, there is pressure on the sending unit. It must be fuel tight. These guys units are not. When I complained they blew me off. James. -
Like I said in my post above, my 251 has leaked and leaked. I have probably spent $500 on extra oil in 15 years due to the rear main bearing leak. I will be looking at using the rope seal. I am even thinking of using a "plate" seal behind the rope seal as well. Although, I suspect that if the rope seals out all the oil, that the rear plate seal will burn the lip in short order with no oil on it. I may put a little lubricate behind the rope seal for the plate seal. I have never seen nor heard of anyone using both. But, since they will both fit, I do not see how it could hurt anything and I have a couple of the NOS plate seals in any case. James.
-
I have seen fluid couplings start to leak when people put ATF in them. Carbon Seals and ATF do not play well together over time. Drain the coupling, flush it out with any cheap hydraulic fluid around and then fill it with Mobile DTE light circulating oil ISO 32 If you are lucky, there is build up on the seal of crap and a good flushing and proper fluid may cause the carbon sealing ring to re-seat on the steel micro polished sealing surface that the carbon seal rides against. You can get that at Granger. Go search here for my document on fluid drive fluid for details on the fluid and its properties. If it leaks, the clutch disc will get wet in time and start to slip. By the way, take a sheet of white paper and soak up some of what is leaking and make sure it is in fact from the fluid coupling. All of the these engines seem to leak from the rear mains. Sometimes people see oil on the couplings and think it is leaking when it is the rear main. The stock fluid will look different than engine oil on a sheet of paper. James.
-
Anyone have any idea id the port size and the bolt patter is the same on the 23" engines and the 25" engines? I do not mean are the entire intake manifolds able to swap, I want to know if the "tips" of the manifolds at the block are the same? I may have the need to hunt down a late 50's Plymouth or Dodge flathead six manifold if they are the same in that respect. I need a two barrel manifold for a flathead six. Even if I have to make it. I am also looking into the flathead eight manifold as well. Thanks, James
-
I could be mistaken. For 1949 the change was made on Chrysler and Desoto...it may not have been made on Plymouth or Dodge. A bad assumption on my part. In any event, I would always use the needle bearings if I could get them. All up side and no down side. James
-
I would still run down a torrington bearing for the upper...the car will self center a lot better. In 1949 they changed the front end geometry and went to a LOT of negative castor. Having the bearings versus the bushing has zero down side and may well have a big up side. This will become especially apparent as the contact patch of the radials available are are usually 20% to 40% wider at the contact patch than the old bias tires. In parking it makes a substantial difference. James
