-
Posts
478 -
Joined
-
Last visited
Everything posted by Tony WestOZ
-
Hang on I just had a second look at your pics and something is not right. The bonnet having the chrome bar is earlier than 58, yet the single bar grill is 58. The tag info would be handy. This might be an late 57 early 58 cross-over or the truck was in an accident requiring a grill change. Interesting. Tony
-
That is an Australian 1958-59 Dodge. Hard to say what model without seeing the rest of the truck or the tags that will be on the firewall inside the engine bay. Probably on the right hand side (passengers side) looking from the front of the truck. Will have 250 cu" flathead. Peddles will be hangers with the master cylinders on the firewall instead of through the floor seen on earlier Australian and US models. Follow the link for a brief history on Australian trucks. http://dodgepilothouseclub.org/garage/garage.htm This link is to a brochure of that model. http://dodgepilothouseclub.org/garage/5859Dodge/index.html Tony
-
We must have crossed over while I was writing on the car side. I shall copy them over here so its in the truck section. Tony
-
Hang on I just had a second look at your pics and something is not right. The bonnet having the chrome bar is earlier than 58, yet the single bar grill is 58. The tag info would be handy. This might be an late 57 early 58 cross-over or the truck was in an accident requiring a grill change. Interesting. \Tony
-
That is an Australian 1958-59 Dodge. Hard to say what model without seeing the rest of the truck or the tags that will be on the firewall inside the engine bay. Probably on the right hand side (passengers side) looking from the front of the truck. Will have 250 cu" flathead. Peddles will be hangers with the master cylinders on the firewall instead of through the floor seen on earlier Australian and US models. Follow the link for a brief history on Australian trucks. http://dodgepilothouseclub.org/garage/garage.htm This link is to a brochure of that model. http://dodgepilothouseclub.org/garage/5859Dodge/index.html Tony
-
Mounted my vintage Sun Tach
Tony WestOZ replied to Jim Shepard's topic in Mopar Flathead Truck Forum
Usually like a tacho the first couple of times I drive or ride something. Once its clear were things are, sound and feel I never look at the things. I do like the look of that Sun tacho. Good job. -

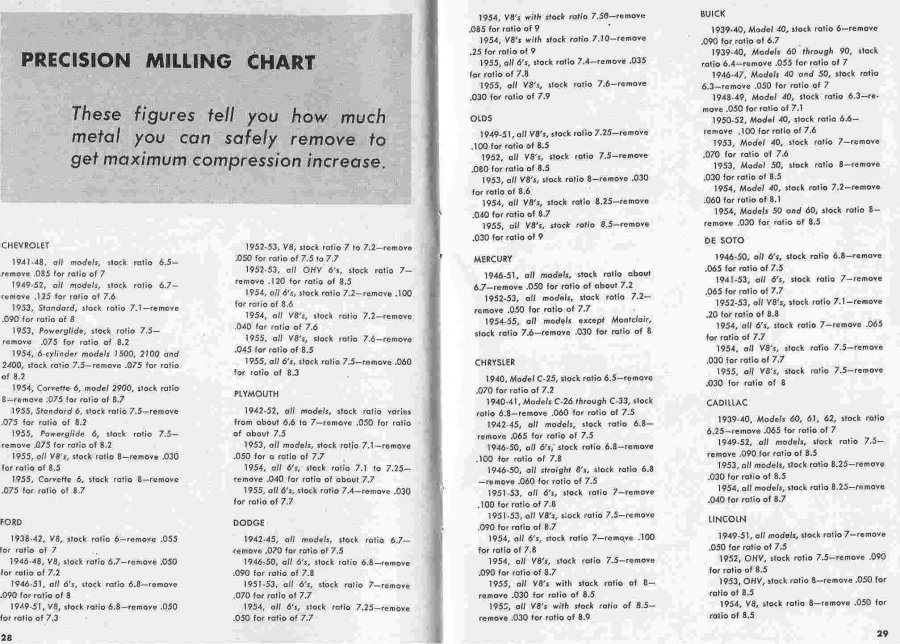
heads, combustion chambers, compression ratio
Tony WestOZ replied to kencombs's topic in Technical Archives
-

heads, combustion chambers, compression ratio
Tony WestOZ replied to kencombs's topic in Technical Archives
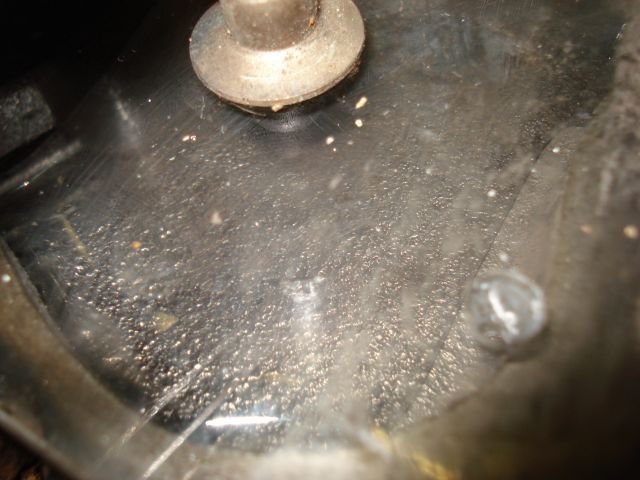
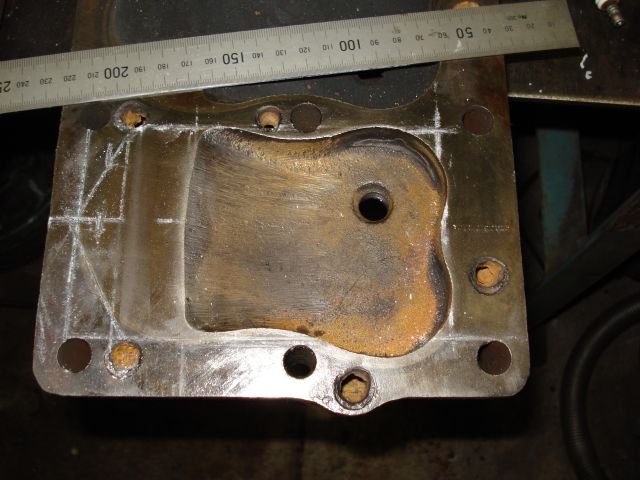
I went through and cc`d some heads years ago. You are right, head thickness does not correlate to chamber volume. I used some 1/4" acrylic that I clamped down with a smear of grease to seal. I worked out the gasket area with chalk marks and some maths but it was a lot easier to put a used gasket between the acrylic and the head to measure the gasket area. A bit of food colouring is good to add to the water. Makes it a bit easier to see and brakes down the water surface tension. Put the head on a very slight slope with the hole at the top end. -
I`ve used poly strip discs with good effect. They remove paint without damaging the metal. Like most things the good ones cost and the cheep ones just waste your time. Tony
-
I use to have to dress the points on the voltage reg every 18 months or so. The points did not seem to like the high current draw from the extras I had connected to the battery. I would use the points file first then some fine (about 600) emery folded in half to do both sides at the same time.
-
Thank you very much Thrifty T for those measurements. From some rough measurements I took of one of my 25" blocks these 265 truck manifolds have the carbs spaced about 1" wider than the after market or DIY manifolds for these bigger blocks. It also pushes out from the engine about 1 1/2" more. Not good for a RHD truck. Andydodge, I do realize that the manifold will bolt to a 25" block. The problem is that with the trucks things don`t run the same as the cars. The exhaust manifold does have problems with the peddles that push through the floor. Common sense would be to fit later model hanger peddles as I have a set and they basicly bolt straight in. With these 265 inlet manifolds it looks like the gearbox shift linkages and maybe part of the steering column would be sitting where the rear carby sits. Not real good. Reminds my of my brothers late 50`s F100. When you put the boot into it the engine rocked over and the extractors jammed the steering column making it hard to steer. Crapped myself the first time I drove it.
-
Thrifty T is it possible to get a couple of measurements from you. Though this manifold would probable never fit on our right hand drive sets ups I am interested to see what the spacing between the carbs are compared to the more central location of the aftermarket and DIY set ups. 1 = centre from hole to hole. 2 = face to the approx. centre of the carby. Tony
-
Is it in yet? I have just been reading a Truck Service Operation Time Schedule book. Transmission (3 speed)- Recondition Includes: Remove, disassemble completely, replace necessary parts, assemble, adjust and install. 4 hours. Tony
-
That would be an interesting read. I have a 53 Australian Truck sales manual about the same size. Its good too know how many boxes of fish or cases of apples I can load up.
-
Great minds think alike. I just came back to post the same link.
-

1950 Dodge Fargo - Need Help!
Tony WestOZ replied to Muppa7677's topic in Mopar Flathead Truck Forum
One very nice Deluxe Ute (often called a coupe ute) there Steven. One thing I`ll get a bit picky with is that this is not really a 56. 108BF4711 brakes down to- 108 = wheel base, B = series F = Fargo 4711 = this was the 4711 th 108 made. In total there were 5697 units made from May 53 to July 55. This total included all models of 108 made. It could have been first registered in 56 that might explain a few things. Does it have a split windscreen with a 3 bar front grill? Tony -
I`ll show my ignorance, "bubble gum machine"?? Nice build by the way.
-
Sorry jgreg53 but this did bring a smile to my face. Have to agree with these two. Nothing worse than having to redo the job again as you are now painfully aware. Tony
-
Greatly appreciate your effort Dave. Wish I did live closer that is a mint pair of seats. Hope they go to a good home. Tony
-
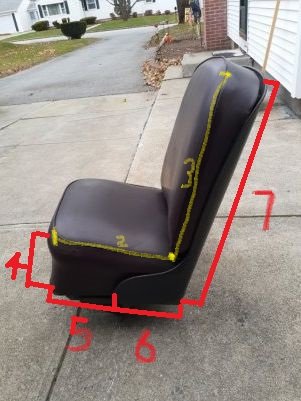
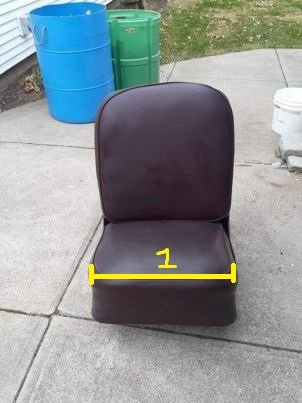
Thanks for that Dave. I just need to check in case I have it backwards. Do the figures you gave match to the yellow 1 = 22", 2 = 18" and 3 = 22" I have marked on the pics. Also if possible could you measure 4,5,6 and 7 in red? Tony
-
The Canadians used two different casting. The small bore ones are different to the large bore castings. Its to do with wall thickness. If they used the same casting for all blocks the small bore engines would have had to much wall thickness to properly cool the engine. Tony
-
Thanks for the offer on picking up the seats but as much as would like to one day visit the US for the moment I cannot see me making the 24,000 mile round trip. That tool box looks very interesting. Was that standard on the panels over there or may be one of the special additions that were available. The Dodge trucks that were supplied to the Post Office here had some special mods like under floor tool boxes though done differently. Any pics and measurements you can supply would be greatly appreciated. Tony
-
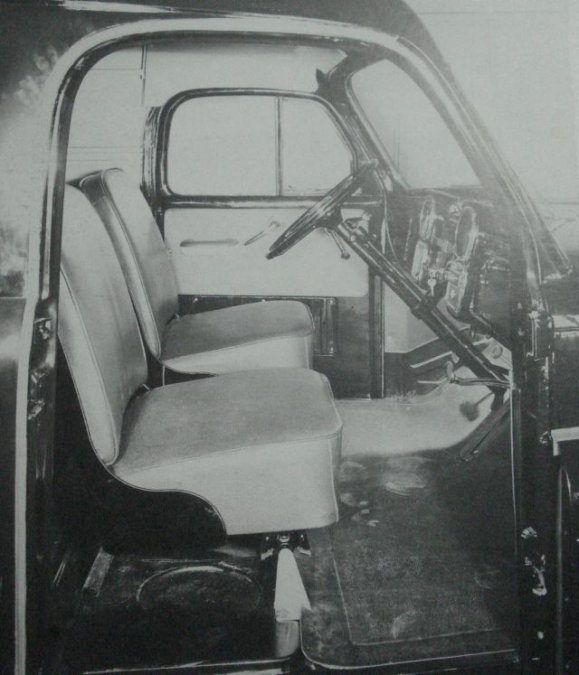
I am hoping someone might be able to help with the single seats that were available in the panel trucks. The pic below is from Don Bunn `s book on B series trucks showing a van with single seats. I would like to get hold of some measurements for these seats. They don`t have to be accurate just ballpark is fine. Pictures would be great if anyone has some. I do have an original bench seat for my panel (if I ever finish it) but I am way to old to climb over the bench seat to get into the rear of the van. Common sense says fit more modern buckets but I would like to make something period in looks. thanks Tony
-
This thread had me watching a few more of these old promo films on the tube. Seems Dodge hit back at Ford a year later with a truck film.
-

T236-engine: Part of the 25inch family
Tony WestOZ replied to T236-Dose's topic in Mopar Flathead Truck Forum
T236 is a 237ci, 3 7/16" bore x 4 1/4" stroke, 25" long block. Dodge Truck Canada WC WWII 3/4 tons or 1 tons depending on what book you read.


