-
Posts
478 -
Joined
-
Last visited
Everything posted by Tony WestOZ
-
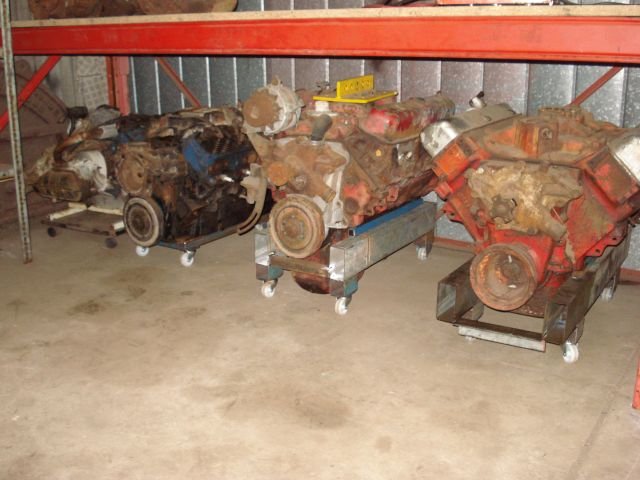
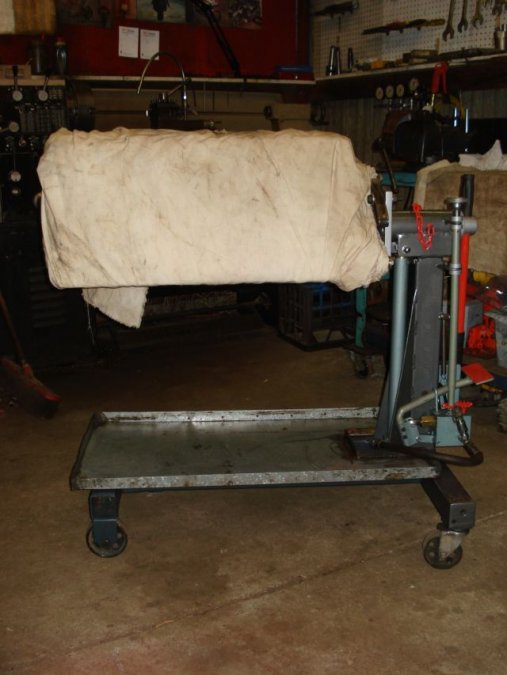
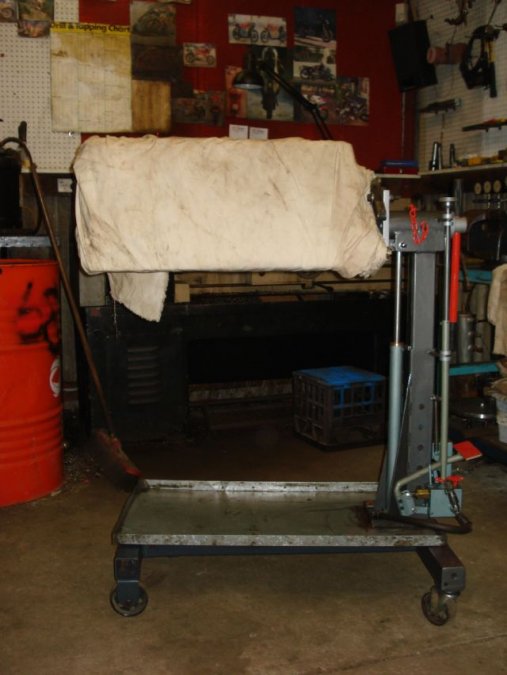
Last time I had a big clean up and moving bits around the shed I made up some wheeled frames for the engines to be stored. I wish this area looked this clean now. Never enough stands when you need them as well. Tony
-
1953 Dodge - What have I got into
Tony WestOZ replied to peteandvanessa's topic in Mopar Flathead Truck Forum
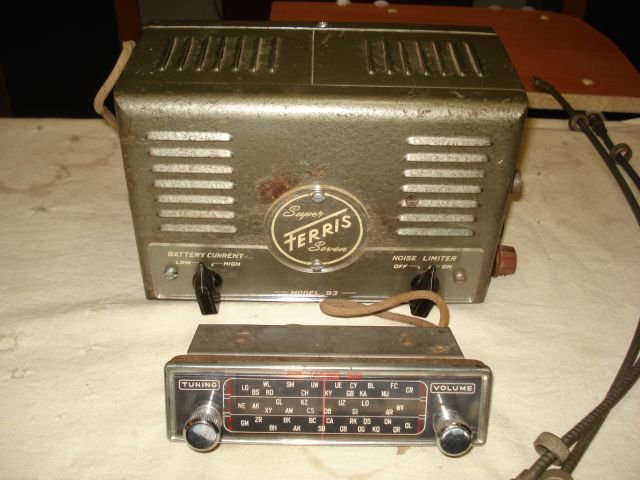
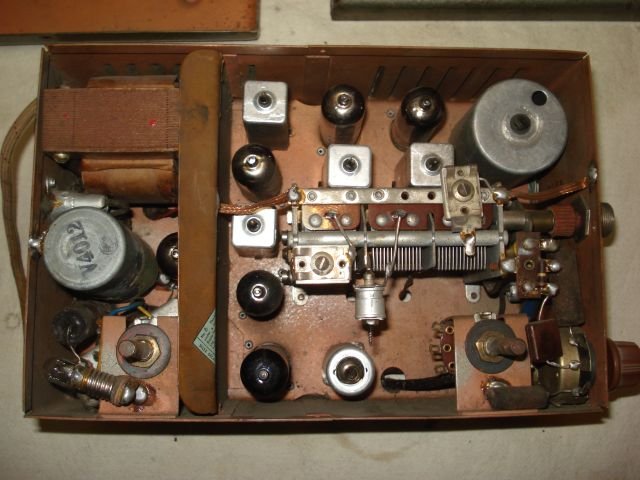
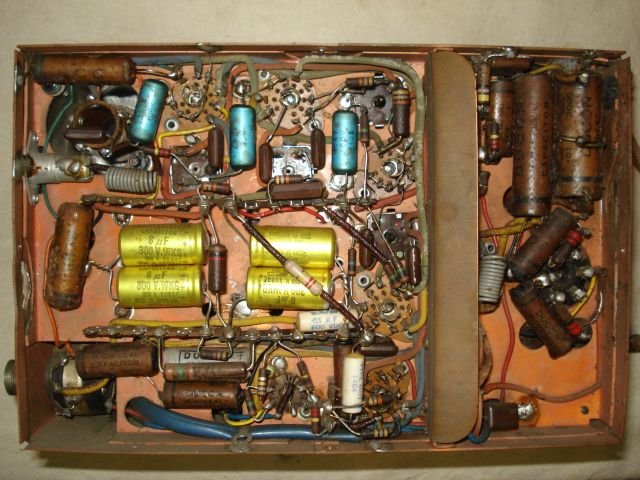
After reading this great bit of work you have done with the radio and the add on`s I was inspired to go and drag mine out of the garage. I had thought with the experience I had gained over the last couple of years building some DIY pre amps and amps I could dive right in and fix this. This is Australian made 1954 Ferris Super Seven model 93. Top of the line at the time and close enough to period for my 53 Australian Dodge. Took off the front panel, Ok there are some valves a tuner thingy and some other bits Then I rolled it over and took off the back panel. I cannot say what I thought but the inspiration started to seep out. All is not lost yet but I am going to have to sit back, study and learn a bit more before I dive in. Tony -
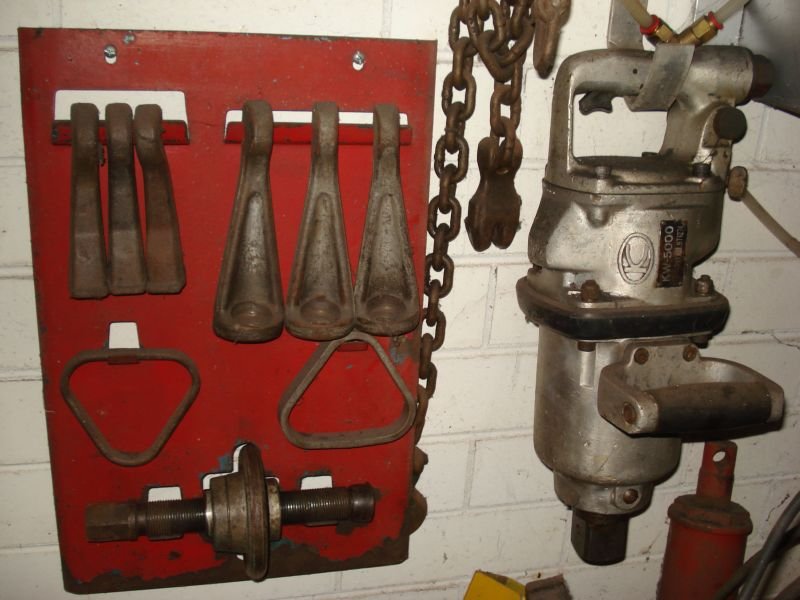
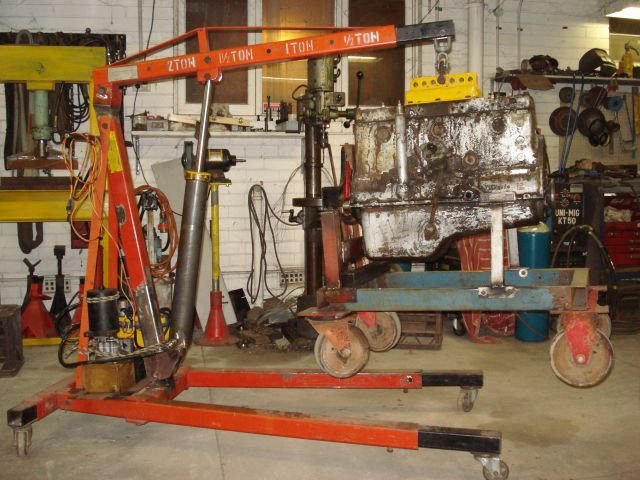
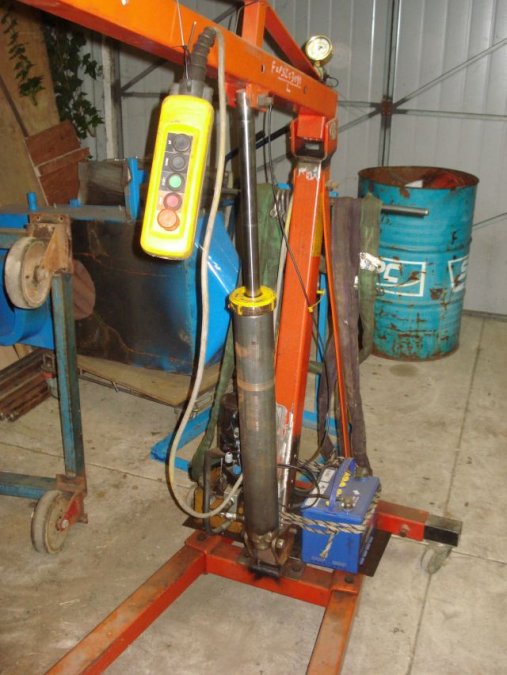
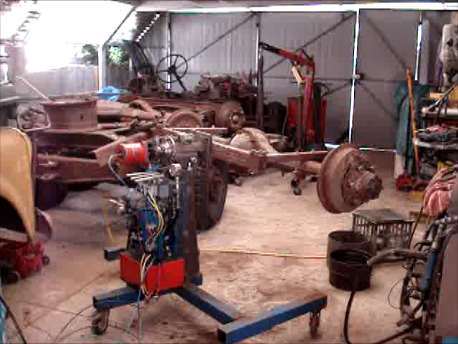
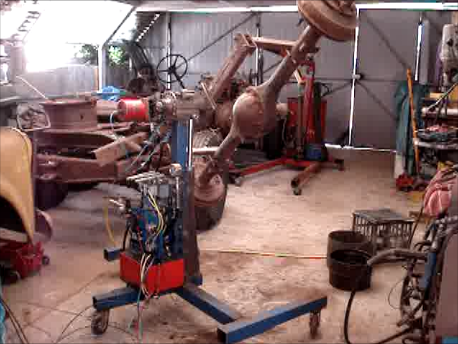
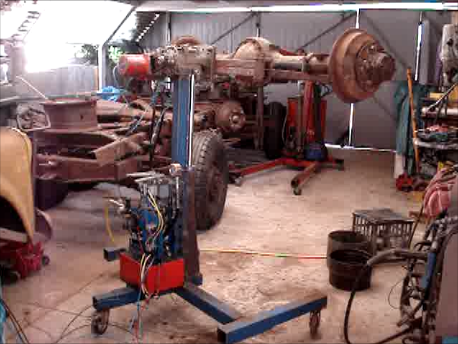
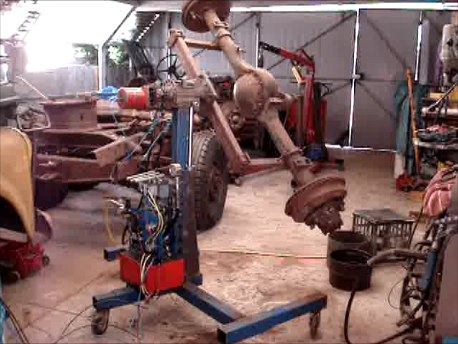
I spent a few hours yesterday going through this thread. You guys have some great old tools in your collections and its good to see that they are still being used today. I have a garage full of tools but the only period tool I have is a wheel hub puller. The 1 1/2" rattle gun beside it is for getting those really hard nuts off. There have been a few tools that I have modified or built to make things easier around the garage. I hated trying to holed a load in position and then lower or raise with the crane. So I built a ram and fitted a 12v hydraulic pump. Has single speed up with two speed down. The slow speed down has a manual flow control valve so it can be adjusted to match the load weight. I used to build the odd engine for others as well as working on my own. I always found that the height that the engines sat at on the stands was always wrong causing lower back pain. After a few failures I came up with one that has worked well. Modified hand pump converted to a foot pump. Height adjustable about 12". Turn the nob on top of the shaft and a comes down. I have picked a reduction box to make for easy engine rotation but I have not got around to fitting it. I wanted a body rotator (rotisserie) and could note find one I liked and for the money they wanted I decided to build one to my requirements. So overboard I went. Pneumatic over hydraulic operation with manual and pneumatic controls. Goes up down and around and around. There is another end. Has a ram for height adjustment but is driven from this end. No pics of it in use with the chassis behind. That was chassis complete driveline and engine. It worked well but I am still not happy using a chain for the final drive. Still some development work to be done. Tony
-
Thanks for that Don. Seems I have been over thinking it, a simple filter by-pass valve. Tony
-
Hello Don how are you going? I do understand how the full flow works. The pics in a previous post show the diamond area and the long thin plunger that goes into the block from the bottom blocking the port so that the oil is diverted to the filter. What I was interested in is this comment by dpollo. I do not understand the "emergency and startup dypass circuit". Maybe I am just confusing myself. Tony
-
The Australian car manuals I have do explain the oil bypass system. The Canadian and Australian truck manuals show virtually nothing. The Australian manuals go from 46 to 62 and there is no mention of a full flow system nor the extra parts involved with them. I had not noticed it before but the car manuals do indicate that they change to a three ring piston in about 58 but the trucks are still listed with a four ring piston up to 62. Very strange. Also the rear crankshaft seal never changed from the external six bolt system to rear main bearing mounted seal. We were a bit backward here. Tony
-
You mention that you replaced the carby. Did the problems start before or after the carby was replaced? Tony
-
The engine was the green colour when I got it. The redish colour is like the old red oxide (or red lead) paint used as an under coat then painted green. Tony
-
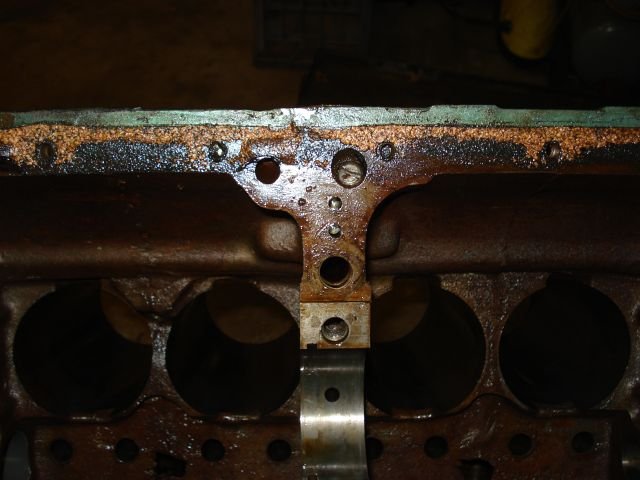
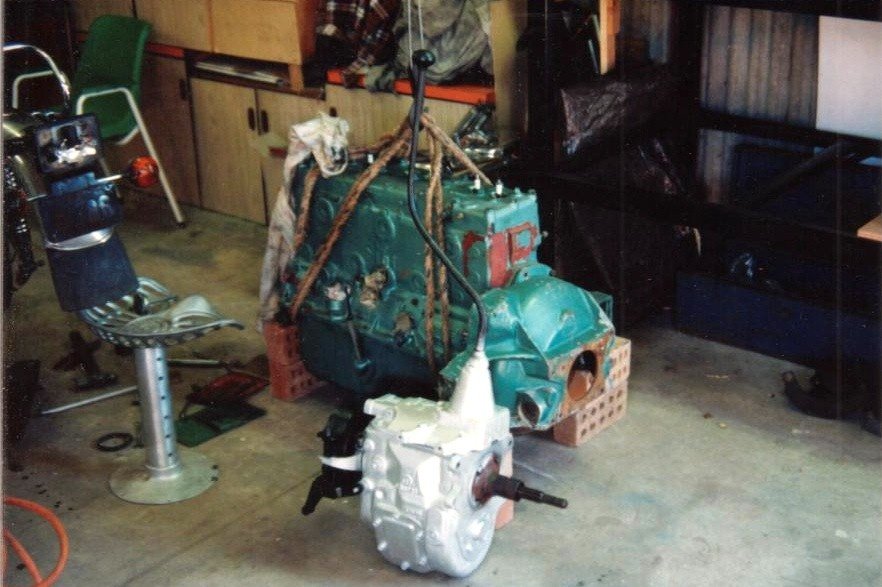
It`s a NOS engine that came out from an Army surplus sale (at least that is what I was told) some 30 years ago when I picked it up. It had been run but not for very long which was lucky as the oil filter had been installed incorrectly and the oil slinger had been put in backwards causing it to rub on the cam chain. As it was in its green It does not have an engine number stamped on the pad area. I have never seen a full flow pad setup like this on any truck engine in Australia. I am not 100% about the car engines but I have never seen one in a car either. Do you have any info on this setup. Apart from the different plunger size the major difference I found was the long plug that screws up into the block oil port so force the oil into the filter then back into the block. The plunger, spring and long plug on the right are for the full flow engine. Tony
-
Thanks for that dpollo. I did not think the full flow filter appeared so early. Live and learn.
-

Rams Head Hood Ornament Placement
Tony WestOZ replied to Jim Roach's topic in Mopar Flathead Truck Forum
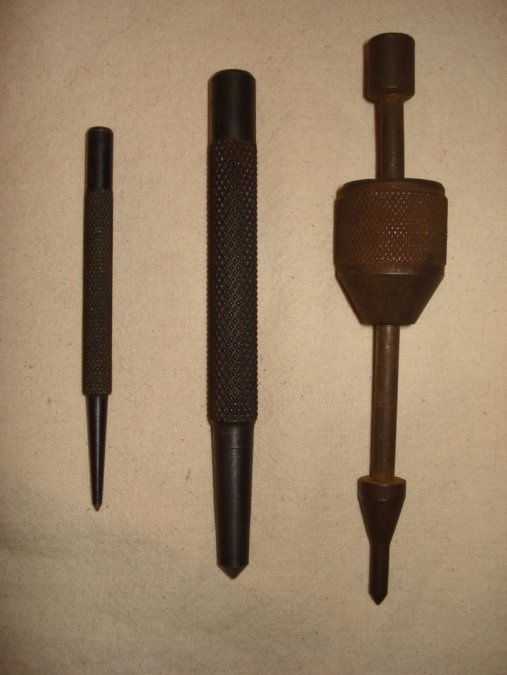
If you think your going to put a crease in the hood you are using to big a punch and hammer. The little one in the pic is smaller in dia than a pencil with a very fine point. A very light tap with a small hammer only leaves a very small centre pop. Drill the first hole with a 1/16" drill bit then work up to the size you need. The one in the centre is 1/2" in dia but I do have a 5/8" one somewhere that would put a nasty dint in thin sheet but is great for thick plate and large holes. The other is pre spring punches. Set it up on the mark then drop the little weight. Tony -
Hello to all, I am sure I asked these questions many years ago back in the days of the original forum but as it has been that long since I have had anything to do with Dodge (trucks mainly) I have forgotten and a lot of my notes have long gone or been misplaced. 1. In what year did Chrysler introduce the full flow oil system? 2. When was the 3 ring piston introduced ? 3. When did the rear crankshaft change from the one that bolted on externally to the rear main to the rubber lipped one that was incorporated in the rear main? I don`t think they all happened at the same time but the way my memory is who knows. Any help appreciated Tony PS I forgot to mention this is for the 251 engine.
-

Fargo Kew ‘Australia’
Tony WestOZ replied to Evan and the Fargo Kew's topic in Mopar Flathead Truck Forum
Yes Merle it has been along time. A couple of weeks ago I was going through and sorting some stuff out in the spare room and found some CD discs sent to me from when the original p15-d24 site shut down in about 2004 . Also found a disc from the DPETC from 2006. All a bit of a trip down memory lane and prompted me to come and have a look again. Its only taken a couple of weeks for me to remember my log in details. Its good to see the truck (and car) site are still going strong. -

Fargo Kew ‘Australia’
Tony WestOZ replied to Evan and the Fargo Kew's topic in Mopar Flathead Truck Forum
Thanks for that Merle. I will try that as I have just had trouble just trying to send small files. My computer skills are sadly lacking. Tony -

Fargo Kew ‘Australia’
Tony WestOZ replied to Evan and the Fargo Kew's topic in Mopar Flathead Truck Forum
Evan, Manual is nearly ready could you PM your Email address and I will send it when finished. The file is approx. 130mb. I don`t know how much I can send in one email so I will split it over a couple of emails. Tony -

Fargo Kew ‘Australia’
Tony WestOZ replied to Evan and the Fargo Kew's topic in Mopar Flathead Truck Forum
I have not found a link and maybe its long gone (going back some 15 years now) but I am sure there was an English Dodge site that had some info. Tony -

Fargo Kew ‘Australia’
Tony WestOZ replied to Evan and the Fargo Kew's topic in Mopar Flathead Truck Forum
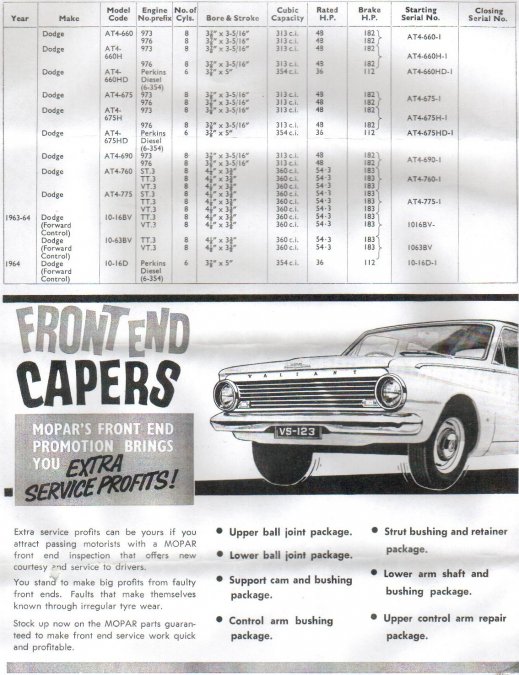
I found this scan in my files. As it turns out I have the rest of the parts manual to go with it. Strangely I did not scan the whole book when I did my other manuals. It will take me some time but I will scan into some form and let you know if you want a copy. Tony -

Fargo Kew ‘Australia’
Tony WestOZ replied to Evan and the Fargo Kew's topic in Mopar Flathead Truck Forum
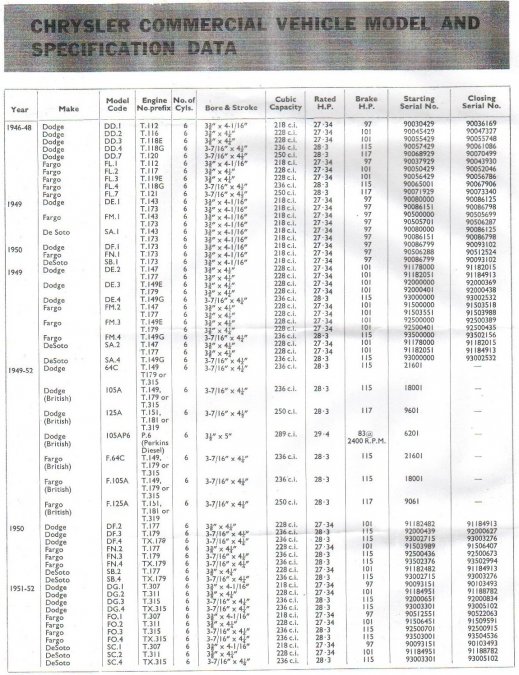
Hi all, Here is some production data. These Kew trucks made in Kew England and then imported to Australia. I am not sure if they were complete or knock down form. I never had a lot of info on this series of trucks but I will have a look through some of my old hard drives and see what I can find. Unless it was too lost in the crash of 2011. Tony -
OOooo no I had better go and see what I have just thrown in the scrap bin. Maybe I could do a swap. One OZ door lock for one US door lock.
-
Unfortunately time has been taken up with non Dodge things. I am sure Chrysler Australia used that bumper style on others apart from the PMG vans. The style did change in 57 to a flat step in between two bumper ends. At least that what was on my father`s 58 Royal mail van that he bought from the PMG. Cannot say I have ever seen a Dodge, Ambulance or otherwise painted red underneath. Strange. I have a copy of one page of the plans showing the mods done to the PMG vans. Wish I had page 2 as well as it shows the grill guard that was available.
-
Desotodav, that looks like the bumpers that was made by Chrysler Australia for the PMG vans.
-
Very nice Dav
-

Fuel tanks...Square or rectangle?
Tony WestOZ replied to dontknowitall's topic in Mopar Flathead Truck Forum
All Australian Pilothouse trucks used the same fuel tank from 48 to 62. As Desotodav said the fuel senders are slightly different. Ryan that link you posted before is for English model trucks. They are a different truck to the pilothouse. -

my start up before the coil burned out..
Tony WestOZ replied to dontknowitall's topic in Mopar Flathead Truck Forum
Very nice Ryan. Runs and looks great. That`s the standard exhaust for an Australian truck. Made that way so the exhaust can clear the brake,clutch pedals and steering box. -
Sorry I thought they were cast pot metal. If they are pressed stainless then you can re-shape it.


