40plyrod
-
Posts
869 -
Joined
-
Last visited
-
Days Won
4
Content Type
Links Directory
Profiles
Articles
Forums
Downloads
Store
Gallery
Blogs
Events
Everything posted by 40plyrod
-
Looks great and the trip sounds awesome! Hope you'll post pics of your trip. I live vicariously through the posters of road trips posted on forums.
-
Very cool
-
I finally found this thread... I had a great time too. It was an absolute pleasure meeting you and your crew. I have some pictures from my side and how I saw things but I'm having a miserable time trying to load them (can't even resize them) Your pictures are great. Plans are in the works for a visit to the "house of mouse" next year so I hope we can meet again. And keep the pictures coming.
-
The beltline on the doors doesn't match the rest of the body so, I think you probably have a "mutt" there
-
 Can't wait to see the flathead build.
 -
A 140 Mile Day In The Dodge Yesterday....
40plyrod replied to frankieflathead's topic in P15-D24 Forum
Great pictures. Thanks for sharing. -
Mr. Bill I'm keeping my eyes open for a build thread. Can't wait to see what you'll do with this one.
-
Nicely done.
-
Thanks Fred you got a darn nice 40 there yourself
-
Thanks guys. James, the hole saw I used was slightly smaller than the pipe so I was able to turn the ends of the pipe on the lathe for a friction fit. It all held itself together before welding all I had to do was make sure the holes were in the right place. Mr. Bill, I come from the draw a picture and tack weld bits of stuff together first camp as well. I worked with a guy that could figure everything out with math on paper and never even draw a picture... I spent a lot of time not understanding and smiling and nodding. pflaming, not many inspection plates are needed. The brake master cylinder is far enough ahead to be accessed for under the hood, and I moved the battery to the inner fender. All the floor panels are homemade, the score lines were put in with a cheap bead roller I bought at our local tool house. I've also seen them at eastwood's and harbour freight.
-
I had trouble too using my bookmark and even when I googled it I couldn't get on. I finally found a link through the domain name registry. Pure fluke.
-
I've been in the odd bar where that would probably be the only difference
-
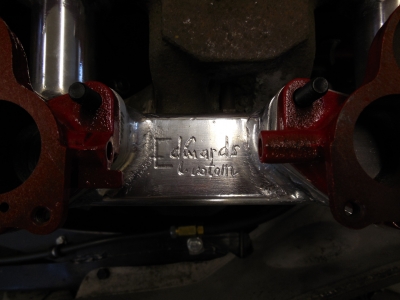
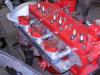
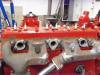
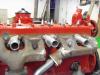
Hey guys thanks for the comments. Mr. Bill- making the manifold is just sticking metal together to make air go from A to B, linkages require math. KnuckleHarley- you can get those clamps in a lot of places now. I've seen them in eastwood's catalogue also in harbour freight. I bought mine from KMS tools here in Canada. You don't have to buy the expensive one the cheap ones work just fine. James - the reason I angled the exhaust like that was because of the oil pump and to stay as far away as possible from the fuel pump. I have heard of stories of people having trouble with over heating the pump. Don and Greg- You guessed it I have a set of early ford holley 94s rebuilt for the intake. Here's a couple more pictures 1st is the intake somewhat polished with the carb bases Pic 2 is my little play on a familiar name.

-
Plymouth Gets Recognition From C&sc Magazine
40plyrod replied to Robin (UK)'s topic in P15-D24 Forum
Nice looking car. Awesome. -
Thanks Don and Greg. The building of the manifold is the easy part. Making the progressive linkage and tuning it will be much harder. I'll be running it on this motor with the two outside carbs blocked off, but I have an old friend who has been collecting mopars and parts for years and we're going to build a motor and I hope to run all three progressively. It may not work but then I'll hang it on the shop wall and make up some tall tale about it.
-
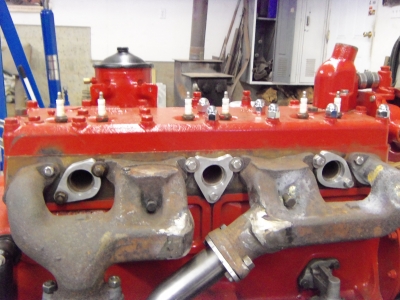
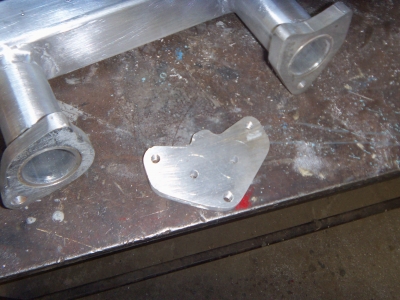
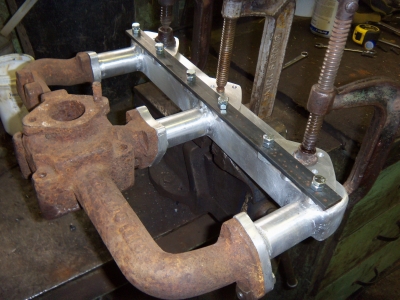
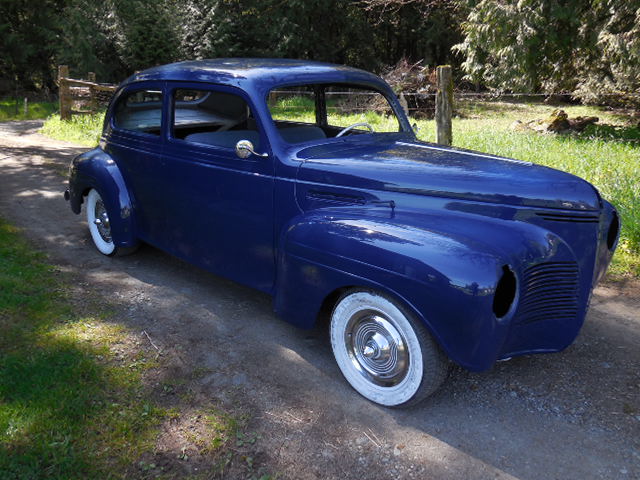
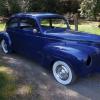
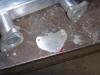
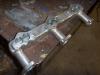
I haven't updated my build in a while, this has been a very busy and difficult spring for farming but I have made some progress on the car. I finally decided to jump in with both feet and build an intake. I've always wanted a triple carb intake on an inline six and since I don't have very much time but I have even less money buying one wasn't an option. I picked up some 3/8" aluminum offcuts, a 2' piece of 2x2" box tubing and 1' of 1 1/4" tubing and started building. Total cost of material was $60. The pictures are pretty self explanatory but the 1st one is the 3/8 bolting flanges attached to the block. I cut the holes with a hole saw in a drillpress and cut the shape with a reciprocating saw. Then a lot of time with a hand file and a rotary file in a hand held drill. Pic 2 I cut the pipe to length with a miter saw and trued up the ends in the lathe. Pic 3 I drilled three hole in the 2x2 box tube with a hole saw and then fit it all together on the engine and tack welded it as well as capped the ends. Pic 4 shows the start of the plates I made up for the carb bases. Pic 5 I had to make up a jig to keep the carb base plates aligned. Pic 6 I always bolted the manifold to either the block or a spare intake to hold everything from warping when I did any welding. 1/4" and 3/8" aluminum takes a lot of heat to weld I had to move my welder to the farm shop to weld because it's wired heavier, I kept tripping the breakers at home. Pic 7 is the finished product minus the sanding and polishing.


-
Very cool!
-
I'm not sure if the 41 has the same pedal mechanism as mine but here's a link to how I did it.http://mopar.pairserver.com/p15d24ph_forum/topic/30508-rust-free-40-plymouth-sedan/#entry304959
- 1 reply
-
- 1
-

-
Can A 1939 Plymouth 201 Be Used In A Hot Rod?
40plyrod replied to wheels777's topic in P15-D24 Forum
running a 6 volt starter on 12 volts is fine I've done it for 20 years on my 51 chevy pickup. -
Looks great, nothing like a little sound deadening to make an old car feel like a new one.
-
How's the inspection going? I'm interested to see what parts that make it work are inside.
-
I never really added it up until this fall when I had to show my reciepts to the insurance agency to register my 51 chevy pickup as a modified collectors vehicle. The total came to $8500 and I did all the work myself. I was surprised and my wife was horrified, I didn't tell her that I may have missed a few.
-
Looks like a good project. Nicely detailed motor, is the firewall a stock dodge blue?
-
I didn't vote but I think that it's fine the way it is. I like to be able to check out someone's build thread, then an of topic question or link and then someone's modified plymouth right next to another's bone stock original. If there's a thread that I'm not interested in I don't view it no problem. Keep up the good work.
-
I used the mustang setup also. There's not a lot of space but it will fit. There's some pictures on my build thread.