John-T-53
-
Posts
1,696 -
Joined
-
Last visited
-
Days Won
21
Content Type
Links Directory
Profiles
Articles
Forums
Downloads
Store
Gallery
Blogs
Events
Everything posted by John-T-53
-
Since I'm a '53 owner, that's the style I'm more fond of of course. Dodge liked them a lot too, I guess that's why they were made for so many years. When I first got my truck, I was unaware of previous style and then saw an older truck on the street somewhere. I thought "who's boat trailer did those fenders come off of?!!!" LOL This was way before this site was online so I was "uneducated" at the time....haha.
-
How come your heater is upside down?!
-

A Funny Thing Happened On The Way To...
John-T-53 replied to Jim Shepard's topic in Mopar Flathead Truck Forum
Jim, did you feel a "pull" from the rear too from the unexpected engine braking? How fast were you going? Glad you made it ok with no damage! -
From what I understand about drum brakes: The different cylinder diameters coincide with the primary and secondary shoes, with the bigger bore being on the primary side. These are non-servo brakes, since the shoe ends are anchored. I've seen stepped wheel cylinders used with shoes of equal length lining, compared to non-stepped cylinders used with shoes of differing lining lengths, thus two ways to achieve primary and secondary shoes - the first by piston pressure, the second by fricton surface area. I'm deducing about 50% of this from observation only, please correct me or contribute more info if you can. Thanks,
-
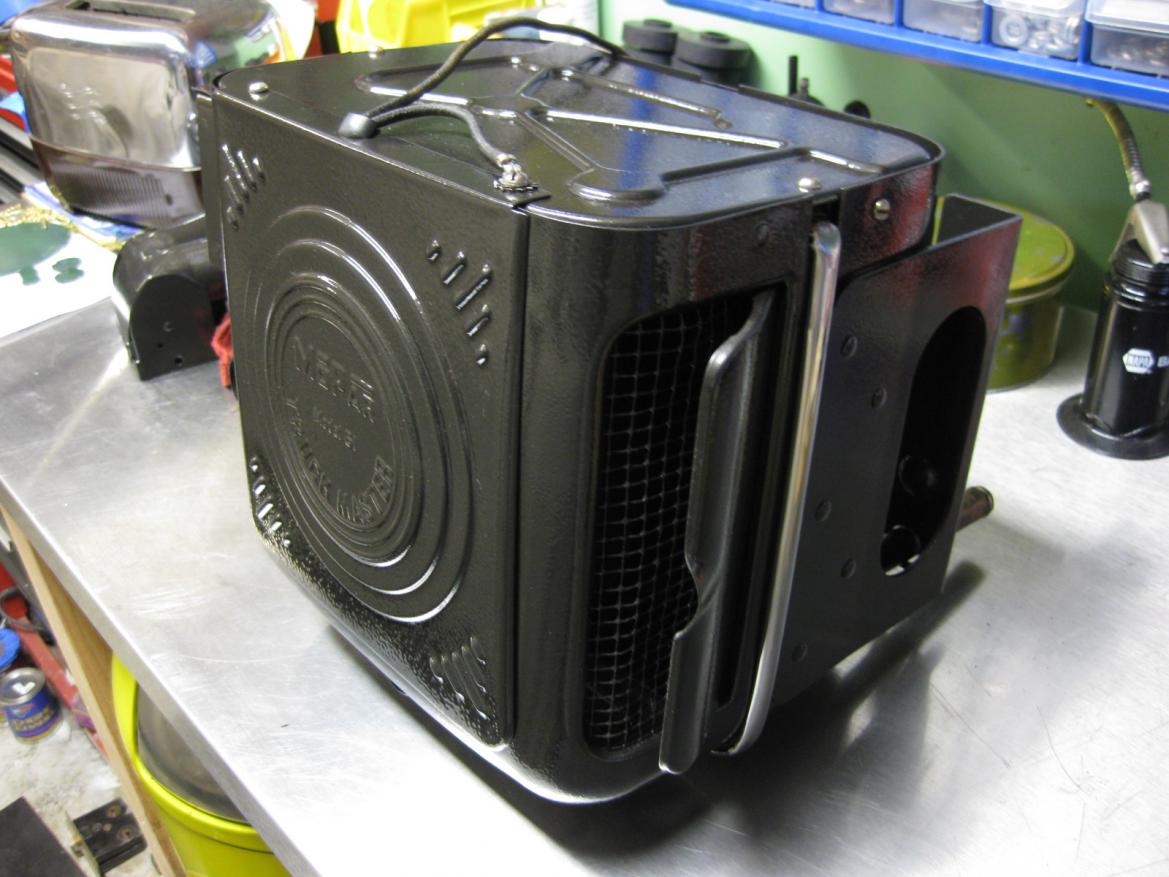
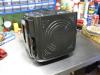
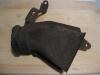
Pics of the model 61 Heater. This is the Rust-Oleum Black Hammered paint. I used the model 65's defroster outlet instead because the 61's door control bracket was broke (pot metal). This previously had original paint and the circle wasn't painted silver. The 61 is incorrect for my year truck, but I opted for this because it has doors on all the outlet grills, thus allowing them to be closed for maximum defroster output. They are prone to denting and bending by carless passenger feet, tho... Just did the first test run where the defroster was essential...230 miles from here to San Simeon last Friday night in the rain. For the first time driving in the rain, I could actually see.


-
I did the same dang thang! But...I ended up squeezing the new glove box inward on all 4 sides and it compressed just enough to slip inside from the front. No damage was done to the card board. And the heater stayed in place!
-
I've added some more pics... I'd like to get rid of this but don't want to throw it out. I'm sure someone out there could use it!


-
Fel-Pro is the only brand I've gotten at NAPA and I use the Permatex "Copper Spray-a-Gasket" sealer on both sides of the gasket before installing. I've heard you can also use a metallic silver paint (?). These two were recommended by my machinist. Teflon tape on the head bolts completes the sealing deal and you'll have no problems as long as the surfaces are flat! I switched to ARP studs with fine thread nuts. Torqued to 53 ft-lbs hot and all is well. I usually re-check the torque at oil changes just for peace o' mind.
-
Thanks for all the ideas...I think the easiest and cheapest solution is to carry a wrench. Now I just have to remember to do so! Desotodav, no worries, that would be a long journey across the Pacific for one wing nut to make. Thanks.
-
Looks like you've got a small block Chevy backed with a Turbo 350 or 400?
-
Anybody ever "fix" a honeycomb radiator core?
John-T-53 replied to 95ttoplt1's topic in Mopar Flathead Truck Forum
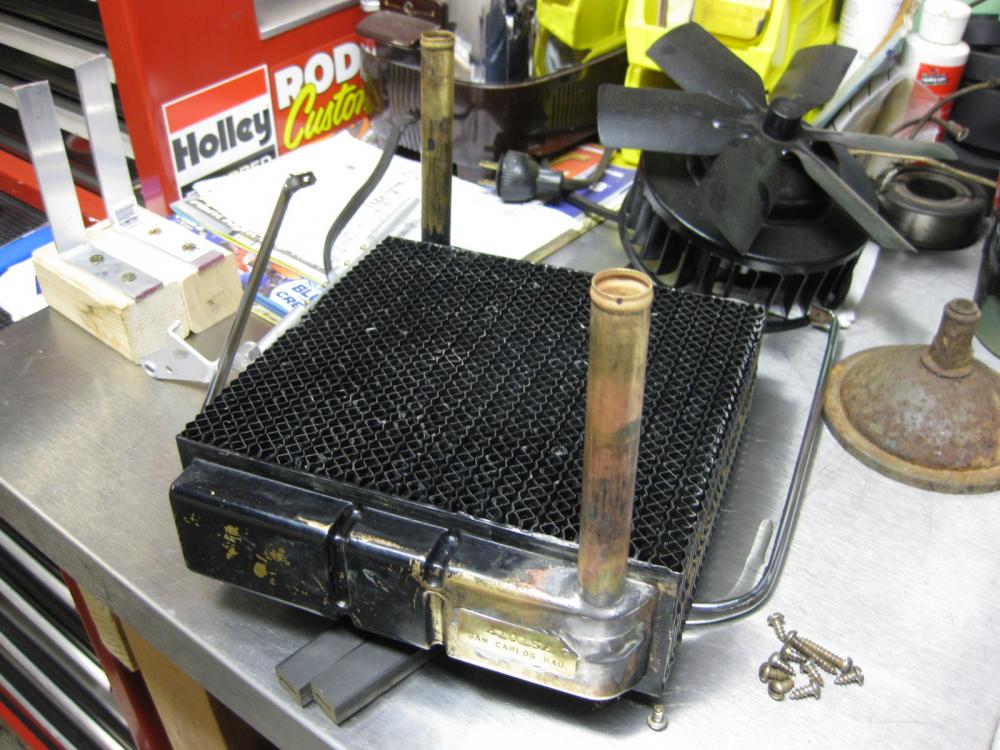
I agree the old cores look cool. These are v-cell cores. Hopefully they didn't put more than 4# on it and blow it out. Most shops don't want to work on these tyes of cores, mainly because nobody knows how they're made or how to fix 'em. The old guys that do know how to work on 'em are reluctant too. When you heat one area up, the areas adjacent melt and then start to leak. You'll be chasing a leak indefinitely. The stop-leak additives only make it worse as they plug up the narrow passages. I nursed my old radiator along for 8 years until I got tired of pulling it every few months to have another leak fixed. Then finally went for the modern recore. It looks better than expected but best of all it'll be trouble free for 20 years at least. p.s. if you want a new reproduction v-cell core, Maine Radiator sells them for about $1k! -
Aw poop. If you know of a source for 1/2" wing nuts with oversized wings, let me know. Just trying to make life easier for when I have to break out the spare. I don't always remember to carry a wrench with me and it would suck to not be able to change the tire!
-
I'd like a wing nut please! All else is good down unda.
-
I don't think it related to the upholstery. Here's what I've seen: Model 61: Dark Grey Model 62: Dark Maroon ?? Model 65: Dark Maroon/Silver Model 504: ?
-
I used this exact color on my model 61 heater. It came out very nice. The 61's were originally a dark grey like this although the texture in the original paint was very slight compared with today's hammered rattle can paints. I bought a model 65 heater from you (Dutch) and searched all over for a color like the original dark maroon. This had a slight texture to it as well. I couldn't find anything close but ended up with a different heater anyway, so the search ended. I still hadn't really searched the dupli-color touch-up paint rack, but was about to get a custom color mixed and just apply it with a gun.
-
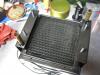
I installed Quiet Ride's firewall pad and put some some strips of Dynamat extreme on the sheet metal underneath. I would cover the entire firewall with dynamat if I did it again. The ABS pad had to be cut to fit around certain areas, mainly the dash brace, and it was a biotch to cut and install with the column in. But the fit, look, and durability is great. I recently got a 36 s.f. bulk pack of Dynamat on Ebay for $135 and included a roller. ggdad - any luck on finding those spring clips?
-
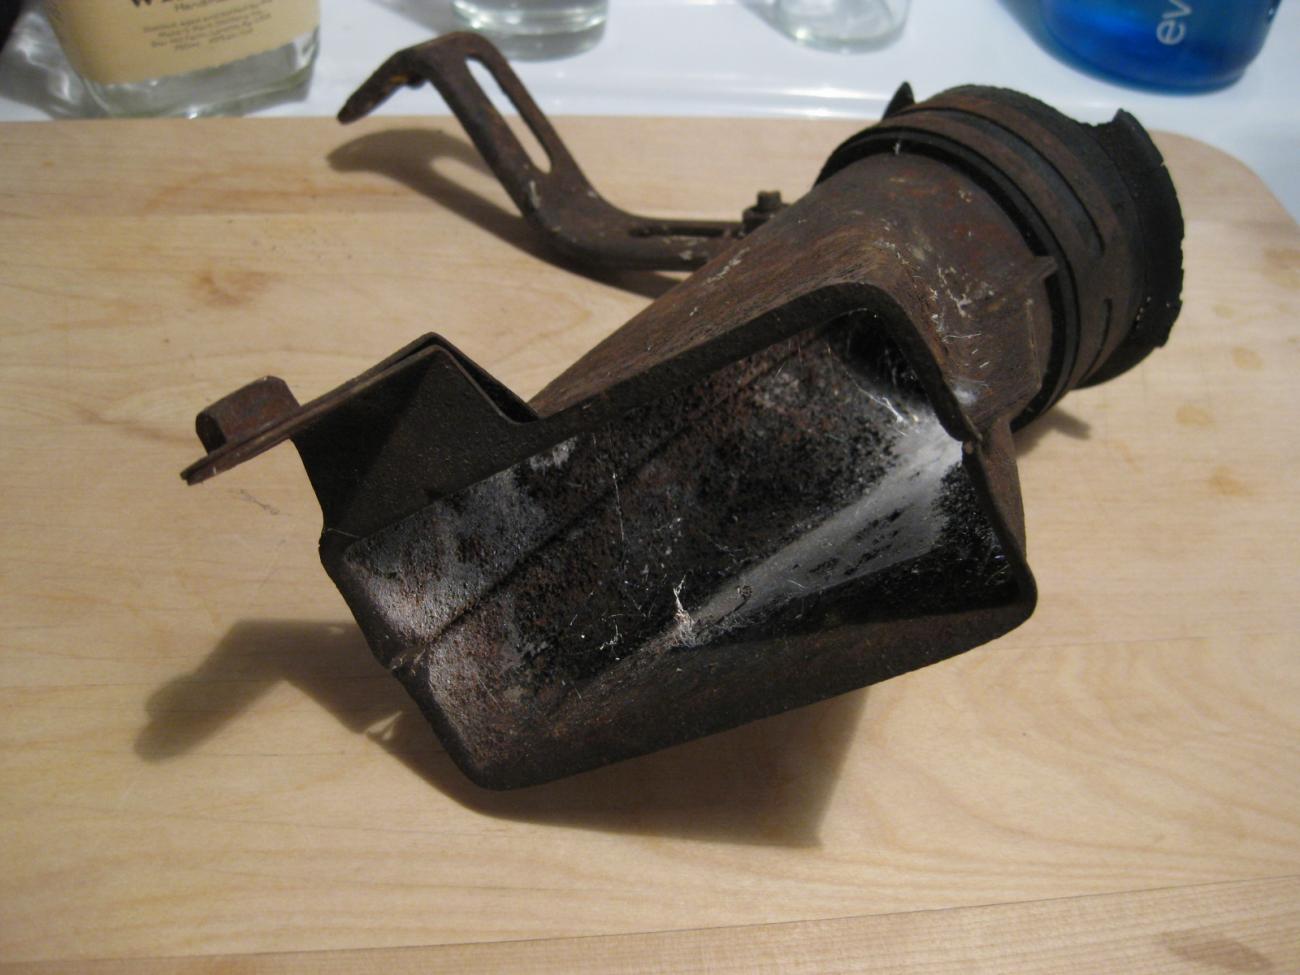
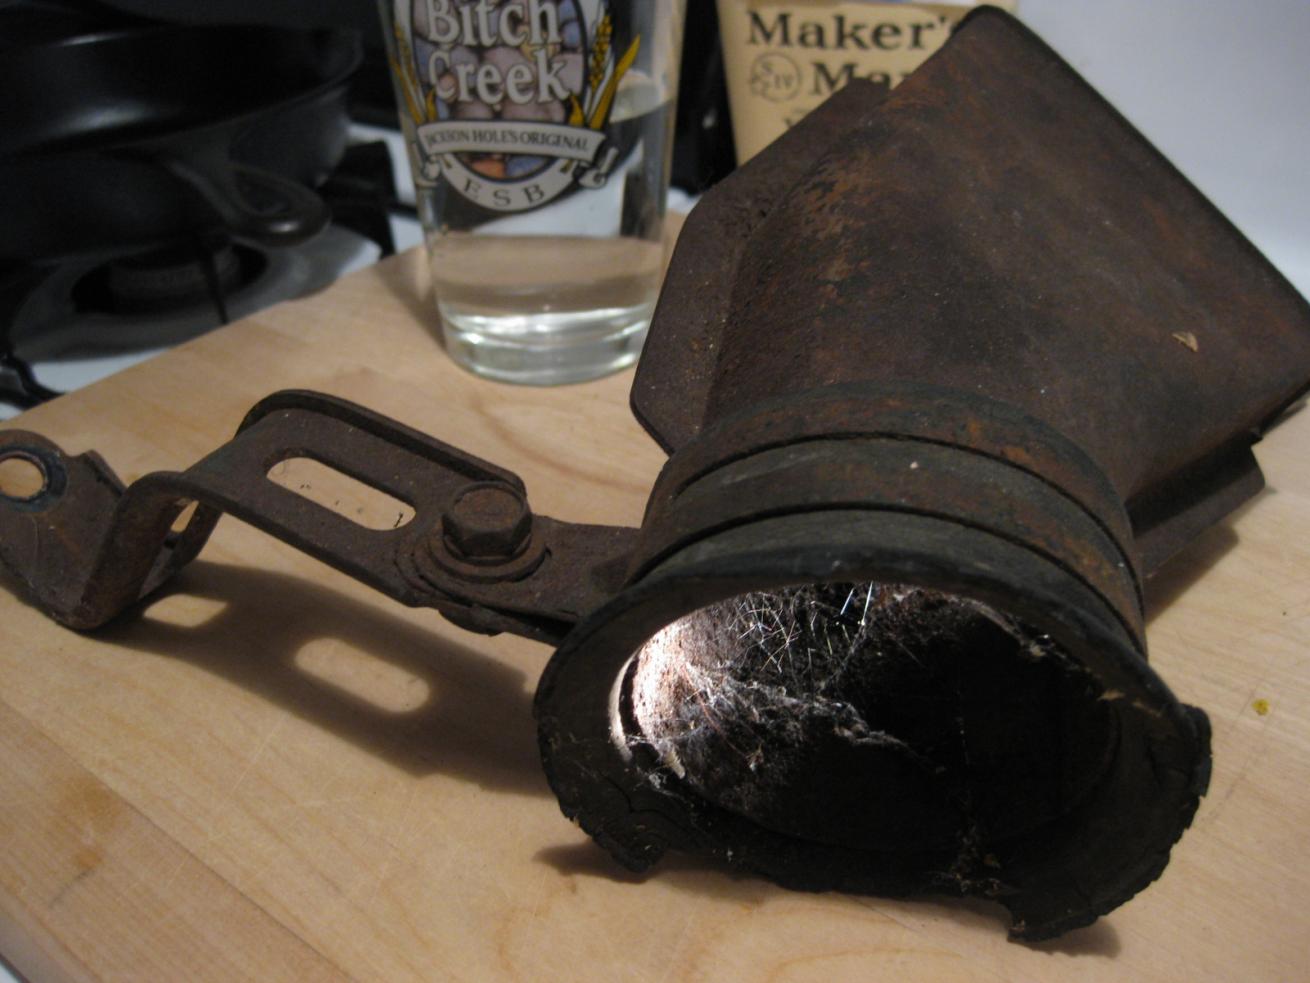
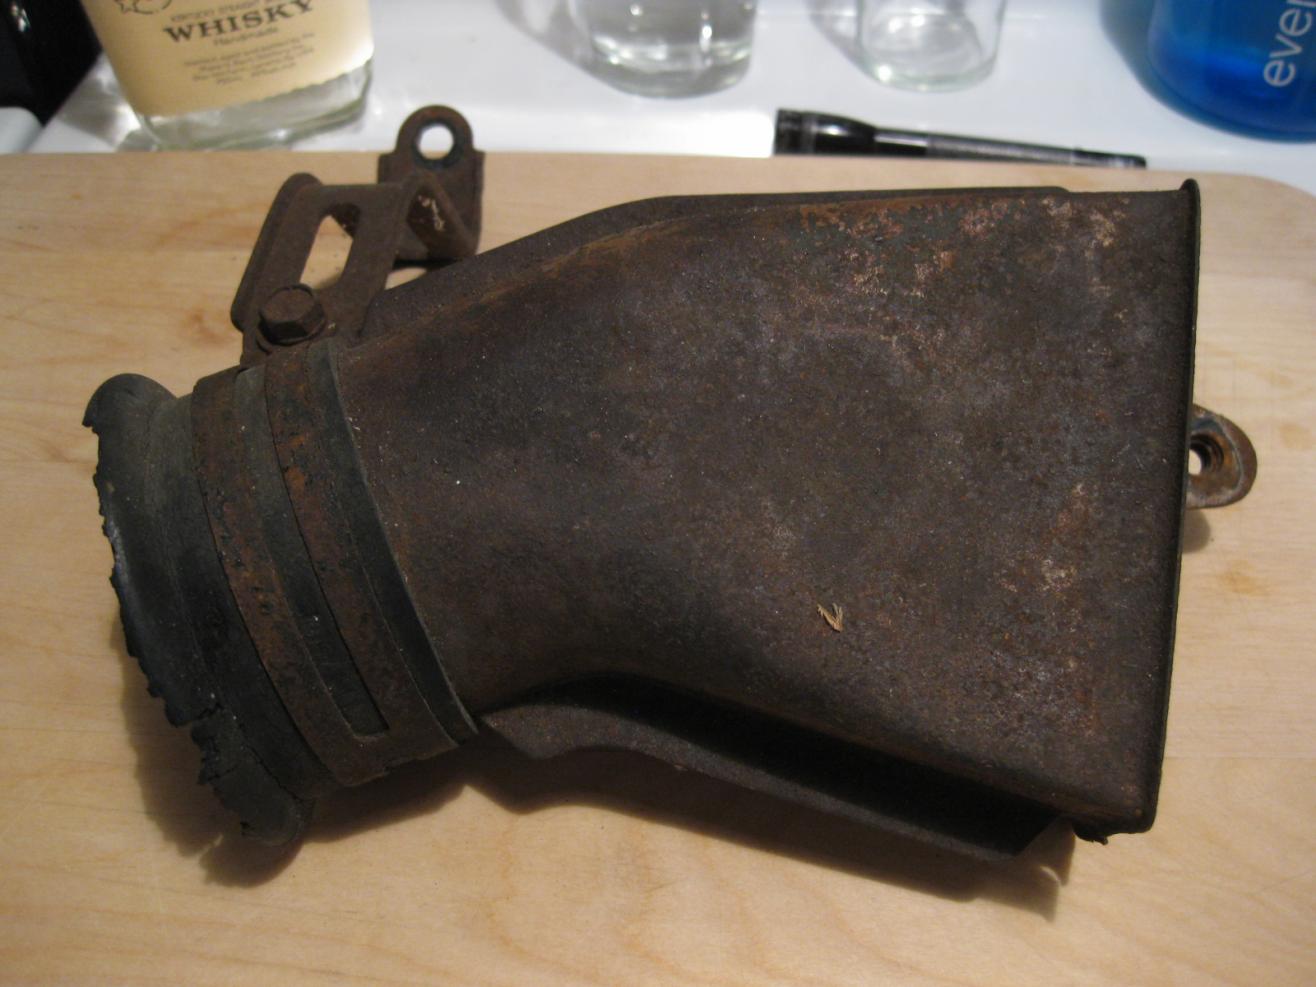
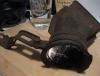
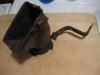
I got this part with my model 65 truckmaster heater, and this in no way fits anything on trucks that I know of. Might this be part of a car heater? It's got the remains of a rubber boot or hose with a clamp on the 2-3/4" dia. round end. See attached pics... Thanks,
-
I just filled a parade request last month, towed a float up and down several slight hills, and the daytime temp was in the upper 70's. The engine was hotter than usual, but no issues arose. No shroud. Radiator has a new core though. An original core might present some challenges. I had more issues with exhaust. If you get into float towing, especially with people in the float, I would strongly recommend routing the exhaust all the way to the back of the float!
-
Low and back is a good thing....lower center of gravity and better handling, right? Hence the reason for the "slant".
-
Unsticking brass from pot metal
John-T-53 replied to ggdad1951's topic in Mopar Flathead Truck Forum
She looks a bit rough... Maybe the ATF/acetone mix would un-stick it? Good luck dude! -
I can certainly attest to that! Haven't seen any on ebay either. There's cables on there for later model sweptlines that look like the same style of cable, except for the knob and dash mount. One of these could probably be adapted. The PH era cables are very high quality, especially at the dash end, in my opinion. The solid brass and zinc plated hardware is bulletproof and works great when cleaned and greased. Dave Miller who had a big list of parts for sale on here still has a fresh air intake scoop last time I talked to him a few months ago.
-
Nearly there..Finally finished one project
John-T-53 replied to dontknowitall's topic in Mopar Flathead Truck Forum
Cool! The Torqueflite script on the back is awesome! -
Good info Reg. Now if I can find some bulk cable for cheap, I might give it a go on making these... Thanks,
-
As I understand it: AIR: The duct valve HEAT or FAN: The heater's fan switch TEMP: Heater control valve DEFROST: (Self explanatory) Tod: Good find on the NAPA valve. I think I'm gonna get one of these as a backup for when the old Mopar valve starts to spray coolant all over.
-
For the valve, another option is to install a non-remote control type with a petcock style shutoff. This coule probably be aquited at Napa. StudebakerParts.com had a 4" duct hose but it's been on back order for months now. They also sell the defroster duct. The long cables that go to the water valve and fresh air duct valve are very scarce and impossible to find. "Townwagon" has a couple as part of an entire heater kit, but he's not selling separate. He might still have some of the dash-mounted pods where the control knobs mount, however. AMS Obsolete (fmmpar on ebay) has NOS cables for like $85 each (too much!). Maybe you could try to talk them down? I have a couple short broken Bowden cables with the control ends intact. Has anybody heard of a place that could rebuild these to any length?