


desoto1939
-
Posts
5,106 -
Joined
-
Last visited
-
Days Won
59
Everything posted by desoto1939
-

Ammco Safe Arc Cam Grinding Brake Shoes purchase
desoto1939 replied to desoto1939's topic in P15-D24 Forum
I was doing some reading in my Miller tool catalog and they show some information on the Ammco Safe arc tool. This tool can be setup to arc the shoes for any drum that has been cut up to .050. So with this information I would assume that the max that any f these old drums on our antique car could be officially turned down and to still have enough meat on them would be .050. Red the description section. Rich Hartung desoto1939@aol.com
-
Ammco Safe Arc Cam Grinding Brake Shoes purchase
desoto1939 replied to desoto1939's topic in P15-D24 Forum
All good points that everyone is posting. This is what I was looking for when I first posted this opportunity. If the cost of the tool was around $150 then I would get the tool but when it is over $500 then it does not become cost effective. I am going to hold off on the offer and the gentleman might lower the price. He even told me that he does not expect to do any brake in the future. So my thinking is that he will be hanging onto the tool and then determine maybe to sell it at a lower price. Thanks for your input. Rich Hartung Desoto1939@aol.com -
Ammco Safe Arc Cam Grinding Brake Shoes purchase
desoto1939 replied to desoto1939's topic in P15-D24 Forum
The seller wants over $550 for the tool. I am still considering the purchase but the real big question is will I ever get enough business to warrant the cost of the tool plus getting some extra parts. Yes I know that this is a dying service so it is a real question for me to answer. If I get the tool I will let everyone know of the service. These older cars and the ownership of these cars is slowly dying and the young kids of today do not want these cars so that makes it harder for me to decide to purchase the tool. Rich Hartung Desoto1939@aol.com -
So Keith are you saying that the threads for the by-pass house are metric and not standard US threads? Also what about the bolt that now goes into the hole around the 7 o-clock position? Rich Hartung
-
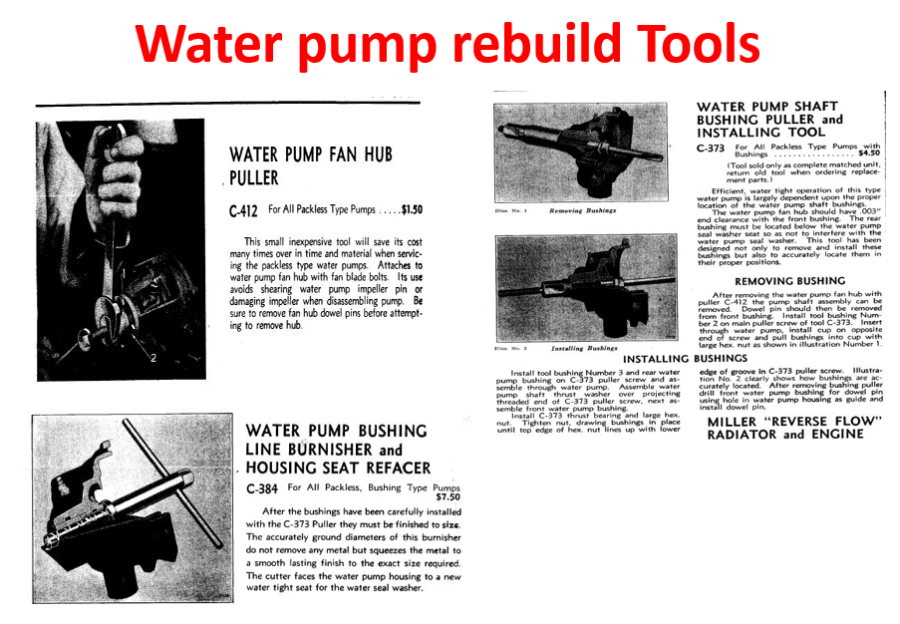
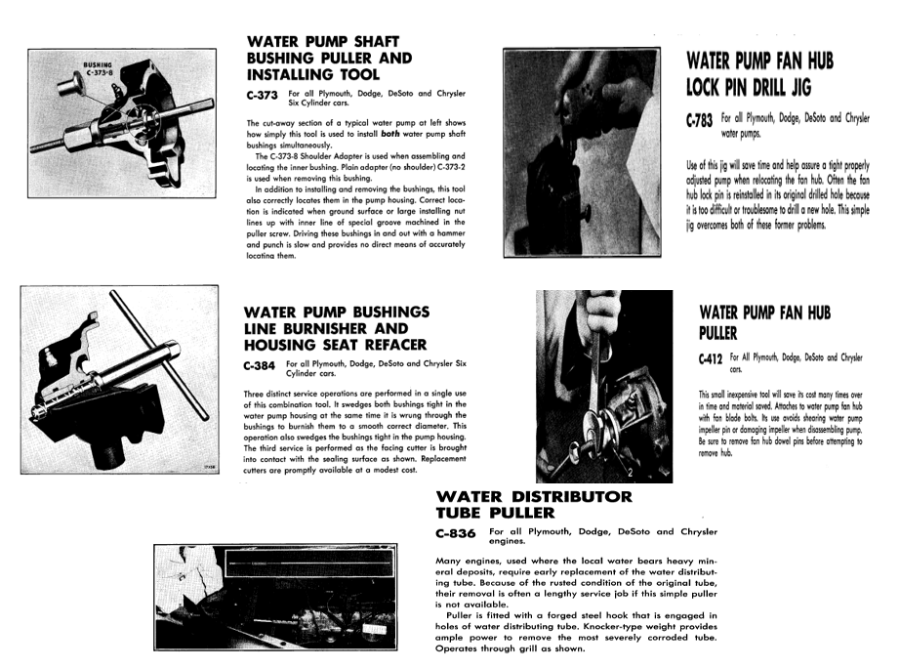
But with the newer gates pump you might have an issue. I have found that the older Mopar had three threaded studs that some out from the front of the block. The issue is that the stud around the 7 oclock position when looking straight forward is very short. The new style now has a thicker body at the point on the body and when you go to install the replacement unit the stud will not stick out of the body and you cannot bolt the waterpump to the engine. They provide you with a long bolt that you can then thread into the water jacket but you then have to remove the studs that might be 50+ years old and has been in the water jacket. Possibility of bracking off the stud. Yes you can heat the old studs and use a stud puller. I have informed Andy Berbaum about the issue and they stated that this is the correct pump but the early bodies of the WP were on approx 1/2 thick at the 7 o-clock position. I spoke to Art Gould WP rebuilder and they told me that if there is enough material in the old wp that they could enlarge the main body and install a sealed bearing which is much better that the old fiber gasket internal bushing. So if you have the older style WP I would keep the body just incase you have to rebuild it. Contact Art Gould up in Mass. I do know they come to Hershey in October. In my last set of picture in the upper left corner is the proper Miller tool to puller the mounting bracket from the shaft. The tool under that is used to insert a drill and is mounted on the shaft to drill the hole into the shaft when you replace the pin. You do not see these tools even at Hershey, so I have some rare finds over the past 35 years. Just an FYI. Rich Hartung desoto1939@aol.com
-
Most of these hoses for the oil gage are rubber so that when the engine might move the rubber then can flex and this prevents the oil line from bending and breaking and leaking. You can get a replace rubber oil line on Ebay or contact Andy Bernbaum for your MoPar Vender. Rich Hartungdesoto1939@aol.com
-
Castrol GTX Classic 20-50 Motor oil with High ZDDP levels
desoto1939 replied to desoto1939's topic in Technical Archives
I fully understand your input. I am not trying to persuade anyone to use any specific brand of oil. I know there has been alot of talk and posting regarding the use of ZDDP for the older cars every since it was removed because of the use of catalytic convertors in the modern cars. I know some people add in the ZDDP additive and others do not. Yes I also agree that the oils we used in the 20's and up have improved dramatically with their protective additives and how we can refined these oil products with better standards. I know people that are using the Purple brand or VR1 in their antiques and that is fine with me. I was just trying to point out that there are other brands that have the same qualities. But I have seen anyone post the data to support what is in each product. I am not a chemical engineer so I have to believe what the company posts and then everone can make their own opinion and use the product of choice. Rich hartung -
Castrol GTX Classic 20-50 Motor oil with High ZDDP levels
desoto1939 replied to desoto1939's topic in Technical Archives
Los Control so what oil brand and weight did you switch to use in your cars/trucks. As you also know multi weight oil is a detergent oil and will get dirty with use. That is the makeup of the product. Straight weight oil does not have the cleaning agents, so maybe you were picking up the oil that had been cleaning the engine over time. Did you also change the filter at the same time. I do know that the by-pass filters in the old style oil cans stated that you could go 5-8000 miles prior to replacing the oil filter, this is because the filter was not a full flow filter. Not sure of why you had this problem, I am only reporting what I can and with the facts that I was provided. Rich Hartung desoto1939@aol.com -
sniper I was also confused by what he was trying to pull off the water pump. refer to my posting just prior to yours and the required tools that the factory Miller tool company created that the dealership used. These tools are from my personal collection and from my power point presentation that I did for the National Desoto club. These were all used by Chrysler, Desoto, Dodge and Plymouth. Rich Hartung
-
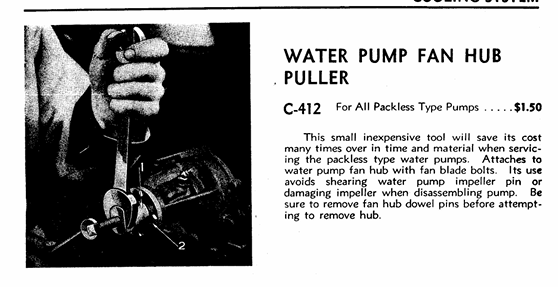
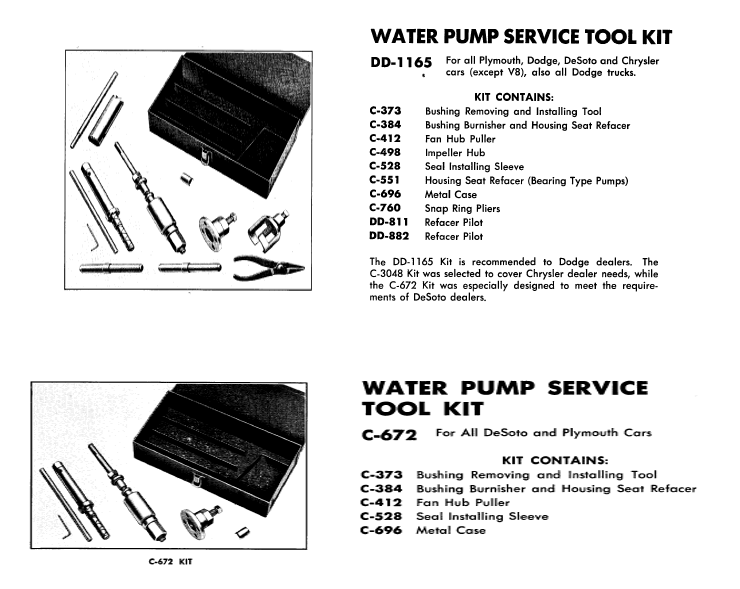
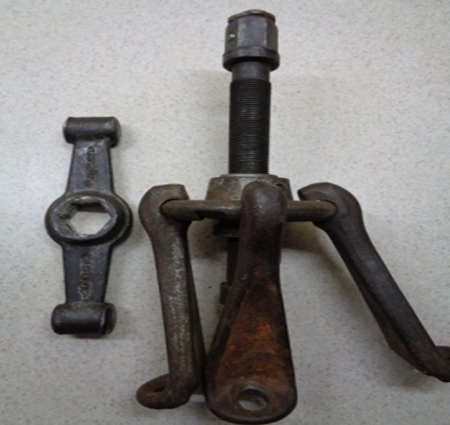
I have this puller in my collection of factory miller tools. Read the description. Prior to pulling the hub there is a pin that goes through the hub and the shaft. This needs to be pushed out prior to trying to pull the hub. You can use a punch to drive out the pin. Then use any two arm or three arm puller to remove the hub. There specific tools that were made to disassemble and rebuild the water pumps. You just might want to get a complete new water pump with the pully already attached. I have the complete rebuilding tools. The screen prints were taken from my Miller tool presentation that was done at the 2022 National Desoto Car show and Annual Convention. So you can tell there are a fair amt of special tools required to rebuild a water pump for your car. I would sell the entire kit if you are really interested. These factory tools are very hard to find even at the Great Hershey swap meet. Rich Hartung Desoto1939@aol.com

-
I know there has been a-lot of questions and answers about the use and requirement of replacing the ZDDP properties for our older cars. Castrol is now offering a motor oil called Castrol GTX classic W20/50 that has one of highest ZDDP amounts. I contacted Castrol and they provided me with a tech sheet about the oil. I also have another document with info on ZDD properties written by Egge Machine company. I have attached both documents for your reading. Rich Hartung Desoto1939@aol.com Castrol GTX classic 20-50 oil zddp & Phosphorus.pdf ZDDP Egge Information.docx
-
I currently use Castrol GTX Classic 20/50 in my 39 Desoto. The engine has been rebuilt. I use this because this il has a very high amt of ZINC and phosphorus and Boron for our older cars. It CAN NOT again IT CAN NOT be used in modern cars that have catalytic convertor, it will run the convertor. I did a posting on this oil awhile back and received the amounts from Castrol's Tech services department. You can get this oil from Amazon and sometime WalMart. Attached is the information from Castrol and also EGGE regarding ZDDP for your reading a files. Rich Hartung Desoto1939@aol.com Castrol GTX classic 20-50 oil zddp & Phosphorus.pdf ZDDP Egge Information.docx
-
five lug rear brake drum puller with the sixth hole for the mounting pin that was used on the MoPar cars that use bolts instead of studs. I like this style because you get equaly amt of pulling on each std or mounting bolt versus the three arm puller that has more pulling on the arms that are close to each other. Took me awhile to find this puller but was worth the wait to purchase one. The 6th hole is the one at the top of the puller at 12 o-clock Rich Hartung desoto1939@aol.com Here are pictures of the pullers taken from the Miller tool company that supplied tools to the Dealerships


-
ED: when you say the threads are worn and you state that one of them will pull off the stud when cranking on the puller. I would be real concerned right now becasue if they are that bad then how do you tighten down each lug nut to insure that the rim is on tight to the drum? If they are that bad then your first concern is to get new studs installed. Since they are lefthand threads did someone try to take them off incorrectly at some point in time? Rich Hartung
-
Yes I am well aware of that fact. So this is why I have over the years collected several NOS Autolite IGS3004A breaker plates that are complete, NOS rotors, Condensers that I have tested distributor caps, AutoliteA9 sparkplugs, vacuum advance units, several IGS4102C complete Distributors and one is even NOS and other items that will keep my car running down the road. So when your Pentonix system craps out on you in the middle of nowhere how are you going to fixit. With spare points,condensor, rotor,cap and plugs I can get the car running again. I am not knocking Pentronic's but the tried and true old points sytsems still provide good service t these older cars. Also from 1939-48 the chrysler products used the same parts so there still be aviable and also parts from Echlin, Blue Streak, Standard and several other manufacturers. But I prefer Autolite as my first choice. Rich Hartung
-
I have a 39 Desoto that still runs the original stock 6v system and still uses the old points and condenser setup for the past 35 years and the car is 84 years old and still goes down the road smoothly at 50-55 mph. I only use Autolite electrical components becasue they were the factory installed parts. The good old quality parts make a difference instead of the Chinese junk! Rich Hartung Desoto1939@aol.com
-
are you using a 3 arm puller or a 4 or 5 arm puller? If one of the threads are weak on one of the studs then move the arms so that the week threaded stud is not being used to pull the drum. Also which drum is in question you also might have left hand threaded studs on the driver side of the car versus right handed threads on the passenger side of the car. You could have the mechanic change to all right hand threaded studs on both drivers side drums. Then go to a good mechanic and have him replace the band studs. This can be done. Rich Hartung
-
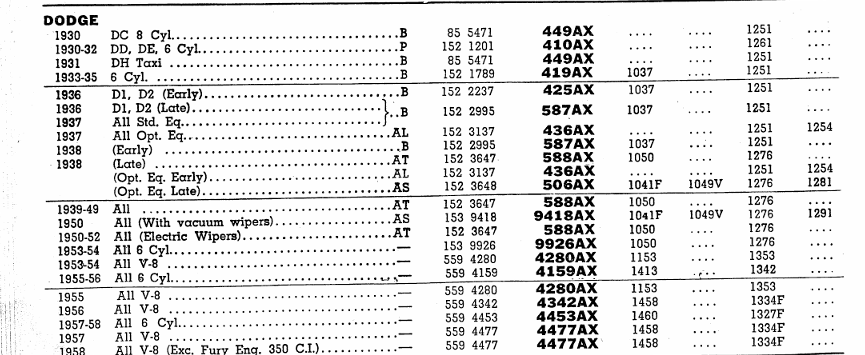
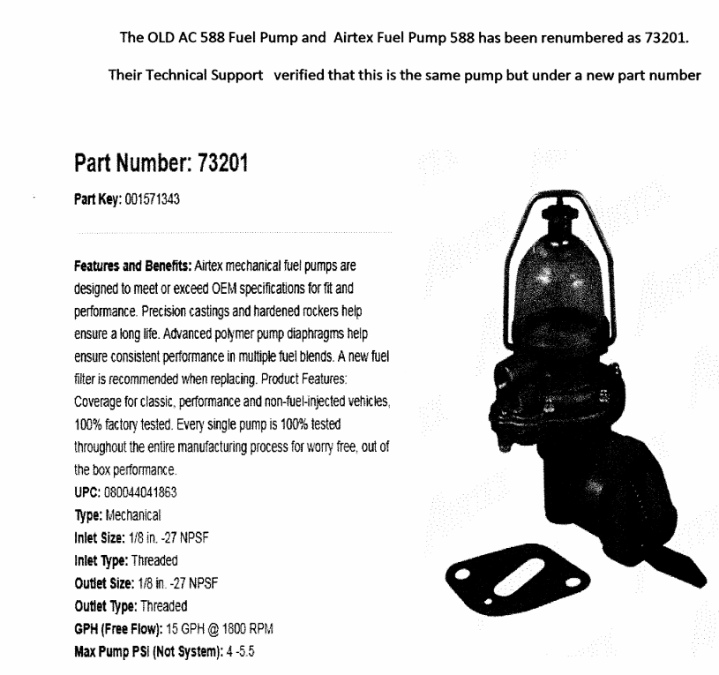
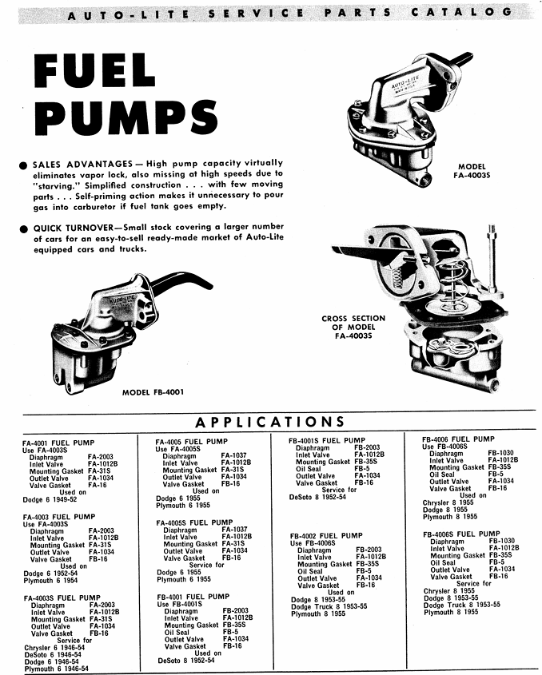
Dave - Rich Hartung adding some info from my Airtex catalog for you. Here is info on Autolite fuel pumps: look a the model FA- 40035 same arm as on the 588 model that Andy B sent you.

-
yes on Tuesday f this week the Hemmings Motor News and Cocker tire was hosting the Great Race from Kty to Maine which ended today. Gettysburg was a stop over location and day ending finishing point. The race which really is not a race but a time and endurance rally is held every year. Original it was an event that went across the USA. Rich Hartung desoto1939@aol.com
-
if i remember correctly these are cast housing so with that in mind I can see that they might get brittle and crack apart when taking them off. Over the years I have obtained several of these housings. Rich Hartung
-
I know that we are talking about putting cars up higher off the ground with wooden jack stands/supports. My main concern is that the entire car is off the ground but no one has mention that if you are working under the car that you should have someone in your house if the garage is attached or even if its a detached garaged to be on a standby situation in case of an accident. When working under the car my suggestion is that you go to a resale baby store and pickup a two way baby monitor and have the sending unit close to where you are under the car and that the other person in the home can also hear you and communicate back to you. These are cheap and just an idea to help incase you need help. Also shake the car or bump into the car to make sure it is stable. Another idea is that you should have some form of a tire stop or wedge built into the stand to prevent the car from rolling forward or backward if holding the car up on the stands via the tires. Most f this is common sense suggestions, but just a reminder to play safe. If the car seems to move when working on the car then stop what you are doing and safely get out from under the car and then get it to a mechanic that has a certified lift to work on the car. The extra cost is minimal when compared to you getting hurt and even killed under the care. Rich Hartung Desoto1939@aol.com
-
Ammco Safe Arc Cam Grinding Brake Shoes purchase
desoto1939 replied to desoto1939's topic in P15-D24 Forum
yes you can arch any style drum brake shoe but not disk brake pads. It is all in the setup of the machine and also having the drum miced to know how the diameter of each drum, you can not assume that each drum is a perfect 10, 11 or 12 inches. If the car is old is probably has been cut down at some point. This is the reason why you have to mate the shoes to the drum. So there is some time that the owner has to spend to get the proper measurements and then that has to be setup on the ammco safe arc tool. Rich Hartung desoto1939@aol.com -
I am going to Gettysburg on Wednesday 6/26/24 This is one of their stop over locations. Rich Hartung Desoto1939@aol.com
-
Ammco Safe Arc Cam Grinding Brake Shoes purchase
desoto1939 replied to desoto1939's topic in P15-D24 Forum
Thank you, I am just trying to guage how much interest there is within the members t o proceed or not to proceed with this option. And yes if I do go with this arching I will then list it in Classified section. Thanks, Rich Hartung Desoto1939@aol.com -
to replace the small 1 inch rubber hose for the by-pass you either remove the thermostat housing or the by-pass housing unit. The hose is a very tight fit in space so that is the best way to replace the hose. When I did mine I also installed a shut off vale in the bypass unit so I could control all water flow from and to the heater. So I had a shutoff valve at the rear of the head by number 6 sparkplug and then one on the bypass adapter. The reason is if I had to work on the heater i could then cut off the entire flow of water at these two point and then only have a small amt of water in the two hoses and in the heater and could drain the heater without draining the engine of AF and water. Think ahead for future project and think about how much time this just saves. Rich Hartung Desoto1939@aol.com

