


DonaldSmith
-
Posts
2,471 -
Joined
-
Last visited
-
Days Won
25
Content Type
Links Directory
Profiles
Articles
Forums
Downloads
Store
Gallery
Blogs
Events
Everything posted by DonaldSmith
-
Possibility 1: Ma Mopar calls up Briggs and says, "The war's almost over. For the postwar Chryslers, DeSotos and Dodges, we're changing the chrome, reworking the doghouse, and we're flaring the front fenders into the doors. (And making the sedan back windows bigger). Briggs says, "We've still got the prewar dies. We'll tweak the front doors, and enlarge the back windows." "Good to go. "Build us some bodies of each body style." They make a few Town Sedans, until Ma Mopar says "Let's concentrate on the regular sedans, which are selling like hotcakes." Possibility 2: Enterprising builder says, "My '42 Chrysler Town Sedan is looking old. I'll make it look like these new, postwar models. I've already got the covered running boards, but I'll redo the chrome moldings, the tail lights, and add the new doghouse. And I'll add the flair to the front doors." But did he enlarge the rear window? I'm guessing Possibility 1 is the most likely.
-
That black Chrysler Town Sedan has the post-war chrome strips, covered running boards, and front fenders flaired into the front doors. So they must have made at least one 46-48.
-
Found images of 1941 and 1942 Dodge, Chrysler and DeSoto Town Sedans on line. (I can see Mother Mopar wondering, why make a low-volume model, when we can't make enough cars of the usual models?
-
Good question. Searching for images, The only Chrysler and DeSoto Town Sedans I found had running boards (pre-war) or were '42s. Hmm...
-
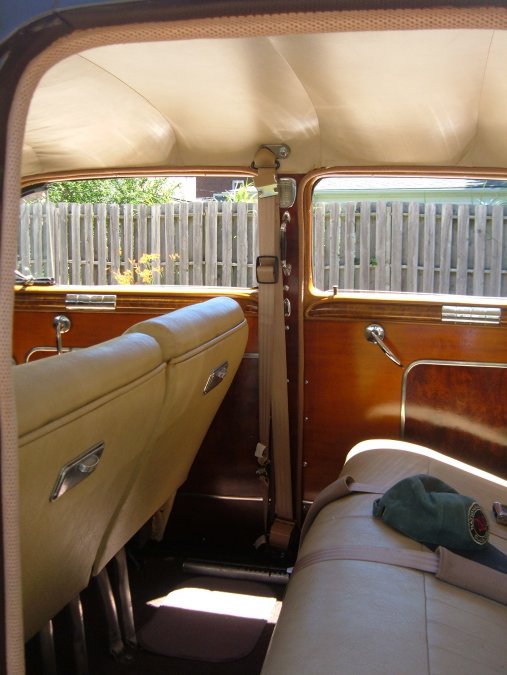
I've put in Seat Belts Plus components, and I'm happy with their quality. I started with lap belts, then figured I wanted lap/shoulder belts, since my seat backs do not latch, and I might have the second seat passengers on my back. I had some fun putting anchorages above the headliner and at the quarter window frames. The front belts obscured the coach lights on my "B" pillars, so I made short extensions. Then the lap/shoulder belts seemed clunky, so I went to retractable belts. I had a little fun installing the retractors at the floor, and getting the inboard belts the right length. But, I'm happy with the products and the result. And what's this hobby without a little fun (read "challenges")? I have more photos, showing installation details. PM me if you have questions or want to see any photos.
-

How to replace door window and door latch?
DonaldSmith replied to MarcDeSoto's topic in P15-D24 Forum
I feel your pain. Then, one could take the stuff to a glass shop, but where's the bragging rights in that?. -
How to replace door window and door latch?
DonaldSmith replied to MarcDeSoto's topic in P15-D24 Forum
The smartass reply to removing the glass - very carefully. Carefully run a snap knife along the channel on both sides? run a non-metallic pry bwtween the glass and the bottom of the channel? I removed the quarter window from the frame years ago. Gradually.
-
Thanks, johnsartain, for the tip - fuel priming pump for outboard, as possible replacement for aging Jiffy Jet bladder. We'll see how long my bladder (the one in the Jiffy Jet pump) lasts.
-
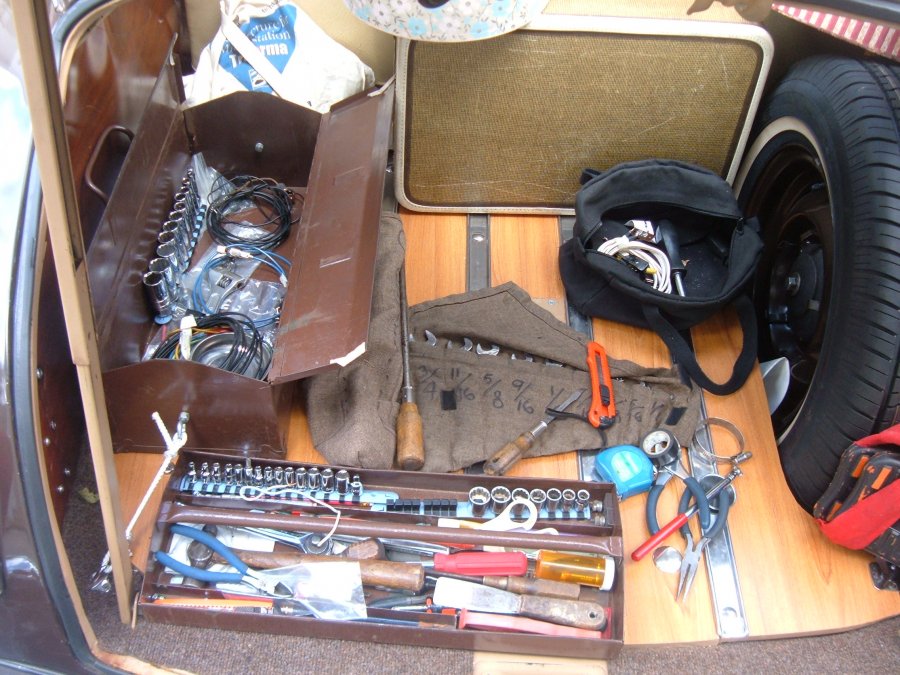
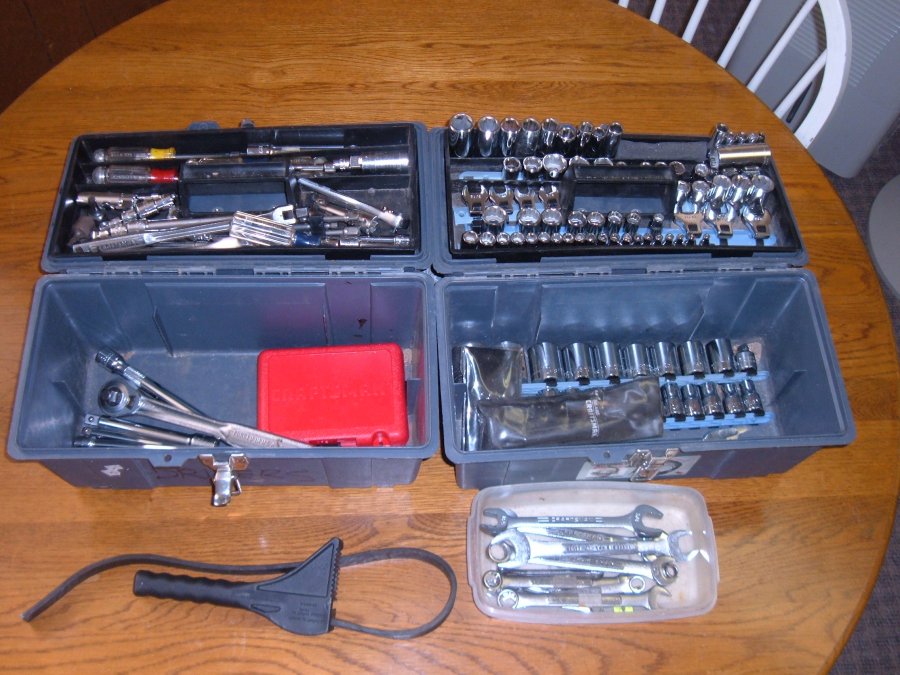
Car Tools: (DeSoto) Garbage-picked vintage toolbox, tied down; sockets in Hazard Fright plastic racks. Hacksaw and combination wrenches in custom-made pouches. Frequently used tools in black HF toolbag. (Jumper cables not shown; in similar HF bag.) Also shown, vintage, garbage-picked suitcase (and hat boxes).
-
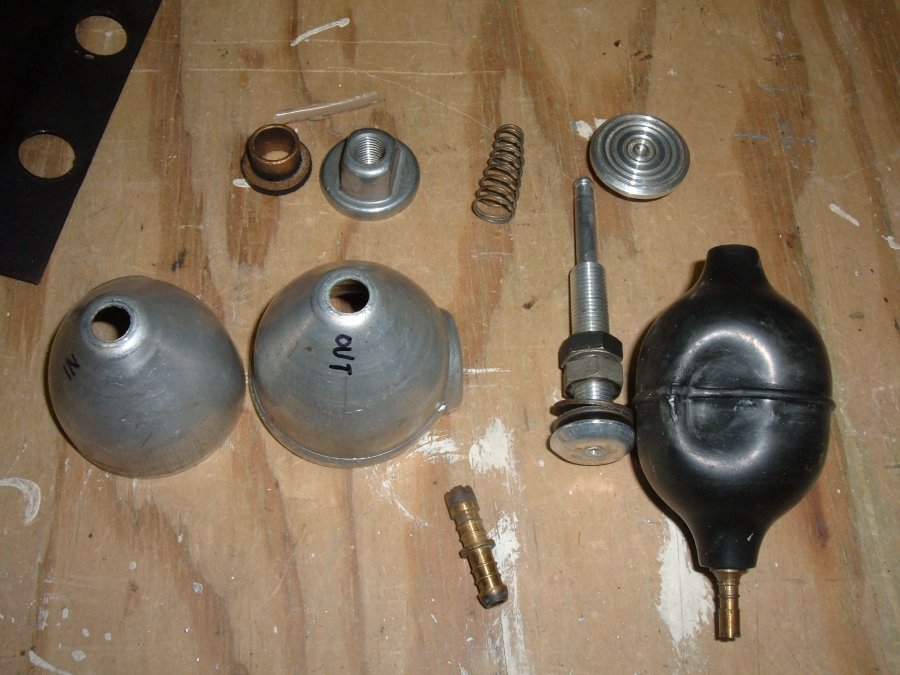
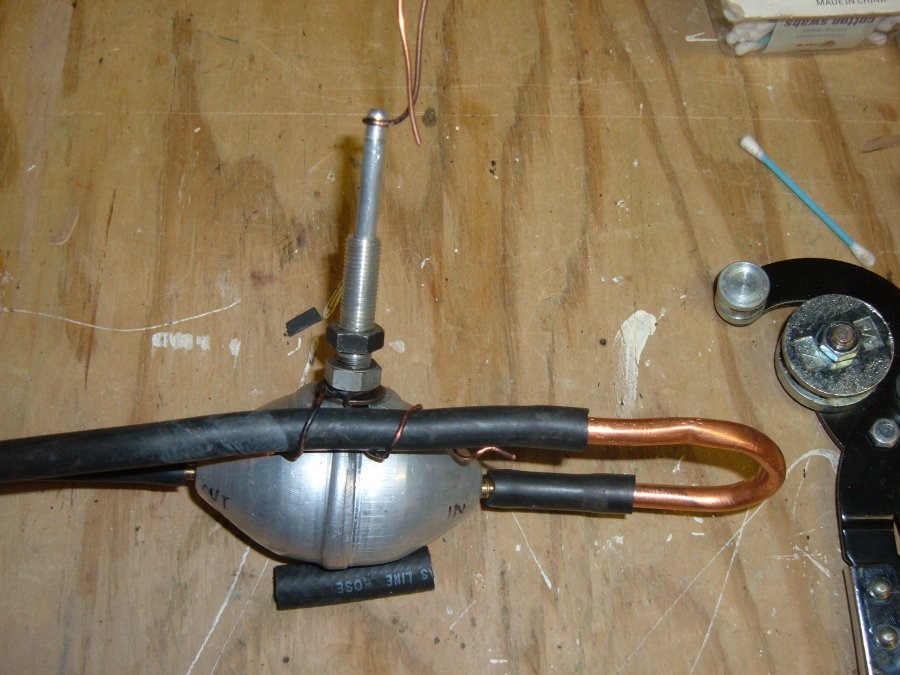
Jiffy Jet Repair: The stream weakened and the Jiffy Jet stopped squirting. I removed and disassembled the foot pump. I think something was caught in one of the check valves, because in a bench test, it worked. The rubber bladder had a permanent indentation from the plunger, and the beginning of a crack. I turned the bladder upside down and reassembled the pump. When I reinstalled the pump, it leaked at the hose fittings. I disassembled the pump again, and super-glued the fittings to the bladder, and filled the cracks with superglue. I reassembled and reinstalled the pump, and it is working, for now.
-
House tools: Most of the wrenches, sockets, etc., are in three tool totes, SAE, metric, and drivers (SAE and drivers shown). The sockets are kept neatly in plastic socket keepers from Hazard Fraught. There's another tool carrier for screwdrivers, pliers, etc.. Then there's the wall-hung cabinet for saws, wrecking bars, etc. I have carrying trays for the tools and parts for a specific project. So, I'm almost organized.
-
I've got house tools and car tools. My car tools reside in a a vintage toolbox secured in the DeSoto trunk, and in a carry bag behind the front seat. Quickie repair tools in the bag, and the heavy-duty ones in the toolbox. On occasion, I'll borrow a house tool, like when I need two wrenches the same size. I'll mark a house wrench with masking tape, so it gets back home. The really heavy car tools reside on shelves in the garage, like the pickle fork and tailpipe expander. I don't expect to use them for roadside repairs. Most of the car wrenches and sockets are SAE, but I have a few 1/4-inch drive metric sockets that were part of a set. I'll need them on occasion, when a metric bolt or nut sneaks in , as on an accessory.
-
A DeSoto motor is about 25 inches long; Plymouth's is 23 inches. Don Coatney put a DeSoto engine in a Plymouth, and the info is here somewhere. It took some modifications to fit.
-
Don't crank on a wrench that's too loose, or the bolt head or nut might get rounded, requiring a pipe wrench or vise-grips from then on.
-
I've heard that mapp gas is heavier than air, like carbon monoxide, while propane is lighter. Mapp might settle in confined areas, or find its way to a pilot light. Just another caution, to be cautious about.
-
My daughter, a high school teacher, sent us a picture of an object flying out of a planet. The caption was "Large mass expelled from Uranus".. Her comment was, "You kids in the last row, stop giggling." She's a good, no-nonsense woman, but growing up with two older brothers equipped her with enough coarseness to match anybody.
-
For testing, you could hook a test light to the horn relay, instead of the horns, and merely annoy your neighbors with the sometimes steady, sometimes intermittent light, rather than with the blaring sound.
-
How the horn ring actually works (counter-intuitively, for sure): The wire up the steering shaft is from the horn relay, and has to be grounded to honk the horn(s). This wire connects to a bar that goes across a big spring. Without the prongs on the back of the horn ring, pushing the spring away, the bar would complete the ground to the spring, honking the horn constantly. The horn ring is insulated, so it can push the spring down without grounding the circuit. As the horn ring is pushed in one location, the opposite side no longer pushes the spring way from the bar. So, you're not honking the horn at the part of the ring you are pushing, but by the opposite side. So, make sure that the ring is free to wobble in every direction. (There's a big washer that goes under the spring; I had it on top of the spring, and because of that, part of the horn ring was unresponsive.) Good luck; we're all counting on you.
-
My 47 DeSoto has an access opening in front of the front seat, for checking and filling the master cylinder. (When I got the car, the cover was missing, so I made a cover from a square electrical box cover, with two corners clipped).
.JPG.de03e8f9c20bb8b0290bfd8db1543dd3.JPG)
-
48 Plymouth harmonic balencer replacement
DonaldSmith replied to Ernie Baily's topic in P15-D24 Forum
Damper, my asymmetrical bolt hole. With the asymmetrical bolt hole, if the pulley is off registration at all, there will always be two bolt holes that don't line up, pulley standard hole against hub asymmetrical, and pulley asymmetrical against hub standard. When I was working out the pulleys for my power steering, I tried flipping some pulleys, and wallowed out the asymmetrical bolt holes as required. But the wallowed hole still worked to register the pulley, so that TDC was where it should be. -
48 Plymouth harmonic balencer replacement
DonaldSmith replied to Ernie Baily's topic in P15-D24 Forum
When I was messing with pulleys for my power steering installation, I was able to remove all the pulleys without removing the large center nut. The nut holds on the hub that has the six bolt holes and a center shoulder. I was even able to add a billet pulley by drilling the six holes to match, and cutting, filing, Dremel-ing the center hole of the billet pulley until if fit over the shoulder of the hub. The upper left pulley goes to the water pump. Upper right, stock crankshaft pulley. Lower right, damper (It just bolts on). Lower left, new billet pulley.ready-wpupperlft.JPG.b619f681de74bc27dfc283bf43806f5c.JPG)
-
Hard lessons relearned: I took a seat back off today, to mess with seatbelts. (47 Suburban seat backs work the same as for coupes and 2-door sedans - they fold forward.) I was able to remove the nut from the back of the outer pivot (philips headed shoulder screw), without removing the seat cushion. 9/16" wrench. But then the star washer fell off, necessitating the eventual removal of the seat cushion to retrieve the washer. I had the hardest time screwing the pivot back in. Kept trying to cross-thread . I chased the threads with a tap and die, and tried the screw with the seat back out of the way. Big Duh! The screw does not go in horizontally, but at an angle, so that it lines up with the center pivot. And the seat back at rest exerts an upward force on the screw, tending to misalign it. So, in reinserting the screw, hold the seat back somewhat forward, away from its final position, and aim the screw slightly upward. Start the screw by hand, run it in tight with a philips screwdriver. (There's a big washer at the head of the screw, and you have to help it stay on the larger shoulder while you tighten the screw.) Then add the star washer and nut. Hold the screw in with some force on the screwdriver while tightening the nut. (You have to do this with the seat cushion out of the way, but you had to move it anyway, to retrieve the star washer.)
-
Safety glazing lecture: Safety glazing either has to hold together when cracked, or break in many small pieces, per certain federal standards. Tempered glass is safety glazing. Laminated glass is safety glazing. Some plastic sheets qualify as safety glazing. Safety glass includes laminated and tempered. End of lecture.
-
48 Plymouth harmonic balencer replacement
DonaldSmith replied to Ernie Baily's topic in P15-D24 Forum
Hard to get the timing right if the harmonic balancer is slipping around. I found the sweet spot of the timing by trial and error, verified by vacuum gauge, and found that the timing marks on the harmonic balancer were all off. So I'm facing replacing the harmonic balancer and pulley this Fall. As far as pulley removal, been there done that. Yes, maybe have to shim up the front motor mount to clear the fan belt at the wallow in the cross member. Should be able to reach the pulley nut through a gap in the bottom of the radiator bracket.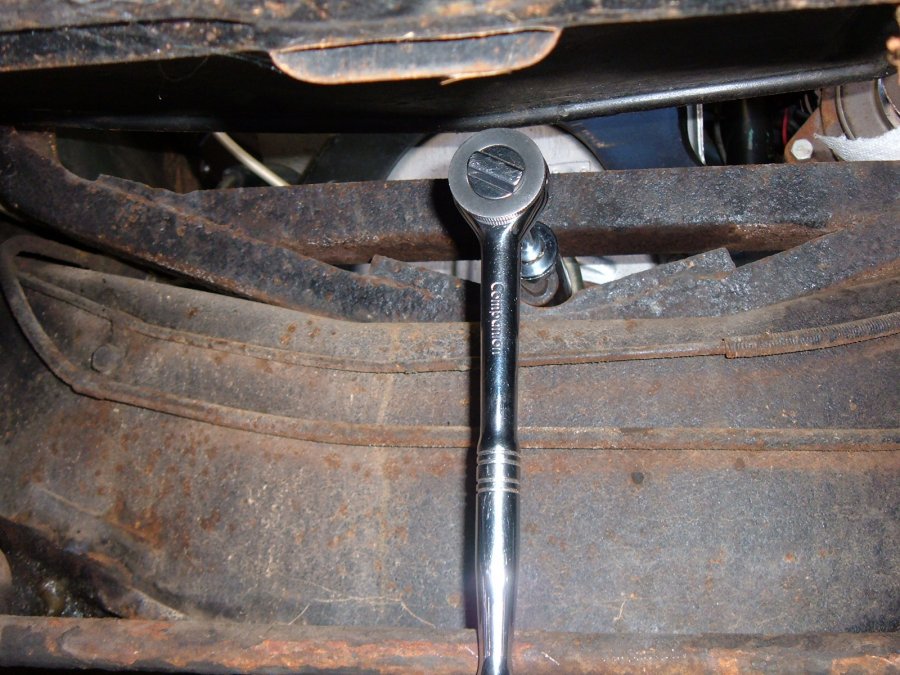
-
New guy with new (to me) '49 Dodge. And a question.
DonaldSmith replied to 49DodgeClubCoupe's topic in P15-D24 Forum
The front doors are locked on the inside by pushing the interior handle forward, and outside by key. Some cars did not have key locks both sides, but that's another story. So, try pulling the interior door handle back. That would be too simple. It that's what it is, it'll get you somewhere else.

