Kilgore47
Members-
Posts
426 -
Joined
-
Last visited
-
Days Won
11
Everything posted by Kilgore47
-
The first time I drove the P15 I had a one gallon lawnmower gas tank duct tapped to the fender with a gravity feed line to the carb. Less than 5 mph around the block. E brake only. What could go wrong. Had a smile on my face all the way. A year after that the car was road worthy. Keep working on your car when you have time. It will all be worth it when it's on the road.
-
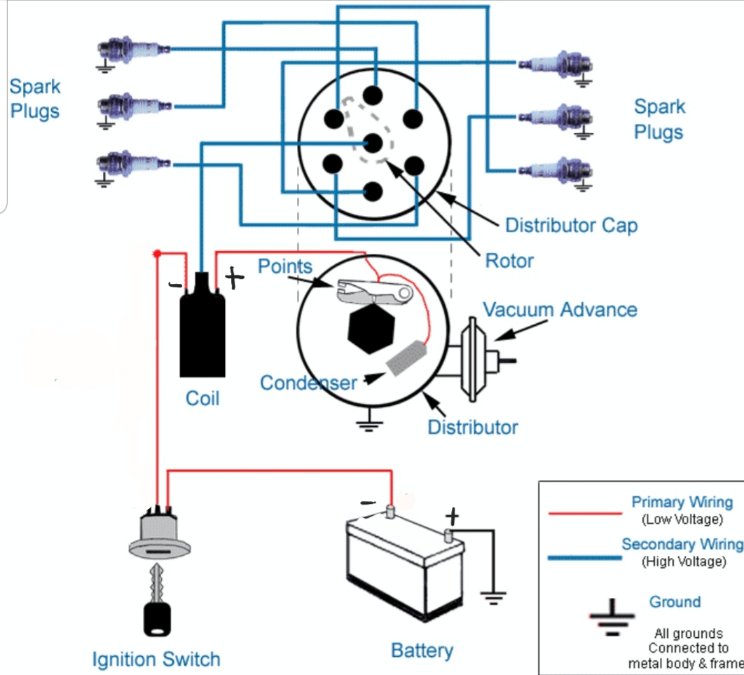
I don't mind. Don't remember where I got the diagram. Could have been on this site somewhere. I just marked it up to show positive ground.
-
This is a simplified generic ignition system diagram. I marked it up to show positive ground. Not sure if something like this has been added to this post. Hope it helps.
-
I put new boots on the P15 drive shaft less than a year back. Rebuilt the u joints at the same time. Not more that a couple of hundred miles on them. I was under the car a few weeks back checking something else and noticed that both the new boots are starting to crack. Guess I'll go with leather when I have to replace them again. That was one of those jobs that I didn't think I would have to fool with again.
-
I haven't been ordering from Bernbaums for 35years - only 2 years. But everything I have received from them has been correct and on time.
-
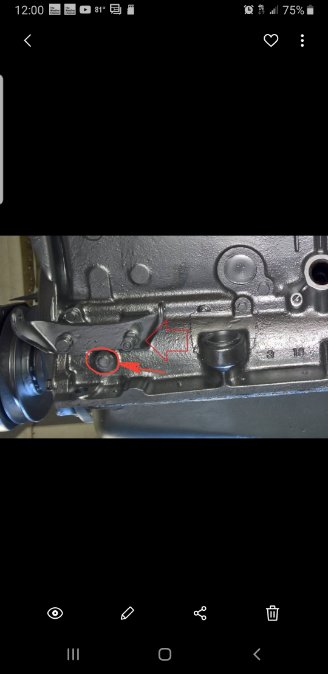
The ground on the block of my 1947 P15 is on a stud just below the generator bracket. But my car does not have the original engine. The PO told me that the engine was replaced in the mid 70's when they puled it out of a field and put it back on the road.
-
The banana trees made it back. They will probably end up bigger than last year. Several neighbors have starters now.
-
Kantner Auto Products has them for about 100 dollars. You may have to send the old one to them for exchange or to rebuild it. I was lucky and they had one in stock when I needed one last summer. They were able to send it to me as soon as my old one got there. I was told by them to keep the washers and fittings before I sent it to them.
-
I went to that aircraft site to check it out. And there on the page when it came up was the cable I needed for the hood release on the 47 P15. 23 bucks. Thanks 61spit. The cable is on order.
-
creative ad....picture yourself in this..!
Kilgore47 replied to Plymouthy Adams's topic in Off Topic (OT)
I have one of those I could sell. Only mine is a car. I think. Haven't seen it for awhile. -
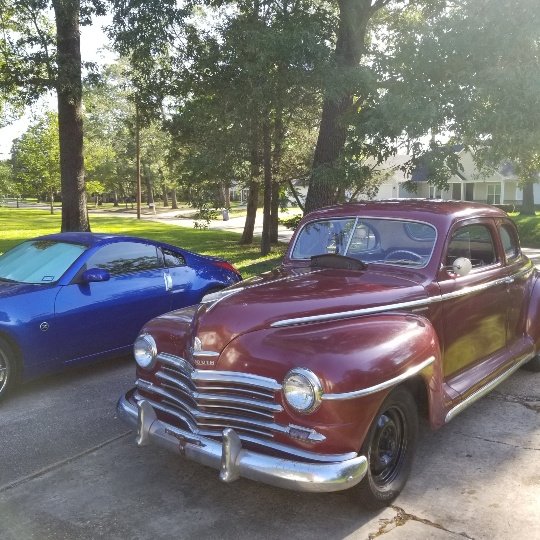
That's a 2007 350Z. I picked it up a few years back and it only had 15 thousand miles on it. Close to 50 thousand now. Before that I had a 1987 Corvette with only 17 thousand miles on it. But someone pulled out in front of me and totaled it. Decided to go with a metal car this time. Around town I use the 47. When I go out of town I take the Z.
-
I filled the tank before I left and filled it again when I got back. 12 mpg. That's more than I thought it would get.
-
My 47 P15 has an Earl Scheib type paint job that was done in the mid 70's. Looks like a quick tape job and lots of over spray. The PO kept the car under cover for 45 years so it still looks OK. Since I got it I have spent many hours buffing this paint and it looks better. There are some rust spots and much of the horizontal surfaces are spider webbed. The paint is a little crusty like the rest of the car. I like it just the way it is.
-
I made it back. Everything went fine. Ran between 50 and 60 MPH. A total of 56 miles. I have a lot more confidence in the car now. The oil pressure dropped from 50 pounds to 40 pounds at 50 mph once the engine got hot but it didn't go any lower than that. Running 30 wt non detergent. 40 pounds is OK. I'll top off the tank later and find out what kind of mileage the car is getting. This is a picture when I was getting ready to leave. The blue car in the back ground is my other daily driver.
-
Been getting into the low 90's here for the last few days. That's cool for this time of the year. Going to take the 47 P15 to brunch this morning with a group of people I used to work with. About 30 miles one way. This will be the first trip out of town with this car. Last time I planned to do this the car came down with generator and clutch problems. All that is fixed now so I'm going for it. More news latter
-
Finally got back to working on the 47. Turns out the generator has problems also. This was discussed under "Hidden Noises". I have a 6 volt positive ground alternator on order and this should solve the charging problems. Thanks for all the information
-
It took way longer to get around to working on the 47 than I expected. The generator is now on my work bench and in pieces. Was going to try and replace the bearing and bushing. Found the bearing no problem. Finding the bushing has been more of a challenge. I went by a local shop where the guy has been rebuilding starters, alternators and generators for 40 years. He had a bushing that would work. While there I asked him to look at the generator and tell me what he thought. He recommended a rebuild before it left me stranded. That would be about 200 dollars. And that was when I decided to go ahead with the alternator swap. A 6 volt positive ground 60 amp alternator is on order. About 200 dollars. Complete with the universal mounting kit and a pulley to fit the wide belt on these cars. I'll fix the bearing and bushing on the generator and keep it for a spare. Or maybe trade it for something one day. It can't be worth very much like it is. Problem solved.
-
I don't keep a log on the 47 P15 but I do keep a list of all the things I have fixed. The list is getting long. At first I kept track of the cost of the parts. After awhile I realized that I really didn't want to know how much it cost so that part stopped. I'll leave the list in the glove box for the next owner. Don't plan on getting rid of it any time soon so the list will get longer and longer
-
I think this information may be in the downloads section of this site. I requires removing the major adjustment bolts and cutting a screw driver slot in the back of the bolts. Then adjustments can be made with the drums installed. It's important as mentioned above that the drums are in good shape and that may require having them turned. I used this method on the 47 P15 after replacing all the shoes, seals, cylinders and lines and it worked. After about a hundred miles I remover the drums and checked for proper shoe to drum contact and all looked good. Brake Adjustment.docx
-
Check where the exhaust pipe passes over the frame cross member. As the rubber engine mounts age they loose height. This allows the engine to get a little lower in the mount. This also allows the exhaust pipe to get closer to the cross member and can sometimes contact the cross member and cause a knocking noise. When I got the 47 P15 the exhaust pipe was touching the cross member.
-
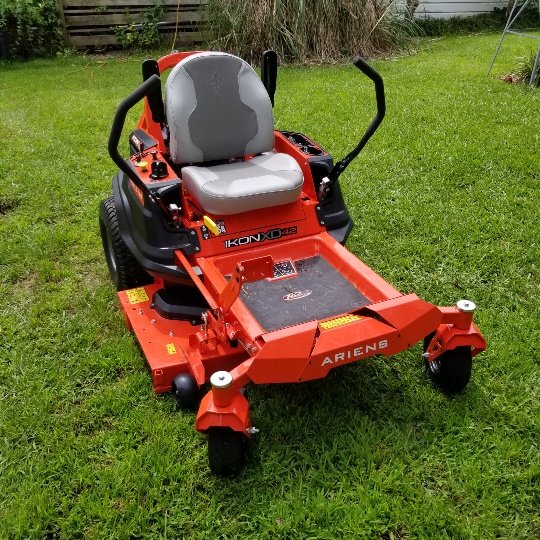
I finally got tired of nursing my old riding lawnmower along. It was getting hard to steer and would bog down on taller grass. And mulching leaves in the fall was almost too much for it. So I bit the bullet and got a 0 turn. A little scary at first but I'm getting used to it. Should be the last lawnmower I'll ever have to buy. My hands and shoulders would hurt after using the old one. Not so with the new 0 turn. Traded the old mower for a mulching kit and a trailer hitch.
-
The engine in the 47 P15 is reddish. The PO said that they put a rebuilt short block in the car when they pulled it out of a field in the mid 70's. At the last cruise night one of the people looking at the car said the engine was red because the PO got the rebuilt engine from Sears or something like that. Has anyone heard of this? One of these days I'll clean up the engine compartment and paint the engine silver.
-
The old battery was a little over two years old. It didn't have the cranking amps to do the job. The new optima spins it like a 12 volt. This is a picture from yesterday. Not a good picture. My car is the one in the middle with the stick holding the hood up. It's missing one of the hood springs. It really amazed me that so many people were interested in that old crusty car. Most of the cars there were modified and mine is original. Modified is OK. As people looked under the hood I could almost heat them think "does that run". There were many younger people looking and asking questions. That surprised me.
-
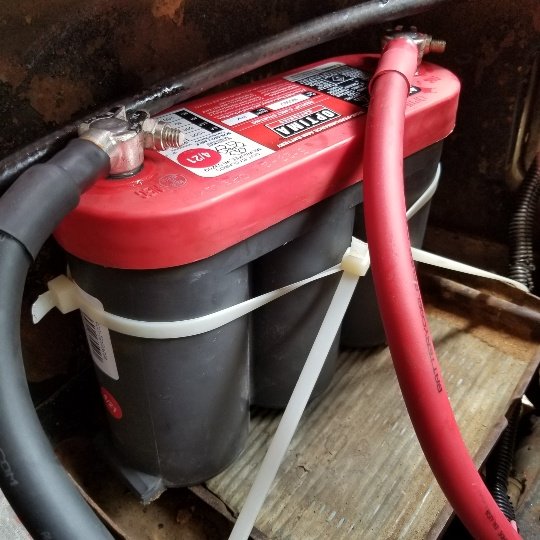
The Optima battery did the trick. Reach through the window hit the starter button and it cranks right up. Did a road kill tie down for the run downtown tonight. I have some brass sheeting to make a hold down tomorrow. After I fix the VR. Looks funny with that little battery.
-
The word cruise may be a little deceiving. It's about two miles to down town where we park along the street, walk around and talk to everyone. Small town. Then about two miles back. The fire extinguisher is a good idea. I'll take the one out of the old jeep.


