


Kilgore47
-
Posts
425 -
Joined
-
Last visited
-
Days Won
11
Content Type
Links Directory
Profiles
Articles
Forums
Downloads
Store
Gallery
Blogs
Events
Everything posted by Kilgore47
-
rear axle seals and bearing replaced on my '47 Plymouth
Kilgore47 replied to sjaakslinger's topic in P15-D24 Forum
I always bring this up when people are working on the rear end. Check the vent and make sure it's clear. If it's plugged it will force the grease through the new seals and onto your new brakes when it heats up. I found this out the hard way when I had to replace the new brakes I had installed a month earlier. -
I see what you did there
-
In my happy place. Working on an old car. This car has two carbs so it's twice the fun. They look good. Alshere59 did a good job cleaning them. Should have it back together in a couple of hours. Next I need to adjust the clutch. The lift will make that much easier. More news later

-
Finished setting up the lift last night. Just put the 50 on it a few minutes ago. Still need to move the tools to this shop. More news later

-
They do come apart. I had to use a Dremel to cut the ring that holds the amber lense in place. The back is metal with a gasket and clamp holding the lense in place. The bulb is soldered in. It's easy to de solder and remove. Carful with how much heat you use. I damaged the mirror finish on the first one I tried. Don't know where the fog light bulb is - I'm moving to the new shop and it's packed away somewhere. I have some extra replacement bulbs I could send to you if you can't find them. The bulbs I have are 32 CP intended as head lights but they can be modified to use in a fog light if you want to keep your original lense. New fog light bulbs are available but the ones I have are stamped with Mopar and I wanted to keep that.

-
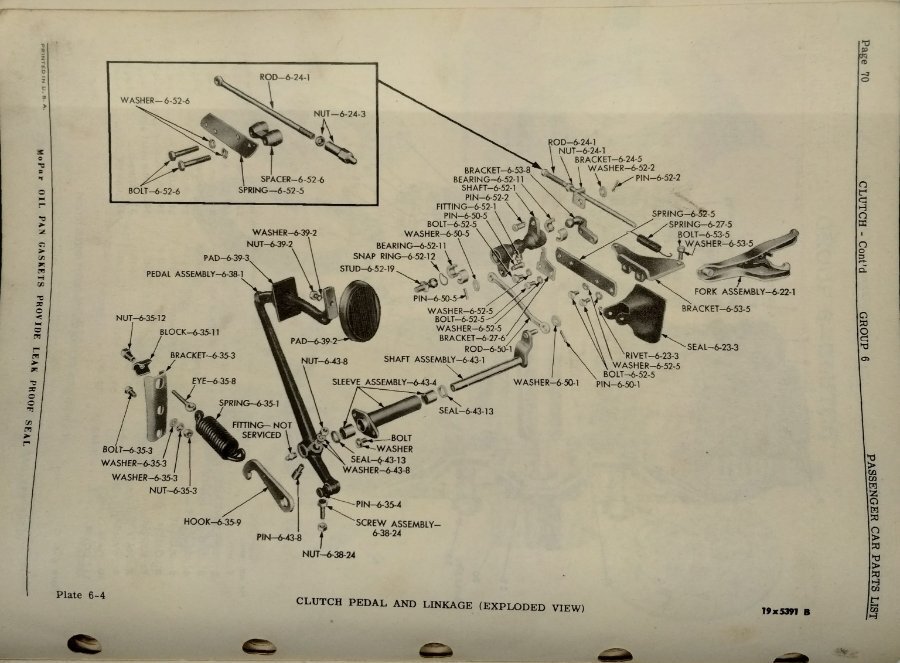
And here is the clutch.
.jpg.496b210d85295ee3ebe4495814e6c682.jpg)
-
I found this original 1950 manual on line and it was reasonably priced so I got it. The pages are yellow but it looks like all the pages are there. These brake diagrams may help.


-
The doors are installed and the heat is hooked up. Tomorrow I plan to install the lift. We were going to install it last Wednesday but it didn't get above freezing that day so I put it off till tomorrow. This will be my last entry to this post. When the 50 that I got from Alshere59 on the lift I will start another post about working on that car. More news latter on another post.
-
One more thing - while you are working on the rear - check the vent on the housing to make sure it is clear.
-
Here is a picture of the rear axle with the drum removed. I was checking the end play after replacing the bearings and seals. As you can see there is no flange on the end of the axle. It's hard to see the taper in this picture but it's there. Just keep working at it and it will eventually come off.

-
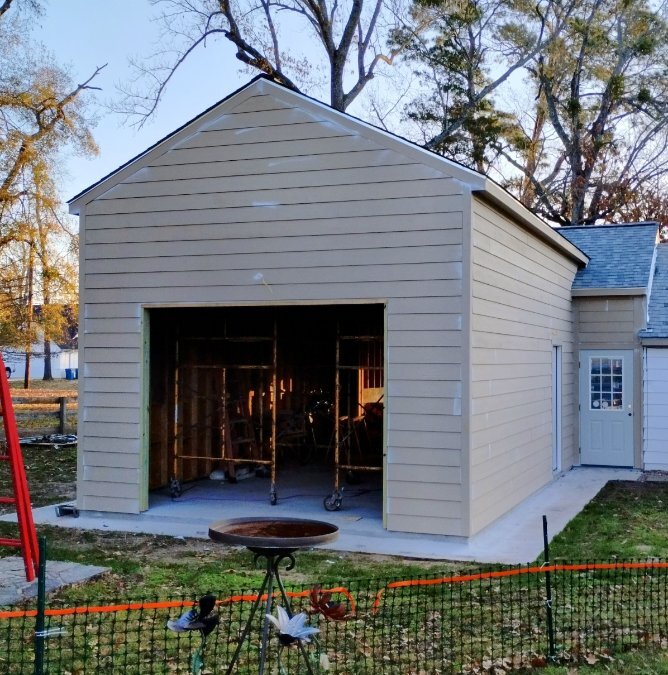
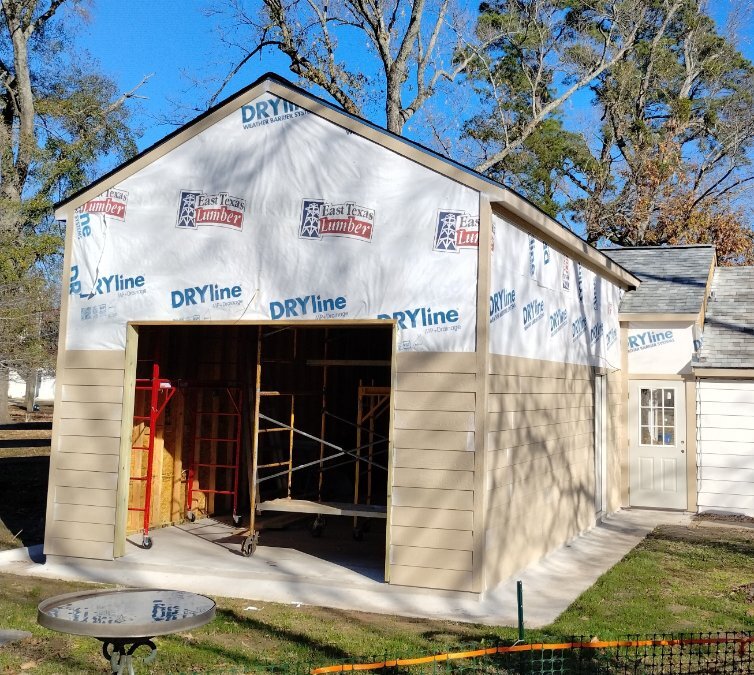
The construction is done. Took three months. They did a great job as usual. Now I go to work. Hang stuff on the walls - install the lift - add the air piping - - -. That door does not seal good. I may consider a different door latter.

-
The big door you are looking at in the last picture is leading into the back yard. This one will be a roll up door. On the other side facing the street I'll have an insulated regular garage door. Going with an insulated door because I plan to add AC. Those 100 degree summer days can be hard on an old guy. The door between the garage and the shop will also be a roll up door.

-
Almost done. The electricians are here today doing the finishing touches. The doors will be installed Tuesday. Then I get to paint the floor and stand around for a week or two watching the epoxy cure. Not sure how that's going to go. Then the lift gets installed. It's so clean and bright in there. I'll probably add a couple of hand prints on the new white wall so I won't feel so bad when I make a real mess in there. More news latter

-
Your engine may be getting too hot. You can get a cheap under the dash mount temp gauge that would do for now. Sounds like you just need to start with one problem - fix that and then move on to the next project. Soon you will have it running and driving great.
-
A few months back I picked up two new dual fuel heaters for the green houses. They can use natural gas or propane. Replaced the one in the green house that had stopped working and stored the other one until it was needed. The green house heaters run on natural gas so I hooked it up and it worked fine. I was planning on using the other one for temporary heat in the shop while the carpenters were working. So I pulled out the 20 gallon propane tank and hooked it up. There are two connections on the heater - one for NG and one for LP. Tied into the LP side and I could not get the new heater to stay lit. So I found the instructions and actually read them. I did everything per the book. Still wouldn't stay lit. So I called the company. After an hour on hold I finally gave them a number to return my call and went back to work. They did call back - wasn't sure that would happen. Turns out that there is a small round panel on the back of the heater that you have to remove and turn that little valve behind it from NG to LP. There is nothing in the instructions about this NOTHING. Everyone else in the world probably knows this already but this is my first dual fuel heater. So if any of you get a duel fuel heater and plan to use propane. Remember that you have to find that little hidden valve that they don't tell you about and switch it to LP. It all makes sense now.

-
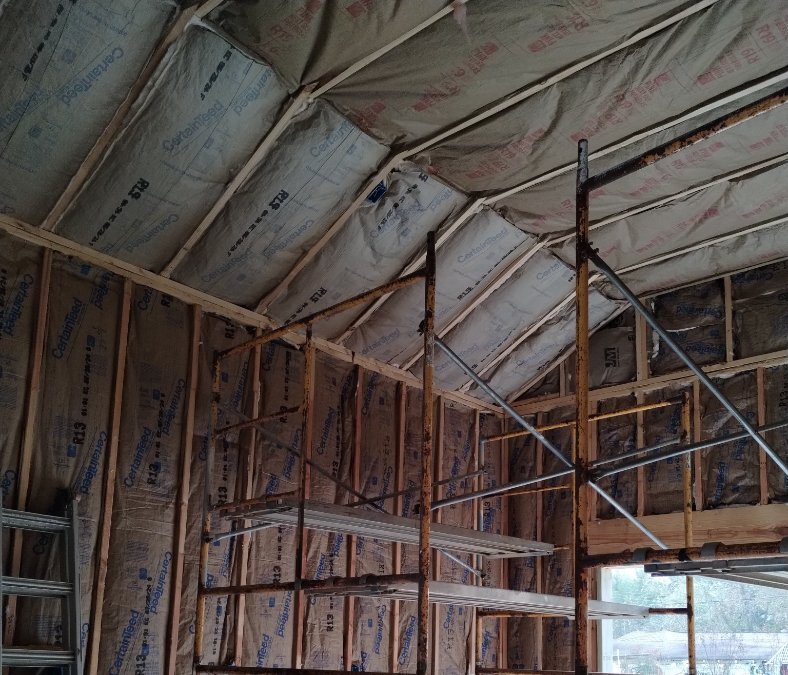
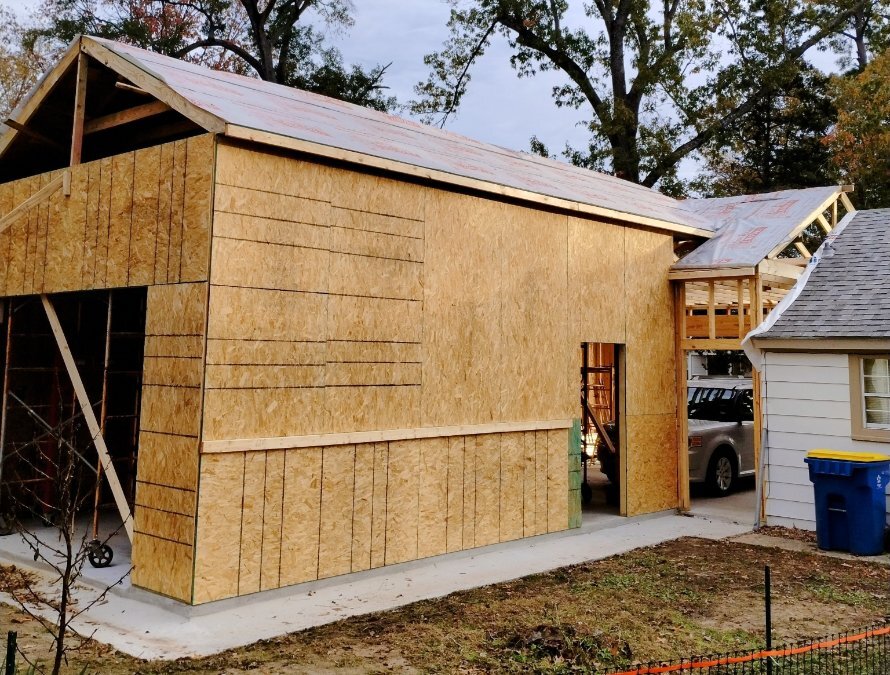
The outside is a normal 1 to 2 roof. The inside is vaulted to leave room for a ceiling fan and lights above a lifted car.
-
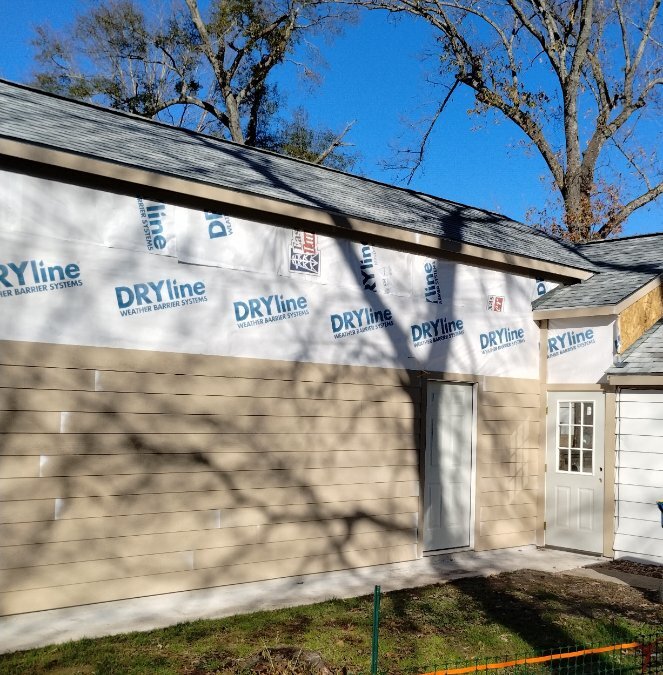
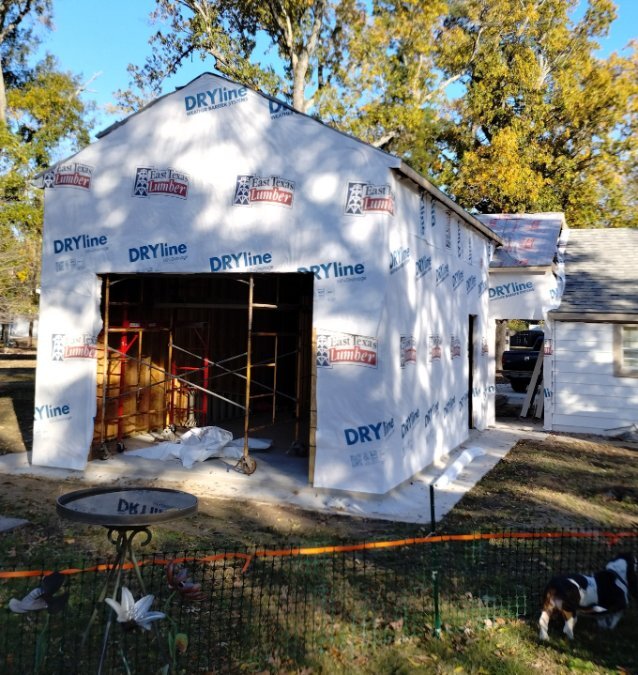
I haven't up dated the pictures lately. Roof is on - siding going on - electric is ruffed in and a couple of doors are installed. Insulation is coming up. The new building will be painted to match the house. Went to the local paint store and priced epoxy for the floor. They said it would take one to two weeks for the paint to cure before I can start loading stuff on it. Watching the paint dry for two weeks is going to be very hard. Been wanting to do this for 71 years - guess I'll be able to hold off for two more weeks once the floor is painted. Maybe More news latter
-
What is a run channel?
-
Ready for the electrician. They should start today or tomorrow. Going with more outlets than I think I will need. I hope. Now it's time to start thinking about stuff to hang on the walls for decoration. I should have plenty of stuff around here for that. An old wagon - an old bicycle - old tractor seats. Stuff like that to break up these big walls. More news latter
-
Got the decking on yesterday. The center of the shop will be 14 feet tall. Plenty of room for a big ceiling fan. More news latter

-
I thought about the too bright thing. That's why I went with dimmable units. If they are too bright, I will add the dimming modules. I'm also having the lights put on separate switches so I can turn on all or just one. They should get the roof on today. More news latter
-
Thanks for the tip on the lighting Bob. I picked up four UFO lights last week. Went to the local warehouse lighting store. They have three settings 150W, 200W or 240W. And they are dimmable. I think you have to buy an accessory to dim them. I plan to just set them on the highest level. The spec sheet lists that as a little over 37,000 lumens. I took one out and plugged it in outside last night to see how bright they will be. WOW the one light lit up the entire back yard. More news latter

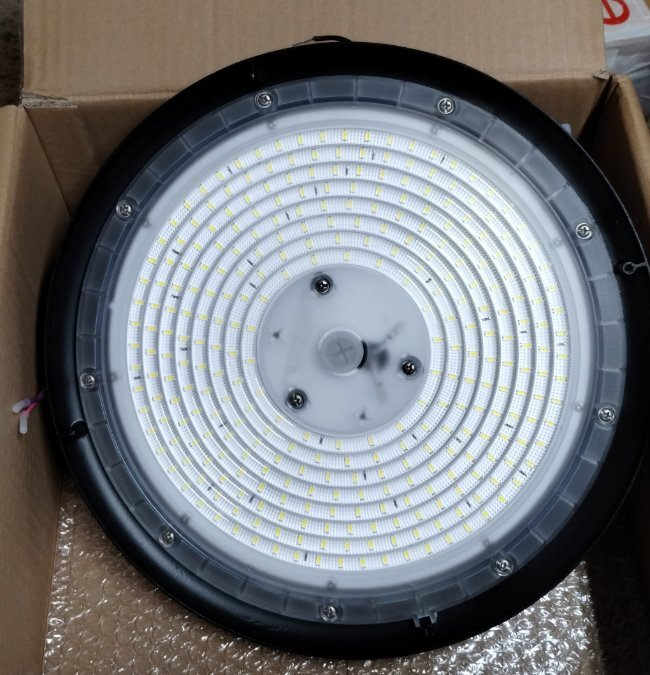
-
Didn't get that much done this week. They only worked Monday and took the rest of the week off for Thanksgiving. Can't blame them for that. They are supposed to be back Monday with three more people. Hope they get the roof on before it rains.

-
Yep - I already wish it was bigger. Another building is always an option. I have slowly been adding buildings to this property. Less grass to mow. This is what they got done yesterday.
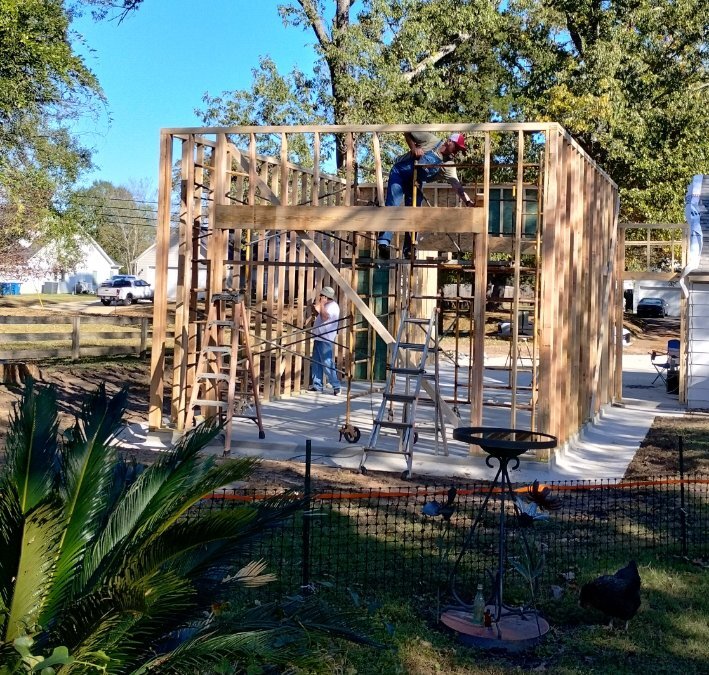
-
I have done most of my work through the years under a car port or in the drive way. I was glad when I had the car port. At 71 it was time to do something about that. The walls started going up yesterday and I didn't sleep much last night - kept thinking about all the projects I'm going to do in the new space. More news latter


