-
Posts
2,513 -
Joined
-
Last visited
-
Days Won
78
Content Type
Links Directory
Profiles
Articles
Forums
Downloads
Store
Gallery
Blogs
Events
Everything posted by Sam Buchanan
-
Sounds like a plan except for the epoxy part. I'm thinking black RTV to seal the exposed rubber because I don't want to inhibit the flexibility of the rubber and lose the damper qualities. Thank you for the suggestions.
-
-
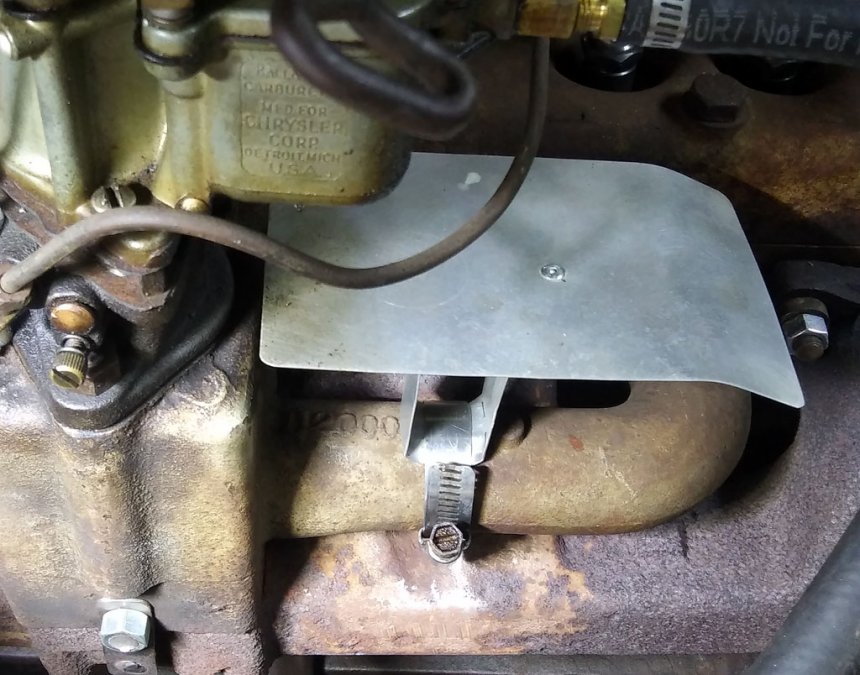
In case anyone is looking for ideas for a carb shield, here is one I made from 0.025 aluminum....can be made and installed in a few minutes. This one doesn't require disturbing the carb to manifold attachment.
-
Scott, I do enjoy working on the car (most of the time....) knowing each task completed gets it a little closer to what it was in its youth. It also helps to be a bit hardheaded....
-
Scott, I think about that nearly every time I drive the car, that is why I really enjoy it. The gentleman who bought my car twenty years ago bought a new '48 Plymouth when he got home from WWII. He and his new bride loved that car and that is why he wanted another one after he retired. He passed away about six years ago and I bought my car from his family. I think of him often and try to imagine being a survivor of the war with my bride by my side as we proudly travel in our new '48. Just knowing that I'm feeling the same feedback in the steering wheel and hearing the same chuckle from the flathead as they did makes me smile....every time. Happy New Year!
-
Early on I checked the marks @ TDC via the threaded hole in the head at #6 cylinder, they are still spot on. I will use the balancer....thank you very much for the experienced feedback. Happy New Year......may we be healthy with many beautiful days to drive our old cars!
-
Got out the calipers and worked through the Speedi-Sleeve tables and ordered a 99218 via Amazon, $35. Dia: 2.186-2.192 Their tech paper recommends an epoxy filler in deep grooves (think mine qualifies....) and install the sleeve before the filler sets. I intend to us JB Weld.
-
Thank you! Do you see any need to replace the one I have? It seems to still be well bonded....just looks ugly.
-
I was gobsmacked when I saw the mount....... Ready to put stuff back together once I decide what to do with balancer and the speed-sleeve arrives.
-
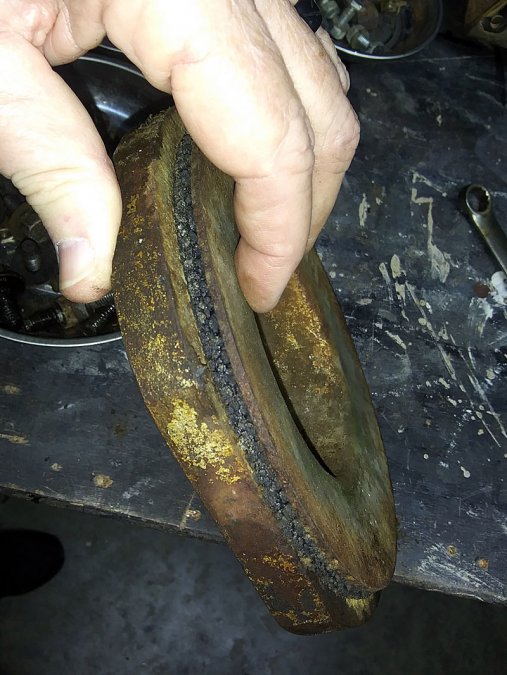
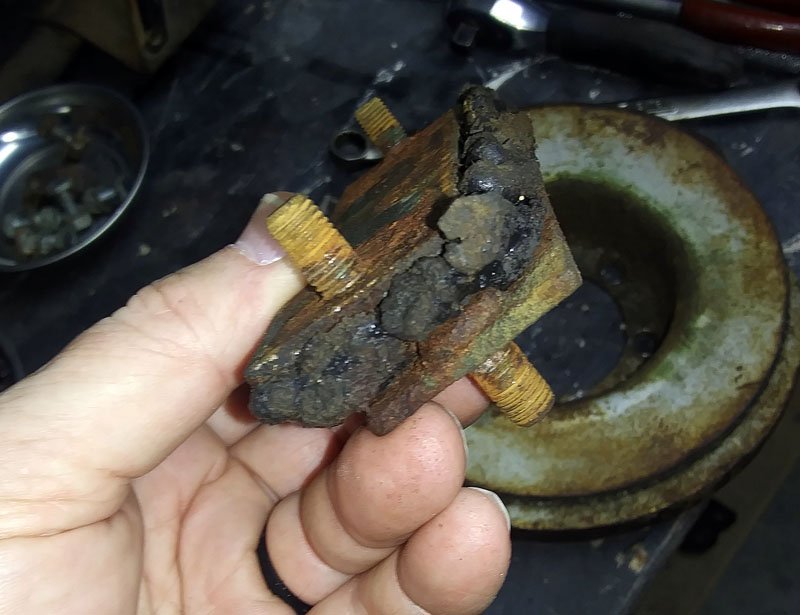
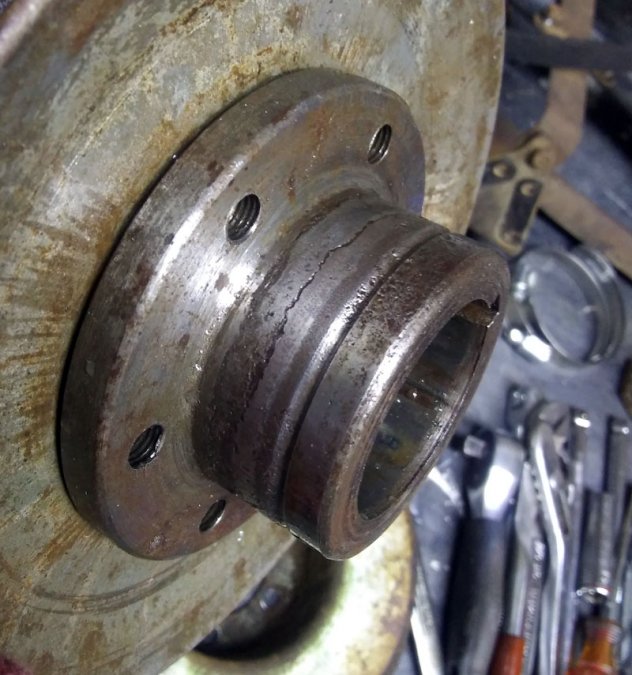
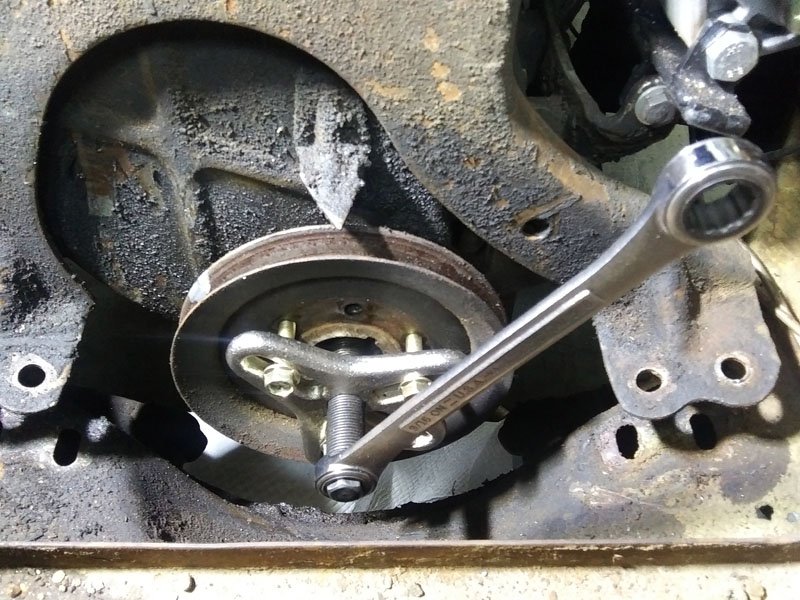
I'n updating this thread for the sake of the archives. I think this engine mount is what our British friends would call "perished": Here is the generic puller that quickly took the hub off the crank: Here is the infamous groove that is often referred to when we are replacing pulley hub and rear pinion seals. This is caused over time by the lip of the seal riding on the journal. My engine had a neoprene seal most likely because the engine was overhauled in 1987, but the old leather seal may have cut the groove. The surface crack is most likely due to corrosion, it doesn't appear to be very deep. I plan on using this hub after a speedy-sleeve is installed on it. The groove and a mis-installed seal were the reasons for the oil leak. Because the timing cover gasket was glued to the engine block and the old seal had part of the lip rolled inside-out I suspect the cover was torqued down before the hub was attached to the crank to properly align the cover. Here is the harmonic balancer with perished rubber: What should I do? 1) Not bother with re-installing the balancer? 2) Get this one overhauled? Lots of threads in the archives indicate the balancer was used intermittently in production and the elimination of the balancer has no ill effects. If the balancer is deleted I'll need to mark the pulley with TDC for timing purposes. I have an email on the way to The Damper Doctor for a quote on overhauling this balancer. I'm open to suggestions.
-
Uhhhhhh........give it a try and let us know how it works.
-
Thank you for the feedback. I got the bolt out with a 24" breaker bar by holding the crank with the parking brake.....will work on pulling the pulley tomorrow.
-
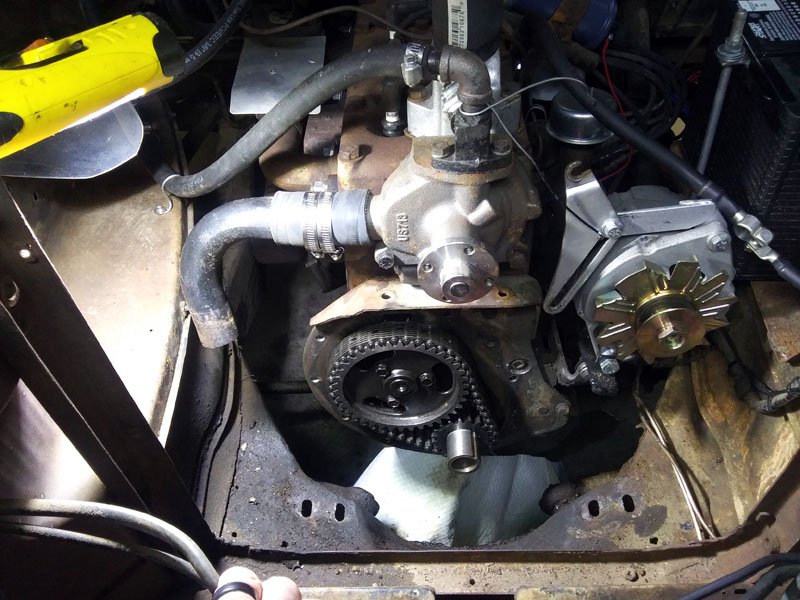
After putting off this job for several months because I'm enjoying the '48 so much, I decided it was time to address the oil leak that keeps the bottom of the engine and tranny wet. Before wasting a bunch of time figuring things out I wish to draw on the experience of those who have already done this repair. Horns and radiator are out and I have jacked up the engine and removed the engine support, rubber mount, and harmonic balancer bolts. The crank pulley bolt measures 1 13/16". Does this sound right? I'll need to buy this socket. How tight is this bolt going to be? Can I put the engine in 3rd gear and use the parking brake so the bolt can be loosened? Is the balancer captured under the crank hub bolt? Is the balancer keyed to the pulley, or are the bolts asymmetrical? I applied a couple of paint dots in case they need to be clocked later. Is the hub keyed to the crank or do I need to carefully set the crank to TDC before removal? Thanks in advance for any insight, I've found asking questions in advance can often help me beat the book flat-rate. ? P.S. As others have stated, I had to adjust the holes in the engine support to get the new mount to fit. Also had to shorten the studs on the lower side so the support and mount can be reinstalled. Simple mods but another case of aftermarket stuff being just a wee bit off......
-
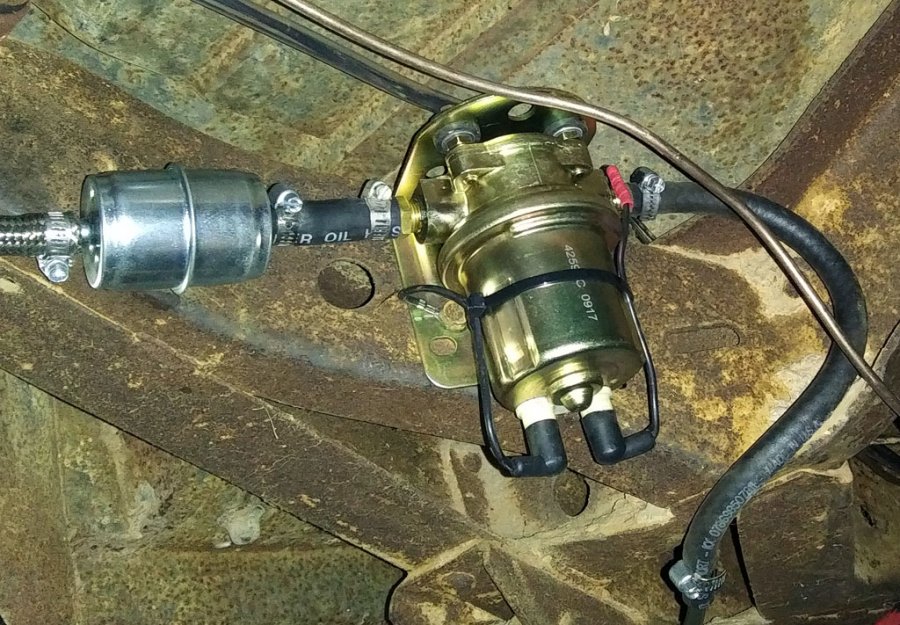
Nick, you might consider -4 braided steel hoses with AN fittings for your fuel plumbing. The hoses are easy to make in the garage, look professional and there are fittings in every configuration. I've made up hoses for numerous auto and aviation applications and never had any leaks. Here is just one of many sources: https://www.jegs.com/p/JEGS/JEGS-AN-Hose-End-Fittings-Blue-Red/752556/10002/-1
-

We really are at the tipping point...
Sam Buchanan replied to James_Douglas's topic in P15-D24 Forum
One of the skills that erode when we get old is math.......... ? ? -

New Member with "new" 1950 plymouth deluxe
Sam Buchanan replied to Donny318's topic in P15-D24 Forum
I was tasked with putting my '48 P15 back on the road after a five-year hibernation. I started out repairing things piecemeal, especially the brakes and fuel system. I was gonna save some money....... After a couple of months I realized what I should have done is totally rip out the brake and fuel systems and start from scratch. It was not until I had replaced ALL the components in the brakes and fuel system that I had a reliable daily driver. This is a classic case of "You can pay me now or pay me later".......quicker and less expensive (when considering shipping cost) to do it all at one time. ? -

New Member with "new" 1950 plymouth deluxe
Sam Buchanan replied to Donny318's topic in P15-D24 Forum
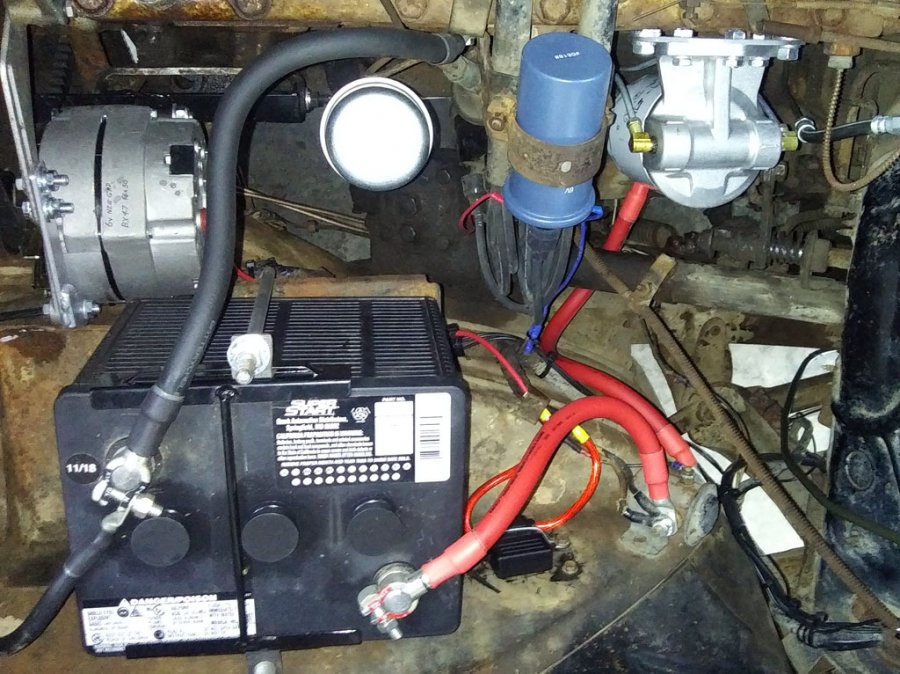
Oops, I may have gotten your thread confused with a different one. Here is where I got my cables and I am very pleased with them: https://www.batterycablesusa.com/1-0-gauge-battery-cables-0-awg.html Yes, replace the starter cable as well with the same gauge as the battery cables. I also installed a ground cable to the body from the battey (my car is negative ground): -

New Member with "new" 1950 plymouth deluxe
Sam Buchanan replied to Donny318's topic in P15-D24 Forum
Don't be surprised if it spins better when you install the new battery cables.....the 6v starter pulls huge amps. -
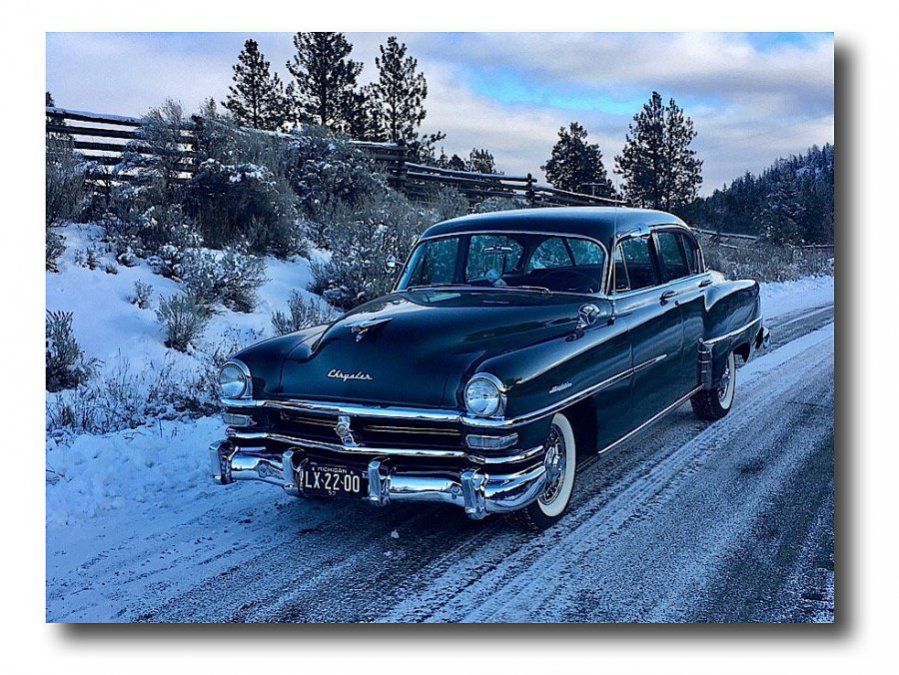
Well....notice how you placed the main mass of the car (the subject) in the lower right third of the image (Rule of Thirds)....then there are the converging diagonal lines of the fence and the tire tracks leading your eye to the car....then the little splash of color in the sky to balance the highlights in the car....then the trees which fill in the spaces in the sky and add counterpoint to the foreground....then the snow playing off the puffy clouds.....and the kicker is the overall cool color balance that brings out the texture of the snow and the color of the car. The only thing I would Photoshop out is the house in the background. That, my friend, is an excellent photograph! Here is a retouched version (lost a little resolution in the process of pulling the image off the web):
-

New Member with "new" 1950 plymouth deluxe
Sam Buchanan replied to Donny318's topic in P15-D24 Forum
It could be short battery life is due to a tired charging system not keeping the battery topped off. -
With the combination of colors in that photo......that is postcard or calendar art! (This from a retired commercial photographer )
-

New Member with "new" 1950 plymouth deluxe
Sam Buchanan replied to Donny318's topic in P15-D24 Forum
Clean all the battery and starter connections before deciding it needs to be towed to start. Make sure it has fuel and fire...these low compression engines will light off even at low rpm if given a fighting chance. -

50 Plymouth (New to me) have a couple of questions
Sam Buchanan replied to LowMasters's topic in P15-D24 Forum
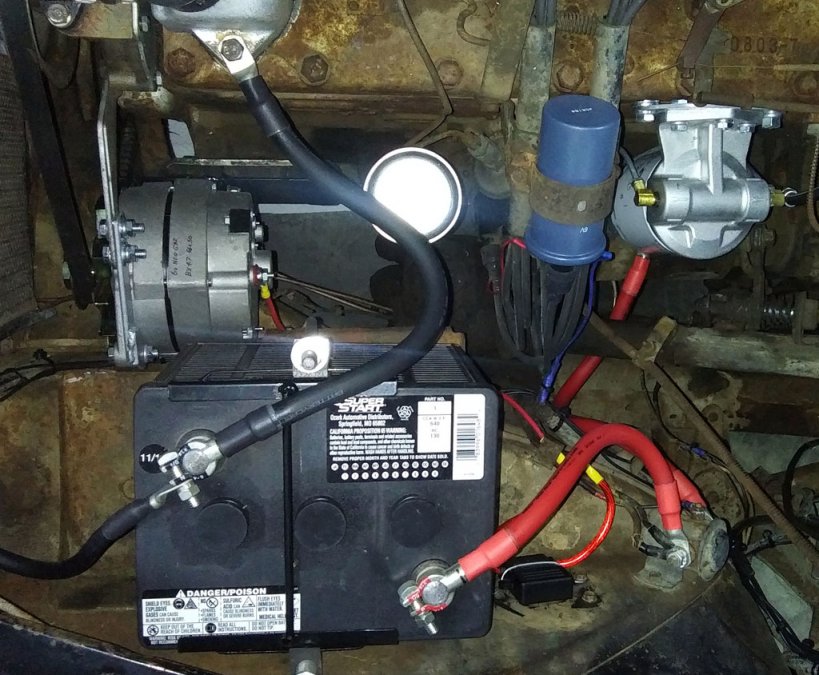
An excellent source for proper battery cables which will improve starter performance: https://www.batterycablesusa.com/1-0-gauge-battery-cables-0-awg.html Here is what they look like: -

We really are at the tipping point...
Sam Buchanan replied to James_Douglas's topic in P15-D24 Forum
James, you make valid points, the collector car community will continue to see changes along with every other hobbyist pursuit. The difficulties with keeping old cars in a condition for reliable use shouldn't come as a surprise.......how many products do we use daily that are 75 years old? As a general rule the products we use in daily routines are considered obsolete in ten years......expecting full support for automotive products several decades old is a big ask. But that is part of the charming challenge of keeping old cars driveable, we just have to be prepared for the inevitable decline of support. Time waits for no man....or car...... Best wishes for a great 2020 as we chase parts, knowledge and fun with old cars! -

50 Plymouth (New to me) have a couple of questions
Sam Buchanan replied to LowMasters's topic in P15-D24 Forum
How has that battery hold down not shorted already?? Time to toss those 12v battery cables and get some properly sized 6v cables. And....that battery cut-off is too small for a 6v system....don't need it anyway. Nice looking car....it'll be a nice ride, enjoy!


