Sam Buchanan
-
Posts
2,561 -
Joined
-
Last visited
-
Days Won
83
Everything posted by Sam Buchanan
-
I agree, I felt the urge to yell at the interviewer "Just shut up....let the old guy talk!". Diarrhea of the mouth seems to be a common affliction of YouTube creators....but guess they have this media figured out, lots of money being put in the pockets of those who have a "YouTube personality".......because we keep watching. It's hard to eat just one potato chip. It is interesting and valuable to hear the knowledge base in the first person from those who began their careers in the heyday of our old cars....a lot of information that was common back then has to be dug up now with considerable research. So the vids are informative even if the presentation is a bit aggravating to some of us. Thanks for the link! P.S. But I'm still pondering the oil-soaked cam tip.....maybe that was the way it was done before high tech assembly lubes.
-
Do new cams have "soaked in oil"? Just curious.......
-
The 6v Bosch-type relays I linked in my post above are working nicely in my P15. Another consideration is the Toyota harness is kinda undersize for 6v, it may function safely but I used 12g wire when installing/building the new 6v relays and lighting harness.
-
The H4 halogen bulbs don't care which way they are wired. Can't see any reason why you can't connect the relays the same way regardless of battery polarity. This is the relay I used and it doesn't appear to have a diode so it could be hooked up either way. However.........be sure you know which wires do what, some carry load and others carry the signal. Study the schematic pasted below until you understand how this works. https://www.amazon.com/dp/B07G9VXC1B?ref=ppx_yo2ov_dt_b_fed_asin_title&th=1 Here is the post describing how I wired the relays in the P15: https://p15-d24.com/topic/61778-high-quality-h4-headlights-for-12v-cars-cheap/page/2/#findComment-665037
-
With 6v bulbs and relays you should be ready to start installation. Get a good ratcheting crimper, a bunch of butt splices and a spool of 12g wire so you can modify the harness as needed. Yes, getting high current off the ignition and headlight switch is a prime reason to do the upgrade. https://tinyurl.com/558cus9s
-
There will be about as many opinions on your inquiry as there are responses, but I don't see any need to over think this. What you are doing is fine and won't do any damage but is probably unnecessary. But if it makes you feel better about your stewardship of your car, so be it. If my P15 sat for four months, I'd make sure the battery is freshly charged, pull the choke, and start the old guy up. These really are robust engines.
-
Probably the same way many of us have done with many engines.......put oil in the engine, start it and verify oil pressure is indicated in a few seconds. Done. An overhaul should include applying assembly lube to the bearings and moving parts and that offers lubrication until the pump fills the galleys.
-

How do we give donations to this awesome page?
Sam Buchanan replied to DavidJose1's topic in P15-D24 Forum
If you will provide me with your bankcard number I'll take care of the rest............ -
How many Mopars can you count in this Crazy old video?
Sam Buchanan replied to Pep48's topic in P15-D24 Forum
Reminds me of a show that came to my little Alabama town in the mid-60's that was headlined by a guy named "Crash Brown". It had the same stunts as the ones in the video and prompted my fellow neighborhood kids to build ramps that we jumped with our bicycles. A different day and age........ Well.....a bit of internet sleuthing: https://www.facebook.com/SumnerCoMuseum/posts/colonel-jt-crash-brown-was-a-stuntman-who-operated-the-devils-bowl-speedway-in-w/2343799799038249/ https://www.findagrave.com/memorial/55751686/john-timothy-brown https://thevintagent.com/2019/07/08/the-vintagent-trailers-crash-brown-without-restraint/ -
When you state the pedal doesn't "lock" onto the ball studs on the floor does that imply the pedal hole spacing is incorrect or the pedal just won't snap into place? These pedals can get hard with age and require a very firm effort to get them to snap over the balls. If the spacing of the holes in the pedal is correct, try using a strong impact (block of wood and hammer?) to seat the pedal onto the studs. In regard to the throttle linkage I attach a pair of locking pliers to the pushrod to prevent it from being depressed while I firmly snap the pedal into place on the linkage ball. Enjoy your new ride!
-
Need help on how to use Miller Brake Gauge MT-19 tool kit.
Sam Buchanan replied to MarcDeSoto's topic in P15-D24 Forum
Rich, I have posted several times in this forum (beginning in 2019 prior to when a version of the tool was offered for sale) how to use my "new" tool to adjust the brakes so they will be concentric to the drums. As I stated in a previous post, here again is my explanation of how the tool is used. I don't know what else to say in this regard, it really is a simple process. https://p15-d24.com/topic/50182-brake-adjustment-tool-updated/ I will defer to the discretion of the forum mods as to whether or not my thread about using the tool should be added to our forum's Tech and Resources sections. -
Need help on how to use Miller Brake Gauge MT-19 tool kit.
Sam Buchanan replied to MarcDeSoto's topic in P15-D24 Forum
text deleted -
But if there was no YouTube video it didn't happen....... 🤣
-
Need help on how to use Miller Brake Gauge MT-19 tool kit.
Sam Buchanan replied to MarcDeSoto's topic in P15-D24 Forum
Rich, your preference and appreciation for the legacy tools is well documented. However, it appears you have not carefully read my description of how the ID of the drum can be indirectly, but accurately, measured with the home-made tool. Bacelaw has this figured out and is offering a direct comparison of how the two types of tools are used. It appears that you are stating his technique is flawed, but I think your understanding of how to use the simple tool needs enhancing. Please reread my post and visualize what is occurring while using the tool. It is good to have choices, if using the antique tools brings enjoyment to the hobby that is a good thing. But we have options for accomplishing the same objective, and that is also a good thing. -
Need help on how to use Miller Brake Gauge MT-19 tool kit.
Sam Buchanan replied to MarcDeSoto's topic in P15-D24 Forum
I'm not going to get into a debate about which tool is superior but I can describe how I measure the inside diameter of the drum and transfer that dimension to the shoes using the "home-made" tool. Here is that description of the process I posted back in 2019: https://p15-d24.com/topic/50182-brake-adjustment-tool-updated/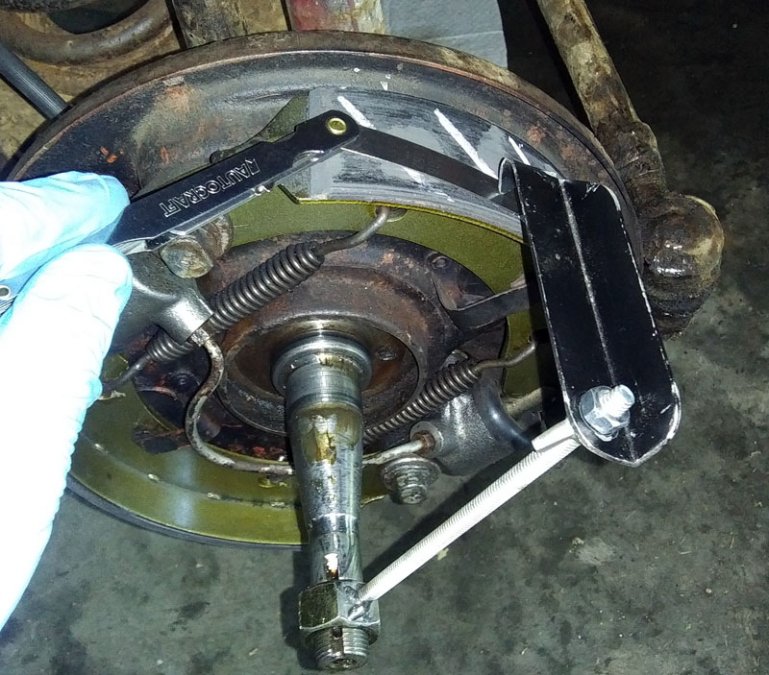
-
Modern Lube for old transmissions including Overdrive
Sam Buchanan replied to Loren's topic in P15-D24 Forum
Redline MTL is what you want, it works great in my '48 P15. It had crunchy 1-2 shifts when cold but the Redline yields very smooth shifts in all gears and temps. It worked so well my '74 TR6 and '69 Beetle now have MTL.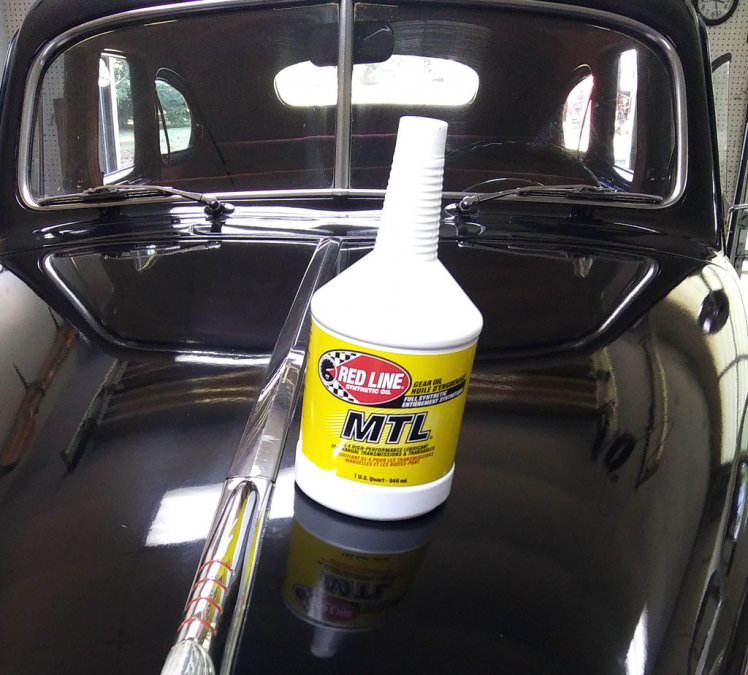
-
Need help on how to use Miller Brake Gauge MT-19 tool kit.
Sam Buchanan replied to MarcDeSoto's topic in P15-D24 Forum
Does anyone know his status...maybe on other forums? Wondering if his project is still active. -
1946 Chrysler Windsor running issues
Sam Buchanan replied to SeasonedNewbie's topic in P15-D24 Forum
Here is a very simple way to address the "ballast resistor" issue, this is the coil on my TR6:
-
1946 Chrysler Windsor running issues
Sam Buchanan replied to SeasonedNewbie's topic in P15-D24 Forum
Some clarification may be needed here. An alternator will only output the amps needed for the load connected to it. Yes, an alternator may be capable of outputting 60a, but unless there is a 60a deficit in the vehicle system it won't deliverer 60a. The highest demand would be for a severely depleted battery, maybe one that has been allowed to *completely* discharge. But a battery will not need such a heavy charge just to replace capacity that was used during normal use so the alternator, even though rated for high output, will not deliver anywhere near its rated output. So the amp gauge continues to live a happy life. But it is true the amp gauge can be reconfigured as a load meter instead of the original design. I unintentionally kinda did this when adding headlight relays that feed directly off the battery. Since headlight current is no longer passing through the amp gauge (and original headlight switch and wiring...this is a good thing....) it shows amps being delivered by the alternator that are being absorbed by the headlights in addition to the usual load from the rest of the car. So the gauge is now a hybrid which in real practice is a non-issue (it functions normally when the headlights are off), just a bit different from the original setup. This is why many consider a voltmeter to be more useful (and less stressful on the system) than an ammeter. -
Just for clarification, truing up the carb mating surfaces is usually achieved with a tiny amount of material loss, probably no more than a couple thousandths of an inch. This is sufficient to get the gasket to function properly.
-
You are certainly free to disagree with anything I post. But we need to accept as fact that using a sealant as a bandaid to compensate for mating surfaces that aren’t true is definitely a “poorer workmanship standard”, and in the long term it will result in inferior service. It seems as if the glass and sandpaper shop technique is something you hadn’t seen before, but rest assured this is a method that has been in common use for……since back in the steam age? I saw it in vintage motorcycle repair manuals over 50 years ago. Once again, we decide to what standards we wish to work. I’ve certainly done my share of gluing things together but I also know there is a superior method…….replicating the tight tolerances the parts possessed when originally manufactured.
-
We all must decide to what standard we are going to seek to achieve when maintaining our old cars. Some will be content with gluing the thing together while others will want to replicate original tolerances as much as practical. The carefully assembled components are going to yield superior service every time.
-
There are valid reasons why an essential step in rebuilding an engine is decking the head and block......some surfaces need to be FLAT for proper sealing. Same with the carb body and top, especially since they are made of low density material that easily warps and depend on a limited number of widely spaced screws for attachment. The glass/sandpaper technique is great for those of us who don't have access to a mill. It also works well for getting a stubborn thermostat housing to seal properly.
-
Is my head gasket either blown or "blowing"?
Sam Buchanan replied to 1949plymouthdeluxe's topic in P15-D24 Forum
Don't fill the radiator past about an inch and a half below the filler neck. That should keep it from sloshing out through the vent tube. -
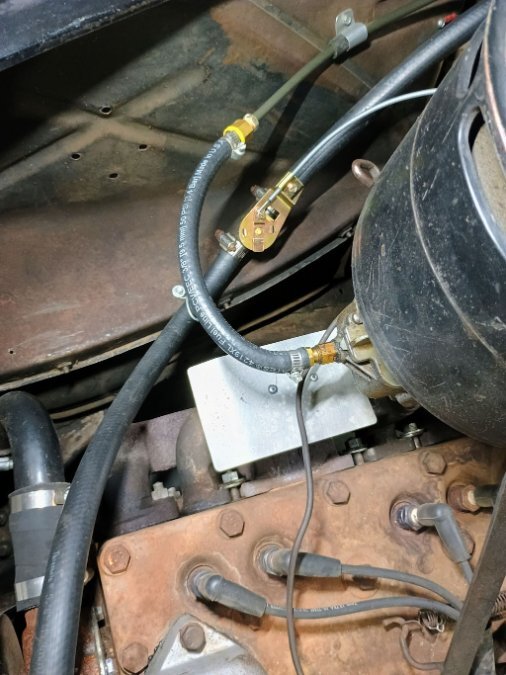
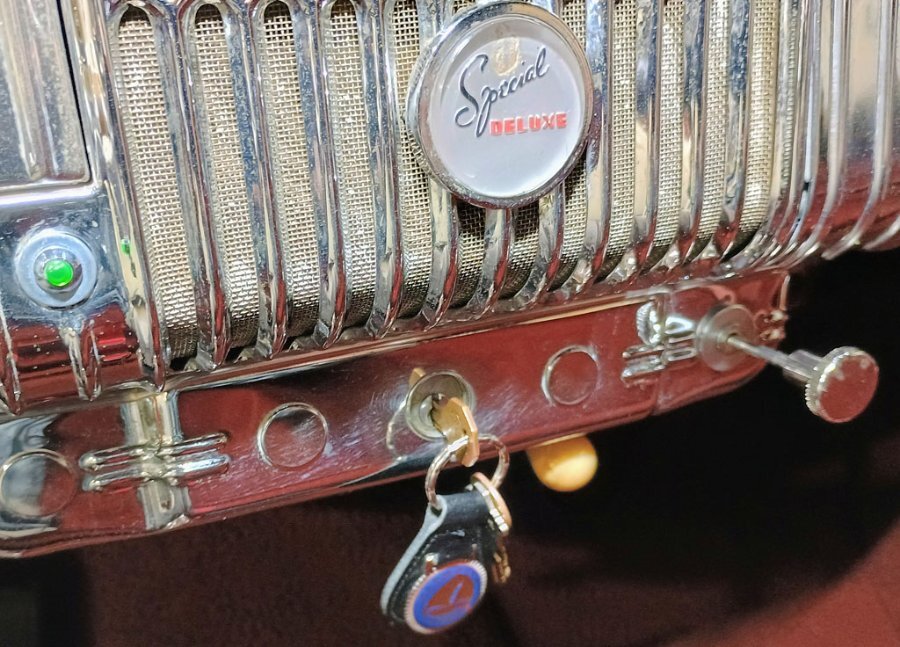
The original heater valve is stuck open and seized in the head of my P15, I'm afraid to crank down on it because it might break off in the head. I installed a valve in one of the heater hoses which is actuated by a bowden cable I installed in a spare knockout in the dash. Both valve and and cable were sourced from Amazon.