

Bryan
-
Posts
1,612 -
Joined
-
Last visited
-
Days Won
13
Content Type
Links Directory
Profiles
Articles
Forums
Downloads
Store
Gallery
Blogs
Events
Everything posted by Bryan
-
That's how I got mine to knocking in the mid 90s. I didn't pull the pan though. Should definitely pull the pan and clean. I found a LOT of sludge in the valve area, may want to take covers off and clean that out. Also in the bypass oil filter cannister, a LOT of sludge. Don't know how much would be in the pump itself.
-
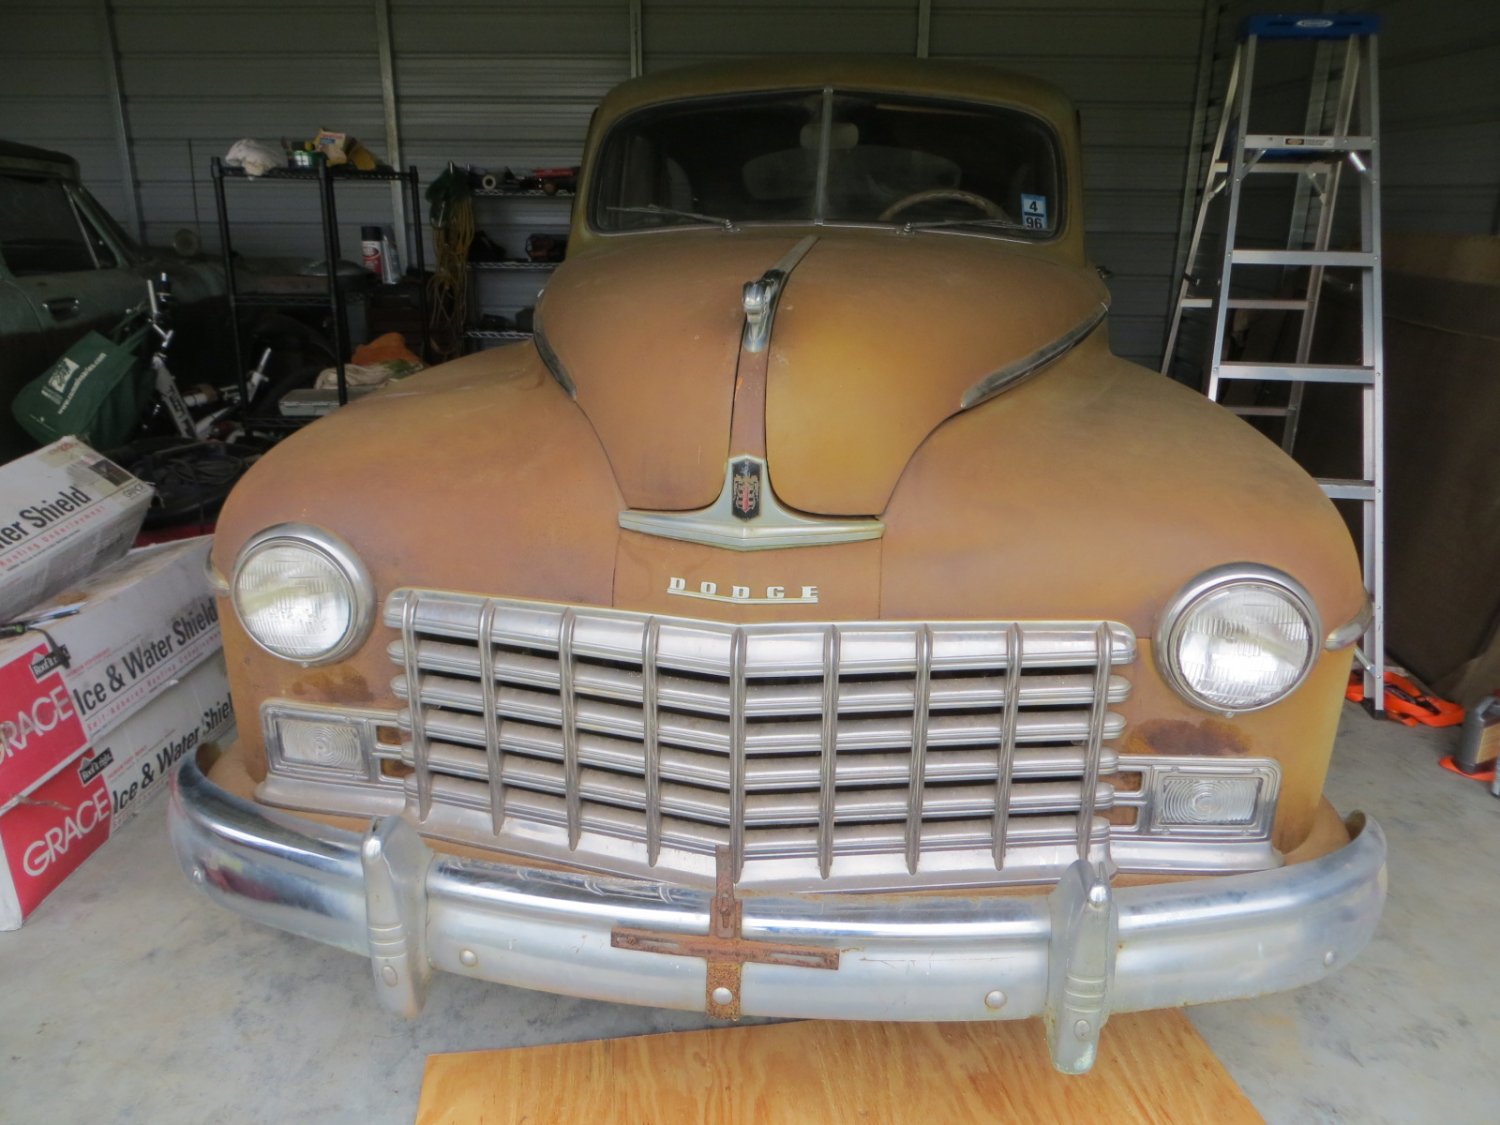
Got out my driveshaft and u-joints for 48 DeSoto
Bryan replied to MarcDeSoto's topic in P15-D24 Forum
Finally found someone that's a worse nick-picker than me. Leave it alone if it's okay. ? Oil or lightly grease the NOS you have to keep them from rusting and put them up for spares. -
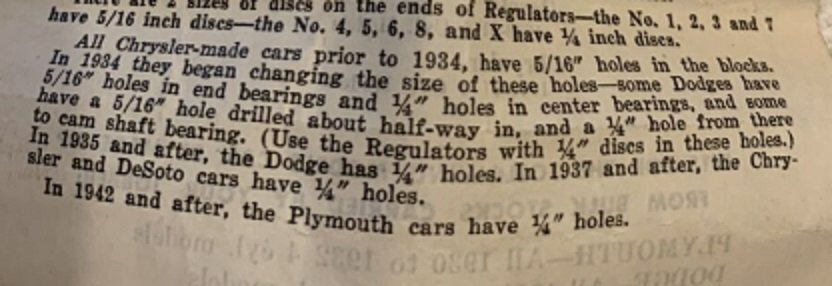
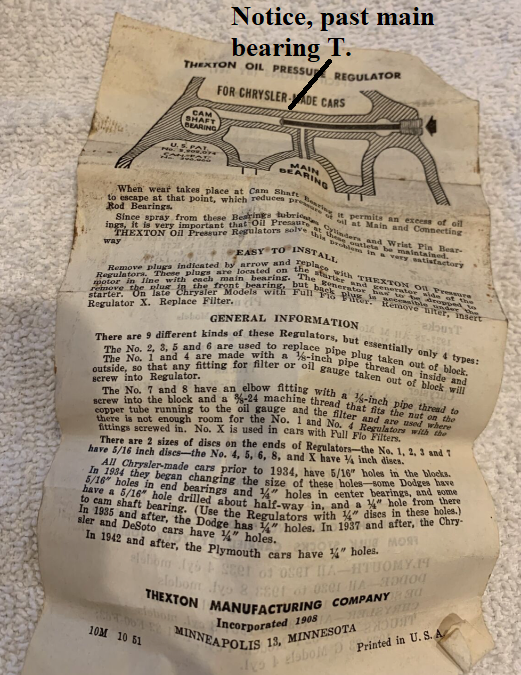
Found that paper in another post. Read through it again and voila! They were drilling the oil passages different sizes based on year. Read the excerpt from the NOS restrictor paper.
-
Think they left off the "T" in the name.
-
George Asche, Speed Parts , Measurable Performance and the work begins.
Bryan replied to Semmerling's topic in P15-D24 Forum
On the intakes I agree on a lot you stated. Not planning on using any water heating on mine. On the exhaust part I toyed with grinding the valve guides down to improve exhaust flow, but was unsure about how much the guides were there to absorb heat. On the block, wondered why designers never changed the side oil passages to make them go from the main gallery to the main bearings directly, THEN feed the cam bearings. Presently the side passages are a direct line to the cam, with Ts coming off them to go to the mains. Improved cranks might be nice, depending on costs. Right now I'm just fighting to figure out why I have one piston .01 above deck and another .01 below. I've read strokes can be equalized but not a lot of discussion of people doing it. -
George Asche, Speed Parts , Measurable Performance and the work begins.
Bryan replied to Semmerling's topic in P15-D24 Forum
That's better. I get that they are a Fenton copy, doesn't bother me as long as the quality is good. That one has to use an electric fuel pump, that's something that a person considers. If they are planning to use an electric pump anyway it wouldn't affect the decision. $100 difference helps. Seen other discussions on parts (not headers) where you finally find out they are out of the average person's price range. Would be better if there was dyno data on the original exhaust manifold, "Fenton copies" and your headers. Then people could weigh the costs vs performance gains, and the issue of the fuel pumps, materials, etc. Bryan -
Some later discussion he said he didn't have a hand brake. Also due to some special ratchet shifter he couldn't downshift.
-
George Asche, Speed Parts , Measurable Performance and the work begins.
Bryan replied to Semmerling's topic in P15-D24 Forum
So if Langdon's headers are $366 with shipping and yours are ??? and they improve HP marginally... Plus are they chrome plated steel or stainless? -
Surprised at no hand brake..wouldn't even think of going on the road without that.
-
Sounds better. I went thru every page of your post. It looks like you first were using the quick disconnect on your battery ground terminal. Are you still using that? Never saw later pictures (except of Sam's setup)?. I read where some people had problems with the quick disconnect. If you get another solenoid I'd try the one I suggested, but it's more expensive. It's listed as 6V.
-
Change the oil first. Find a way to turn the engine manually w/o coil hooked up.
-
Seems like newer metals might have material failure.
-
In my research I ran across this article. Engine Crankshaft: Crank Grinding - .010”/.010” Myth (enginebuildermag.com)
-
55Fargo was painting with Rustoleum. It takes a while (a couple of weeks) for the primer to harden. Maybe the regular paint also? https://p15-d24.com/topic/12903-finessing-the-paint/?do=findComment&comment=116937
-
Don't know much about painting. Maybe the humidity is too high? Been raining like crazy here. Think somewhere I read it might take a while. I'll look.
-
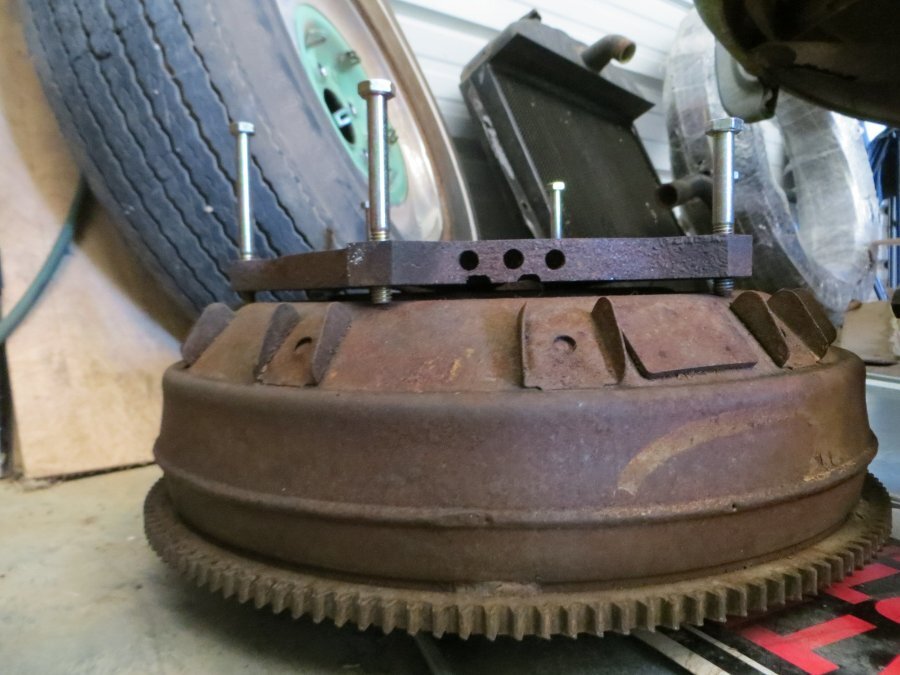
Be careful not to hit the plate on the other side against anything or wiggle it too hard. There is a delicate seal (carbon) that you can damage. I bought some too long bolts and used them to lightly fix the plate so it couldn't be wobbled.

-
I think that is normal, not welded. Mine was working in the 90s and looks the same on that side. I got a poor pic but you can see it.

-
Waking up after a bad yesterday. Still in pain. Ran across this and thought was interesting. Stroke equalization. Maybe I should ship it off. ? Crankshafts | Engineering | Service | Oselli
-
Compressor? I'd probably be trying to hook my shop Vac exhaust to that. After cleaning it up of course.?
-
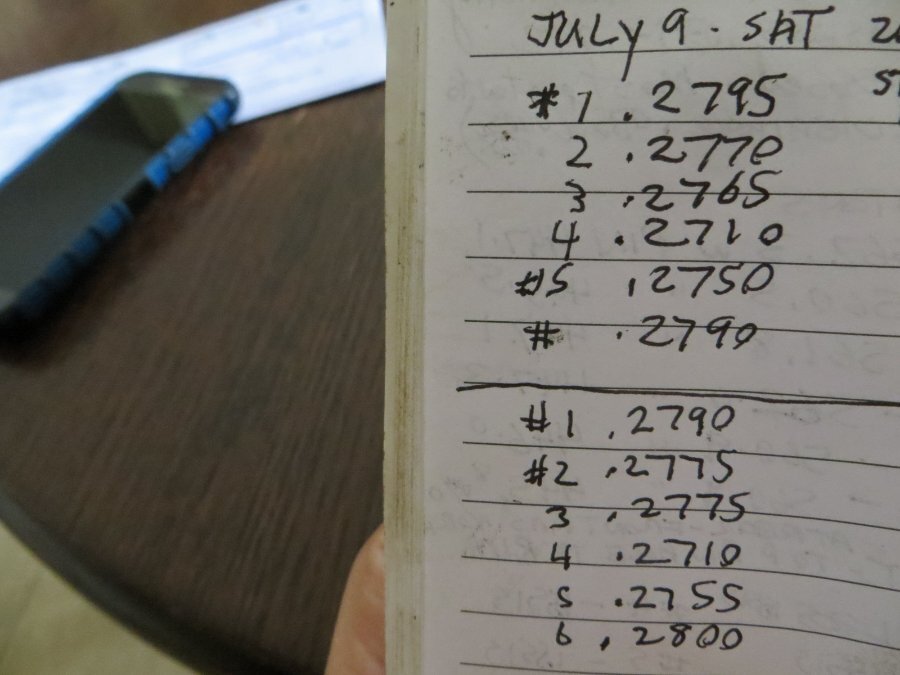
Trying to be as accurate as I can, but mainly just trying to see why I was getting such a wide variation using the same rod, same piston on the 48 crankshaft. .012 below deck and .010 above deck is a pretty big deviation. If my health gets better I'll pull the motor out of another 48 in the woods at my fathers and try the crank out in this 53 block to see what kind of measurements it gives. Wish I had more data like Keith's. A few other people's measurements would give me an idea what "normal" is. I'm doing this one time, and want it right. I'd be a little less antsy if I hadn't had that block of wood in #3, trying to get the crank nut off.
-
Think you meant irreverent.
-
Understand that. Don't have the 53 crankshaft, and the only thing I had to hook on the edge of the ridge was these calipers, to measure to the bottom of the straightedge.
-
Thanks a bunch. That's what I was expecting with mine, and got worried because it varied so wildly. I did do some measurements earlier today, catching the bottom of the ring ridge and measuring to the bottom of a straightedge sitting on the deck. Previous 53 crank and different pistons would have made the ridge. About .009" difference between smallest and largest.

-
On my 1948 4-door D24 Dodge I measured under the car. Don't know if Plymouth is the same. It's 28" from center of cross member to front of heat shield, or 30" if you measure from front lip of cross member. Heat shield is 20" L and 9" wide. The flat area (some angle iron piece on side) for a muffler is 29" long. From that angle piece to center of axle is 30" (or to hanger is 28 1/2"). Tried measuring from front of cross member lip at bellhousing to same hanger - measures 5ft. From bottom side edge of heat shield to bottom of frame is 3 3/4". From rear of axle to end of bumper is 47". Would do like Plymouthy Adams said, use inlet/outlet sizes and orientation to pick a Walker muffler.
-
Understand that. I checked all the rods using the old "2 rods against each other on a wrist pin" checking for a gap. I used the same rod for all even cylinders, and odd rod for odd cylinders. If the rod was bent it would cause the piston to be consistently cocked.

