-
Posts
3,466 -
Joined
-
Last visited
-
Days Won
193
Content Type
Links Directory
Profiles
Articles
Forums
Downloads
Store
Gallery
Blogs
Events
Everything posted by keithb7
-
Steve if you’d like one of mine send me a personal message. Thanks.
-
I got very lucky with a brand new NOS Mopar built camshaft. Same part number stamped into it as the original 1953 cam that I removed from my engine. CDPD logo on it. A seller had it listed on Ebay as a "cam shaft". So I guess maybe few were seeing it when they did a search? I scooped it up. A few deals are out there! Yet then I had to spend a small fortune on a full set of new tappets. Might as well go for broke... No help here for you. Just like to share a success story.
-
Assume this is 3 3/8 bore? Egge had nothing for me when I enquired. Nor Vintage Power Wagons. After several other sources said no, I exercised the option to bore it over to 3 7/16". Standard size. The 228 was now a very readily mass produced 237.
-
Allow me to have fun with the valvetrain for a moment. The cam lobes being scored up. Here’s my theory. The rear most valves get the the least cooled water from the water pump. Furthest back, way at the end of the water distribution tube. By the time the water gets there, its pretty hot again. High heat causes metal to expand. Let’s assume someone was not doing good car maintenance at some point in the past. Not up on their tappet clearances. As valves recess, tappet clearances shrink. Add extra heat here due to limited water cooling. Now we have quite tight valve-to-tappet clearances at the very rear of the engine. The Engine starts to develop a miss. Driver is on a hiway trip a long ways from home. He pushes through to get home. Cam is turning at 1/2 engine rpm speed. So lets assume 1500 times per minute for the 5 hour drive back home. Tappet cannot float nicely on the cam. Its being forced down to ride on the cam lobe due to pressure from the valve return spring. No tappet clearance remember. Cam continues to turn as the car is forced along the hiway home. The oil is also quite aged because the owner is lazy with his maintenance. The oil has lost most of its lubricity by now. Should have been changed quite a while ago. The oil has lots of soot in it too because burnt exhaust gasses are entering the engine crankcase at an exhaust valve that is no longer seating. Soot is more abrasive than sand. Bad stuff to allow to build up in your crankcase. The now zero clearance area between the tappet and cam lobe, has soot in the oil, grinding away as driver hurries on his way home. Like sand rubbing between your finger and thumb. Very abrasive. The tappet stops spinning on the cam lobe. It gets slightly skewed in its bore due to no tappet to valve clearance. The valve too gets slightly skewed in its guide. The exponential wear rate and destruction of the engine has begun. Its only a matter of time. Eventually the car owner parks his old Mopar in a field due to poor running engine. 25 years later it’s rescued. A new owner tears it down and posts his findings on P15-D24. “Look at this odd cam wear. Lots of sludge in the crankcase.” (Scarcasm) It Could happen! Lol. The moral of this story is? Change your oil and set your valve clearance.
-
Has the root of the problem been identified yet? I'd erase all preconceived ideas. Even if it ran 3 months ago. Start with a new set of eyes. If your A/F adjustment screw has no effect, you may well have an air leak in the carb base. If you had a spray/drip bottle with some gasoline in it, air filter off carb, after engine starts, if you manually tickle the fuel in the top the carb yourself, does the engine keep running? I'm not there to see or know what has been done so far. If it showed up in my garage I'd begin by doing a compression test. It will quickly reveal any stuck valves. Set the dwell. While in the distributor inspect all wires in there. Clean the distributor cap & spark plugs. Monitor vacuum gauge while running. Check ground wire from the coil to points. Also from key switch to coil. Pull the arb and separate the base sections. Inspect gaskets. Clean carb. Re-install new gaskets and assemble all. Using the said vacuum gauge, then I'l check fuel pump pressure. I like showing this invisible problem below. The A/F mixture screw indeed had no effect on my car. Car would stumble off idle and surge a little when driving right off fully closed throttle. Then I found this.
-
-
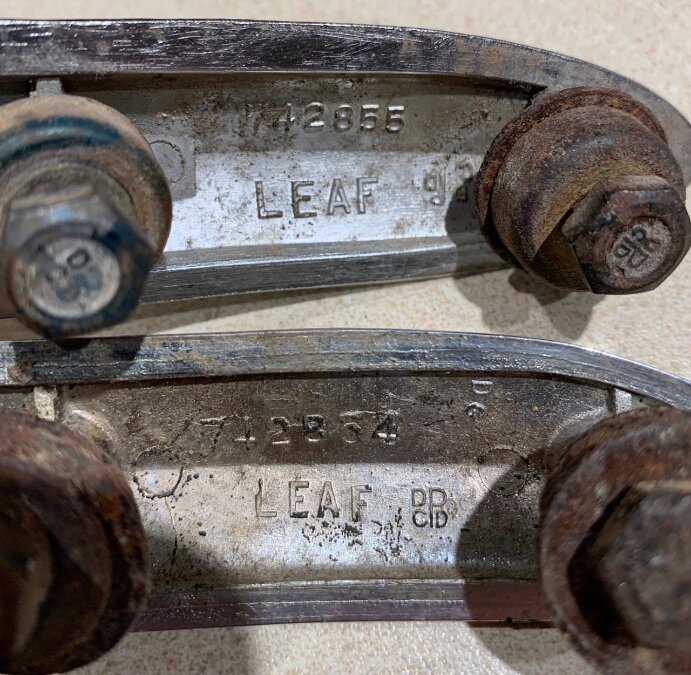
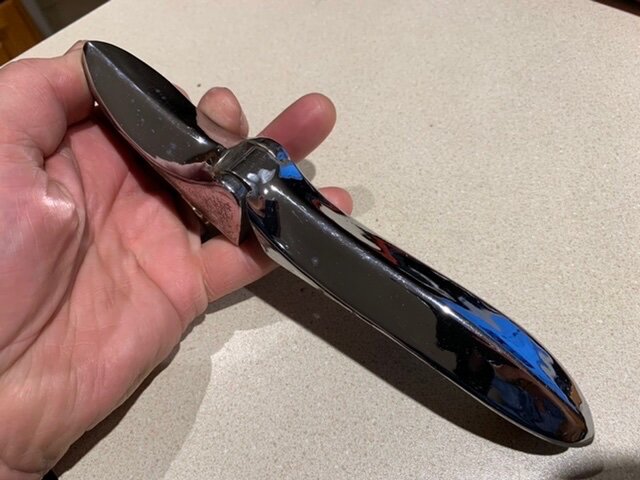
I’ve got a decent spare pair here. Unsure which is left or right tho. Some casting numbers are on the back. Maybe we can ID?
-
You came back Bryan, explaining your feelings. That’s a good thing. Some folks out there in this world refuse to give in. They’ll fight and fight. Tappity tap tap tap on the keyboard. Often known as the “keyboard warrior”. I try to sure and check all emotions at the door when I come in here. Or anywhere else on the internet. I can moan and groan to my wife but it doesn’t go past her. Way too many ways to get upset on the internet. For nothing. It does no good. Chin up. Spring is coming. You got a great project on the go. You’ll feel like a million when it flashes up the first time.
-
If a 37 is like a 38 I may have one. Got a pic?
-
Not sure if this helps. These results here are block drain pet-cocks. https://www.google.com/search?q=radiator+drain+petcock+brass+pipe+thread&oq=radiator+drain+petcock+brass+pipe+thread&aqs=chrome..69i57j33i160l2.19346j0j7&sourceid=chrome&ie=UTF-8
- 1 reply
-
- 1
-

-
It’s hitting me hard to read these posts @knuckleharley . Seeing your unfinished work. Hearing about your prognosis. Its challenging to accept. Its hard to know what to say. I want to say again I have enjoyed your posts and our interactions. Ive been thinking about you. Please keep posting if you feel like it. We’ve got your back. I’m taking a minute to pray for you right now Mopar brother.
-
Different....Cheap transportation I guess? I see that chain drive and think back to 1900. It was't long and they knew it had to go.
-
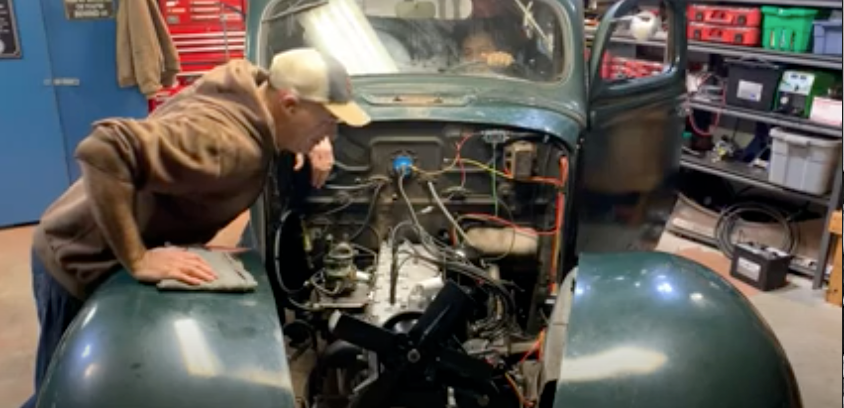
I fired the engine up briefly a couple of times to ensure if would indeed run, before I had the entire cooling system re-connected. That task will take a while yet. The front nose cone is to go back on, support bracketing. Old rusty damaged hardware is to be replaced. The rad and hoses hoses etc. A fair bit of work. I had lubed up the engine internals quite a bit upon reassembly. I had good full oil pressure before firing it up. It was about -7 C in the garage when I flashed it up. I think it'll be ok. It has not fired up since. I am progressing ahead now with the rest of the goodies now that we know it runs. I'll follow a break-in procedure once the roads here are free of snow, salt and ice. Likely first half of March.
-
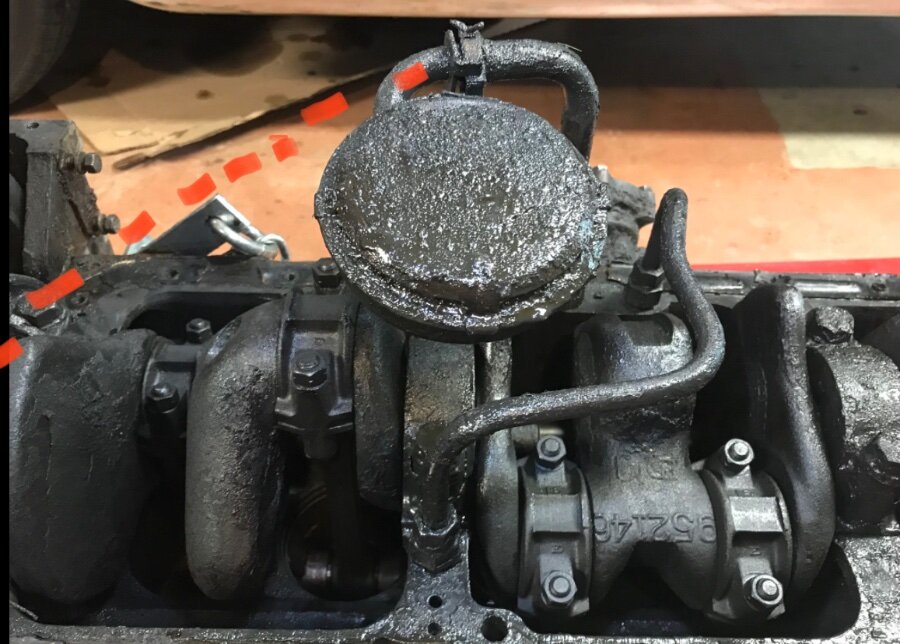
I seem to recall reading some where. Twist the oil screen , straight part of the pick up tube until it points diagonally toward the main bearing cap at the farthest end. You think I can find that info now? I cannot.
-
Lol. No pressure hey? Living up the standards set by a 23 year old.
-
Here is how it went down:
-
My 228 engine, that I had bored out to 237 should indeed have raised compression. Just based on the larger diameter bore. I suspect the 228 head should have a smaller cc combustion chamber too, when compared to a stock 237 head. I also have a spare block and head here, a 218. All mentioned here are 25" long engines. It would be interesting to put the 218 head on my 237 engine.
-

Influence of social Media sites on forum membership
keithb7 replied to Eneto-55's topic in Off Topic (OT)
When I dive deep into a hobby, I almost become obsessed with it. Digging in to find as much info as I can. I hunt for an on-line home for my hobby. The best place for support specific to my chosen passion. I found P15-D24 while seeking out options in a Google search. This site is without a doubt, the world-wide home for flathead era Mopars. I am a Facebook user too. I am a member of many FB groups specific to flathead era Mopars. I certainly don't learn much there on FB. I don't feel connected with any FB group members. Here we seem to have friendly, caring people who want to help. The age demographic here lends to respect and kindness. I have recommended this site countless times to FB users in specialized Mopar groups. I cannot tell you for sure how many come here, then register and stay. I have a suspicion that some users in here have different profile names on FB. So we can't really tell who's who between here and FB. I agree that the FB user interface is terrible. Yet it does help feed my seemingly endless desire to feed on flathead Mopar era information. However, indeed here at P15-D24 it feels more like home. @2nd place would be the AACA forum. I like it there too.- 11 replies
-
- 3
-

-

-
I’ll consider short term SAE oil use for ring sealing. Yet that info is related to ring technology from back in the 50’s. I am skeptical the new piston rings purchased today are made to the old standards?
-
100% stock. I figured I did not want to mess with all those years of success on the engine. The engineers did pretty good!
-
Yes. I do feel pretty darn swell. Its not often in life that most of us get to rebuild an engine. I was about 18 the last time I rebuilt a car engine. I did other engines, dirt-bikes, seadoos etc, but no cars in the past 32 years. My work on this engine is far from proven yet. It needs to actually drive and make good power and torque under load! Then how long will it actually last? Could take decades before my work is proven. Lol. I pulled my engine late Nov 2021. So it me about 13 months to get the project done. Took my time. Enjoyed life along the way. @Dodgeb4yaThanks for your kind comments on my Mopar related videos. @Polsonator2This is a big reason I make these videos. To encourage others to do their own work. Teach others too. I enjoy it.
-
Pretty cool feeling after all that time, effort & money invested. I'd love to rebuild another engine soon , yet it's quite a pricey little hobby. All in, I estimate I spent about +/- $4500 USD to rebuild the engine myself, to stock condition. It was a 228 CI 1953 25”Canadian Dodge engine. I had it bored over to make it a stock 237 ci. The Desoto engine. The majority of my costs was the full machining. Oh and parts freight costs! Other than an align bore, everything else was machined. Crank, head, block/caps and con rods were re-used. Pretty much every other wearing part was new. New cam, tappets, guides, valves, springs, pistons & pins, piston bushings & clips, etc. I also had the generator rebuilt during the process. Water pump and new radiator rebuild were only about a year old so did not include these costs in the amount above. I gained a ton of experience and had a ton of fun. I was very pleased when the engine fired up immediately for the first time. It idled and ran well right from the first crank of the starter. My 1938 Plymouth has been a very fun and educational lab tool for me. I rebuilt my first transmission on it as well. Driving it between improvements and major repairs, has proven very rewarding and incentivizing. I recommend you give it some thought. Think about rebuilding your own engine. Of course you need clean dry shop space. Tools and some wits about you but it's not a difficult project. For those who follow me on You Tube, a video of the start up will be posted within a few days. Thanks to those who supported me here with my questions. This site has my back, so I feel a little more secure diving in to big projects. - Keith
- 26 replies
-
- 20
-

-

-
Do a few of us agree zinc additive, like lead additive, is not need for these flathead engines? I too use whatever 10W30 I get at a decent price. Clean engines. Clean internals. Newly rebuilt. Don't over think it. Any modern oil is better than the oil back in the day, that these engines were engineered to run with. I like Northern California. 10W30 land 8 months of the year. 10W40 in the dog days of summer.
-
I recall one time my brake lights stayed on a for a sec. Hmm. Caught my attention as I walked away from my parked car in the garage. Yet they went out 3 seconds later. Weird. Oh well. Carry on. Couple weeks later I went out to start my car. Dead battery. Hmm. Weird. Maybe the light in the glove box is stuck on? Nope. Re-charge the battery & go for a drive. When I got back home notice a drain on the ammeter. I pulled out my clamp style multimeter/ammeter testing unit. With the key turned off, I tracked amp flow in the wires under the dash. Interesting. The wire leading right to the hydraulic pressure brake light switch. Remove wire at switch. Amp drain stopped. Bingo! Bought a generic modern replacement $10 pressure switch at a local parts store. Problem solved. I do like trouble shooting with an ammeter.
-
Pretty easy to hook a bulb up to a 12V or 6V battery and see how bright it is. Compare it to a known 12V if you like. Easiest is look at the number on the bulb base and google it.


.jpg.9b78b8d4f8a639354852ab9b8dcf991a.jpg)


