
Leaderboard


Popular Content
Showing content with the highest reputation on 12/20/2024 in all areas
-
Push pins now installed. The easiest was to use the angled needle nose pliers gripping the pin just enough to hold it in place and use the rubber mallet to hit it. Each pin took about three wacks to properly seat it.2 points
-
Maybe post some tractor content in the off topic area. I've got this one waiting in the wings but it might squeak by enough to be in the truck forum1 point
-
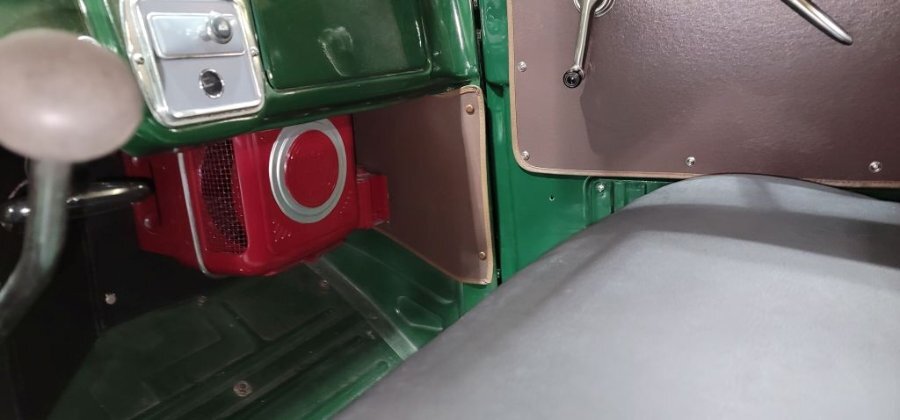
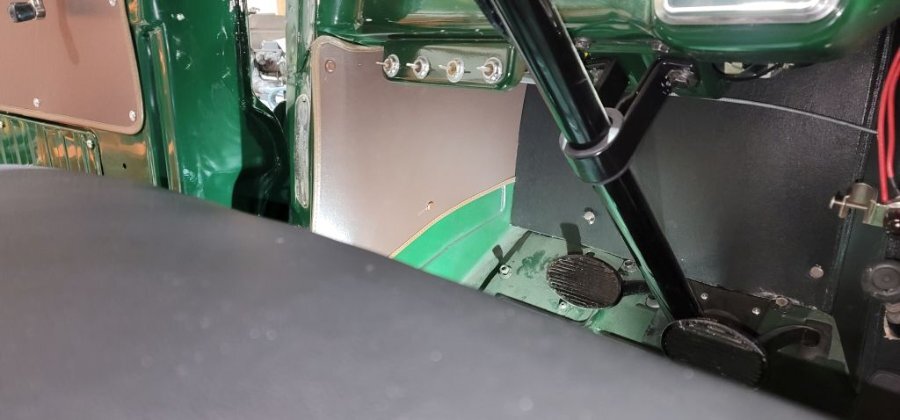
Kick panels installed.
 1 point
 -
If you look closely at the ends of the wire next to the lugs, you'll see that it was originally covered with cloth insulation that has since worn away, so it looks like it was intended to be insulated.1 point
-
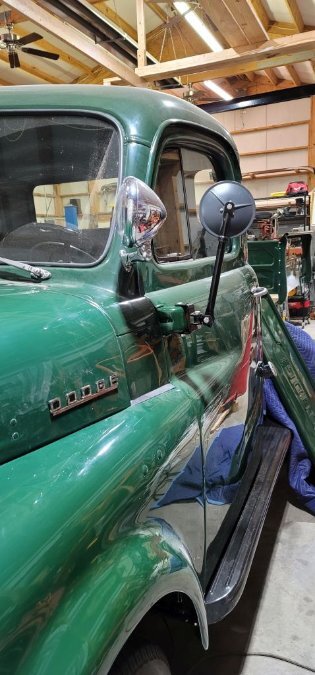
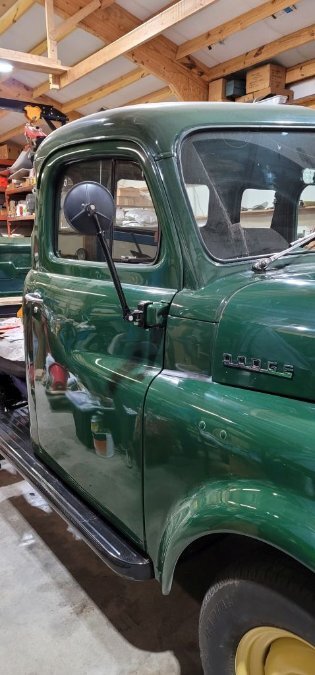
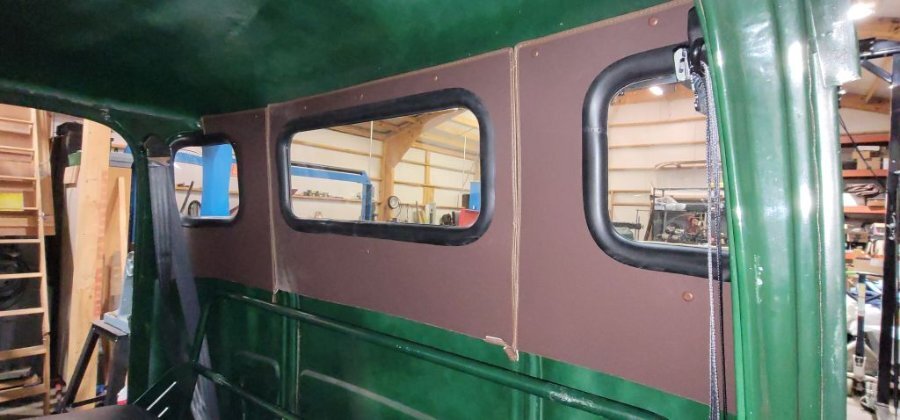
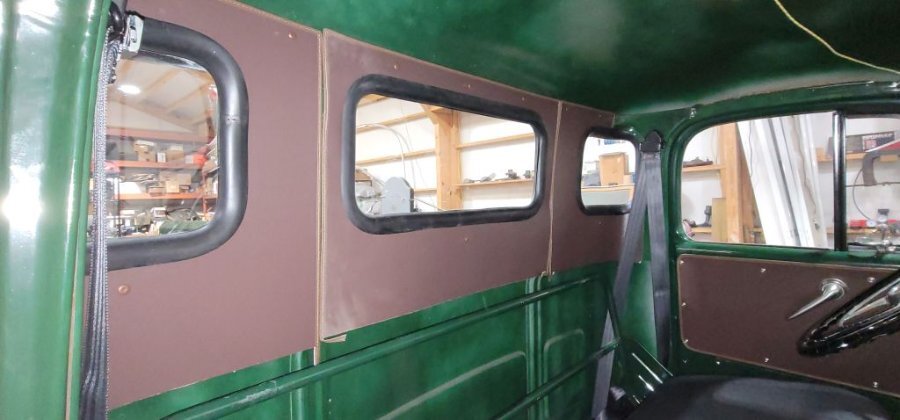
After figuring out the easiest way to install the brown trim push pins I finished the installation of the rear trim panel. I'm not overly impressed with the panel quality so I'll probably look into the ones that DCM sells, but that's for another day. Also finished up the side view mirrors. Next up for the interior is the headliner. I'm not sure how I'm going to manhandle it by myself but I'll figure out something.
 1 point
 -
I haven't gone through all the responses, but it haven't been suggested yet, you might want to do a vacuum gauge timing procedure. Second Chance garagehas a good how to on this technique. This uses intake manifold to find the optimum spot for your car's operating conditions. You did mention you corrected some issues inside the distributor . There is a wire connecting the points to the breaker plate. This is a snort many stranded flexible that allows the breaker to rotate freely from centrifugal and vacuum inputs. Many folks have found that wire in bad condition, insulation missing, broken strands, and or replaced by wire that is too thick to be as flexible as needed. Napa supposedly has replacements of various lengths.1 point
-
Glad it worked. Btw - rather than trying to scribe low and full, I just filed small notches in the side of the stick. Makes it easy to read.1 point
-
I have the cheap brown cardboard from Robert's. Back in the 90s when I bought the kit it was the only thing available. I figure I'll see how it looks and if I don't like it or it doesn't last I'll buy a kit from DCM. What you suggested is exactly what I tried, with no success. I have the same pliers that you described. The problem was the push pin wire is so stiff, the rubber mallet couldn't break the pliers grip on the pin. I had zero luck with the pliers and managed two with my thumb. I think tomorrow I'll get a small chunk of wood and dimple it with a ball pen hammer. Maybe the dimple will support the pin better than my thumb. It just occurred to me as I was typing the above, maybe instead of squeezing the pin I should rotate it 90 degrees in the pliers, basically just support the pin in the hole and then hit it with the rubber mallet. I'll try this first and if that doesn't work I'll try the block of wood.1 point
-
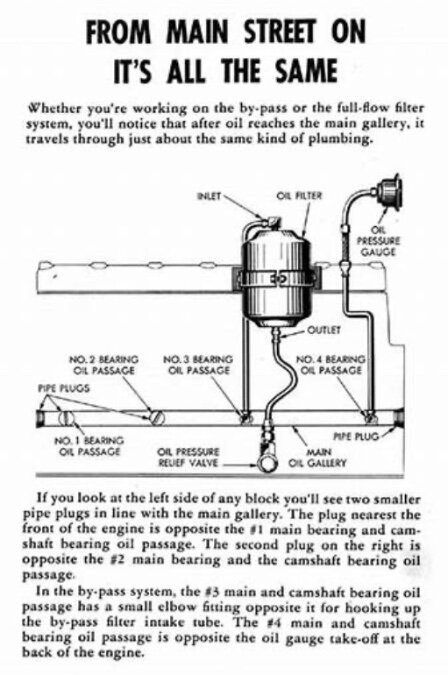
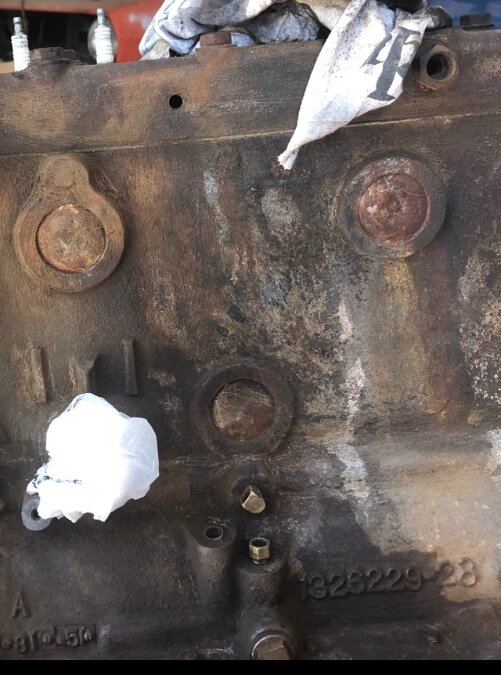
While you are cleaning oil stuff, make sure you clean the lines too, and from the oil filter. Also, remove the bypass oil pressure valve, clean that area all out, and don’t stretch the spring. If that valve sticks, the oil pressure will destroy your gauge and make an oily mess in your cab. Don’t ask me how I know… The first attached photo is a generic description of the system. The second photo is the driver’s side of the engine. The bypass spring and valve are behind that square-head plug at the bottom of the photo.
 1 point
 -
Thank you, I can scratch the transmission off the list of potential sticking points.1 point
-
My factory dipstick reads full with 6qts. With the filter. Better to be a little too full, than sucking up air.1 point
-
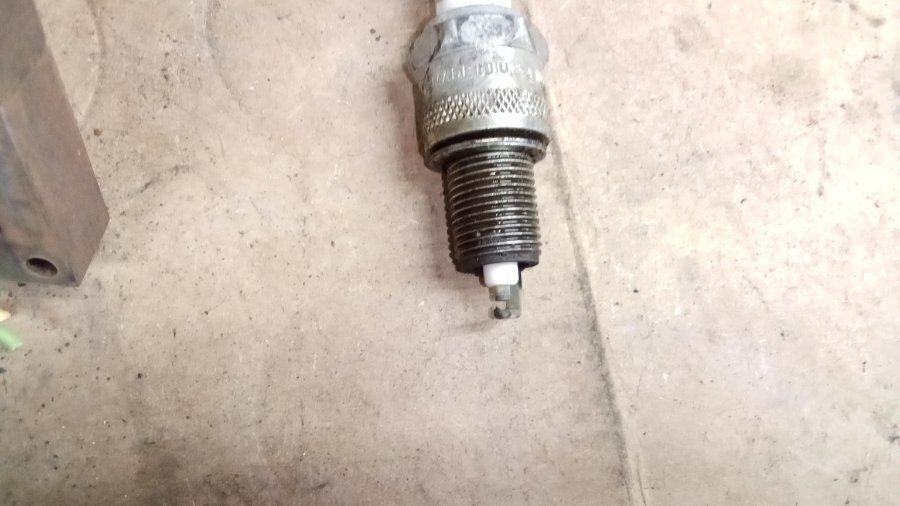
That's good advice there Dave .... I pulled a plug to take a peek. ... almost 1500 miles on them. I think my next plan, after the Holidays ... Is to pull the plenum. Both vacuum and electrical run under it and I will get a chance to spend time and make sure I did not miss something when I installed it. All the main harness plugs I cleaned and used dielectric grease on them .... except the ones I missed Doing the engine swap, I may have got in a hurry and missed something when connecting those items and installing the plenum .... double check my work. Also this plenum I noticed has a lot of oil in it from when the engine blew up ... I have been moving the plenum and all the sensors/TB over to the new engine .... The old dried oil is 3 years old now and I doubt it would be a issue ... I have 2 clean plenums so will swap it out. I also have the modified fuel rail that is working fine and the injectors have 188K miles on them. I do not think it is a injector issue, but have 2 other sets of injectors can clean and test then install them. Currently just frustrated with it and need to step away from it before I blow it up
 1 point
 -
Painting before it's all really ready: I followed the progress of a 2-door 51 Dodge custom (chopped, sectioned, channeled, hood opening reshaped, top rear corner of the door reshaped, etc.) on Rat Rods Rule, and he often painted an area he had just started on. He said that he couldn't really see how it was going to look until it was all one color. But he also did the same with structural areas, partly because he always put the car outside over the winter, when he worked on a wooden boat. (He was from Michigan, too.) When we were doing the body work on my 46, we also sprayed a coat of sealer over the primer, to be able to spot any problem areas. So, maybe just paint it anyway. (I think I've heard of some kind of paint that is 'weldable'. Probably pretty expensive. As I recall, it is used in areas that will later be inaccessible.) But you probably know all of this already.1 point
-
That's why women consistently outlive us.1 point
-
Real men use to lean over the fender and adjust them while the driver would keep a steady pace down the road.1 point
-
Get a hold of member Mark Duggan (mark@rdusaclassics.com). He has sourced rebuild parts for a couple OD's he rebuilt, and a couple sets of parts for others. He can also provide a list of part numbers if you would rather source common wear parts independently . My car runs a 56 Plymouth 230 with 225 r 75 15, 4,11 rear and overdrive. At 62mph it was turning ~3300. With OD its runs ~2400. And gets 19/20 mpg on the highway.1 point

Rescaled.thumb.jpg.72b30067313ca448ec104f87d35a8215.jpg)


