Leaderboard
Popular Content
Showing content with the highest reputation on 12/19/2023 in all areas
-
Follow-Up: I finished cleaning the block last night. I kept a mental tally of how many hours I spent on it over the last two weeks, and it came out to about 28 hours. Of that, the first 15 or 16 hours were spent on those three "chambers" that were the subject of my initial post. I had to spend so much time because, every time I thought that area was clean, I could spray more brake parts cleaner in there, scrub with a wire brush and come up with more grit. With a mirror and light, I could see a couple of dark patches that looked like baked-on oil. Those seemed to be the source of the grit, so I sprayed that whole area with oven cleaner, till it was foaming out of all those openings, doing so with the block in different orientations every few hours, and leaving it to soak for several hours each time (per the oven cleaner instructions for cleaning of cold surfaces). Then I hosed out the oven cleaner with water. To my amazement, that didn't get rid of the gunk. So I just had to keep at it the hard way, using wire brushes by hand, a wire brush on a Dremel, and using some dental picks to tediously scrape across every square inch, and paper towels and cotton towels with lots of brake cleaner (dozens of cans and also a couple 1-gallon jugs sprayed from one of my Vaper sprayers, which is a knock-off the SureShot sprayer). Eventually, I got to the point where I couldn't produce any more grit and it looked visually very clean, so I was satisfied that it was good to go. Then I moved on to the rest of the block, which went much faster. I used brake cleaner and hand-held wire brushes to clean the crankcase and valve tappet areas, getting in all the little divots and such, and using "pipe cleaner" brushes from a Moroso engine brush kit to clean the various oil gallery passages. Despite the block being cleaned at two different shops, there was still a lot of black gunk that came out of all of those areas. Not impressed with the professional cleaning. I couldn't find the cylinder bore brush from that kit (don't know where I could have put it?), so I used a kitchen brush of similar shape and size that did ok, and also a kitchen sponge with soap and water. I then followed up all of this with a soap-and-water cleaning of all those areas (using the sponge), except the oil passages, as I felt they had been pretty well-cleaned the first go-around with brake cleaner. I was pleased that the sponge came back from all of that looking clean and basically new. That means I had done a good job with my initial cleaning. I then hosed off all the soapy water with the hose sprayer on the "full" setting (forceful stream) and also sprayed out the oil passages. I figure this would help to dislodge any remaining particulates and get them all to drain onto the ground below. Finally, I used my other Vaper sprayer to spray about a half-gallon of WD-40 all over the block - outside, inside the crankcase, valve tappet area, cylinders, oil galleries, etc. The whole thing got completely soaked in WD-40. I finally feel satisfied that it's all clean and ready for assembly. I double-bagged the block with heavy-duty (3-mil) 55-gallon trash bags. After all that, my hands are dry and cracked from the brake parts cleaner, and my finger tips are a little raw and sore from rubbing the rough casting surfaces so much to check for presence of grit. I also have various little cuts and nicks from the sharp edges around the block. Typing kinda hurts. I tried using the best chemical-resistant gloves I could find at the parts store, but they didn't hold up to brake cleaner for more than a few minutes. It was a futile effort. Plus, with the gloves on, I couldn't feel the grit to be able to tell if I needed to do more cleaning. Exposure to chemicals for that long can't be good, but I didn't know what else to do. I didn't want to use soap and water for all of that initial cleaning, for fear that the sensitive parts of the block would start to rust. At least I was outdoors, so I wasn't breathing it much; my exposure was mostly limited to the exposure through the skin. If I were to do more engine work like this, I would have to come up with something better.2 points
-
I finally replaced my clock movement with a cheap battery operated quartz motor. done. period1 point
-
A photo of the Optima battery shows the positive post to the right when the "Optima Battery label is read right Maybe your pics will show whichway the label reads.1 point
-
I don't know if this is your starter, but it's a typical find off a search of your part number. I have a feeling that there is one out there for you somewhere. Spend an hour and scour the net. https://www.hiltopautoparts.com/product/nos-mopar-starter-solenoid-1950-thru-1954-desoto-chrysler-models/1 point
-
I've just been through the same experience with my '47 De Soto starter. It takes an ss4507 starter and my rely was shot. One day as I was surfing the net I accidentally found a guy who was selling a NOS relay for my starter. Needless to say, I bought it. Apparently he had a few and mine was the last. Anyway, when tested it worked great and now I am in the process of getting my starter back together. I always operate with the optimism in mind that somewhere out there is an answer to a problem that just takes some rooting out. Hit all of the usual suspects of Mopar parts and you might run across one or a starter that may be shot but the relay might work. I also accidentally came across NOS pistons for my front brake cylinders. There are many on this board with far more experience and knowledge about these things than me, so I'm sure they'll chime in. They've helped me out a lot to understand how a starter and solenoid go together.1 point
-
Personally I would not run synthetic oil in these old engines. If you do I suspect the engine will burn and leak a lot more oil than it does today. For my clean, rebuilt engine, detergent dino oil is just fine. No zinc added.1 point
-
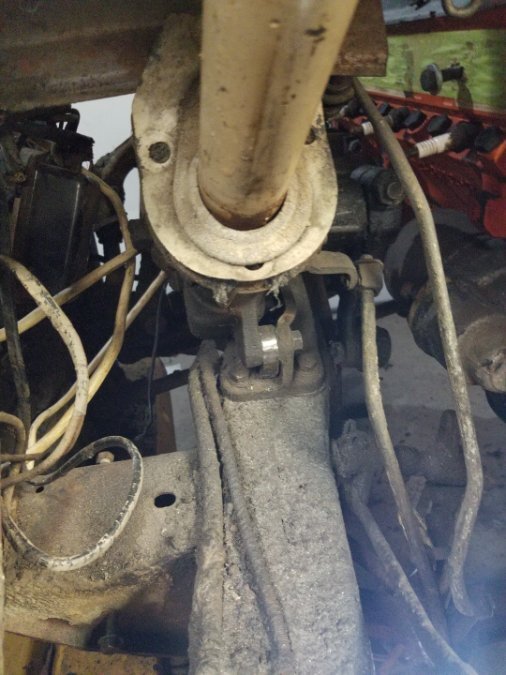
I believe my 50 Desoto has the same steering setup as your car. What I did for my mopar 383/727 combo was move the entire steering box towards the driver's side. That was accomplished by making spacer out of steel plate and inserting it between the vertical steering box frame mount and the steering box itself. Offhand I don't remember the exact thickness of the spacer but I think it was 1/2". It required longer mounting bolts as well. I measured the steering angles of the wheels lock to lock before and after inserting the spacer and there was negligible difference in terms of turning radius. As mentioned above, mini starters are shorter but wider due to their gear drive. I tried one with a clockable snout and it didn't have any advantage over the stock starter. After shifting the steering box, I just used the stock starter.1 point
-
I don't think you'll find a bolt-on fit for that. If there is just a small interference and If I were working on it I think the first thing I'd try is removing the pitman arm. Then install the starter and measure a lot. It may be possible to bend the pitman enough to clear. They are forged steel and can be safely bent. Maybe even construct a new arm altogether. That's what I'd try, but some say I'm overconfident in my welding skills. My letter to Santa asking for a new welder was returned. With a note, 'I've seen your welding, you're getting a new grinder for Christmas!". Seriously, don't try either of those unless you are confident in the process and your skills/equipment.1 point
-
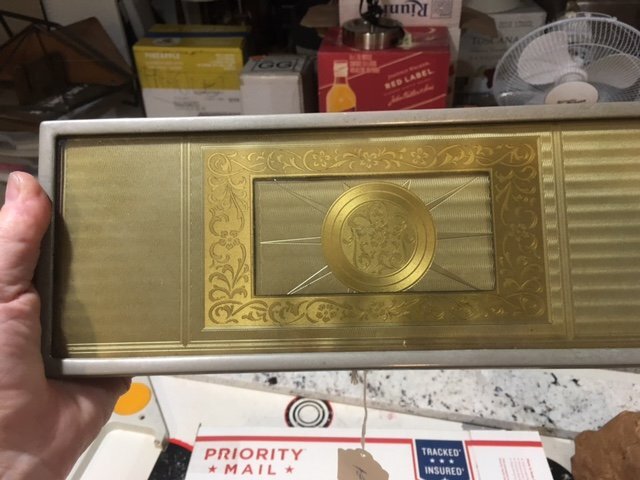
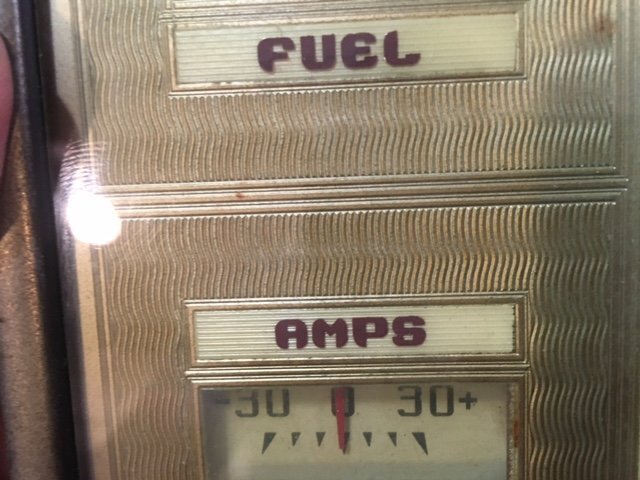
how about this art deco speedometer with the original bakalite insert for a 1939 Desoto. this is my spare unit and I still have the original in better shape in the car. and the second picture is of the glovebox lid. The center section is where the clock would be inserted. This is also a backup to the one inthe car. in the third picture you can see the fine lines and details that make up the spacing between each guage. Rich Hartung Desoto1939@aol.com1 point
-
1 point
-
I think it would be safe to assume the lubrication suggestions in the manual are totally obsolete, so much has changed in the past 70 years that we now should use modern oils and service intervals. From a practical standpoint it probably doesn't matter which modern oils we use, any of them will be far superior to what was available in 1948 for these extremely simple engines.1 point


