
Leaderboard


Popular Content
Showing content with the highest reputation on 03/03/2022 in all areas
-
Variety for sure! I'm not sure what I want to do. Thought about using all 15" since I have them and It would be easiest. I could put the 16's on the back but I don't see any real benefit. Besides, I kind of like the Smoothie hubcap thing I got going on in the front. Maybe a little polish...
 3 points
 -
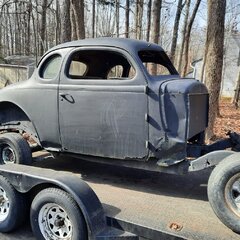
Not bad for $300 !


 2 points
 -
Well done on the repair. I acquired a clock for my 38 Dodge. Mounted in the glovebox. Wasn't going but with a careful clean it has sprung into life. I don't watch much TV but there is a program that I try to see every week. It's called "The Repair Shop" and is made in the uk. Easy to find on the 'net. People bring in their cherished but neglected family treasures and a team of very clever craftspeople restore them to their former glory. Paintings, artworks, clocks, furniture items, musical instruments, teddy bears etc. etc. The program shows how each item is restored and brought back to life. I am sure many of you would enjoy seeing it. Many of the skills shown are what you folks are all about here ......thanks for sharing your little project. Gives inspiration to others to give it a go and is very satisfying when these old pieces of our cars can be brought back to life.2 points
-
Yes that was my issue the tapered end of the bleeder was not the same as in the wheel cylinder so the fluid would then weep out the bleeder screw via the threads. Have to watch what products you are using to repair our older cars. At least there are some quality people supplying quality products to help us keep these cars on the road. Rich Hartung2 points
-
Was working on my 92 Dodge Dakota truck yesterday. Aggravating POS. On my D24 I've only encountered difficulties because of rust holding parts (head bolts, valve guides, etc). On my Dodge Dakota it's difficult removing bolts holding the pipes on the exhaust manifold. They put the junction right next to the starter and steering column on the drivers side. Had to use a long extension to be able to turn the ratchet. On the passenger side they curved the pipe just enough to keep from getting a socket on one. Then the stupidity of no gasket, just a metal to metal junction. Also you'd have to take both sides loose to do one side. Same as the exhaust pipe junction to the Cat. They put the joint at the tightest spot they could find. Went to replace the idler pulley. Rear bolt is in a long tube right in front of the thermostat housing. You'd have to take the alternator bracket off to get to it. Really sucks working on some modern vehicles.1 point
-
YIKES!! If you get them soaked down with some penetrating lubricant you may be able to use an extractor without needing to remove the head. Also, a bit of localized heat with an oxy/acetylene torch right into what's left of the spark plug may help break the rust bond. You may need to heat it and let it cool again to break the bond.1 point
-
There really is almost nothing simpler than working on a Plymouth flat head. Even my air cooled Volkswagen engine, initially designed around 1925 and based on an earlier design, was not simpler. The Volkswagen has push rods and rocker arms because it is an overhead valve engine. It is indeed MUCH more difficult to check the valve clearance on the Plymouth. I have to pull the wheel & the inner fender off. The manifold is too close for comfort. In the Volkswagen you just lay down under the back with a screwdriver and tappet wrench. If you were a big guy, you stick the jack in the socket and jack the car up a little bit. Easy Peezy. But you can’t turn the flywheel from down there, so you have to crawl out and turn the engine to get all the valves. Between 1925 and 1990 they made a lot of changes to increase horsepower and reduce emissions. All of these made the engine accessories more difficult to r&r. Mine is a ‘73, and it is a absolutely a bit harder than the ones I worked on from the 60’s. Both of these were pretty dirty engines, and engine life was quite similar between rebuilds. 50 to 60k Even worse if you drove on a lot of dirt roads. But you could re-bore a Plymouth engine three times. If a Volkswagen needs more than a hone, you change the pistons and cylinders as a matched set. Which is much cheaper & faster than a re-bore job, because all the machine work was done at a factory somewhere. They made something like 40 million sets of pistons and cylinders, Not including aftermarket. This makes the stuff pretty cheap. Ultimately it’s a very apples and oranges comparison because the ‘47 Plymouth will tow two ‘47 VWs backwards down the road. (Please don’t ask me to prove this but I’ve driven both cars, and this is my educated opinion.)1 point
-
Hey Bryan I am right there with you...I am currently working on an old English car and other than the quirky ways they put stuff together...it is so basic when you really look at it... The new stuff is so complex...I love the way the new stuff runs and drives but I love the simplicity of the older junk... Good luck on the old Dakota... MikeC1 point
-
Definitely use metal. Plastic filters are a disaster waiting to happen!1 point
-
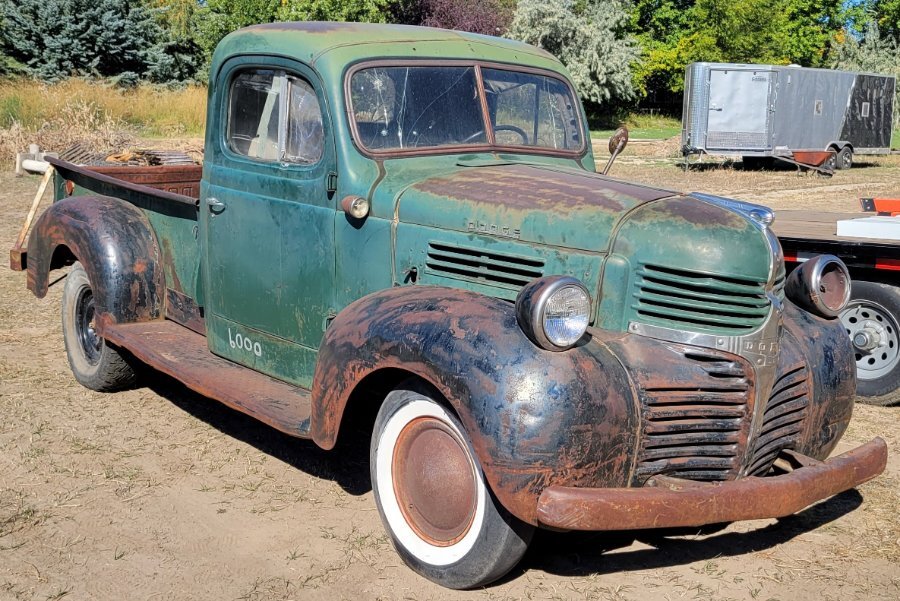
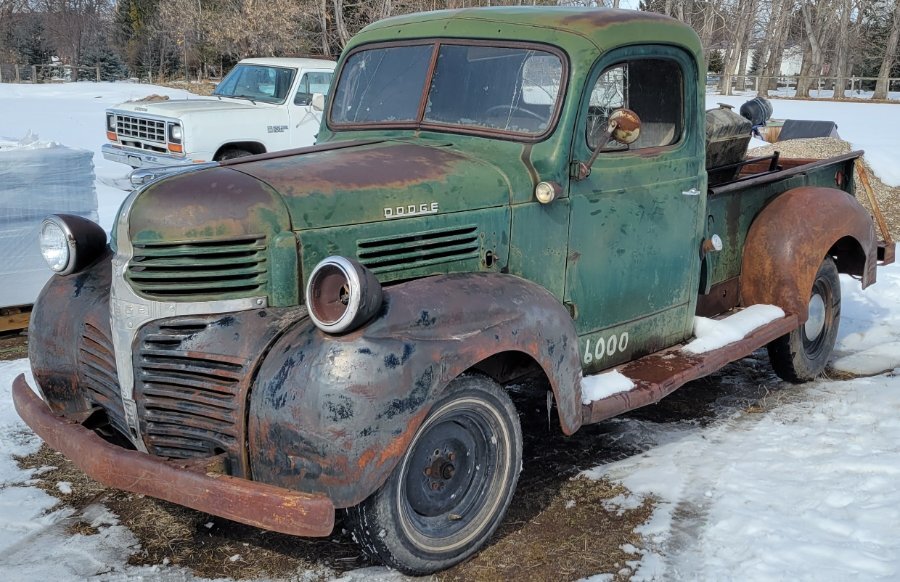
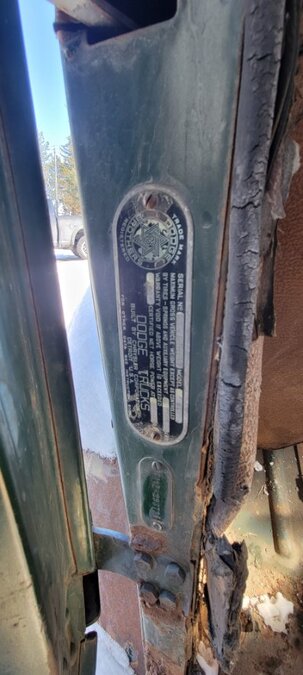
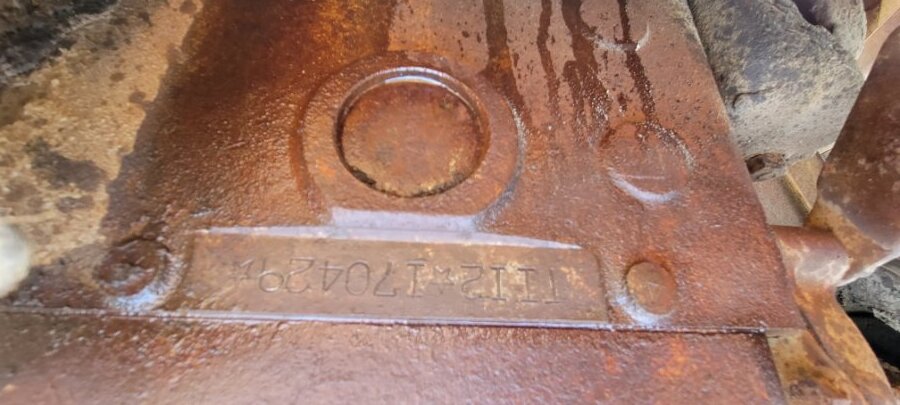
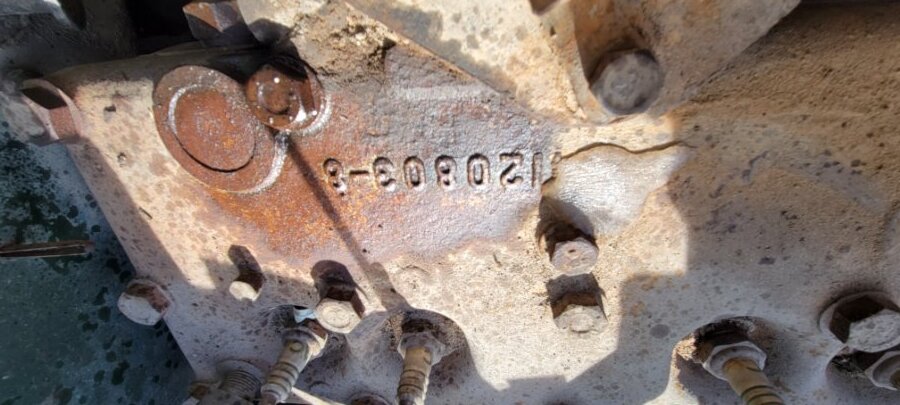
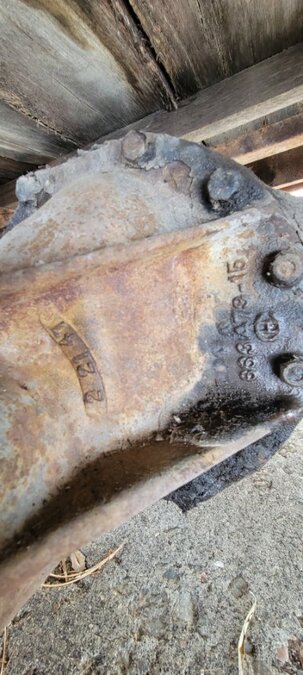
I am new to this forum. I have been a Mopar guy nearly my whole life. I recently picked up this project last fall. I am pretty good a researching things but I also like to be sure. I am hoping someone can help me verify what I have? What I think I know: 1947 wc, 218 flathead, 3 speed, has 11 bolt rear end. What I'd like to know: What do the numbers on the rear end mean? What trans is that? Number on head means....?

 1 point
 -
I too have seen and bled cylinders of the two piece dsign...common in the 30's to very early 40's cars. New wheel cylinder bleeders from china sometimes are found to not seal up no matter how tight they are. The bleeder screw threads are not the seal...the tapered cone tip of the bleeder to the wheel cylinder seat is.1 point
-
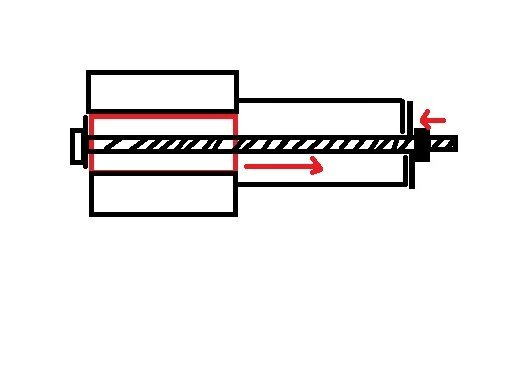
Trick is for pulling something out is getting anything shaped like a tube that is larger than the part you are trying to get out. It has to be thick or it will mushroom.
 1 point
 -
Ignore the polarity of the car’s electrical system. Just look at the battery. The Positive post on the battery gets the red clamp from the battery charger. Negative battery post gets the black clamp. Just make sure it’s 6V charger!1 point
-
Well I fixed it ?! But it was pretty tough and it took lots of patience to get it all back together. I'm thinking at least 45 minutes for each gear. After awhile I figured out a method of getting a gear in place without loosing the rest of the gears. I think the issue was 3 different things. That cluster gear assembly finally got loose enough so that I can turn it from the knob on the front of the clock. The points had welded themselves together which is fairly common. There was a pin that was supposed to be at 90 degrees to one of the plates and it was about 75 degrees. The positioning of that pin is critical to the operation of the mechanical part of the clock immediately after the points go off. Beats me how it got like that. I ran it for about an hour and the points reset about ever 45 seconds which tells me it's probably running to fast. One puzzling and interesting thing is that the clock from my 48 which is dated Feb 47 has different gears than the one from my parts car that's dated April 46. First look and everything looks the same. But the gear assemblies are completely different other than the gears are the same diameter and the same number of teeth. If anyone is curious I can explain in detail how the clock works and explain why most of them don't work these days.1 point
-
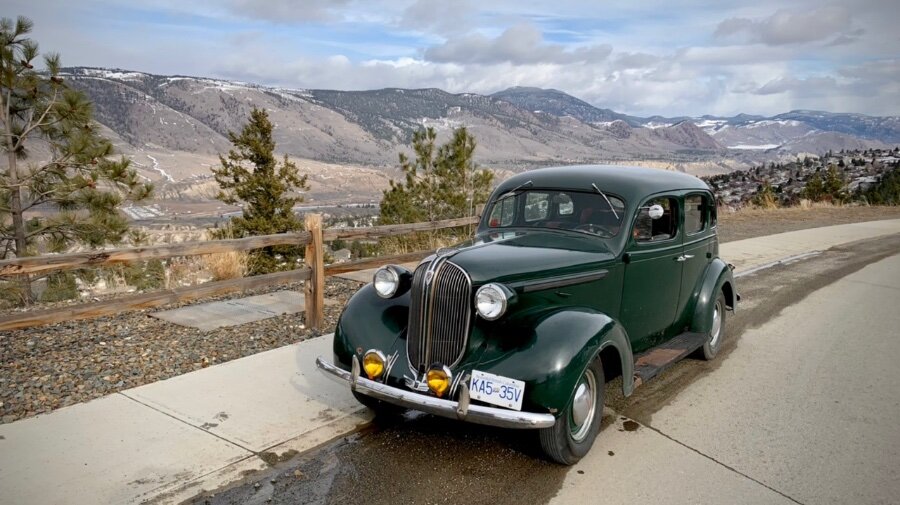
Today was my first pleasure cruise of 2022. My 1938 Plymouth is back up with her newly rebuilt 237 ci 25” long engine. “How’s it drive with the new bigger engine?” you might ask. Fantastic! The is the best performing flathead powered car I’ve driven. The improved power to weight ratio seems quite good. There’s noticeably more torque. I rarely need to use 1st gear any more. I’m working her a little harder on the local hills today. Where others passed me before, i can easily overcome them if I want to. Without down shifting, up hill, in several examples. 3rd gear at 1:1 with a 4.11 rear end and a 237 engine is a sweet little package. I reset the valves this morning. I dialled in the timing and dwell. She’s smooth! Holy man, she starts right up very quickly. Smooth running, clean, no smoke. Very good power and performance. Cool running temps. Great 6V generator and throttle performance. I rebuilt the steering gear box while I was waiting for the machine shop. It steers good, better response. Hard to find much to complain about. I do confess, it appears I may have forgotten to put thread sealant on the rear main oil galley plug. I have an oil leak below this area. It’s in there pretty deep! Tranny would have to come out. Clutch off. Flywheel off. Support rear of block. Remove bell housing. Then remove the galley plug. Apply thread sealer and reassemble all. Phew! Maybe next winter. Maybe in a month. We’ll see. The odometer is just about to roll over 100,000 miles. Good timing. Long may you run….
 1 point


.thumb.jpg.d599d4c13e08899474e0348bd9baed3b.jpg)