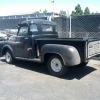
TrampSteer Posted May 4, 2014 Report Share Posted May 4, 2014 My next project step is the frame now that I have one to start working with. One of the specific items I need to work on is a rear shackle mount replacement. It seems fairly straight forward - but I learn a lot more when I ask a question than when I assume I know the answer. I also could have just asked the guy that I got it from 'cuz I know he knows too, but then a lot more people don't get to learn. I know I have learned plenty form archived posts ... I could find plenty of posts that talked about the shackle hangers - including 48Dodger's videos on removing them, but only one post that talked directly about the rivets and none that talked about mounts. I bet a lot of you have already done this. I bet even more have something to say! Here is the part that I am talking about. REMOVAL: Dave Claussen recommended removing rivets by piloting a 3/16 hole first to relieve side pressure. Grind the head off, then pound it home. Of course they were talking about a fish-plate, not the spring shackle mount. Would the pilot hole be really necessary? Anything special about this area? Other ideas? REASSEMBLY: From the same post, Grey Beard recounted his actual work experience: "...we just used grade 8 bolts and nuts with lock washers on each side - bolt head and nut and flat washers, and cranked them down". I have no other guidelines as to what might work, what has worked, what didn't work. I open it up to you fine gentlemen. Thanks in advance ts Ref : Starting over again Quote Link to comment Share on other sites More sharing options...
Dave72dt Posted May 4, 2014 Report Share Posted May 4, 2014 I used G8 bolts and locknuts on my newer 3/4 ton 4wd when I replaced the rear hangers in it. The locknuts were not he the elastic locking type, instead one end of the nut is somewhat deformed. No problems after several years. You can re rivet them if you can find the correct size and have the tools to get them clinched properly. I think they were hot riveted in so they are really tight and come out hard in not relieved by drilling. If you're looking at points when showing, riveting is the only way. Otherwise, use bolts. Quote Link to comment Share on other sites More sharing options...
TodFitch Posted May 4, 2014 Report Share Posted May 4, 2014 My rear spring hangers look different but I had a similar problem: Some previous mechanic had taken a cutting torch to the rivets to remove the hanger. I imagine it was to work it on the bench. Lousy torch work meant that parts of the frame were damaged. I ended up building up the missing frame material by gas welding. To re-install the hanger I used bolts to hold it in place and then I hot set rivets replacing one bolt at a time. Been a lot of miles and a lot of years since then and there is no sign that my install is having a problem. As I recall it, I got the some of the rivets at a local hardware store. But I also recall that there was a size that they did not have and I was able to take a carriage bolt, grind off the square at the top of the shank and then cut the unthreaded portion to length for the other rivets. With respect to removing rivets, I had to do that for the battery box support. I recall using the method you say Dave Claussen recommends. Worked for me. 2 Quote Link to comment Share on other sites More sharing options...
Young Ed Posted May 5, 2014 Report Share Posted May 5, 2014 REMOVAL: Dave Claussen recommended removing rivets by piloting a 3/16 hole first to relieve side pressure. Grind the head off, then pound it home. Of course they were talking about a fish-plate, not the spring shackle mount. Would the pilot hole be really necessary? Anything special about this area? Other ideas? REASSEMBLY: From the same post, Grey Beard recounted his actual work experience: "...we just used grade 8 bolts and nuts with lock washers on each side - bolt head and nut and flat washers, and cranked them down". I have no other guidelines as to what might work, what has worked, what didn't work. Ref : Starting over again Yes that sounds about like how I did it. Angle grinder the heads flat/off and drill some and then push the remaining parts out. Mine have been on there with grade 8 bolts and nuts with lock washers for over a decade now. Mine were also slightly worn at the top so I swapped them side to side. Quote Link to comment Share on other sites More sharing options...
NiftyFifty Posted May 5, 2014 Report Share Posted May 5, 2014 None of you guys own air hammers? When I removed the running board mounts from my 47 Fargo I used my shap bit and hammered the heads and then a point to push the rivets in. Now the $10 cheap hammers won't work, you need to buy a big one with a longer stroke and less beats per minute. Their only about $70-100 for ingersol, and are so handy for many projects... Especially when you can't get in to swing a hammer correctly 1 Quote Link to comment Share on other sites More sharing options...
Young Ed Posted May 5, 2014 Report Share Posted May 5, 2014 I believe I used the air hammer for the running board on my 46 too. When you have access I found it less risky of other damage to grind the head off. Quote Link to comment Share on other sites More sharing options...
Desotodav Posted May 5, 2014 Report Share Posted May 5, 2014 I've found that the hot rivets are still hard to push through after grinding the heads off, possibly as they are tapered (and red hot) when initially inserted making them a tight fit. I've found it easier to drill a reasonable sized pilot hole through center of the rivet/s (to enable them to compress in the center a little) when punching them out, which in-turn has made them easier to push out. Definitely use hardened bolts when re-installing the mounts. Quote Link to comment Share on other sites More sharing options...
Merle Coggins Posted May 5, 2014 Report Share Posted May 5, 2014 I'd prefer the use of Frame Bolts to reassemble that type of thing. The have a flange head and a shank that will help align the two pieces. They come in grade 8 or better. Also, use Stover nuts, also available with a flange if you wish, like Dave said. One word of caution with Stover nuts... don't use an impact gun to spin them on. If you spin them too fast they will overheat and destroy their ability to lock in place. 3 Quote Link to comment Share on other sites More sharing options...
Dave72dt Posted May 5, 2014 Report Share Posted May 5, 2014 None of you guys own air hammers? When I removed the running board mounts from my 47 Fargo I used my shap bit and hammered the heads and then a point to push the rivets in. Now the $10 cheap hammers won't work, you need to buy a big one with a longer stroke and less beats per minute. Their only about $70-100 for ingersol, and are so handy for many projects... Especially when you can't get in to swing a hammer correctly Yes I do and yes I did Quote Link to comment Share on other sites More sharing options...
TrampSteer Posted May 7, 2014 Author Report Share Posted May 7, 2014 Thanks guys. Knew you'd have a lot of right answers. Quote Link to comment Share on other sites More sharing options...

Recommended Posts
Join the conversation
You can post now and register later. If you have an account, sign in now to post with your account.