Radarsonwheels
-
Posts
1,232 -
Joined
-
Last visited
-
Days Won
17
Content Type
Links Directory
Profiles
Articles
Forums
Downloads
Store
Gallery
Blogs
Events
Everything posted by Radarsonwheels
-
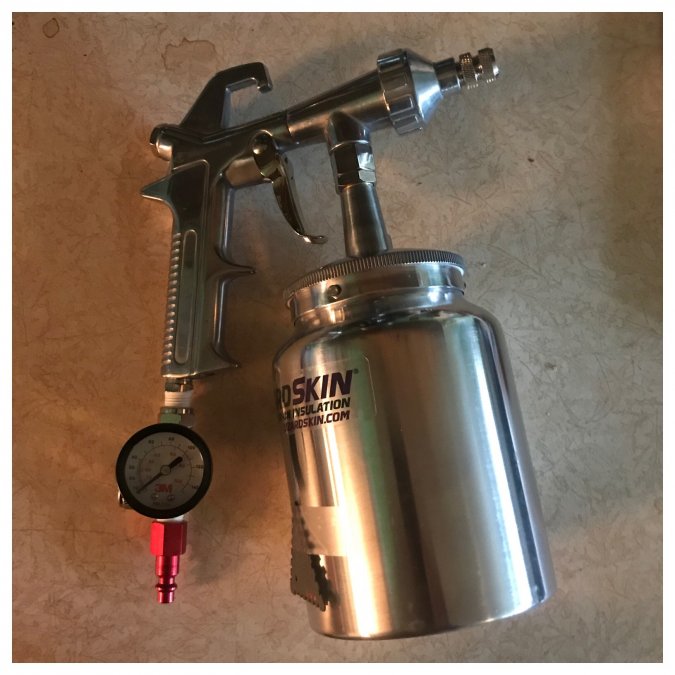
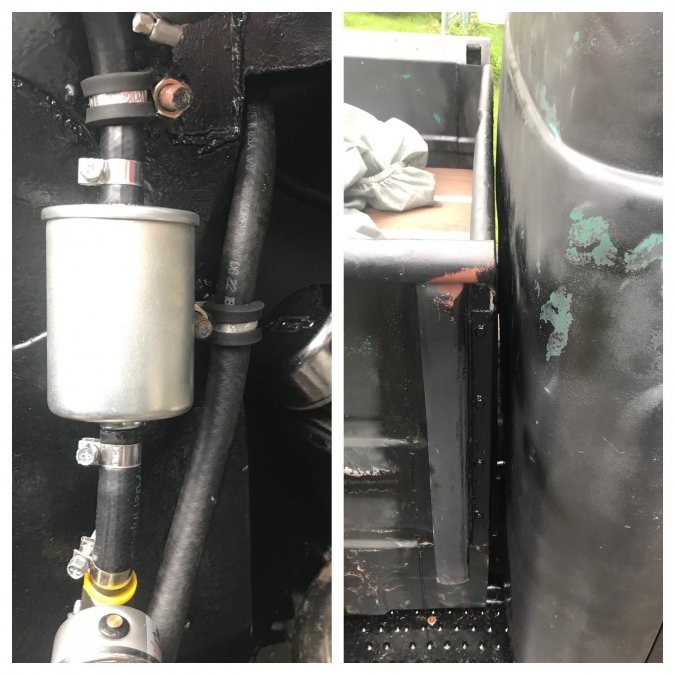
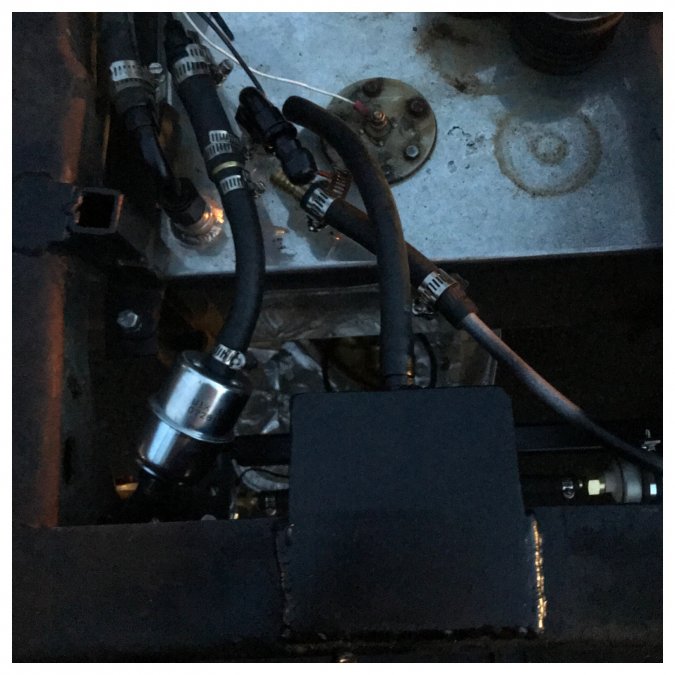
 Welp it’s raining pretty good here so I probably won’t be doing too much more today but I replaced the rubber efi hose from the filter to the front of the throttle body with 3/8 steel line that I bubble flared to make hose barbs. I tried to keep the radical bends smooth and there are no kinks in it. It’s got a DEI insulating sleeve on it to try and keep the gas cool while running over the headers. I made sure to leave enough rubber line to the throttle body to soak up vibration and wrapped the top loop with a rubber hose so it can’t rattle or abrade. I thought I’d need a bracket but between the line touching at the cowl and being held to the inner fender with a pico clamp it is pretty solid to the chassis. I still have to make a hard line for the return from the back of the fuel pressure regulator and I definitely want to insulate that as well since heat will probably build up in the upper rear of the engine bay. I also got a cheap namebrand (3M) inline pressure regulator for the gun that came with the lizardskin installation kit and a quick release nozzle for the air line. So that’ll be ready to go when I get a nice day to work. I like hearing the motor but deadening the cabin especially the firewall, trans tunnel, and roof can only make it sound better and more solid. I have some dynamat left over that I’m planning to install on the firewall behind the dash so I won’t have to strip all the gauges and wires out to spray up there.
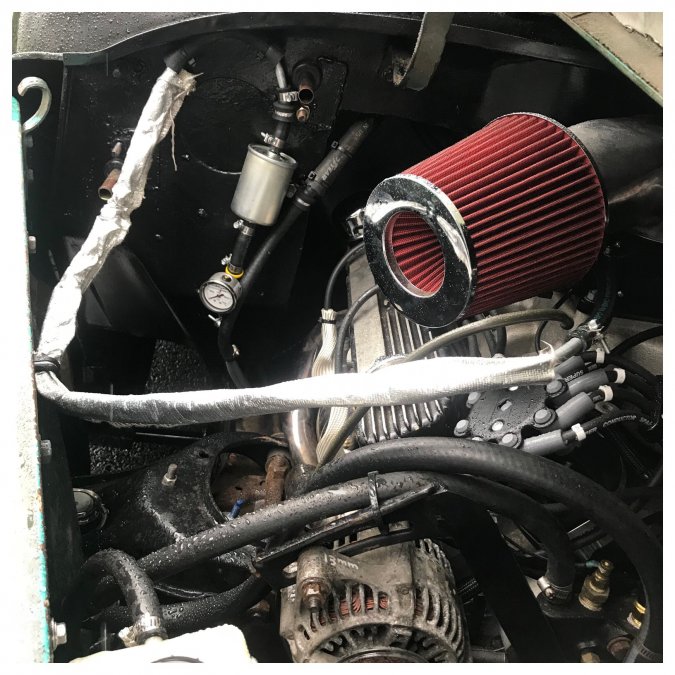
-
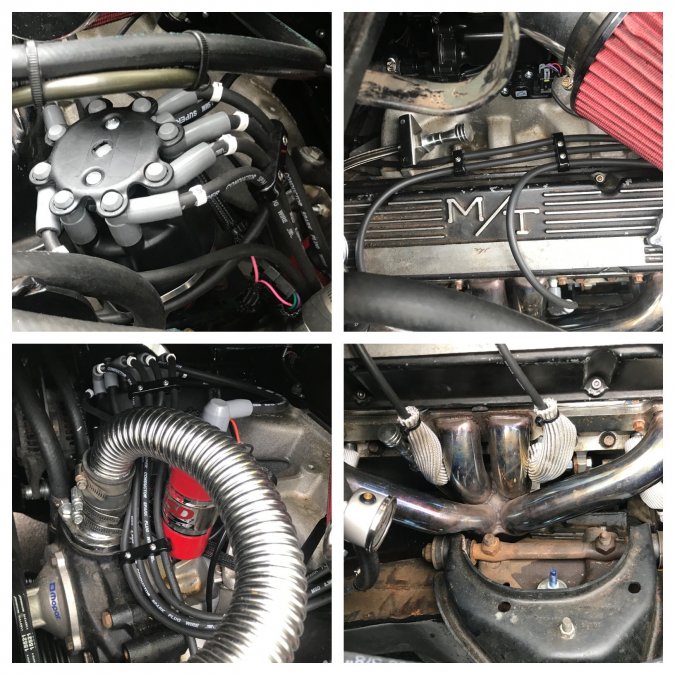
Sorry for the terrible after picture- the accel header clearance spark plugs look like they’re only a touch shorter than the champions but after installing them I have the little bit of air between the plug boots and the headers that I needed. After a few miles with the booted plugs touching the tubes they weren’t burnt but the pattern of the fiberglass weave was imprinted on the silicone boots. I think they wouldn’t have lasted long like that.

-
Yeah if you do a 70s-80s carbureted 360 with 727 or 904 three speed trans it’s an easy swap with an aftermarket shifter and cable throttle/kickdown. Just three brackets to hold the motor/trans and get a driveshaft made. The old U joints are even the same size as the new ones sometimes. Or throw a 440 out of a motorhome or something in there if you want some more power!
-
I had to bypass my heater core- it was weeping into the passenger footwell. Bummer. Maybe I’ll make something up using the dakota heater core and fabricating a box to fit the 12v fan motor I bought and never installed or buy something before winter. Gotta see if I can find a rad shop to seal up the OG unit first. It’s small enough to ship so there’s that option. My shorty sparkplugs are supposed to come in the mail today while I’m at work. That’ll be a relief to have the boots fully off the pipes and still wrapped/booted. I started making hard fuel lines to get from the firewall to the throttle body. The loops of rubber line work fine for now but I know they’ll eventually sag and kink. I have a blockoff plate for the mechanical fuel pump- mostly for cleanliness since I don’t think I’m missing the power it’s robbing from my motor running the diaphram ? I’ll have to make bolt on mounts to hold them up to avoid unplugging all my fancy electronics before welding. My fan belt pulley had a bolt backing out that started hitting the plastic cover on my electric fan. I tightened them up along with the belts and every bolt I could touch on the front of the motor. The headers are still nice and tight but I have to re-torque the collectors and they are really hard to get a wrench on. I’m psyched for my alignment to get done. I hit 60 on local 45mph surface roads late at night but I know this big motor will be a weapon on the highway with the 3.21 gear. Just gotta get the wheels tracking true before I try high speed cruising. The sniper setup continues to impress me. It’s the best thing I did so far for drivability and fun. It used to idle rumpety at 900 rpm and now it barely sounds cammed at 750-800.
-
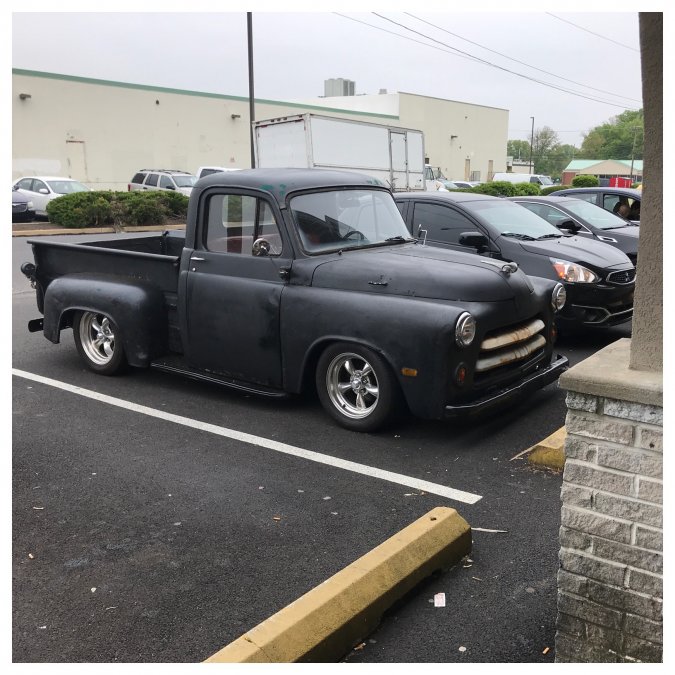
I drove it a few miles to work today! Man it is so nice to not be afraid of stalling at a hard stop or having to mess with the carb or fuel system. My new msd cut to fit plug wires are very nice and the taylor wire separators made them look way cleaner and stay where I want them. Unfortunately the MSD 8.5mm wires have a bigger silicone plug boot than the old accel 8mm did and now the four corner plug boots touch the headers. I ordered some Accel header plugs that have a 3/8” shorter ceramic end to install on monday and in the meantime and for extra protection later I installed a set of DEI fiberglass boot sleeves. It drives ok steering wise- not dangerous but but obviously needs an alignment. I have an appointment on monday to drop it at the alignment spot. There is an old guy that only does alignment and frame work about a mile from my house that all the local body shops use. The last time I used him was for this truck but he was setting toe on the old straight axle! This time he can just look up specs for an 89 dakota.

-
It lives!! It’s a totally different animal with the EFI and I only went around the block a couple times. The fan comes on when it’s supposed to and it runs 180°-190°. The base fuel maps still have a lot of learning to do but the idle is much smoother with a bunch more initial timing at idle, it fires immediately with no gas pedal input, and throttle response is amazing. I need to get an alignment! Reverse seems to work like it’s supposed to and it backs up nice and smooth. I think I hit 3rd once but it’s hard to say with the high stall converter. I air checked the front clutches before buttoning up the trans so at least I know the previous problems are fixed. The power brakes will get a little better when the rotors are smoothed out again from sitting. I have like 13” of vacuum at idle so they work better at speed but they’re not rock hard or anything. You’re supposed to do a bunch of cruising at different speeds and loads to let the fuel maps learn but it constantly adjusts pretty well so far and did everything my foot asked. I even got a scary fishtail with a 1/2 throttle blip while turning a corner. The new fuel cutoff switch (formerly battery neg cutoff) has a gremlin/ground loop ghost that makes the Idle Air Control valve hunt and tick with the ignition off. It still works for safety or if the motor won’t cut off for any reason in the future but I’ll have to throw a secret killswitch into the cab if I want more theft protection. A funny story- my neighbors are very patient and tolerant of my driveway activities. Technically you are only allowed to have a car up on stands if you’re under it- no junk laying around. But it doesn’t matter unless somebody complains- then you get a huge fix-it ticket and 10 days. Well nobody complained about me but the new renters across the street have a huge boat, RV, jeep, trailer, and a fleet of cars spilling out of the driveway, plus they pissed off some folks by playing basketball late at night and keeping people awake. My friend is kind of the mayor of the block and he warned me that when the township came to serve this guy he got loud with them and started pointing at my house “what about that guy!?” Perfect timing, jerk. I had just finished plumbing and wiring everything and only had one day of work left under the car. As long as it is not up on stands or visibly taken apart it’s legal but as of now it’s running driving insured registered and inspection exempt. I won’t be sad when they move out and I hope it’s soon! Anyway, I’m driving my car that has AC to work but I’m feeling pretty good!
-
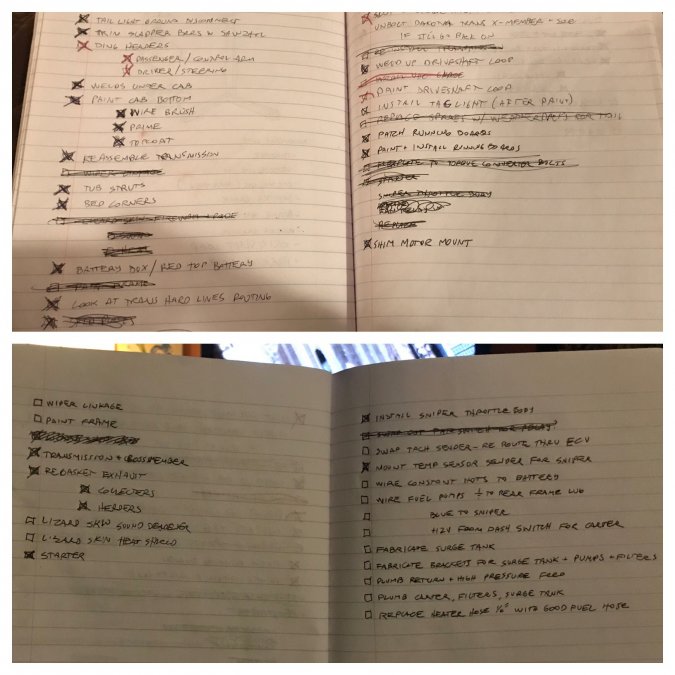
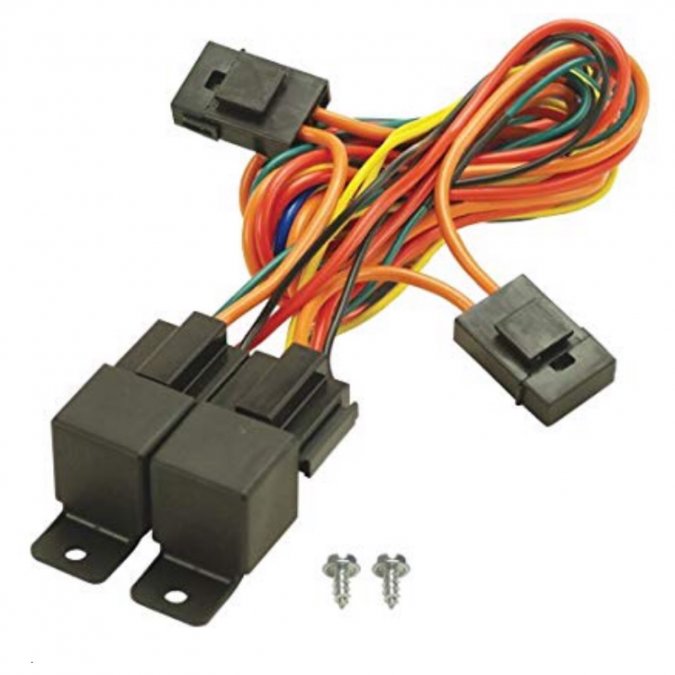
Got my relays mounted and wired up. Clean power with a hot trigger for the efi, ignition, and distributor on one, and another with a ground trigger from the ECU to run the fan. I still have the ground switch to do in the back for the pumps and I got a set of msd cut to fit plug wires here but I’m still waiting for the distributor to show up. I did put the motor at TDC on the #1 compression stroke so when the distributor comes it will go in easy. I’m getting close to firing up again. My wiper linkage and the lizardskin insulation are the items that keep getting moved to the new list and not done. I think the temptation skip doing those and just throw the bench seat and rubber floor back in is too great- when this thing fires I’m going to start driving it again.

-
I made a bead rolled 18g stainless mount for the sniper touchscreen inside the glovebox opening and a waxed twine (ok so it’s three strands of dental floss twisted together ?) lanyard for the stylus that comes with it to help accurately adjust the settings for the fat fingered. It is doing wierd stuff because of my grounds- the sniper constant hot & ground run to the battery side terminals along with a new 12g +12v wire I ran last night for clean constant power to the new relays. When the ground is switched off the sniper module comes on despite its trigger wire not being hooked up. Ghosts/ground loops. I managed to slightly smash the knob on my large battery disconnect switch while re-installing the bed so I ordered a new one. I had been using it as a negative disconnect for working on (building) the truck since it’s harder to pull the neg. terminal with my tucked away battery. I’m considering wiring together all the battery to chassis grounds on one common side of it and having it only switch the ground for the fuel pumps. More like a safety/ killswitch/ anti-theft type deal. I also ran a 4g ground to the engine block right by the starter so the efi won’t have to rely on chassis ground all the way to the battery. Once the fuel pump grounds are wired to the switch the last cheesy self tapper ground will be gone and the system will be much more robust not to mention fully in compliance with the efi suggestions.

-
Agreed! Your truck looks gorgeous and the recent work is definitely up to snuff with the existing quality.
-
Eh- easier to do it right than worry about it and do it twice. I ordered a dual relay holder and harness. One is to run the clean power for the efi & ignition and the other is so I can use the sniper to run my electric fan- it has switched low current grounds and can be programmed to run a fan relay with on and off temperature values. I’ll have to remove the probe in the top rad hose and replace my fan control with the relay.
-
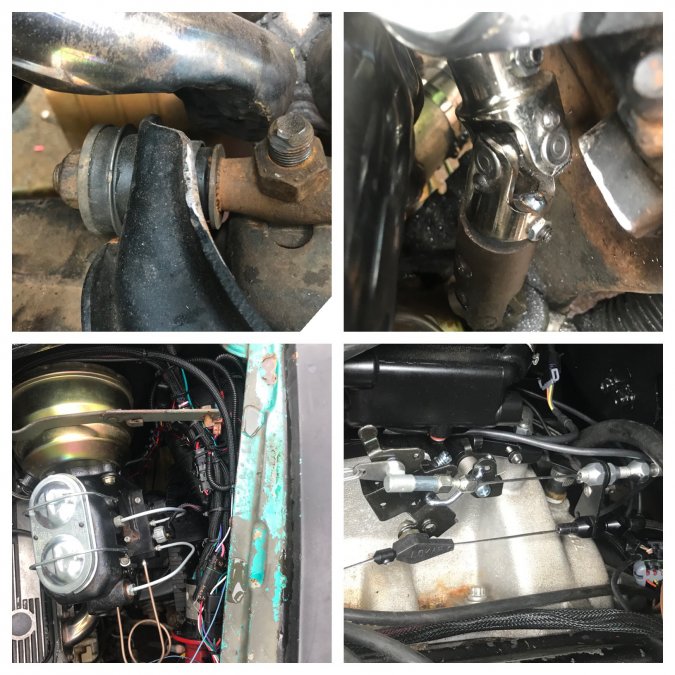
I started getting a bunch of stuff done yesterday putting the truck back together and finishing the switch to EFI. My locked out hall effect distributor and hei style cut to fit plug wires should be coming tomorrow so I’ll be able to finish the last wiring connections. The new header clearance is much better with just the 3/16” shim under the passenger side motor mount. The intake is still basically level- maybe it is even canted 1.5° to account for road crown ? The steering shaft and middle knuckle also clear the exhaust well now and I whittled on the corner of the UCA mount a little to make more room on the outboard side. It was flirting with it a little before. That side should need less clearance since the chassis doesn’t shake relative to the shaft like the motor does. All my weatherpack connectors worked awesome for an easy clean hookup going back together. After all my connections were made I ziptied all the bundles to clean it up some but it’s still the size of a supermodel’s thigh. The throttle, brake, and kickdown are all hooked up now on the throttle body. I suspect the kickdown travel is shorter on throttle bracket than the full travel on the transmission. The trans lever is full back at WOT but since it possibly can’t return as far it might delay upshifts at light throttle. Not ok for the family car but maybe perfect for a hotrod. The fuel send and return lines on the firewall got pico clamps to secure them to the conveniently located heater box studs. I might bend up some hard lines to replace most of the rubber line between there and the throttle body. That way they won’t ever flop and kink under their own weight. I am using the top of the old hard line up from the mechanical pump to the carb as a bracket to keep the efi hose in place and up off of the heater hoses. I really should make a bracket for that and delete the mechanical pump with a blockoff plate. In initial mockup I always had 1/8” clearance between the cab & bed and at some point it got lost. Either the rusty front bed wall/top bowed out in handling the bed, or the cab ended up farther back than anticipated or the back cab wall moved from welding. In any case while the bed was off I cave-manned the front of the bed dead flat with no bow and now I have a nice thin slice of light all the way around. Finishing the EFI and ignition wiring will be pretty easy. I did male myself a little more work because I plan to add a ground run of 4g directly from the battery cutoff switch to the block in case the chassis grounds aren’t sufficient. Doing that and an insulating blanket on the starter should help the starter spin harder on hot starts. I’m also considering running a separate 12g hot off the battery to a relay for clean power to the distributor and ecu but I don’t know if it will matter. The EFI manual says not to run power off of a starter solenoid because it is dirty power. I dunno- it might dip and spike while cranking but if my motor starts it should be smooth sailing from there. Maybe I could run relays directly off the charge lug on the alternator? Any electrical engineers here? Right now I have a 0g cable to the starter and 4g to a remote positive lug on the inner fender that I treat like a regular engine bay battery + terminal to power my fusebox constant bus. My electric fan doesn’t have a relay- just decently thick wires and a dedicated fuse. The only relays I used in this build are internal ones in the MSD box and Sniper ECU which have dedicated constant power and a trigger wire to turn on. The sniper also came with a fuel pump relay already wired into their harness which I did use to power my pumps. Those wiring jobs should be pretty easy and hopefully startup and self learning on the Sniper will be fun and not frustrating. I have some dirty jobs left though. I have to roll under the truck and hook up the shift linkage, driveshaft, and new ground wire. I also want to do the Lizardskin spray on sound deadener and heat control on the firewall, trans tunnel, roof, and rear corners inside the cab before I re-assemble the interior. The roof has a light but consistent coat of surface rust that needs to be power wirebrushed and primered with an automotive non oil based product so that will involve a lot of cleanup and dust before I can paint the lizardskin. Plus I will need to clean, scuff, and mask everything twice and give 24hrs between painting the sound and heat layers. Definitely will be worth it though.
-
Look into john deere blitz black chassis paint. It holds up amazing, easy to spray out of a cheap gun, fairly inexpensive. It’s a base/hardener/reducer deal you mix up and spray (or brush I guess?) That said, I went with the nuclear option on my latest build and brushed on oil based primer and enamel for my undercarriage. If it holds up for ten years on a wrought iron fence it’s good enough for my old truck- I’m still going to use automotive paint for the visible body work.
-
Sounds cool! Post up some pictures of the old girl and maybe the interference and mounts too
-
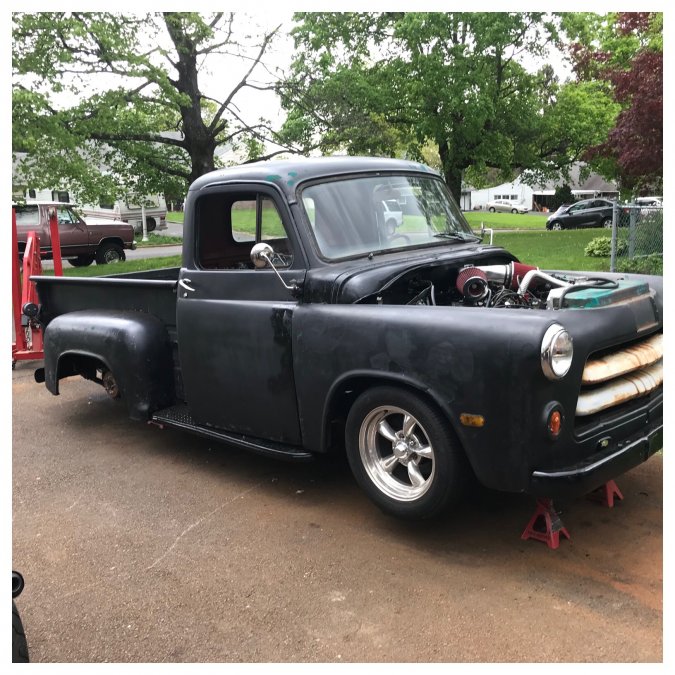
Body is back on!
-
This thing has a 3 1/2” touchscreen display/controller which is really cool and definitely too modern for the old truck interior. I think I’m going to mount it inside the glovebox so I can hang the door open when I want to see it or adjust stuff. This is what it looks like when it’s set to display all your info. It also has menus and controls for a ton of stuff- I will probably never have to hook it up to a laptop to tweak it.

-
Oh and no leaks! Woot!
-
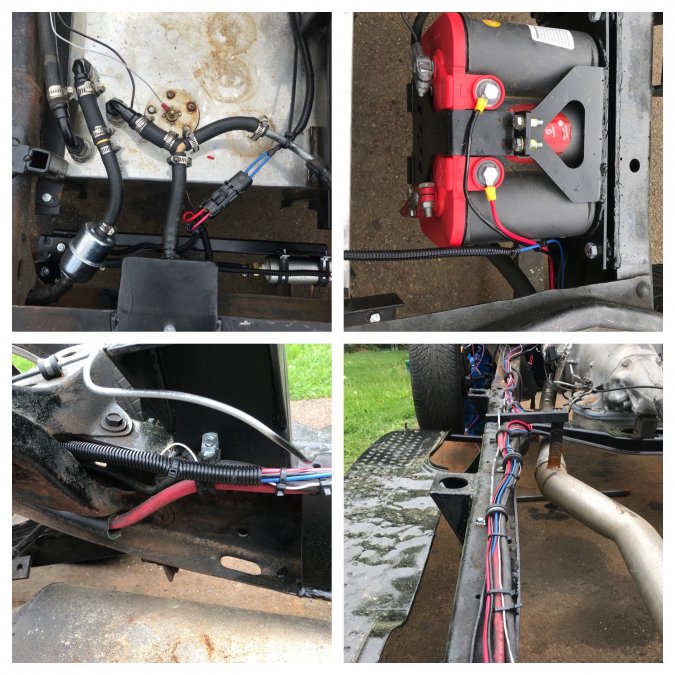
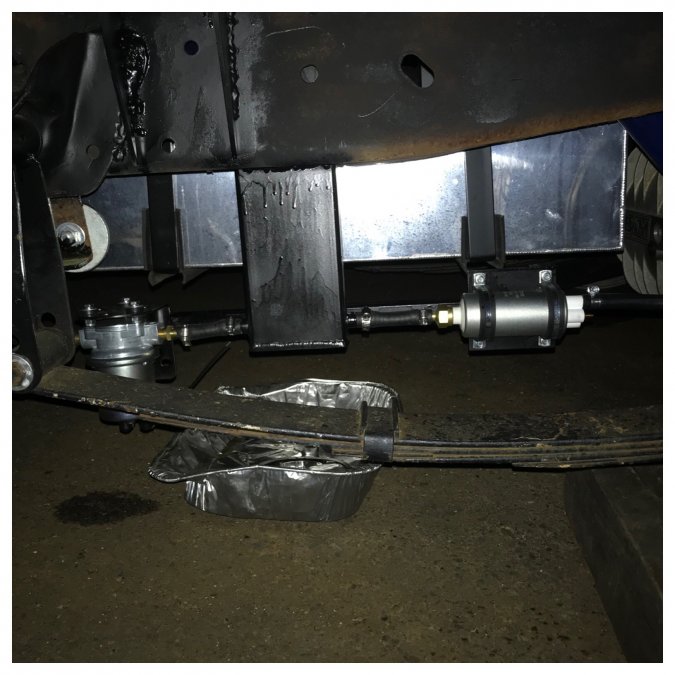
Wiring is all done now too. Jumping the pumps to power I have 62psi in the high pressure line before the regulator with the lift pump on and the same with the lift pump off so it doesn’t seem to present any restriction. I’m assuming that running the pumps with the motor off would present the highest demand on the return lines so that’s good. It took about 12 seconds to fill the .45 gallon surge tank with the lift pump and it flows more volume than the high pressure pump so I ran power for it on the same wire as the efi pump. The sniper has a relay and a fairly thick long wire included in the harness so I used that to power them both. My return bung in the tank didn’t extend to the bottom and would have sprayed and aerated the fuel on return so I snipped large slots in the bottom of a piece of hard line so it can’t be blocked by touching the bottom of the tank and flared the top so it is a snug fit in the male -8 AN bung. I tested it by blowing in it and got strong bubbling down in the gas. The wire bundle down the driver’s side frame rail is pretty thick after all this wiring. The sniper is like an MSD where they want the fat constant power leads attached directly to the battery terminals so I extended it with the recommended 12g wires using soldered and shrink wrapped connections and ring terminals to the side hookups that are on top of my sideways battery. All that’s left is the ignition on trigger wire to the keyswitch and rpm signal wire from the msd box. I’ll probably go right to the IGN terminal on the keyswitch for clean switched power. The rpm signal will come from the sender to my tach from the msd then the ECU has a tach out that will hook to the gauge. My list is looking pretty good. I’ll be ready to throw the cab back on soon.
-
The efi plumbing is done! The lines in the engine bay will get attached to the firewall once the cab is back on. Now on to wiring for the pumps and the ecu.
-
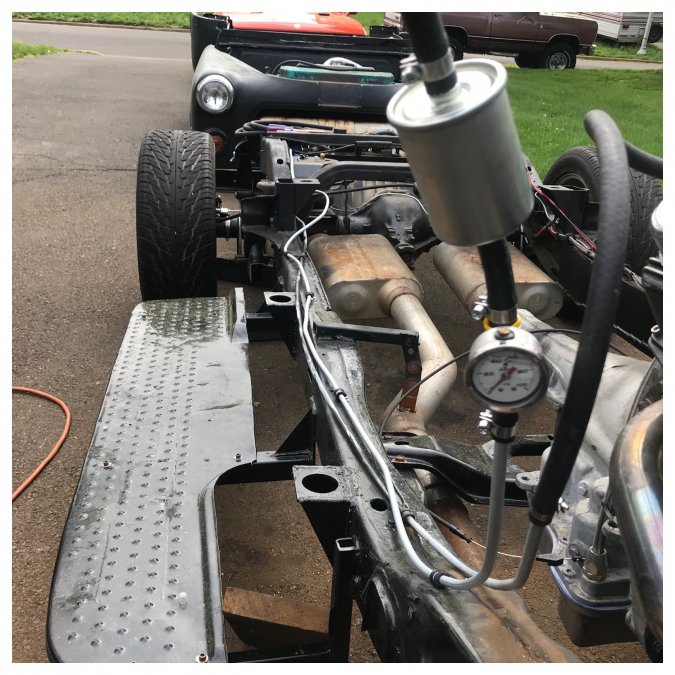
The surge tank is in and plumbed. I still need to install the post filter and finalize the run up to the throttle body, and my Y fitting for the two returns is supposed to come in the mail tomorrow. It was a pretty good day. Now I have to tackle the wiring for the pumps and efi. I can only do so much until the cab is back on but before that it will get finished up past the firewall and into the engine bay area. Doing tons of work, buttoning it up and crossing my fingers it will all function as planned is always fun.
-
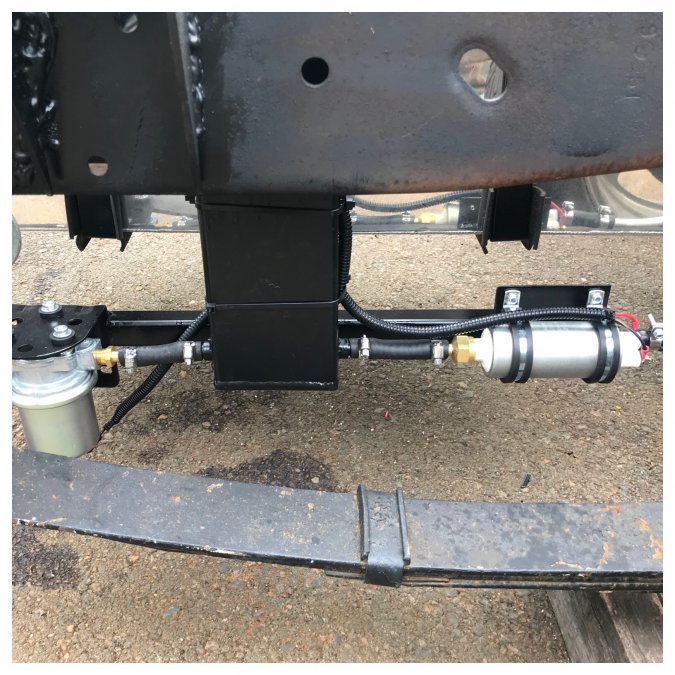
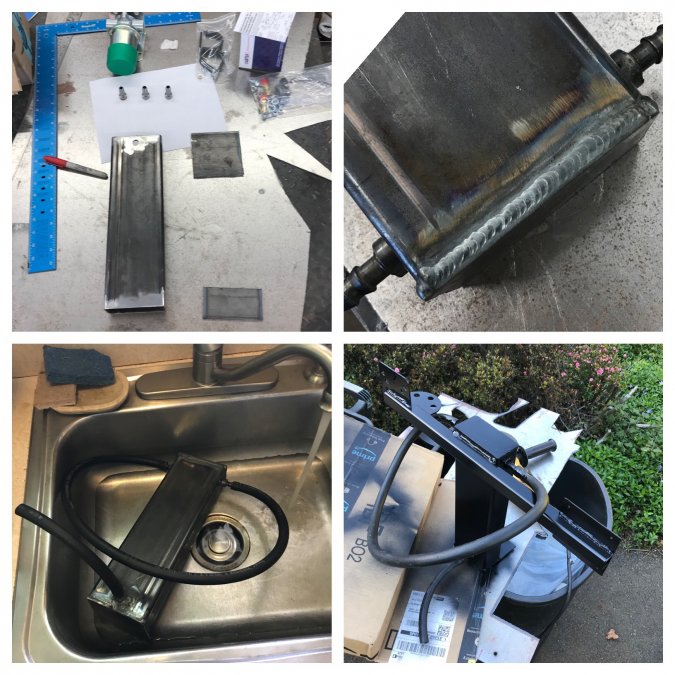
Today was surge tank day. I’m new to tig welding but I was confident I could weld a vessel without much trouble. I used a chunk of 2x4 tubing and welding the caps on was easy. The only problem I ran into was the ‘vibrant performance’ brand mild steel weld in hosebarbs I bought were far from mild steel. It makes sense they would use some kind of free machining alloy to make them but where I was making nice airtight welds on the tank body when I hit the bungs with the torch I could see the garbage boiling and sizzling out of them. I wish I had some silicon bronze rod- it probably would have made it an easier job. Instead I just puddled the good steel and gently washed in the edges with it instead of hitting the corner like normal. It took a few trips to the kitchen sink for pressure testing to get the bungs all airtight. Once it stopped having leaks I blew some pressure in it and vicegripped the open hose. When I opened it ten minutes later it said “foomp” so I called it good. The top has an L of plate so I can hang it off the top of the frame and I hung brackets for the lift pump and the efi pump before and after the surge tank so they all line up and have room for a servicable amount of hose. I figure I’ll let the pre and post filters hang inline with the tube. It’s upside down with the paint drying on it in the last pic.
-
Looks a lot cleaner than mine did but they were twins from the factory. That 3320 is very interesting! Is that with a full interior, wood bed, spare tire, tank of gas? I kind of figured mine would end up in that 3k-3500 lb range but I was under the impression the C series was closer to 3000 bone stock. What’s your plan for it?
-
I finally talked to a Holley tech about the return lines. It looks like I will be fine running the throttle body and surge tank returns teed together into my fuel cell return. As long as the pressure in the efi return isn’t over 5psi it won’t unbalance the fuel pressure regulator. The carter lift pump is rated at 5psi deadheaded but running unrestricted straight back to the cell it should be all flow no pressure.

-
I think a lot of the old detroit iron was 19 gauge steel which is now basically unobtainium. I’m a big fan of 16g- it’s thin enough to easily cut, bend, and hammer form but thick enough to be very forgiving to weld and strong too. You can do a lot with a 4” angle grinder and some cutting wheels and if you don’t have a truck (haha one that can drive to the metal supply) most big metal spots will throw a full sheet on the shear for a few bucks and get it down to a manageable size. Also if you are not a welder look into 3m panel bond- crazy strong for lap joints and nobody is gonna see it under a carpet or rubber floor. Just some more ideas for you. I just finished doing super heavy floor and firewall fabrication but I didn’t always know how or have the tools to do that kind of stuff- definitely do post some pics thurs. I have a joke I like to tell when people talk about rusty floors- it goes like this: ”I know a trick for fixing rust holes in floor pans- did you ever see ‘hotrod’ magazine?” ”sure” they say, expecting me to quote an article about making patch panels. ”well it’s got a nice glossy paper that holds up real good. You just peel back the floormats and carpet and spread out some new hotrod magazines over the holes then flap the carpet back over it!!” I think I’m pretty funny, but the real punchline is I actually did that for over a year to keep fumes and dirt from coming up into my ‘73 swinger before I fixed it right. You gotta change the magazines every few months...
-
My old 230 was awesome- so reliable, simple, and transported me back in time to 1954 every time I stepped on the starter. It was a riding mower engine compared to a healthy mopar v8 though. If I ever found a clean truck with a flatty I wouldn’t hesitate to leave it in there. That first gen hemi is the holy grail of oldschool hotrodding though and how cool that it isn’t in a chopped ford! Still waiting for video Bisquik! Can you get somebody with a steady hand and a smartphone to make a nice startup and drive clip?
-
The trans crossmember is in, exhaust all back in and re-gasketed with fancy percy’s aluminum, starter is in, the carb is off and the throttle body is on and wired to the new upstream o2 sensor and h2o temp sender. I need to go get some allthread to make a new air cleaner stud- the old one was 5/16” and the sniper is 1/4”. The old list I made to get done before reassembling the body is all crossed off now but I made a new one. Hoping to crank back up in the next few weeks.