-
Posts
4,964 -
Joined
-
Last visited
-
Days Won
42
Content Type
Links Directory
Profiles
Articles
Forums
Downloads
Store
Gallery
Blogs
Events
Everything posted by Los_Control
-
While we are talking about transmission/differential oils ..... I claim I use super tech gl5 from walmart because it is cheap and available ... claims it works with soft metals. What about foaming? I'm a little concerned with the amount of foam. I drained this oil 1 hour ago .... just full of bubbles on top. For some reason I feel this is not normal ... maybe I need to change my oil brand? I put this oil in the rear end of my daily driver chebby about 6 months ago .... It seems fine, I ran a magnet through the oil searching for metal .... found none. Is it normal to have all the foam?
-

1953 B4B 1/2 Ton 218 engine and fluiddrive Tow Rating
Los_Control replied to Dan693's topic in Mopar Flathead Truck Forum
I Remember towing a 12'x60' mobile home 35 miles to a new destination with a 1960 Dodge 1 ton ...... The trailer had so much tongue weight that I could not go over 35 mph. The front tires were barely touching the ground. The low powered slant 6 engine & 4spd trans worked fine ..... just could not steer over 35mph. At least the truck seemed to have enough brakes to go down the steep hill ..... You just needed a lot of common sense to survive back then ..... Sometimes I wonder if we do not have a helping Angel flying with us. What size of trailer you can haul will be decided with your experience pulling trailers with the truck. Start small and work up. -

1953 B4B 1/2 Ton 218 engine and fluiddrive Tow Rating
Los_Control replied to Dan693's topic in Mopar Flathead Truck Forum
Search for the movie "the big trailer" starred by Lucile Ball & Desi Arnez ..... Was a good comedy as they towed a travel trailer in some sort of 50's car. The 53 Dodge is very small in size & weight compared to a modern vehicle. They have brake shoes 2" wide & 10" in diameter ..... barely enough to stop their own weight. They have a engine with 100 HP ..... barely enough to haul themselves around. The suspension was simply meant for farm use. The bias ply tires were interesting for traction. I imagine the 4spd manual helped a lot towing trailers in the day, to get them moving and is obvious they had trailers around the farm to tow. It was simply a different time back then, they were still figuring out highways and safer roads ..... there was no DOT or regulations. People tried what they thought they could do ..... Then rules & regulations were invented. These trucks never from the factory had brakes to haul a heavy trailer downhill. I'm sure they can handle a small trailer, each individual truck will have a different capacity due to power, brakes, tires, suspension. -

1953 B4B 1/2 Ton 218 engine and fluiddrive Tow Rating
Los_Control replied to Dan693's topic in Mopar Flathead Truck Forum
Tow ratings for my 1953 B1C ??? ..... Depends on how big of a ball sack you carry ...... IMHO. -
I say you pull a spark plug out and with it connected, you lay it on the head for ground and turn the motor over. Does the plug have spark? Next you remove the cap and check with the key on you have spark at the points. While difficult to tell to a untrained eye .... If it is a really bright spark, then the condenser is not working. If it is a good spark but dull, you know the condenser is working. If no spark at the points, then you have to back up to the coil and see you have proper electricity going into the coil. What others have said, just run a jumper wire from the battery to the coil and see if you have spark ..... Just saying you get power to the coil, it goes to the distributor and the points spark. If no spark to the points then find out why. If you have spark to the points but not to the plugs it is a bad condenser If no spark to points then go upstream and find where it fails ..... I keep jumper wires with alligator clips on them to Years ago to hot wire a car and steal it, they just used jumper wires to run power to the coil and they bypassed the ignition switch. Thats what others are saying, just run a hot wire from battery to coil and see if you get spark. This will tell you where the issue is .... before or after the coil.
-
Ok I'll be the bad guy here .... Actually starter to flywheel grease is non existent. It is simply ran dry. The problem is if you put oil in this area it can spread to the clutch plate or flywheel ... causing slippage and probably forced to replace the clutch disk if it happens. You defiantly do not want to add grease or oil .... sadly sometimes the rear main oil seal can leak and ruin the clutch ... Just not a area where you want to introduce grease. Soon I need to replace all the bearings in my rear end on my daily driver ..... Some say to oil up the shaft so the race slides on easier, Others suggest that adding oil to this area may allow the race to spin on the shaft and cause bigger issues ..... they are meant to go on clean and dry. Your question about ring gear and starter gear they are meant to go on clean and dry. Adding lubrication would simply add issues. I hope that helps in some way ..... just that lubrication in some areas can be more harmful then good.
-

Installing inner front fenders.
Los_Control replied to Los_Control's topic in Mopar Flathead Truck Forum
Thanks @Merle Coggins for taking time to post the video .... truly was just what I needed for me to install mine. And Tim for the teamwork of posting it. I was just too stubborn to believe they went through the top .... seeing how you had the hood fully raised and went straight in and not at a angle. The drivers side went pretty good, the passenger side was really fighting me because of the heater hose connection at the firewall. Removing the hose would have gave me the room I needed .... or taking 3 bolts out of the fender worked also. I just flushed and installed fresh antifreeze a couple months ago and did not want to deal with draining it. Fender was easier at this stage. I apologize to @wallytoo for not believing it could go in the top ..... Guess I'm a little slow and need to be shown. -
I'm really good at that
-
I would measure the head to see if it is 23" or 25" I do not know if engines in Canada are identified differently then USA ..... Using your numbers on this site I would guess it is a 46-48 Dodge car 218 or 230 CI Is interesting that the field for cubic inch is blank on D25 .... yet the number lands in the middle of 230 CI engines ..... I do not know what that means. Measure the head to determine 23" or 25" then measure the stroke and would tell you if it is a 218 or 230 assuming it is a 23" engine. https://www.t137.com/registry/help/otherengines/otherengines.php I have a 49 Dodge truck and the engine # starts with T for truck. D is Dodge car. P is Plymouth
-

Installing inner front fenders.
Los_Control replied to Los_Control's topic in Mopar Flathead Truck Forum
Thanks @JBNeal .... and it took 23 seconds for @48Dodger to show how it is done ! I'm still scratching my head because I saw no way to get it out of the top .... While I do have a aftermarket aluminum radiator, I'm using the factory brackets & mounting holes to install it. I'm going to have to take a better look at it tomorrow. And flip the hood all the way over, not just propped up. -

Installing inner front fenders.
Los_Control replied to Los_Control's topic in Mopar Flathead Truck Forum
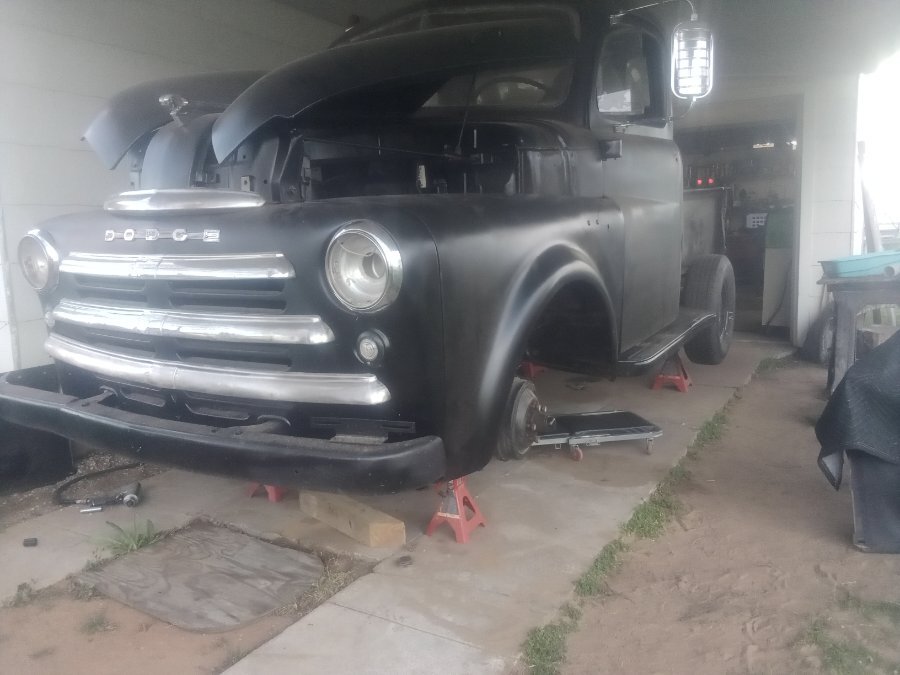
Here is exactly where I'm at, trying to get the inner fender installed. I think it should go in through the wheel well, no way it is going through the top .... I'm certain now I'm just going to have to remove the shock mounts to get it in. I was hoping they would just slide in with the wheels out of the way .... not going to happen. Same time I'm just physically worn out for today and need rest ... I have a big week ahead of me. I can spend a hour or two on it in the morning ..... No matter what this truck needs to move tomorrow and I have to replace all the bearings in my rear end of my daily driver using these jack stands and this space. Just would be nice to get them in while it was on jack stands and not out in the gravel driveway .... they sure want to fight me though. -

Installing inner front fenders.
Los_Control replied to Los_Control's topic in Mopar Flathead Truck Forum
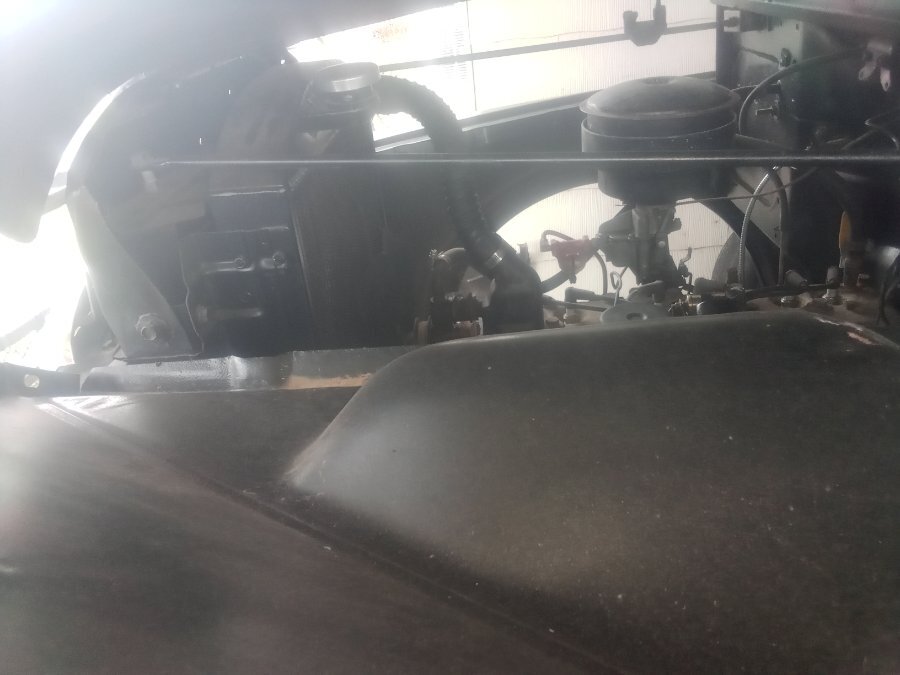
Yes sir I am, I never tried from the top through the hood. You can see in the photo I would need to shorten the fender 5" to get it past the core support and radiator. No way I can turn it sideways and slip it in. I dunno about your big truck with the 25" engine ..... no way mine is going through the top ..... because I'm not restoring my truck, just repairing it .... I never took the shock mounts off the frame so I'm working on taking out the 75 year old bolts. ..... One of those days just not getting a lot done. -
Using google image search I also see the exact same photo on pinterest saying it is a 1938 Volkswagon. Here is a random photo of a 1937 Volkswagon ..... I still say the Bugatti is cooler
-
This is what it reminds me of .... Bugatti Type 57 ..... But we only see the rear and nothing else. It is a foreign car according to the license plate. Maybe there are others that look like a Bugatti. The louvers in the rear deck lid does not look correct but who knows? ..... This is my guess. I did watch Bad Chad for a few years and he is building one for his girlfriend from scratch. I should add, when @Plymouthy Adams checks in, I bet he knows
-
Have to admit, I have not seen a invisible car before.
-

Installing inner front fenders.
Los_Control replied to Los_Control's topic in Mopar Flathead Truck Forum
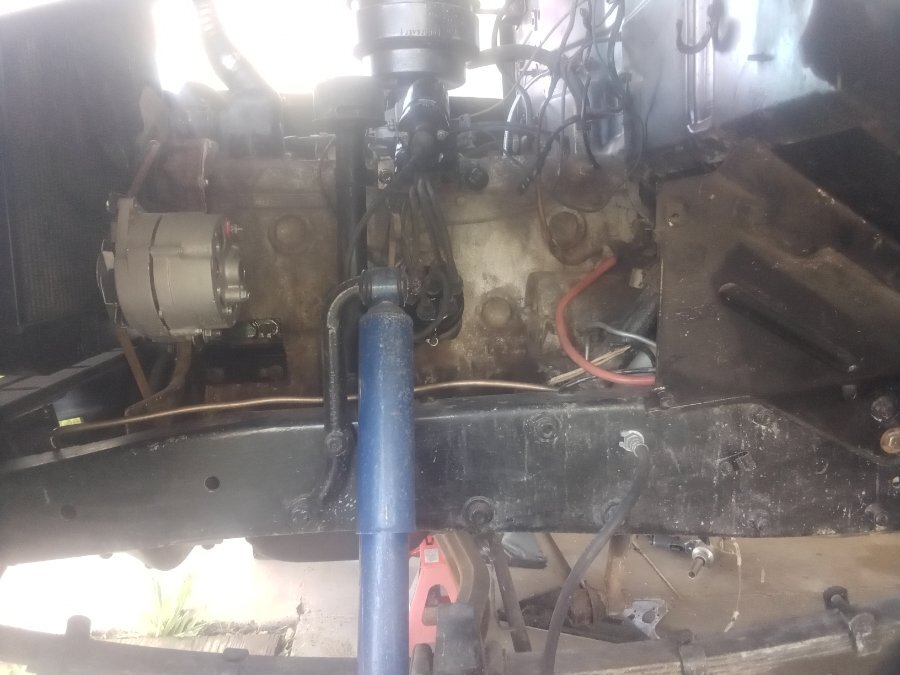
Thanks Keith, this is what I'm looking at ..... I worked on it for awhile last night and gave up on it. Tried again this morning and only way I can see it is the fender needs to go behind the shock ..... I have tried to lift it up through the hood but can not get high enough to get over the shock. I have tried to put the bottom in first to get it past the shock & swing it up. I have tried to sneak it in anyway I can think of ...... I'm not very good at jigsaw puzzles either. I got snookered into taking the wife to the grocery store so no chance to remove the shock mount yet ..... going to try that now so can move forward. -
It's been awhile since I have taken this truck apart ..... same time I was taking everything apart so not sure if I removed the front fender first or what I did. Seems like others with their cars they just remove the front tire and unbolt the inner fender and pull it out. I remember watching one of @keithb7 video on adjusting valves and was a non issue .... thinking his 38 Chrysler does not have a straight axle front end though. I'm just not seeing A way to get it past the shock mount without removing the shock /mount then installing the inner fender then re-install the shock & mount. Is this the proper way for trucks? ..... Guess I'm going to try it and see, just not sure thats what others do.
-

Cleaning carbs without toxic chemicals
Los_Control replied to lostviking's topic in Mopar Flathead Truck Forum
While I do not feel I have enough space for one in my little garage to justify how little "I" would use one. I often watch one youtuber that does a lot of carburetors and has the space so naturally has one. Couple years ago he made a few different videos and would talk about the different solutions he would try in the ultrasonic cleaner .... in the end he went with Berrymans carb cleaner. Nothing he tried really did a good enough job on the carburetors. Later on he bought the larger sized cleaner for carbs and he uses the smaller one with some sort of soap for non automotive cleaning .... jewelry and such. Making youtube videos, seems like every week he is going through a different project and all of them need the carb cleaned .... so he uses it a lot. You might find something that works to your satisfaction that is less toxic .... let us know. -
What I meant is, I buy it by the gallon. I buy walmart super tech for $19.98 per gallon .... Then the name brands are always $25-$30 a gallon. .... $10 more. I have researched and found the cheaper walmart oil is basically same quality ..... simply does not have the same packaging as the name brand oils. This is what I do, I understand others have their own preferences.
-
I understand that totally. I did cut the brazing out and removed my seat base ..... I did not have a lower seat to put back in it. Now my seat base is heavily modified, flipped upside down & backwards ... Has several supports welded into it for bucket seats and seat belts ...... I doubt anyone has a seat like mine. ..... But it started out as a original 48-50 pilothouse seat base. It still is flat and straight across the top & bottom, is the floor that changed in my case.
-
You're just not cheap like me .... I get synthetic GL5 for about $20 a gallon .... GL1 at a specialty house is over $10 a quart .... Says the guy that is currently replacing the pinion bearing on his daily driver that runs the same oil .... In fairness I can not blame the oil on a vehicle that has over 400k miles on it ..... possible it is my choice of oil but no way to confirm it. I'm changing the bearings but not the oil.
-
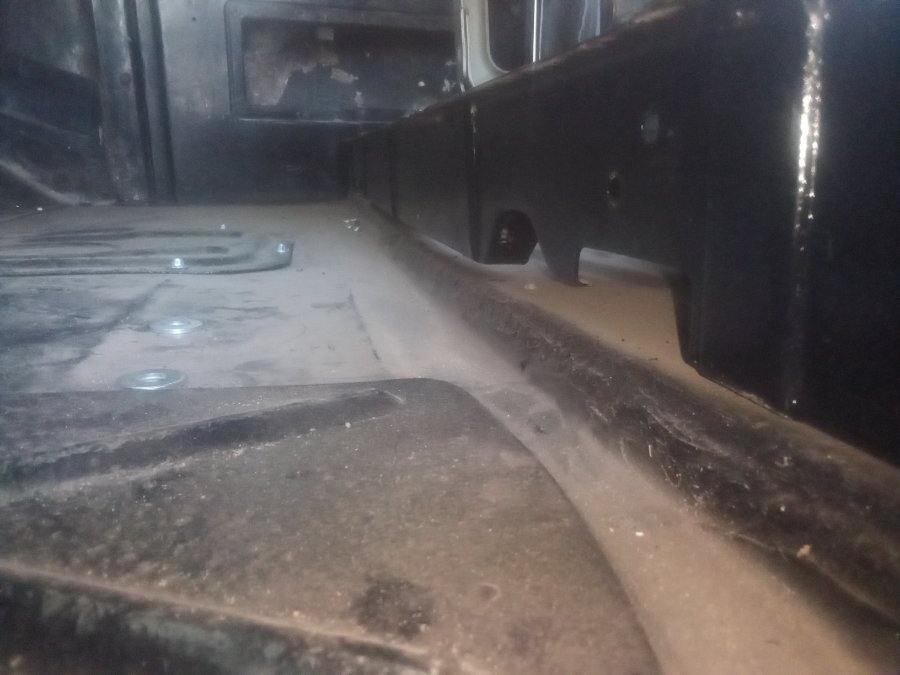
My first time also. I think what matters is your end goal for the truck .... Will it be a 100 point show vehicle? .... I doubt it since it is your first floor replacement. This is also my first floor replacement .... my goal is for it to be rust free, painted and I want to drive the wheels off of it. .... Use it as a work truck scratching up the paint in the bed and not care about it. ...... So what is your goals? I made a first time mistake installing my floor. You can see where I cut out the floor pan, the upper level relaxed and bowed. I did not catch it and welded the pan in this way. Now with the seat base in, you can really see the bow. .... sits flush on the ends, big gap in the middle. .... Next time I promise to do better. I'm not going to beat myself up over it and use it as it is. First I will see how close I can get it using bolts and sucking it down tight .... then I will use washers or shims to be sure it is tight ..... I have 16 grade 5 bolts going into the seat base & floor and will use the base for my seat belt attachment point. I will trust my life on it and it will be fine. .... The base is still straight across the top, will never feel it in your butt. The floor has a small wow to it .... will never feel it in your feet ..... nobody needs to look at it ...... So it just depends on what you want to do. I like to watch a clown on Youtube weld in body panels, Just amazing to me how he can take a car apart and fix it using basic tools most of us have in our garage. His last car was a 1967 camaro ..... Was fun too watch how much rust he found as he dug into it deeper .... within 6-8 weeks he had replaced every panel on that car. He was really good at pointing out the differences between the factory sheet metal and the modern replacement panels. Point was, the original metal was not great as if there was no real quality control on the assembly line .... there were original panels way out of specs when you measured them. ..... We all knew body panel fitment was never good in the 30, 40's, 50's .... he proved not much better in the 60's. So when you say one side is 1/8" out ..... fix it if you need to, just your choice. ..... These old cars were never that exact in the first place. My example is a flat out mistake on my part .... I'm comfortable living with it and promise to do better next time.
-
Really is looking good, I know it looks better then mine ..... I just kept fixing junk though.
-
I'll tell you what I did .... does not mean it is correct. The key is to read the label on the bottle and you are looking for words such as .... Protects against rust, foam, high temperature, and corrosion of copper or bronze bushings. I once found a chart that had the differences of GL1 through GL5 oils ..... Wish I would have saved it. Basically when our cars were new, GL1 is all that was available. .... The chart said that was good for heavy hydraulic equipment that sat outside and basically not that important. .... but it did have some very good characteristics such as resisting condensation. Then improvements came along with GL2, 3, 4, 5, far superior oil. ..... By the time GL4 came out, the automobile manufacturers were no longer using copper, bronze, or other soft metals in gear boxes. ..... They stopped adding the needed additives to protect these softer metals .... then there were failures in older vehicles and many complained . Not sure when the oil companies started back at adding the correct additives for older vehicles .... maybe not all oils have it. So you have to read the label to see it does have it! I'm using walmart supertech synthetic oil GL5 85-140 because thats what available to me .... it has the correct additives ... or claims too for our old cars. Thats what you need to look for ..... you may have your own oil brand preferences, you need to see it has the additives for your vehicle. The research I have done on walmart super tech engine oil, The 5/30 I run in my daily driver is the same as Mobil1 synthetic. .... It is made in the exact same plant but it is put into different bottles with different labels for walmart ..... And $10 cheaper. Choose your own oil, just be sure it has correct additives for older vehicles.
-
Interesting question. Since the heaters were offered as a option and not shipped with the truck. They were either installed at the dealer or bought aftermarket and installed from the owner. When I went through my heater I wanted to test it to see the motor actually did work. I had no idea which wire was ground or positive. I just connected them to a 12 volt battery .... It truly did not care which wire was hot and which was ground .... it ran really fast since it was a 6 volt motor on a 12 volt battery. I'm only suggesting that this type of motor does not care, it will run and spin in the correct direction no matter which way you wire it up. I have been wrong before , I have no idea which motor you have by reading your post .... just touch the wires to a battery and watch it spin. I get it, sounds like a really stupid answer to a honest question .... Honestly the way some electric motors are made or wound .... they really do not care. The electric heater motors are one of them ..... in my experience.

