


bkahler
-
Posts
1,936 -
Joined
-
Last visited
-
Days Won
37
Content Type
Links Directory
Profiles
Articles
Forums
Downloads
Store
Gallery
Blogs
Events
Everything posted by bkahler
-
Looks good. I assume the rear doors have fixed glass panes....
-
'51 half ton restoration complete.
bkahler replied to Bluesmann9's topic in Mopar Flathead Truck Forum
Terry, I didn't realize you had started this thread! I'm not sure what happened but the pictures in your posts are no longer visible, at least to me. I thought you had completed your truck years ago, I didn't realize it was actually just a few months ago. It's amazing how long these projects can take Brad -
51 B3B build thread - after all these years
bkahler replied to bkahler's topic in Mopar Flathead Truck Forum
Los & JB, The leak isn't occurring on the gasketed surface. It's around the seam where the tube passes through the flange. I think what is happening is the weld that secures the tube to the flange is porous from age and rust. The current leak is occurring when the engine is hot and also when the engine is cold. The latest wet spot showed up several days after the engine had cooled down. I think it's wicking through the seam. If I remember correctly the housing was really rusty inside, which is expected, but the top edge of the tube is heavily corroded and thin and actually missing a few small chunks of metal at the top. Replacing the housing will give me peace of mind. The last thing I want to deal with is to be out driving here in the hills of Kentucky and start having issues with the coolant system. I have to break into the coolant system anyway to adjust the radiator support frame so might as well get it done when the opportunity arises! -
51 B3B build thread - after all these years
bkahler replied to bkahler's topic in Mopar Flathead Truck Forum
I still seem to be fighting a losing battle with coolant leaks. I get one fixed and another one crops up somewhere else. During its first run the other day I noticed what appeared to be a thin line of coolant on the rearward seam of the thermostat housing where the vertical tube meets the base. I wiped it off at the time and I didn't see any return by the time I shut the engine off. Fast forward a couple of days after the run and I was examining the engine and noticed on the forward seam of the thermostat housing there was a thin line of coolant. The engine hasn't been started since the first run and I know the area was dry a few days ago. The vertical portion of the pipe is not wet which tells me the coolant wasn't coming from the hose connection above. There is no coolant around the seam where the housing meets the head, so I know it's not coolant flowing up hill. ? The only assumption I could make is the seam itself is cracked inside and allowing coolant to pass through. With that in mind I ordered a replacement housing from DCM Classics. I don't plan to replace the housing until it's time to install the front sheet metal. At that point I know I'm going to have to loosen the radiator hose fitting so I can tilt the radiator frame forward or backward to properly fit the sheet metal. At that time, I'll drain the radiator, install the sheet metal and then replace the housing and find a new hose. Oh well, I'd rather find all of these little problems before installing the grille and fenders.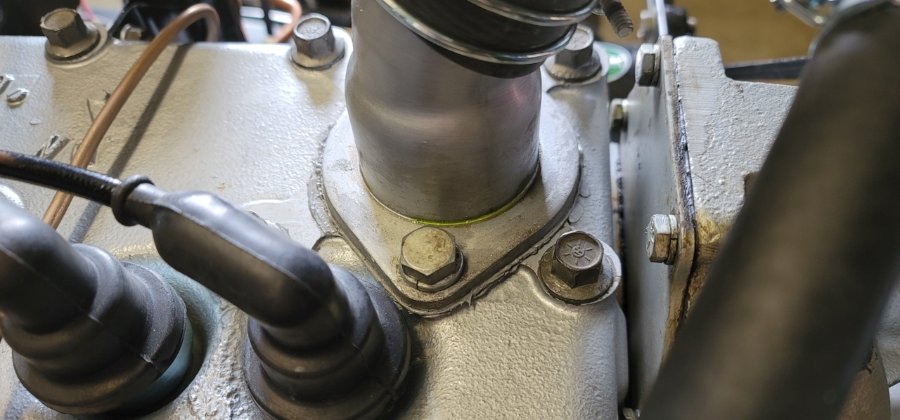
-
51 B3B build thread - after all these years
bkahler replied to bkahler's topic in Mopar Flathead Truck Forum
That is pretty much my thought as well. -
51 B3B build thread - after all these years
bkahler replied to bkahler's topic in Mopar Flathead Truck Forum
For some reason I made a note indicating the long spoke was supposed to be down and in the center. I have no idea why I made that note or when I made it. I like the way looks now better. -
51 B3B build thread - after all these years
bkahler replied to bkahler's topic in Mopar Flathead Truck Forum
Please tell me I didn't install the steering wheel 180 degrees off -
51 B3B build thread - after all these years
bkahler replied to bkahler's topic in Mopar Flathead Truck Forum
Yeah, 86 stumps in a long line and 5 others because they were easily accessible at the time.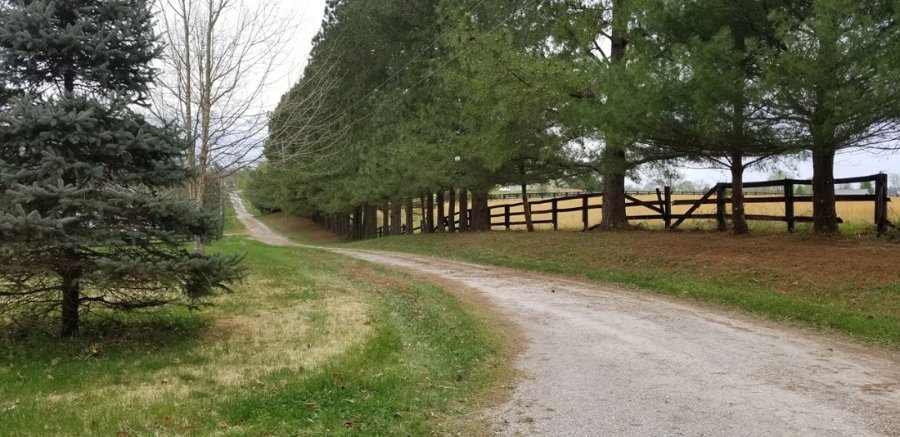
-
51 B3B build thread - after all these years
bkahler replied to bkahler's topic in Mopar Flathead Truck Forum
I completed a few tasks this weekend on the truck. I installed the fuel pump on/off switch that hangs under the dash, replaced the temporary wire inside the distributor, replaced the small points screw inside the distributor with one that wasn't rounded off, installed the seat track return springs, adjusted the clutch pedal for proper engagement, and installed the horn button ring. All small stuff but they needed to be done.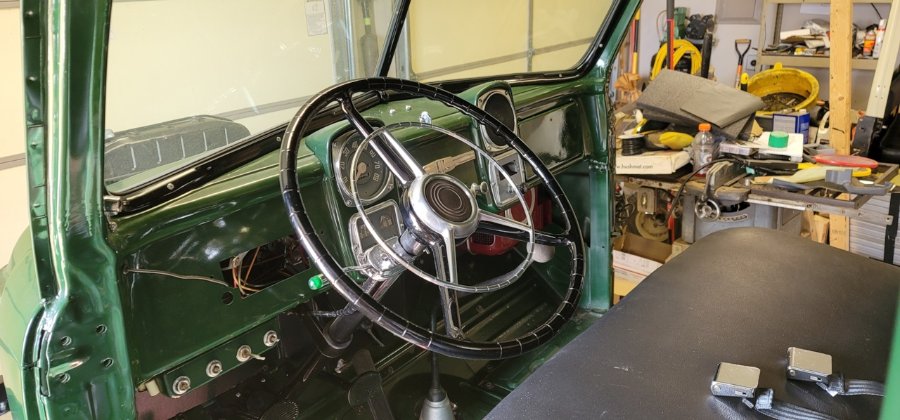
-
51 B3B build thread - after all these years
bkahler replied to bkahler's topic in Mopar Flathead Truck Forum
I wish I could say I don't have any more stumps on my property because I just had 91 stumps ground, unfortunately there are still more to go..jpg.58eb8d478fe56e75bc6a3e2c899e1aad.jpg)
-
51 B3B build thread - after all these years
bkahler replied to bkahler's topic in Mopar Flathead Truck Forum
All that makes sense. Over the next couple of weeks I hope to get time to tinker with the carburetor adjustments. Stay tuned for that No worries. Once I start I'm sure it will be an evolving project where situations will occur that will cause me to deviate from whatever plan I start with. Somehow I just can't bring myself to take a hammer to something that I've spent years trying to make new again -
51 B3B build thread - after all these years
bkahler replied to bkahler's topic in Mopar Flathead Truck Forum
Finished up the parking brake today. I'm quite pleased with out it came out. Time to move on to a few other small details before driving to the painters...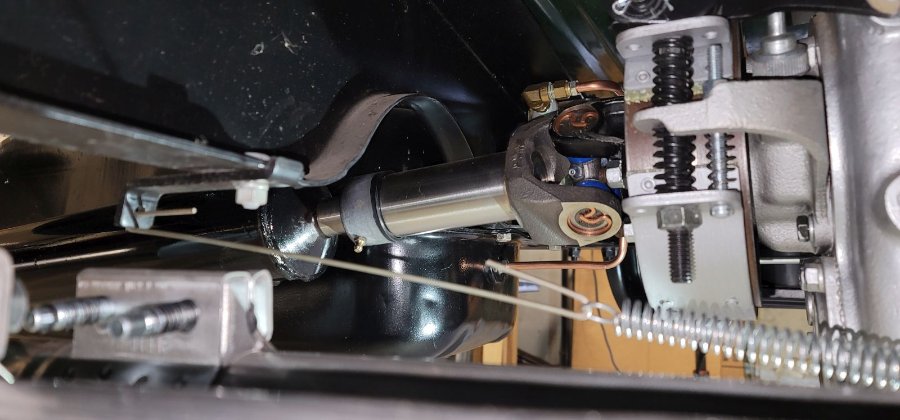
-
51 B3B build thread - after all these years
bkahler replied to bkahler's topic in Mopar Flathead Truck Forum
After the spacers were installed and everything tightened down, measuring in the center of the cab to the frame I get about 2" on the passenger side and about 1-7/8" on the drivers side. I think once I start installing the doors and body panels I'll know more as to whether or not I have to make any more adjustments. At least for now I have functional throttle linkage! -
51 B3B build thread - after all these years
bkahler replied to bkahler's topic in Mopar Flathead Truck Forum
Thanks for the info. With dual carbs it might be a challenge to get it down to 500. Right now with the idle stop screws backed all the way out, the idle is 1100. I hope to play with the carb adjustments sometime this weekend. -
51 B3B build thread - after all these years
bkahler replied to bkahler's topic in Mopar Flathead Truck Forum
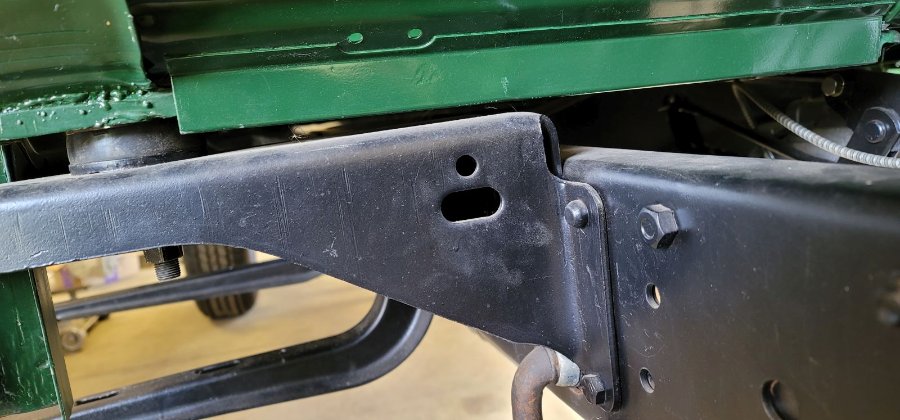
I wouldn't say we're over thinking it. It was pretty obvious I had a problem since the throttle linkage was binding on the toe board. Knowing how much and where to raise the cab needed to be worked through. I did notice as I was jacking the front of the cab up off of the frame mounts, it was obvious that the frame was twisting slightly as the weight was removed. Then when I lowered the cab back down you could see the frame twist. There was no movement of the arm support relative to the frame, it was the frame itself that was twisting. Not a lot but enough to cause the droop. I guess I got lucky with my cab and doors, there was no damage to them. Actually even the fenders and front grille were in great shape. However he rear fenders and bed walls are another matter -
51 B3B build thread - after all these years
bkahler replied to bkahler's topic in Mopar Flathead Truck Forum
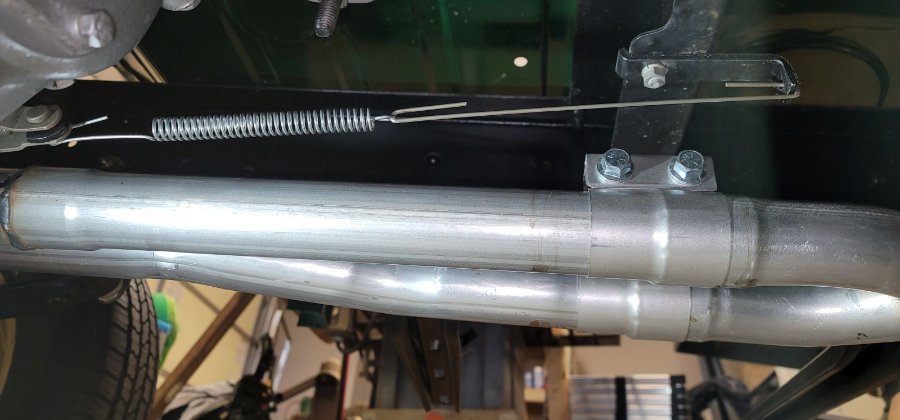
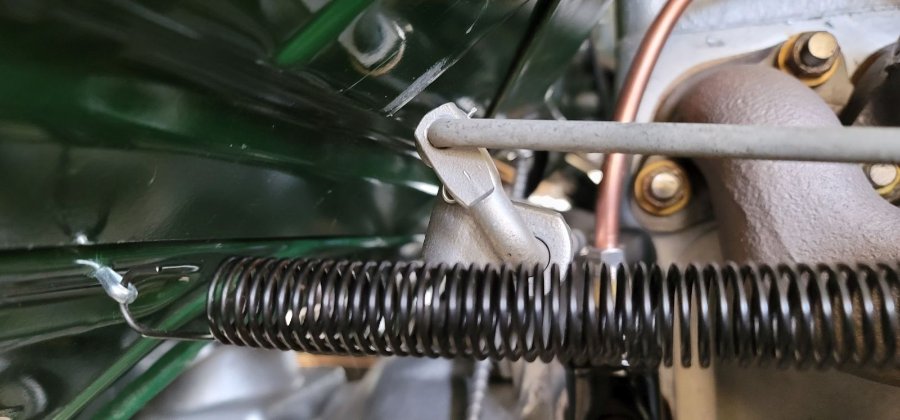
This morning I fabricated two spacers for the front cab mounts. I didn't capture any pictures but they were 2-1/2" in diameter and 5/16" thick. You can see the final results in the pictures below. All four corners of the cab are now tightened down. Passenger side: Pedal linkage clearance. Clearance worked out to about 5/16" at the throttle arm closest approach to the toe board. Drivers side: The gaps between the cab and the frame support arms is just slightly over 1/4" on each side. The throttle linkage works nice and smooth now. I plan on replacing the temporary wire inside the distributor with a proper replacement. After that I plan to go for another engine start to see if I can get the idle down. In looking through the manual I haven't found what the idle speed is supposed to be. Would someone clue me in as to what the idle rpm should be?
-
51 B3B build thread - after all these years
bkahler replied to bkahler's topic in Mopar Flathead Truck Forum
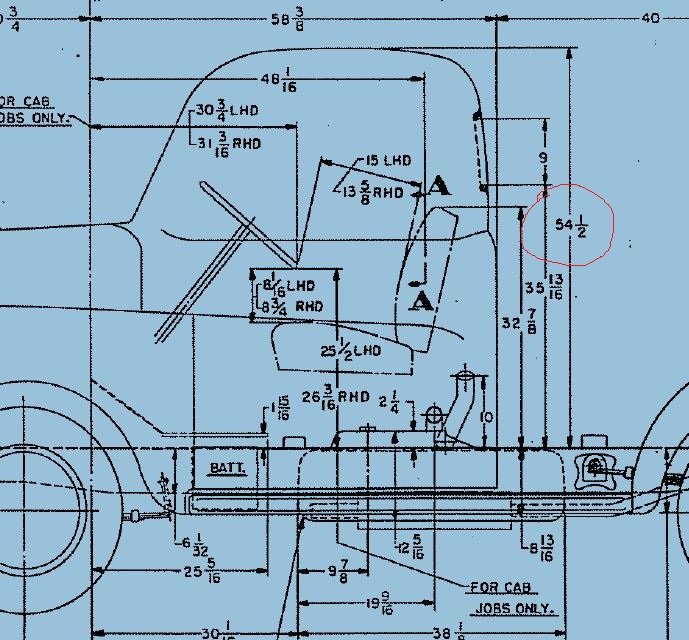
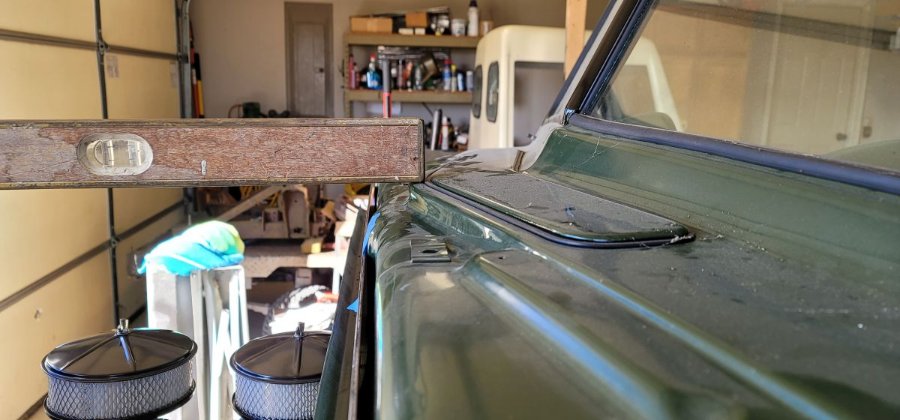
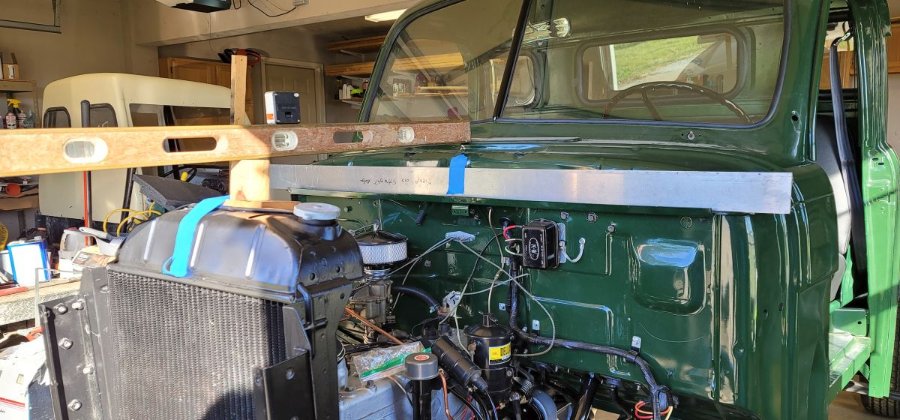
I've been taking some measurements comparing the cab position to the top of the frame and now I have questions Looking at this first drawing, the dimension I have circled in red 54-1/2" is the first number I established. I used a digital angle finder to find a flat plane along the top of the frame relative to how it's sitting and zeroed it out. I then set a long horizontal straight edge on the roof and a straight edge on the frame rails side to side along the back of the cab. The straight edge on top of the cab is pointing to the rear and using the angle finder I got the straight edge to run parallel to the frame. I then measured from the bottom of the straight edge on the frame to the bottom of the straight edge on top of the cab. I came up with 54-9/16". I'd say that's pretty close to spot on. In this next picture there is a dimension of 30-3/4" at the front center of the cowl at what appears to be the very tip just in front of the air vent. That's my best guess anyway. Setting up to measure this one was a little trickier. I set the level to match the zero angle that I used for the frame at the rear. By ensuring the level matched that angle any dimension measured from the frame should be in the same reference as the 54-9/16" measurement I obtained earlier. I then measured from the top of the frame to the top of the aluminum bar and then from the top of the aluminum bar to the bottom of the level. That measurement was 30-1/4". That's telling me I need to raise the front of the cab by 1/2" to bring it up to what the drawing dimension of 30-3/4". My gut feeling is this would be to much. In the picture above I circled a 1-7/8" dimension that is supposed to be from the top of the frame to some point around the zero line of the cab. My problem is I can't seem to figure out where the point on the cab is being referenced at. I'm open to suggestion on what it might be. In the mean time I am going to try to slowly jack up the front of the cab to see what happens when I try to reach the 30-3/4" dimension.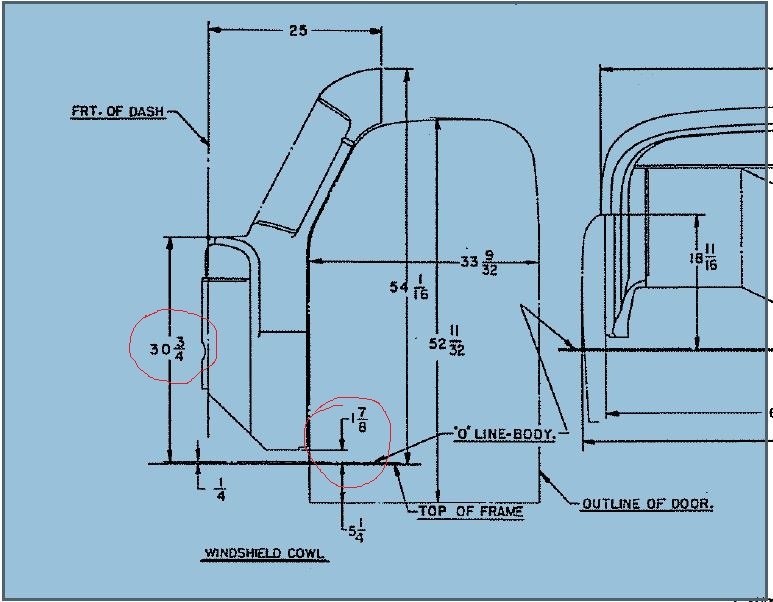
-
A few long nights and a few beers ought to do it....
-
Wow, I know that feeling real well!
-
51 B3B build thread - after all these years
bkahler replied to bkahler's topic in Mopar Flathead Truck Forum
Based on current measurements I'll likely end up with around 5/32" of clearance, possibly a little more. All mounts, engine and cab are new. I do have dual springs installed, the original main spring that runs under the cab toe board and one on each carburetor.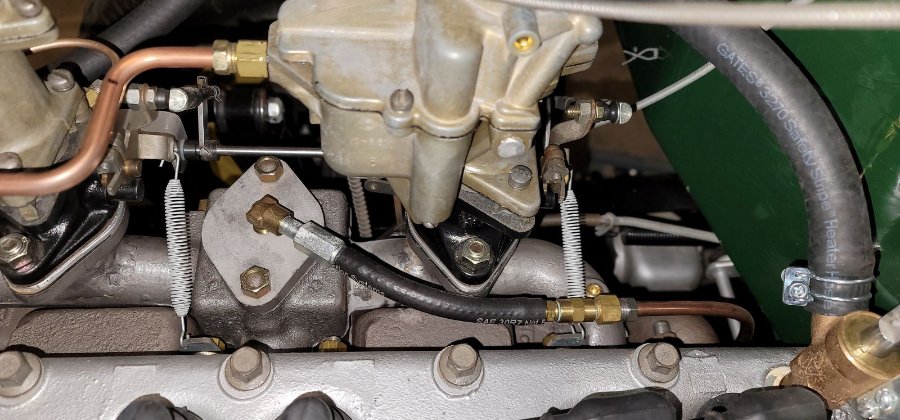
-
51 B3B build thread - after all these years
bkahler replied to bkahler's topic in Mopar Flathead Truck Forum
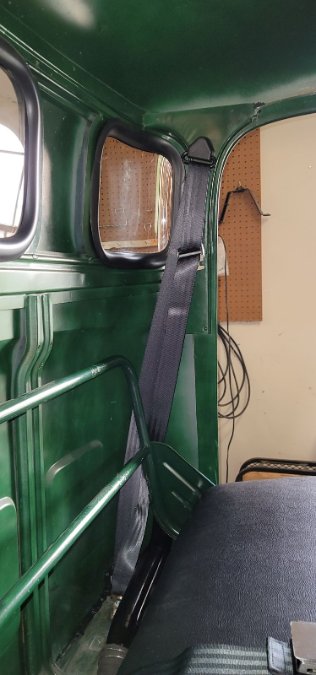
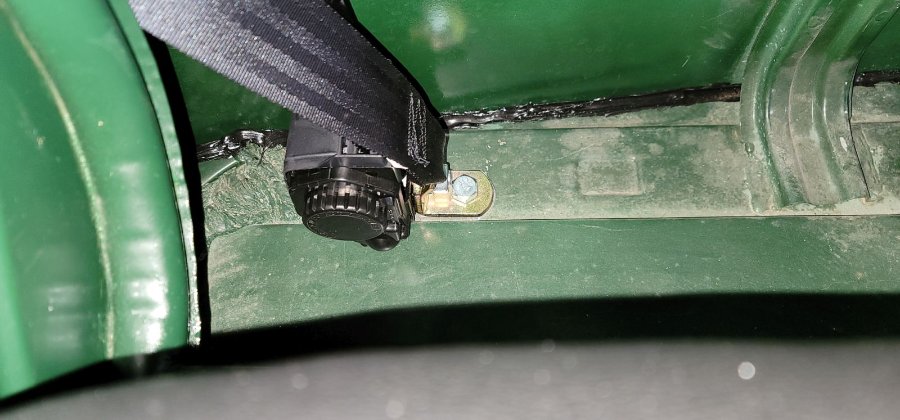
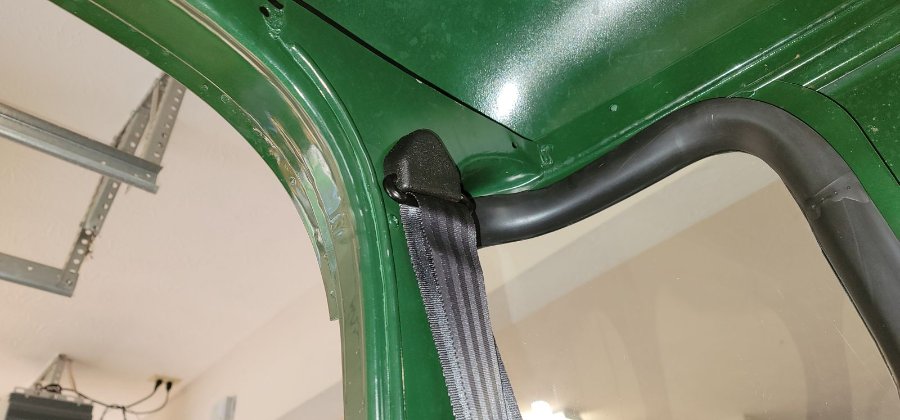
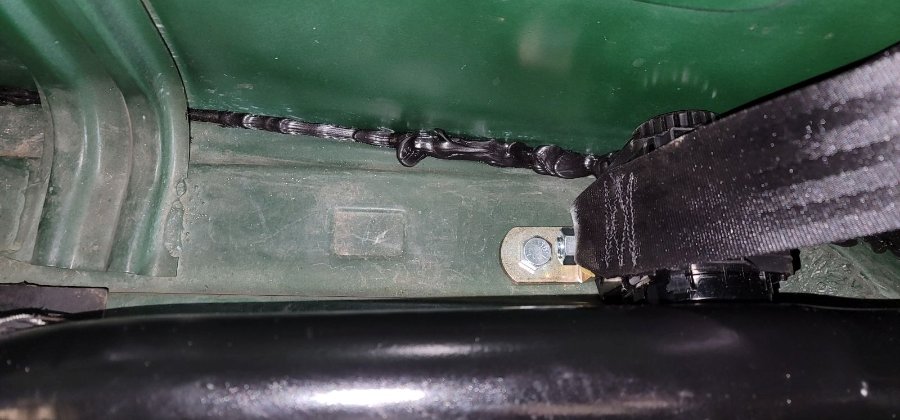
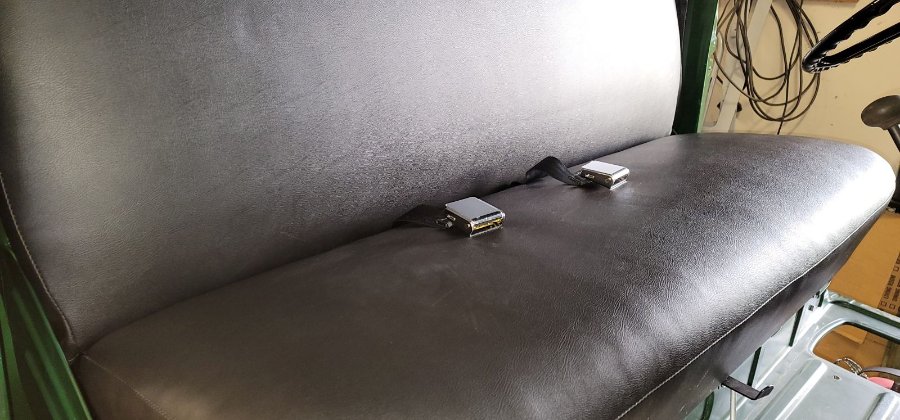
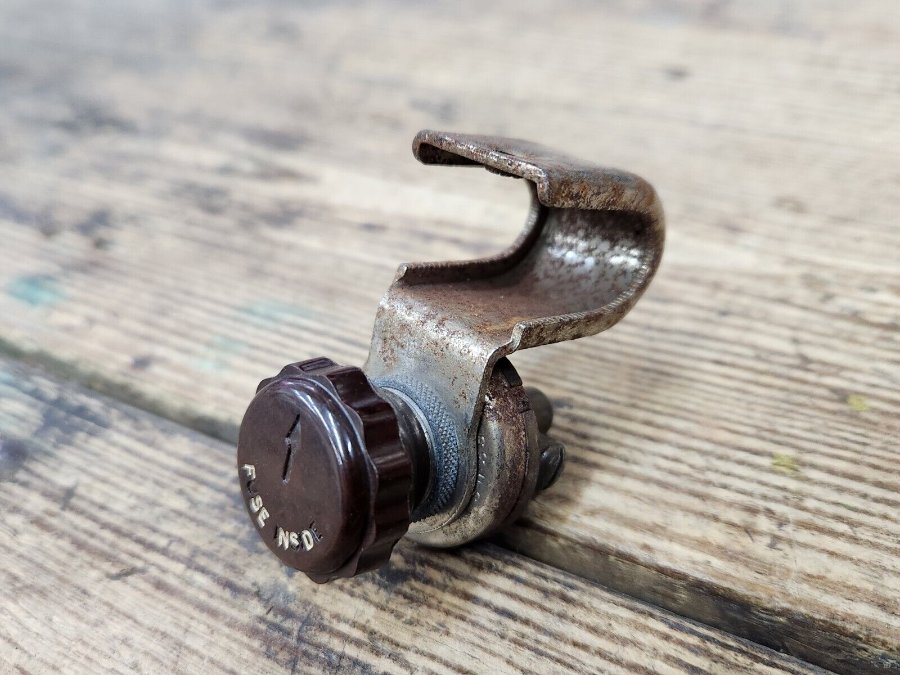
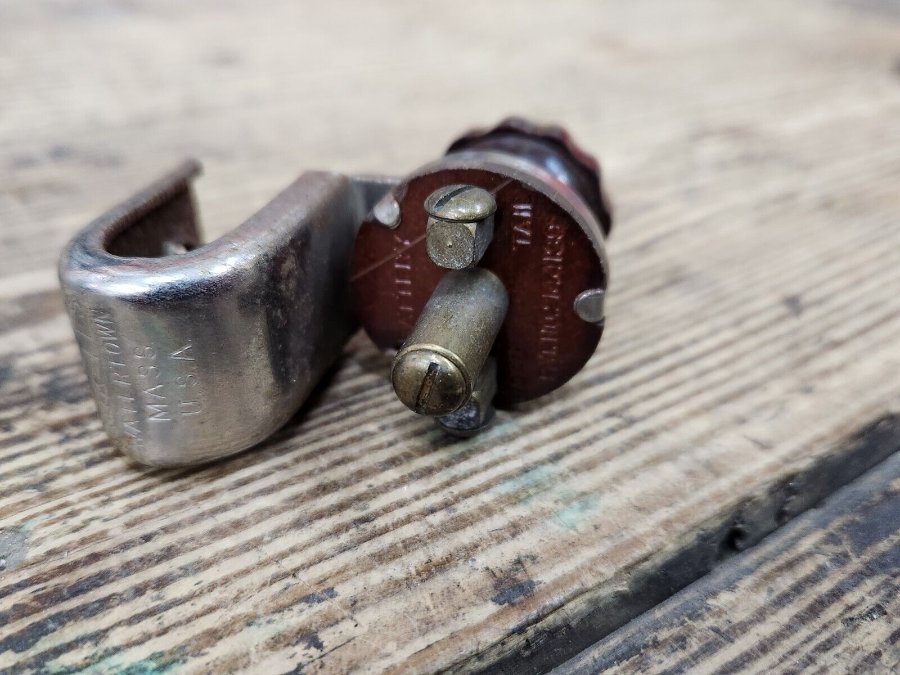
Here's a weekend update. I did an inspection of the engine looking for any signs of leaks and found one, the rear valve cover is weeping oil at the lower left corner. Not sure what's up with that but I'll take a peak at it sometime this week. I finished adjusting the parking brake and connected the pull handle cable. Seems to hold the truck from moving just fine. I still need to install a return spring on the lower pull lever and will do so once I source a spring. I found a nice 2-1/2" x 12 piece of steel round bar that I'll use to make the shims for the cab mounts. I've started taking preliminary measurements but I'm finding it rather difficult to determine where to take measurements from. Right now it looks like I need to raise the drivers front 5/16" and the passenger front 3/8". I haven't really come up with numbers for the rear mounts yet. I figured I would wait until the fronts are installed and then lift the rear to see what looked right. I've been looking for a switch to use as a shutoff for the electric fuel pump so I don't have to let it run all the time. This is what I found. It's period correct and I think it will look just fine attached to the bottom of the dash. I'll dismantle the switch and soak it in Evaporust and then re-assemble. I worked my way through installing the 3-point seat belts. I'm pleased with how they look and appreciate other forum members having posted their installations previously. It's great to have reference pictures for tasks like this. Brad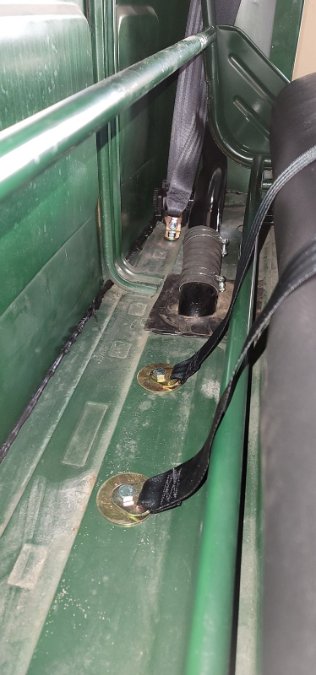
-
I guess that would depend on the shade of sunglasses you're wearing
-
Maybe it was supposed to be brown originally?
-
Several have mentioned bolting the fenders to the front grille and then installing (doghouse). Since I have a gantry crane the process of installing the doghouse would likely be greatly simplified. Special tooling as in alignment jigs? That would make sense. Yep, figured finger tight would be the most logical approach. As long as I don't forget to go back and tighten them later
-
51 B3B build thread - after all these years
bkahler replied to bkahler's topic in Mopar Flathead Truck Forum
It appears this issue is not uncommon for our aging trucks. I'd hate to be driving down the road, hit a bad bump and have the cab settle a little lower. Engine could definitely accelerate out of control
