


bkahler
-
Posts
1,936 -
Joined
-
Last visited
-
Days Won
37
Content Type
Links Directory
Profiles
Articles
Forums
Downloads
Store
Gallery
Blogs
Events
Everything posted by bkahler
-
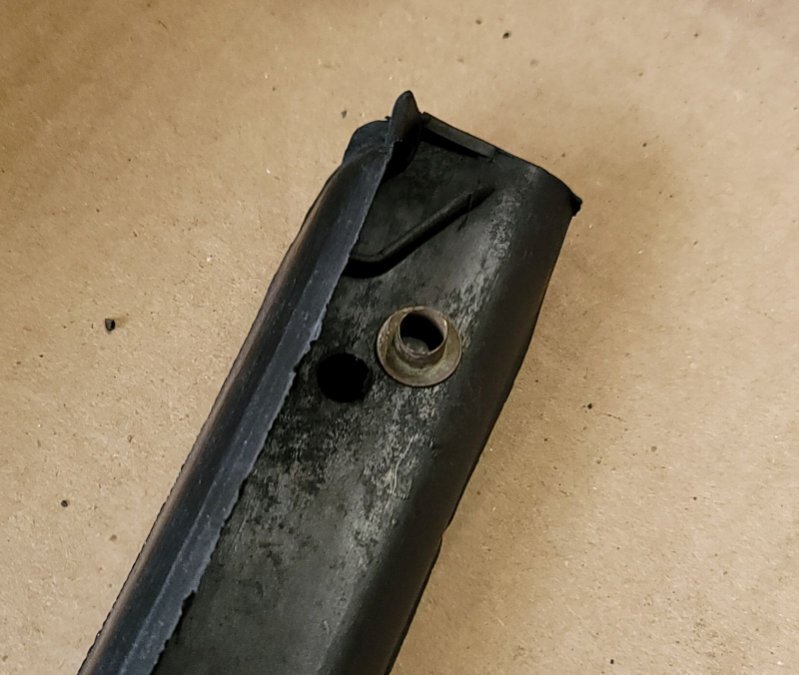
What you're describing is pretty much what I figured would happen without the brass sleeves. When I was removing the old rubber gaskets the sleeves appeared to have been imbedded in the gasket. I had to break the old gasket into pieces to get the sleeves out. Of the 8 sleeves one of them was broken but fortunately I had a spare set of windows to salvage a sleeve from. Thanks!
-
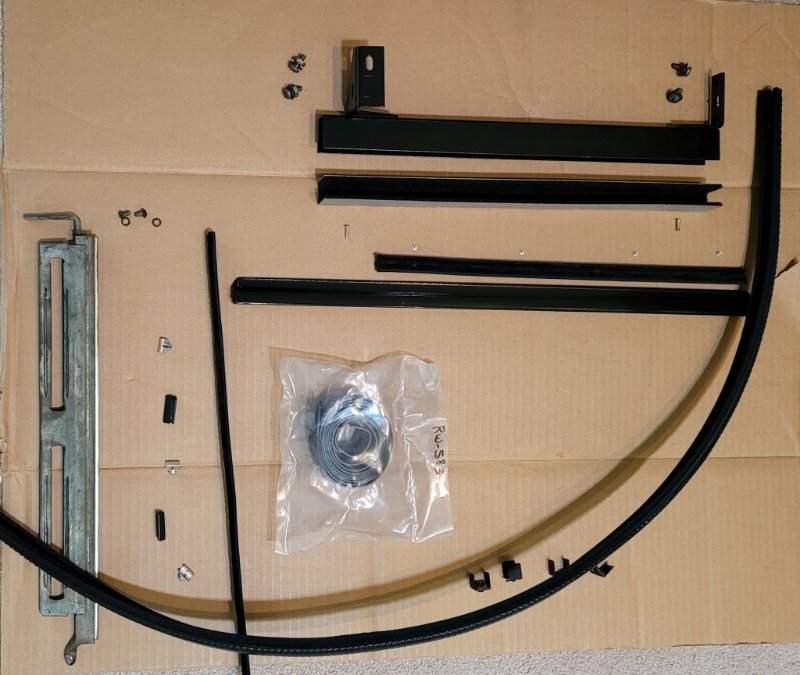
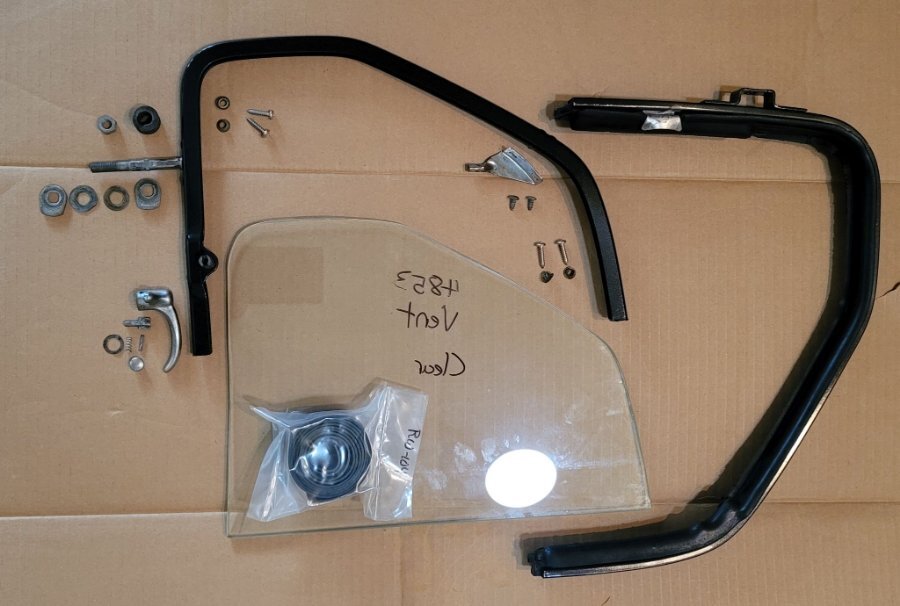
In this thread I'm going to document the assembly of my B3 doors and hopefully get some answers to a few questions that I have. I plan to build the two wing windows first, next assemble the two roll up windows and then install everything into the two doors. This first picture shows all of the components for one wing window. I meant to take this picture before I installed the rubber gaskets but forgot to The next picture shows all of the components for one roll up window assembly. In a follow on post I'll list where I got each of the pieces along with part numbers. I do have a question on the four screws holding a wing window to the door frame. While removing the rotten hard brittle rubber from the frame I found four top had style brass sleeves. They were imbedded about half way into the rubber. The rubber gaskets I bought from Roberts years ago does not have any sort of sleeves installed. My guess is when new the sleeves were on the top and when the screws were drawn into the door frame the sleeve would slowly over time sink into the rubber. Am I right or if not how the heck do you use these sleeves? More to come.....
-
JB, thanks for the photo. It's interesting how many subtle changes there are between the B2, B3 and B4 models. I wonder why the frame member was redesigned. It looks like Plymouthy's comment about replacing the cotter pin with the spring might be what Dodge did.
-
Of course I did
-
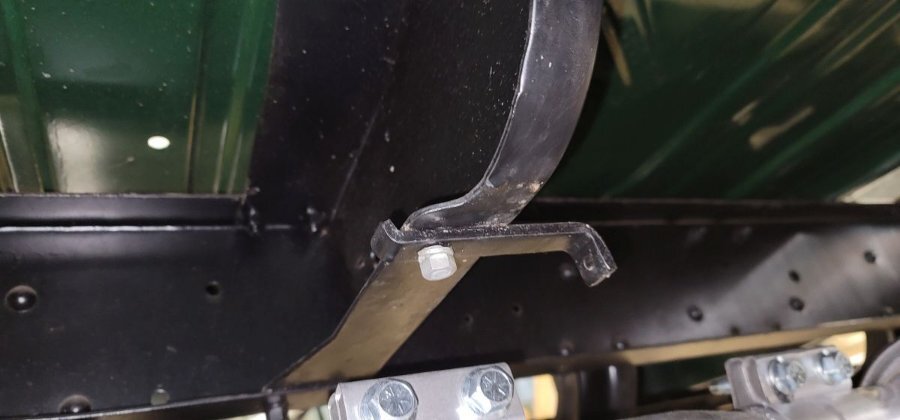
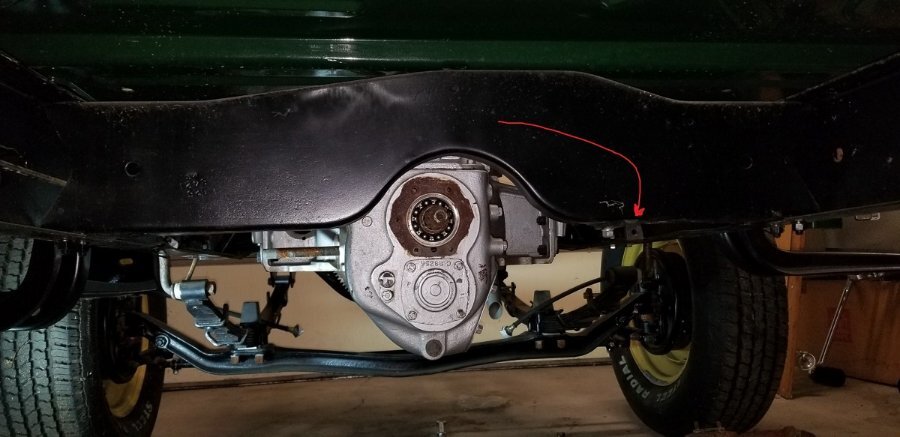
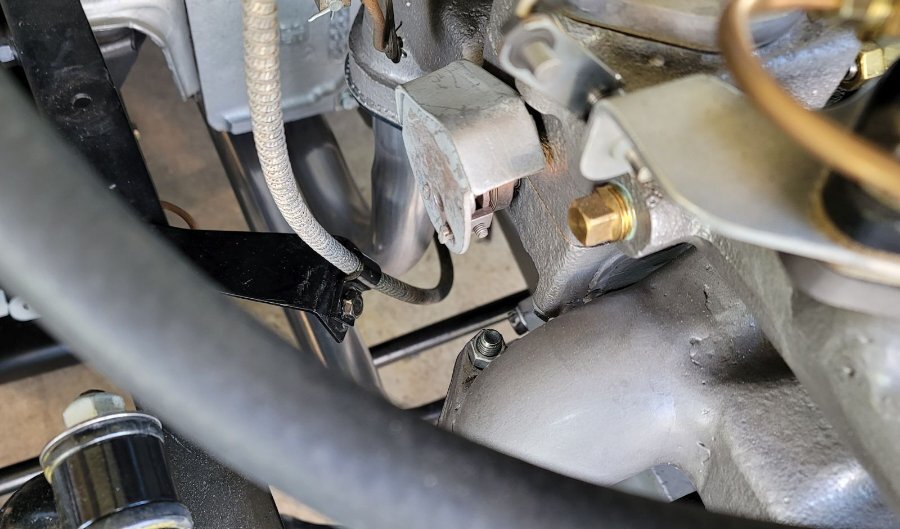
Here's what the bracket looks like for the spring. This bracket was on the truck when I bought it although no spring was present due to the truck having the parking brake lever on the transmission.
-
That's a nice clean way to attach the spring to the frame. Also I now have a good idea on what size spring to be looking for I just checked the lever arm and no extra holes.
-
1951 B3B 3 on the tree to floor shift conversion
bkahler replied to Mseacow's topic in Mopar Flathead Truck Forum
Ah sorry about that. Not having a 3-speed I haven't really paid much attention to threads talking about 3-speeds. My suggestion would be to start a new thread titled "3-speed from column to floor shift conversion" and see what kind of response you get. I vaguely recall people talking about that but like I said I've not really paid much attention. Brad -
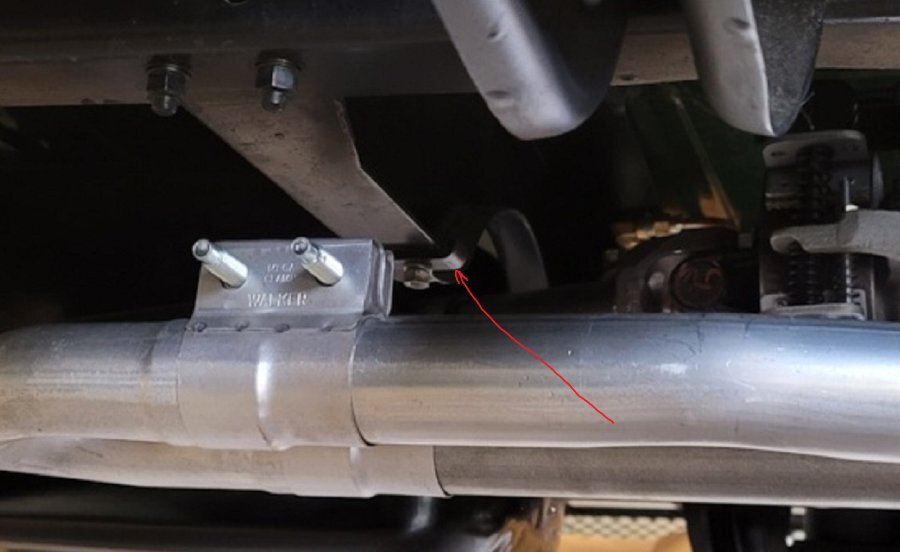
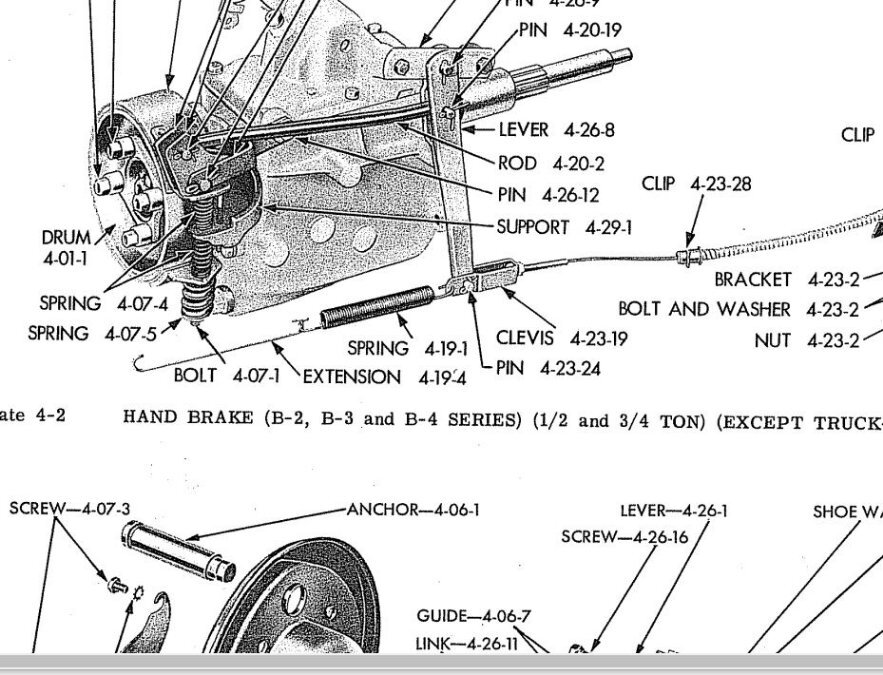
48D, Prior to watching your video yesterday it didn't even cross my mind that there might be an issue with connecting or fitting a return spring. I found it interesting where you pointed out the differences in the frame crossmember, that's one of those details that a person would never notice until it's pointed out an then you're thinking HOW did I miss something like that!! Something you didn't mention in your video and something I couldn't find in the parts manual was the small L-bracket that was bolted to my cross member. You can just make out the bracket in the pictures below. I'll try and get a better shot this evening. The bracket has a hole in it that would be appropriate for a spring or spring extension. Also, it was bolted in place with the same style of bolt used throughout the truck but I have no idea if it was original or not. The parts list does mention a bracket 4-19-5 (4-speed), part # 1272 996 that was listed for B3 and B4 models, My truck was originally a 3-speed so I would not think the bracket in the pictures above is the one in the parts book. I don't recall any other holes in the crossmember where a spring would attach to. Again, I'll look this evening. So after all this I'm now trying to figure out how Dodge would have attached the spring to the clevis assuming the clevis didn't have the extra hole as shown in your video. Plymouthy may have the answer in not using the cotter pin and instead using the spring to keep the pin installed. That's an interesting approach I had not heard of before but it sorta makes sense. I'm pretty sure you wouldn't be able to hook the spring just anywhere on the clevis or lever arm. I won't say this is one of those subjects that keep me up at night but it does have me wondering.... ? Tim, PM has been sent...... Thanks! Brad
-
I think a lot of the problem is it is just so easy to search for information online that I/we tend to forget how to actually use a paper manual. Years ago I used to sit and pour through technical documents and manuals. Maybe it's time I start to relearn some of those old habits
-
Oh yeah, that would be really good for my OCD ?
-
You trying to say you've slept since then? Roberts L channel looks to be the same as the stuff from Restoration Specialties but is almost twice the price. RS sells them for $20/pair. I measured one of the old rivets last night and it appears to be .100"/diameter by .120/long with a head of about .155"/diameter. I found some semi-tubular rivets that are .095"/diameter by .125/long that I think will work. I'm going to go ahead and order a box today. If these rivets don't work I might give you a shout.... Thanks!
-
Ok Merle, I guess I'm some what of a dunce I know I had searched my B3 manual for info on the gauge in the Fuel section of the manual and didn't find it. I just looked again and somehow someway a page has been inserted into my manual since then The page describing the gauge is just like your B2. So I then looked for the information I was looking for about the doors and surprise surprise, the information is right there in the Body section. Go figure. It looks like I need to spend some quality time with the manual each night to get familiar with what really is in the manual. Thanks!
-
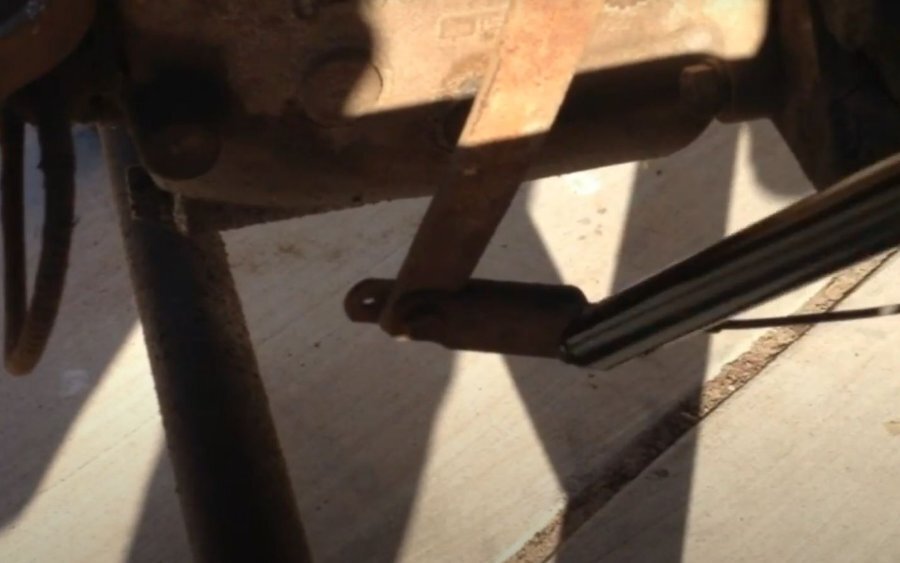
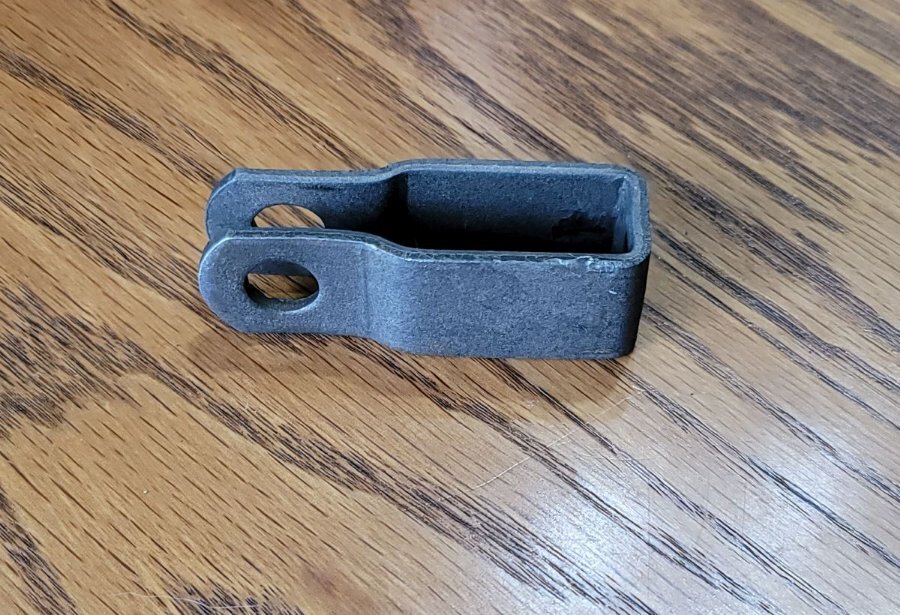
Here I was all ready to install the clevis and pin on the end of the parking brake cable and I happen to run across 48Dodger's video on the dash parking brake configuration. So guess what, in his video he shows a clevis that is NOT like the clevis I have for my truck! What?!!! My clevis: 48Dodger's clevis: Parts manual matches 48Dodger's: As the saying goes, one of these is not like the others When I got my truck it didn't have the cable but I managed to source a nice one complete with clevis and clips from Larry Frank. Needless to say I was a little bummed that my clevis is wrong. My first thought was someone for some reason replaced the original clevis with the one I have now. After thinking about it for a bit I decided to get the part number from the manual and see what google could come up with. Well whadda ya know, looking deeper into the parts manual there are TWO part numbers for the clevis. The B2 is 1266-643. The B3 is 1272-600. Already I'm feeling better My guess is for whatever reason Dodge eliminated the hole for the return spring in the clevis. More than likely because it was cheaper to make. Now that the stars have realigned and my heart rate is back under control I'm ready to get back to working on the truck
-
Mark, do you remember the diameter and length of rivets you used and where you got them from? I just ordered the Rigid Pile Lining from Restoration Specialties. I also ordered some rivets just in case, but they aren't like the originals. My original aluminum rivets were approximately .100" in diameter with a head not much larger and were probably about .100" long. The only semi tubular rivets RS has are stainless rivets and I'm not inclined to use them unless I can't find anything else. Thanks! Brad
-
I'm going to check my manual again on the fuel gauge but I thought I had previously checked the fuel system section to see if the gauge details might be there and I didn't see it. But again like I said previously I frequently seem to miss details
-
Thanks Merle Now you have me wondering if I just don't know how to find things in the shop manual! I would have thought the B3 manual would be more refined with more/better info. I've downloaded the manual, thank you. Tonight I'll do some comparisons between the B2 and the B3 manuals to see if I'm just not finding info like I should. It wouldn't be the first time I've missed information that's staring me in the face. Brad
-
1951 B3B 3 on the tree to floor shift conversion
bkahler replied to Mseacow's topic in Mopar Flathead Truck Forum
Hi Paul, welcome to the forum. It sounds like you like the floor shift over the column shift, you're not alone in that Just so you're aware, parts requests are frowned upon within messages. The preferred method of making a parts request is using the Classified section. Parts requests are free, parts being listed for sale cost, I think $5. Anyway, a moderator will likely edit your request and mention the Classifieds. Good look in your search! Brad -
Merle, I realize this is an old post but this is second time recently where I've found you referencing your shop manual. What surprises me is your shop manual seems to be a lot more detailed than mine! What version/year of shop manual do you have? Could you provide details so I can try and locate a copy? Thanks! Brad
-
I'm glad you qualified your statement about best year...... ?
-
Original Fuel Pump Filters / Strainers
bkahler replied to bkahler's topic in Mopar Flathead Truck Forum
I tend to agree for long term operation a pre filter and the strainer are probably enough. I do however kind of like the idea of more filtration on a new system. As much as I tried to keep things clean while building the fuel system I'm betting there is still trash of various sizes in the system. Heck, who would have thought an aluminum fuel filter housing would be porous enough to leak! -
Oh well, to late for me. I've already got the fitting installed. The nut did seem to snug up nicely so with luck I won't have a leak. However to be on the safe side I don't think I' will install the floor mat until I know for sure
-
51 B3B build thread - after all these years
bkahler replied to bkahler's topic in Mopar Flathead Truck Forum
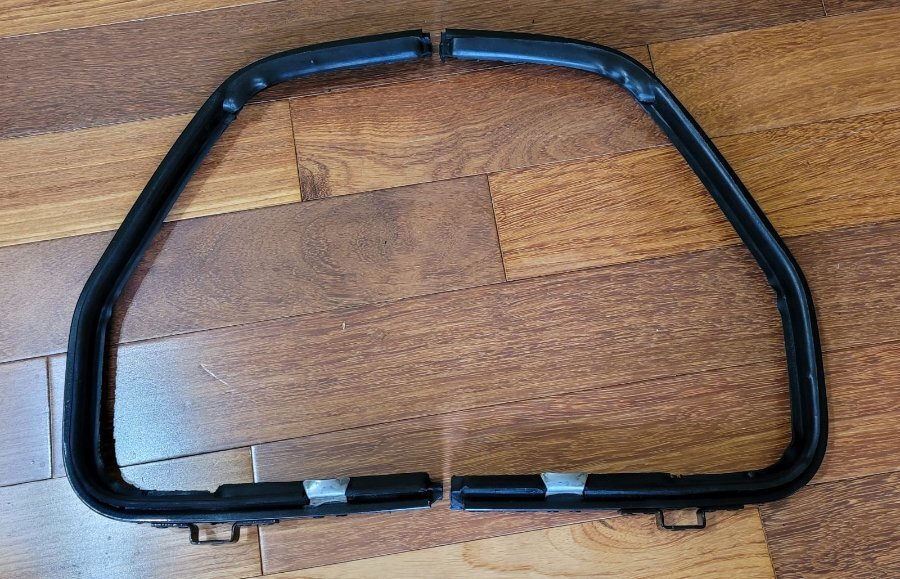
I didn't have the opportunity to work on the truck as much as I had originally planned for this weekend. The opportunity arose for me to dispose of my above ground pool so this Friday I spent the day dismantling and loading the pool bits and pieces on the new owners trailer. Unfortunately this effort pretty much wiped me out and I spent more time recovering than working on what I wanted to But a few things did get accomplished. The windshield interior molding is now installed and looks good. I also installed the parking brake cable. I was somewhat worried about whether the cable would fit properly since the truck has dual exhaust down pipes. It turns out the cable routes perfectly around the rear down pipe. That took care of a big worry I also spent time prepping the vent windows for installation in the doors. I bought the wing window rubber gaskets back in 1998 from Roberts. The rubber was still nice and pliable which was a big relief. It was definitely a struggle getting the rubber into the frame and I have a nice puncture wound in the palm of my hand for my efforts! Brad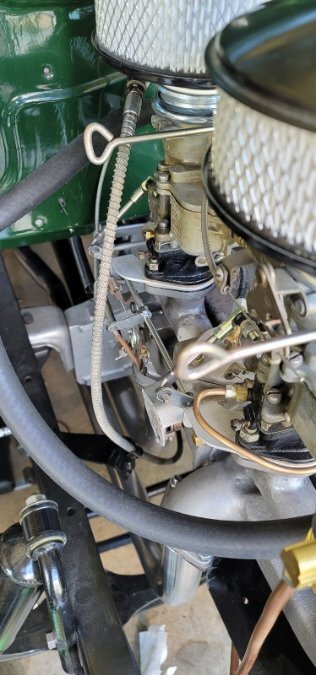
-
After much searching I ended up buying the Oil Pressure Gauge Sleeve/Nut from McMaster Carr.
-
51 B3B build thread - after all these years
bkahler replied to bkahler's topic in Mopar Flathead Truck Forum
I'm trying to decide whether I should use these window assemblies as is or maybe spruce them up a little bit with some rattle can paint.....
-
Which came first the chicken or the......
bkahler replied to bkahler's topic in Mopar Flathead Truck Forum
Thank you both for the quick responses. I hope to start building the doors this weekend. I have a nice big dining table that will make for a perfect assembly station

