-
Posts
1,912 -
Joined
-
Last visited
-
Days Won
14
Content Type
Links Directory
Profiles
Articles
Forums
Downloads
Store
Gallery
Blogs
Events
Everything posted by Desotodav
-
1953 Dodge 'coupe' truck project
Desotodav replied to Desotodav's topic in Mopar Flathead Truck Forum
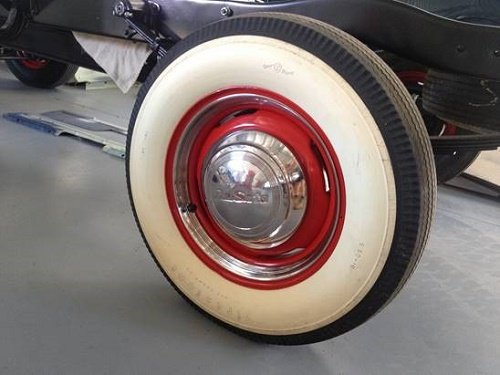
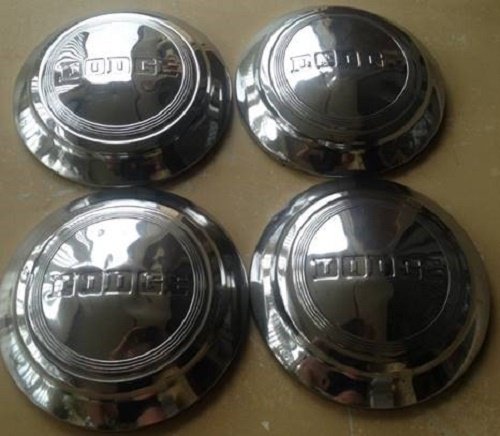
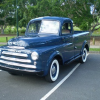
... I have a set of wheels on the 53 coupe truck chassis at present which are from a 54 truck (they have the 'nibs' on the rims for the hubcaps to push-over as opposed to the earlier clip-on hubcaps). I guess that you would refer these rims as to those fitted to your C series trucks in USA? I fitted a set of Bob Drake stainless steel trim rings and find that the grooves (or 'ribs'?) really match in well with the same grooves in the hubcaps. I have DeSoto hubcaps on there at present but will most likely be installing my Dodge hubcaps which I am yet to have restored. I have a set of correct 53 rims (with the clips for the clip on hubcaps) which I will restore and run a set of light truck tires on - for better road handling than ply tires on longer trips. The red 54 rims will probably end up on my 55 DeSoto truck which I may restore down the track... -

1953 Dodge 'coupe' truck project
Desotodav replied to Desotodav's topic in Mopar Flathead Truck Forum
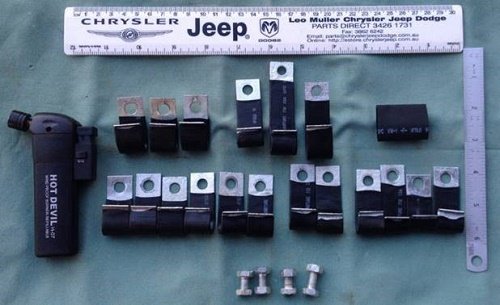
... I spend any of my spare time tackling smaller chores. Most of the parts which I put back on the truck are zinc plated. I had the seat slide brackets plated and then put them back together ready for install. I had a number of nuts, bolts and washers plated at the same time. I find that zinc plating is relatively cheap, and a good way to minimize future rust! I also zinc plated a heap of the small metal tabs while hold various items like electrical wiring, fuel and brake lines. I then used a small heat blower to shrink plastic onto those metal tabs... -

1953 Dodge 'coupe' truck project
Desotodav replied to Desotodav's topic in Mopar Flathead Truck Forum
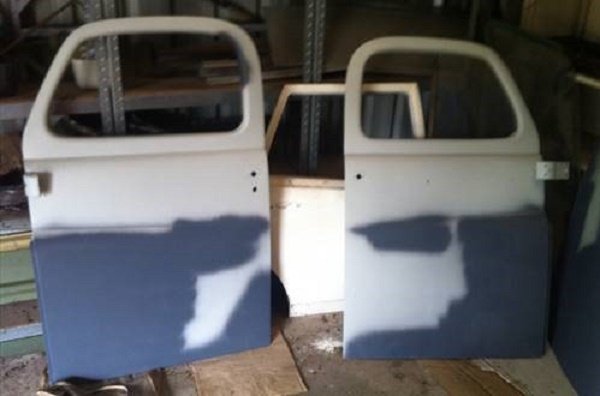
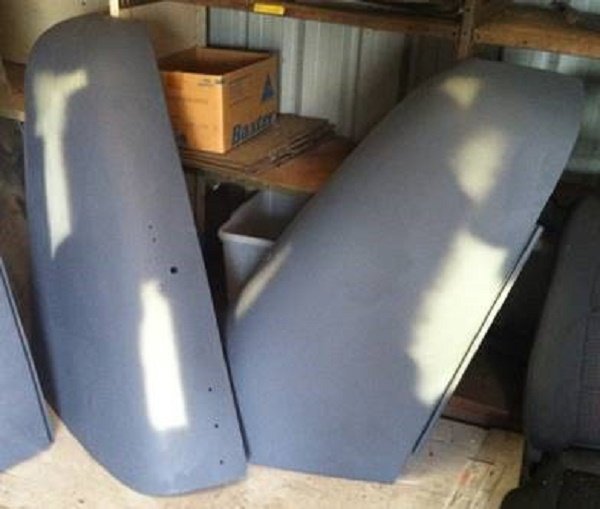
... I had most of the removable panels repaired by an old friend of mine before he retired. I found the rear of my old suburban van a most suitable place to store these panels to protect them from damage down at my shed... -

1953 Dodge 'coupe' truck project
Desotodav replied to Desotodav's topic in Mopar Flathead Truck Forum
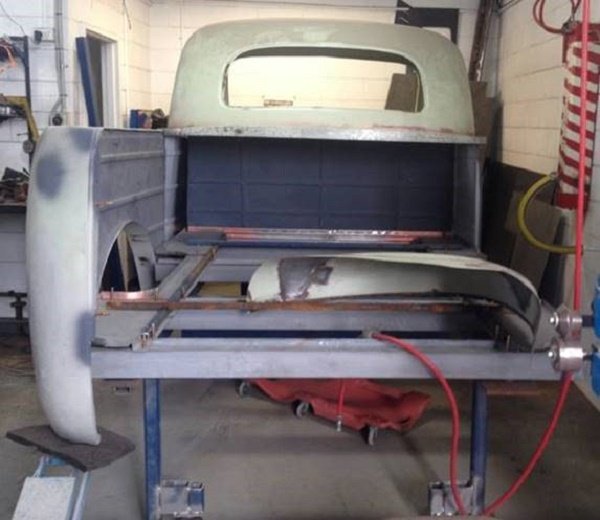
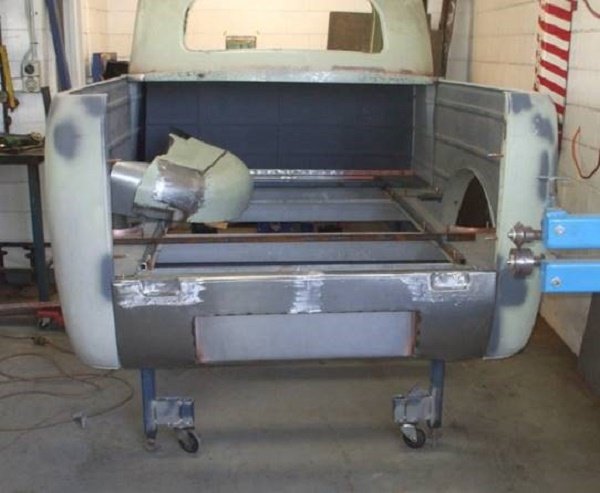
... the work seemed to be moving along well, but was held up at times due to other rush jobs in the shop (and my supply of funds!). It was comforting to finally see things start to go back together! The load area panel between the seat and the bed was removed and beat back into shape. It is common to see them bent inward here in Oz due items rolling around in the load area and (I assume) smashing into that panel when the brakes were applied! My panel was not too bad, but it was certainly easier to remove it for re-working. The old rusty bed channels and flat metal bed floor panels were all made new and replaced. The channels here had a timber beam inserted in their center, which the timber floor boards would screw into. The only problem with that was that water would sit around those timber beams and cause the metal channels to rust out. I had new metal channels made up out of thicker gauge material and will spot-weld a top flat plate over the top of those channels for additional strength (and somewhere to screw the timber floorboards to). A small length of galvanized pipe will be inserted into the channel (before the top plate is affixed) to prevent the top plate for compressing when the body to chassis bolts are inserted to hold the body to the chassis... -

1953 Dodge 'coupe' truck project
Desotodav replied to Desotodav's topic in Mopar Flathead Truck Forum
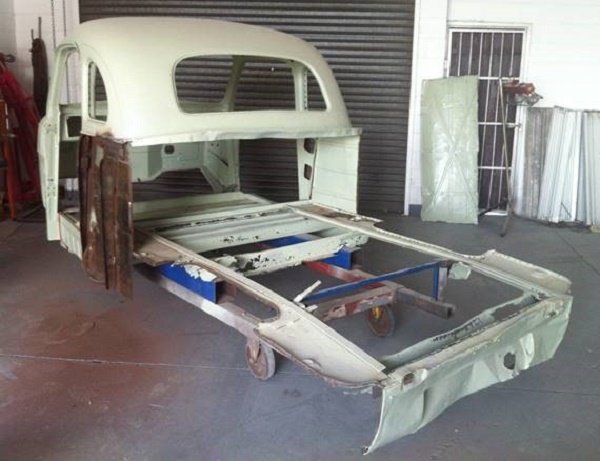
Wow, it has been just over a year since my last build update, so I suppose that time is well overdue to bring those who are interested up to speed. I apologize in advance as it may be a lengthy story... The panel beating on my 53 Dodge coupe truck is still an ongoing project, which is thankfully nearing completion! It has been a long and certainly costly project! I have no doubt that there are those who would consider my attention to detail way over the top, but this is my truck so I guess I can do with it as I please. I decided early in the piece that we would undertake the panel work on this truck in the same process as we did for my 52 truck. It just makes more sense to me to rip everything down to the bare minimum in order to restore the panels to a standard of my liking. I suppose that we are a little unfortunate in a way that many of our smaller trucks here in Oz were produced in what you on the other side of the pond would call a 'uni-body' configuration as this created a fair amount of additional work when is comes to panel restoration. The guys carefully unpicked all of the spot welds required in order to reduce my coupe truck body to a skeleton, and then those panels removed were split inside from out so that they were able to be repaired from both sides. Most of those panels have small 'saddle-type' metal tabs spot welded to them in order to hold the 'captive nuts' to secure things (such as the rear guard wheel flares and the top bed rails) and there were quite a few of those fittings which I damaged when removing rusty bolts during disassembly. I was able to recycle some replacement fittings which I carefully obtained from one of my parts trucks - I bought new square nuts for those fittings as well, but I had to tap them to the correct thread before fitting. I wanted to make sure that all of these fittings were perfect while I had access to them as there are not accessible once the panels are welded back together... -
How good is this pictured spanner - they reckon its got metric at one end and imperial at the other. I'm told that it was located on the shelf right next to the left-handed screw driver's...
-
Can you post some photos up of what you have JPP? There should be 2 springs - one on the shaft and one to the toe-board. The additional (third) spring to the inner guard appears to have been optional (and somewhat controversial). I don't really know where you would get those springs from, but I had some of these spring sets made up a few years back and may still have some of them spare (message me rather than discussing supply here though). Check the thread that Brian pointed you towards in post #5 of this topic... ... as there is some good throttle spring information contained therein.
-
I'm surprised Paul as I thought that you had promised your daughter the truck. It might be worthwhile telling the prospective new owner that he wouldn't gain any advantage by installing a 4 speed transmission as the top gear ratios are the same between 3 and 4 speed.
-
Best to send a message to B1B Keven as he is the man for speedo repairs and information. He would most likely have a new printed speedo face cover available for you as well.
-
Hi Tim,
Did you see this NOS rear fender guard on Epay?... http://www.ebay.com/itm/NOS-1948-1953-Dodge-Panel-Rear-Fender-1949-1950-1951-1952-Pick-up-Truck-1936-/142172516048?hash=item211a246ed0:g:dOwAAOSwo4pYH60T&vxp=mtr
That one is obviously in much better shape than anything I could bring over to you!
Dav
-

Parking light question
Desotodav replied to bridog57's topic in DPETCA - Dodge Pilothouse Era Truck Club of America
I installed a new socket in mine and changed from single to dual wiring so that I could run parker and indicator lights.The main shaft (or tube part) was just pressed tightly into the parking light bucket on my 52 Oz truck. I found that the new sockets I bought were just the right size to press nicely into the center hold of the parking light bucket. -
I had the side gears swapped out when I went from the 4.1 to the 3.54 diff in my truck. I found that the car axles were an inch or so shorter than the truck axles, so changing over the pumpkin and the side gears from the car and using the truck axles really was the only way to go for me.
-
I saw a link (on another forum which I frequent) which had a link to many old MOPAR photos from here in Oz. Some really cool old photos there... https://get.google.com/albumarchive/104928423534347932585?source=pwa . A couple of my favorites attached...
-
Check the link to this thread... ... and then send me a message with your email address if you wish.
- 1 reply
-
- 1
-

-
Sent today John. Will probably take a couple of weeks to reach you from Oz though. Enjoy.
-
I had a 'pending alert' message appear whilst accessing the forum on my iPhone (see attached screen shots) which turned out to be a spam message... but I don't see it anymore so I assume that it has been fixed. Thanks GTK
-
I will get back to you via email soon John. There are 3 springs in a truck door latch (see attached photo) - one for the tongue movement (bottom rgt of photo), one for the door handle droop (bottom left of photo), and one for the locking mechanism (top of photo).
-
I have new door latch springs available John. Drop me a PM with your email & I will get back to you.
-
Could just be a linkage adjustment... if you have a column shift?
-
It's always good to see you making progress Paul. I have been meaning to ask... did you get the left-front chassis rail straightened out? I haven't seen any comment since the photos at post # 252 on page 26.
-

Transmission/differential question
Desotodav replied to chrismfischer's topic in Mopar Flathead Truck Forum
Do you have a flat section on the diff just below the filler plug Chris?... as this is where the ratio was stamped on the later model trucks. I couldn't quite see that area from your photos. Here's a pic of the red diff in one of my trucks showing the area of that ratio stamping... -
I will contact you soon Dave. I have hub & axle puller tools you can use. Axle should pull out with backing plate removed. There is a seal fella just down the road from my shed who should have new seals for you. Hopefully the axles are the same as yours (I think they are from 54 car/s). I have emailed & messaged you.
-
Hi Dave and welcome to the forum. Let me know if you have further issues with the axle thread as I have a few spare car axles down at my shed. I'm just down the road from you!
-

1954 Dodge Panel Mail Truck RH Drive
Desotodav replied to ssnowden's topic in Mopar Flathead Truck Forum
That's a really great find. I have only ever seen pictures of them. Plenty of RH parts for them here downunder in Oz.


