


Merle Coggins
-
Posts
9,394 -
Joined
-
Last visited
-
Days Won
87


-

Resurrecting and diagnosing…
Merle Coggins replied to Matfirstattempt's topic in Mopar Flathead Truck Forum
I agree, use pipe dope on your head bolts. -
I don't believe aerodynamics plays much of a factor in this application.
-
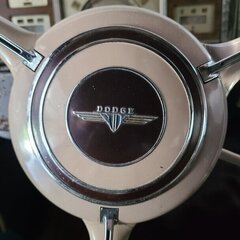
Was yours the Daytona or the block of butter?
-
The easier swap is likely a rear diff, or axle upgrade. I was able to acquire a 3.73 diff out of a '50 Plymouth that was pretty much a direct replacement into my axle. I can cruise at 70+ when needed, but sometimes I wish I could drop the ratio slightly to gain a little more drive up steeper grades. A Jeep Cherokee axle seems to be a popular swap. Many have installed 5 speed overdrive transmissions, such as the Borg Warner T-5 out of S-10's and other vehicles. If you search the forums there are several threads on that upgrade. The Mopar 833 OD 4 speed, mentioned earlier, is also an option. Again, search the forums. there are only a couple threads on that one, but they're out there. An OD trans with your 4.10:1 diff would be a good package.
-
That appears to be a later replacement switch, as it has the Pentstar logo on it. Does it have identifying markings for each terminal that may help? You may need to do some testing with an ohm meter, or continuity meter, to determine which terminals are connected at each switch position. I happened to have a picture of the underside of the dash on my truck that shows the switch, but there isn't enough detail to see where the wires all go. Here's a snip from a PDF copy of service manual, wire diagram. This may, or may not, help you.

-
This time of year when it hits 60's we open up the doors and windows and enjoy the weather.... perspective... 😉
-
New B-3-B owner with some basic questions
Merle Coggins replied to ktb's topic in Mopar Flathead Truck Forum
When I pulled my engine, in a similar condition, I removed the transmission along with the clutch and brake pedals. I was then able to pull the engine out with the bell housing attached. This is tricky as the steering column interferes with things a bit. But it'll come out. I then laid the block on it's side, on a solid bench and removed the crankshaft out the bottom with the Fluid Drive attached. I could then access all of the FD nuts to separate the FD and Crank. Then a lot of cleaning with wire wheels and flapper sanding drums, and a lot of penetrating oil. I was finally able to drive all of the pistons out with a BFH and a block of wood. Then I focused on the valves. I gripped the cam sprocket with a large channel lock pliers and rotated it back and forth, a little at a time, until all of the valves were stuck open. I could then tip the block upside down and slide the came out, followed by the tappets. I then hammered the valves back closed to remove the keepers and springs. Then, with the aid of a long punch, I drove the valves up and out of the block. Then I hauled it all to a machine shop where they bored it, decked the block and milled the head, replaced the valve guides and seats, as they were also trashed. They provided the pistons and rings when I picked it all up. I then reassembled it and it's been a solid engine ever since. -
51 B3B build thread - after all these years
Merle Coggins replied to bkahler's topic in Mopar Flathead Truck Forum
Did you do a disc brake conversion on the front axle? If so this will require shortening the tie rod. At least that was the case with my Rusty Hope kit. The caliper mounting plate moves the steering arms inboard and I found that my tie rod didn't have enough adjustment to compensate for this. I ended up trimming off an equal amount off of each end and reinserting the tie rod ends. This gave me the adjustability that I needed. -
Questions on 54 C-1 truck project
Merle Coggins replied to 888's topic in Mopar Flathead Truck Forum
I have not seen that type of filter canister with a bolt on lid, but if you can identify the proper filter cartridge there's no reason why it won't work for you. As you said, many filters were aftermarket installs on these trucks. You'll need to determine which ports on the filter canister are Inlet and Outlet and make up new lines to connect to your engine. I took your photo and labeled the plugs for you as you seemed unsure how to connect it. You may also want to search for the correct coil mounting bracket as this one seems to be home made.
-
Remove Door Latch Assembly 1948 B1B
Merle Coggins replied to Dodging Work's topic in Mopar Flathead Truck Forum
Allow the rod that goes to the inside handle pivot to rotate down so that it is parallel to the window track. This will allow the latch assembly to rotate out around the window track. At least that's how I remember finally getting mine out. -
'47 Plymouth axle seals replacement - correct seals
Merle Coggins replied to sjaakslinger's topic in P15-D24 Forum
Remove the brake backing plate. The outer seal in pressed into that anyway. Once you have that out of the way you'll need to pull the axle shaft. You may need to rig up a puller, or slide hammer to pull the axle. The inner seal is behind the wheel bearing. When you go back together you'll want to clean and repack the bearing with grease. -
What part of 'Sconsin are you in?
-
I would have welcomed 28 degrees this morning. We had -8. I'm sure it was colder farther north, as I'm in the Milwaukee area this week.
-
From what I've seen the C-series changed the bell housings to be more like that used in the cars. However, everything forward of the bell housing should be pretty much the same. Just use your bell housing on that engine block and it should all be good.
-
Send that speedo face off to Keven Paddy, aka B1B Keven. He does vinyl overlays that'll make it like new again.

