JBNeal
-
Posts
7,194 -
Joined
-
Last visited
-
Days Won
81
Content Type
Links Directory
Profiles
Articles
Forums
Downloads
Store
Gallery
Blogs
Events
Everything posted by JBNeal
-
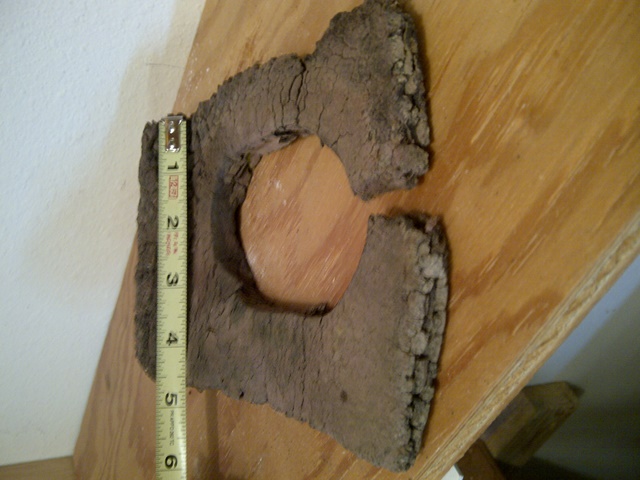
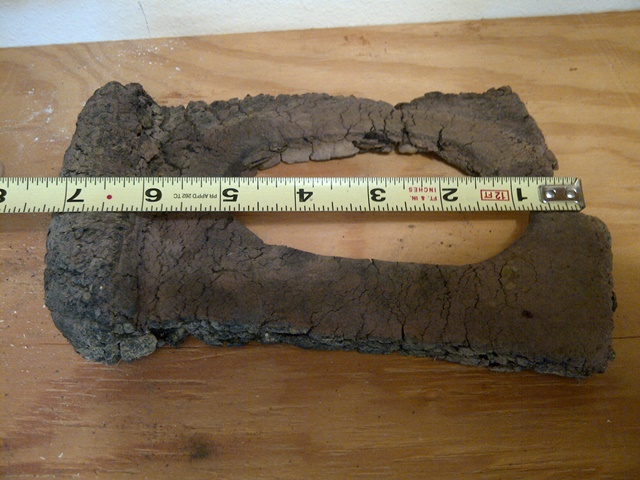
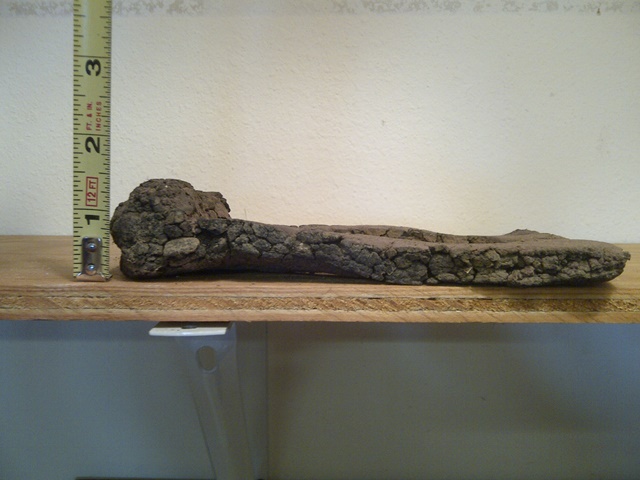
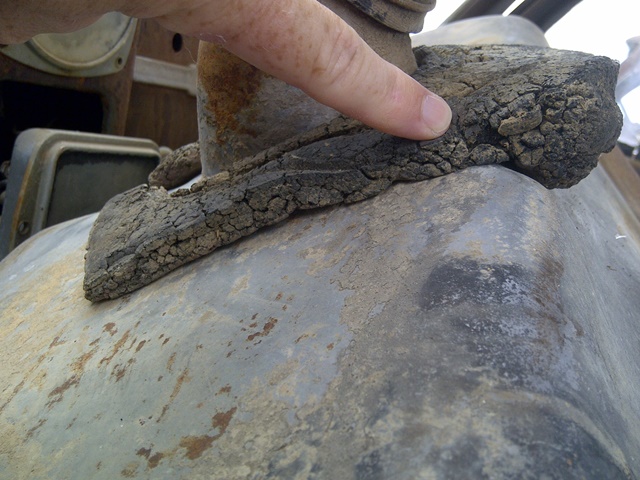
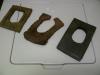
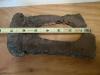
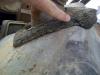
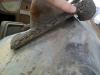
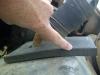
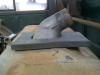
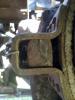
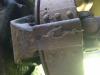
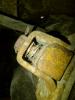
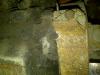
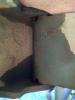
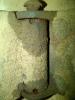
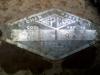
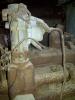
while cleaning & organizing in the garage, I had these fuel tank seals in the same place so I thought I'd display them. I have an old stiff mudflap that I cut to mimic the original (but it was too thin so it just rattled atop the tank), the original spongy rubber type that was on the '48, and a replacement that I made from a chunk of an old work station floormat. The original appears to be formed as shown in the parts manual drawing, and it has the indentations from being pressed onto the underside of the cab. When mounted on the non-B4 style fuel tank, the original gasket fits neatly around the tank neck and the adjacent formed area so as to fully contact the underside of the cab, completing the seal. Without that extra lump of material, a flat gasket will eventually droop in the area that would be under the fuel neck hose, forming an incomplete seal. I looked at the B4 Spring Special & it appears to have a flat piece of rubber about 1/8" thick on the inside of the cab at the fuel tank neck, but I don't know what is under the cab without removing the tank. As can be seen from the remnants of my original seal, the spongy rubber could split and the seal could slide off of the neck. I'm gonna guess that this happened on every truck that was driven on wet or dry roads, and the Dodge engineers decided to get away from this formed seal to a simpler (cheaper) rubber seal that just covered the gap. I think the only reason I have this seal is that my great-grandfather was a notoriously slow driver (think of the geezer who gets in the way in the bayou chase scene from Live & Let Die) and the original seal was never slung off of the chassis from going around a corner or flying over railroad tracks. The original seal material is still spongy, but the surface is crusty like melted plastic that has cooled off. It's not so much like foam rubber as it seems to be like foam asphalt, if there ever was such a thing. The material can be squeezed flat and feels like it gums together, but after a few minutes of sitting on a table, it expands back to its original shape. With the variations in what has been found out in the field by fellow forum members, I cracked open the parts book and tried to figger out which variation is correct. And it looks like there are several correct versions, as 14-86-60 has 3 listed part numbers in the parts book I have that was printed Jan.'53. There is a part number for the early B-1s; another part number for the late B-1s & early B-2s; and another part number for late B-2s, all B-3s & all B-4s. This may be another instance similar to the steering gearboxes, as the parts & shop manuals show a graphic indicative of early B-1 usage, but later B-series models have different parts used that look similar but are not the same as the graphic shown simply because Dodge did not update their literature. At any rate, only us pickers of nits will know the difference and can testify what is correct and what is homemade to this part that is rarely seen...as long as it keeps the rats from chewing the stuffing out of the seat, I reckon drivers can use whatever works best for them

-
 I wouldn't mind seeing the door panels, seat, and if possible, what's left of the gasket between the gas tank & the cab from inside the cab & from under the truck. Also, a few shots of the fuel line from the carb to the fuel pump just fer grins...thanks!
 -
HOLLYWOOD I'm in a rain delay at the house, so I was watching that Argo movie I picked up at Target on sale a few weeks ago...look what was at the airport at about 1:25...
-
Look close & ya might see the COE ram hood medallion...but the D-O-D-G-E nose emblem & grill bars make me think 'Route Van'...I'm gonna guess that thar is a special order Cab & Chassis with a wicked steering, brake & throttle linkage setup
-
Emergency Brake Band Assembly Question
JBNeal replied to Dodgebawl's topic in Mopar Flathead Truck Forum
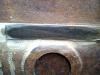
Here's a few pics to study, but they all say the same thing: the spring allows the brake band to float on it's mounting arm; the bolt is used to adjust the brake band; and the lock wire keeps the bolt from turning. On the '48 3 spd I added a zinc-plated flat washer, but it's not needed. The '49 spur gear 4 spd is similar to the '48. The '51 synchro 4 spd is similar to the '49 except that the mounting arm is in the 10 o'clock position instead of the 9 o'clock position.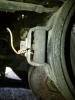
-
1948 B-1-B-108 BUILD THREAD Papa's Dodge
JBNeal replied to JBNeal's topic in Mopar Flathead Truck Forum
We're having wonderful weather so I've been cleaning out the garage. After finding an oilcan that I bought years ago and forgot about, I decided to take a break from the chores and have a li'l fun. Filled up that oilcan with MMO and started attacking old truck door strikers & hinges, hadn't done that in about a year and it showed as every door took a little effort to open, if at all. Was looking at the door checks in the '49, and both of'm were tore up...then noticed something I hadn't really paid any attention to before. So I looked at the doors in the '48, and they were in much better shape with a lot less crud on them. When the doors are opened fully to 90°, there they were: two oil ports each for top & bottom hinges. The shop manual mentions to oil these regularly, and with the old style oil can, the spout fits perfectly in these ports. The top hinges are a little harder to access than the lower hinges, I'm guessing the oil port is clocked so that it is fully covered to minimize moisture exposure.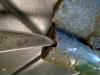

-
the carburetor will need adjustment with the addition of the PCV system as this is introducing a controlled vacuum leak into the intake charged air. There are two parts to the system: the PCV valve plumbed from the crankcase to the intake manifold, which draws vapor at low rpm; and the draw line plumbed from the oil filler pipe to the air cleaner base, which draws vapor at high rpm. The original PCV kit that was documented had among its parts listed a replacement idle orifice tube with no specifications listed. This has led to speculation that this tube allowed more fuel into the carb to compensate for the added air allowed into the charged air stream. grey beard installed his VPW PCV valve but had some trouble so he replaced it with a modern valve. He did some stewin' on the problem & was able to remedy the VPW PCV valve problem with some careful machining.
-
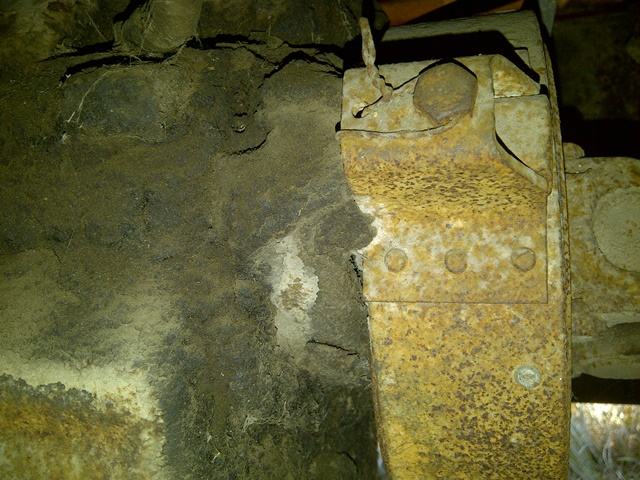
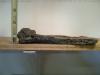
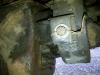
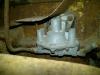
Bad news: your steering shaft tube + worm gear are only usable as a display item now as that tube is shot. The tube is supposed to have a smooth surface; I'm not sure how those grooves got there, but that will definitely weaken the steering tube. Also, I don't know where the floating ball bearings came from, as they are not needed in the gearbox. Good news: B-1 steering shaft tube + worm gear are also used in B-2, B-3 & B-4, so any donor gearbox assembly guts will fit in your gearbox. B-1 gearboxes castings are different than B-3 & B-4 and have a different part number than B-2 gearboxes. When I rebuilt the gearbox in my '49, I used the guts from a B-3 donor and everything fit perfect Verify that the gearbox casting has not been damaged. I've condemned various gearboxes because a roller bearing has shelled out, one of the rollers gets caught in the meshing teeth, and the casting will flex outward & crack. Bottom line: ya got lucky with that failure in your driveway rather than on the street at speed. I've messed with enough old stuff and had all kinds of odd failures at inopportune times & locations that I'm leery about putting my trust in an old machine that has sat for an extended period or has a lot of hours racked up without the assurance of a complete teardown & inspection. It's a lot easier to work on one in the driveway than on the side of the road...
-
Here's a few threads that are chock full of information: Thoughts on Flatheads - Part 1 Thoughts on Flatheads - Part 2 Engine Rebuilding Gotchas
-
the roadside semi engulfed in flames...A CLASSIC
-
How Many Pilot House Trucks Have Survived?
JBNeal replied to Bradley S.'s topic in Mopar Flathead Truck Forum
SURVIVOR: saw this article about a stray in the old country -
How Many Pilot House Trucks Have Survived?
JBNeal replied to Bradley S.'s topic in Mopar Flathead Truck Forum
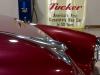
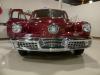
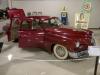
SURVIVOR: was out & about a few days ago and stopped by Dick's Classic Garage to see their '48...there was a nice red car there too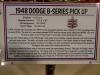
-
bed parts can still be found, there's Mar-K in OKC but be prepared for some sticker shock...them fender bolts are also known as elevator bolts but the originals had the Phillips head...McMaster-Carr and Grainger have non-original elevator bolts that can be had but probably would be cheaper to throw them in with an order with some other parts to save on shipping & whutnot. I reckon one alternative is to get the non-original elevator bolts since they cost pennies, cut a slot in the head to use a large slotted screwdriver for assembly & paint over them later
-
something I learned about heat exchange is that different materials conduct heat energy at different rates, and that the mass that is storing heat energy acts as a capacitor as it transfers that heat to another mass in the presence of a temperature gradient. Grandma's Diplomat's 318 was notorious for pegging out the temperature gauge after the engine was shut off, as heat from the lower areas of the engine radiated upward towards the temp.sensor, but once the engine was running again, the temperature would stabilize to normal operating temps. On my '48 & '49, I can drive around at operating temperature for a good while, then shut off the engine and watch the mechanical temperature gauge rise to boiling temps. When I first saw this phenomenon, I thought I was doing damage to the engine, so I would start the engine and rev the motor to get the water pump to moving coolant, which would bring the temps back down to operating temp. Shutting off the engine would see that the temps rise again, so I stewed about it and let it shed heat on its own. If it's overheating during operation, then ya have a problem, as the temp sensor is measuring a constant high heat radiating from the engine internals, and that's not always a good thing. Heat generation is from the combustion process, but also friction from rotating & sliding parts, so if one of those heat sources is too high, then ya might have a charged air mixture problem or an internal mechanical problem. Or in some cases, a blocked coolant passage will cause area of the engine to not shed heat at the same rate at other areas of the engine, causing hot spots that can do damage to the engine. And if ya think about it, if ya boil water on a conductive stove top, then turn off the stove (heat), does the stove, water pot or water cool off right away? As for the ticking noise ya hear when a modern engine is shut off, I'm purty sure what you're hearing is the various heat shields on the manifolds and exhaust pipes that are moving around from the heat. They are thin sheet metal and expand quickly compared to cast iron. If ya hear a ticking noise from a flathead, RUN FOR DA HILLS
-
How Many Pilot House Trucks Have Survived?
JBNeal replied to Bradley S.'s topic in Mopar Flathead Truck Forum
SURVIVOR: a friend of mine saw this'n near San Diego while she was on vacation last year: -
From the B-3 service manual: flywheel nuts [7/16-20]: 55-60 ft-lbs transmission to clutch housing nut/screw [7/16-20 or -14]: 45-50 ft-lbs clutch to flywheel bolt [5/16-18]: 15-20 ft-lbs
-
I've never had an offer over 3-digits, and several of those offers were insistent that I was rolling around in a hunk o'junk and that they were doing me a favor by taking them rust buckets off my hands. One ethnic fella got particularly upset and that I was insulting him by not taking him up on his paltry offer. My country boy politeness at turning them 'offers' down was met with more than one disappointed harrumph. And then there are the parts trucks next to the house...several fellas have rolled up and volunteered to haul them off for no charge, one kid and his rather husky girlfriend wanted to take the Spring Special, paint it bright yellow and put it on a chevy 4x4 that he had
-
Flat Head Books That You Have Used For Your Engine Rebuild
JBNeal replied to rkldesign's topic in Mopar Flathead Truck Forum
the flathead engines are simple by design, hence their inherit reliability vs. overhead cam engines. The shop manual does give specifications & procedures on rebuilds / repair of the powertrain, electrical, body, etc. But sometimes there is information in between the lines or left out altogether. Examples are the window riser adjustments, steering gearbox dust seal lubrication access hole, B-3 B-4 turn signal conversion & installation, horn rebuild dos & don'ts...that's when a build thread on this forum comes in handy, folks will chime in with all kinds of help (some of it more useful than others) -
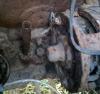
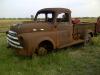
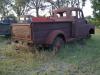
truck picture B-1-D-116: here's a few more pics of this beast:

-
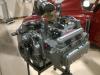
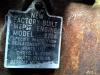
truck picture B-1-D-116: I found this '48 B-1-D-116 on CL for a C-note four counties to the south, picked it up back in February under the cover of darkness. It has a rebuilt '49 motor from a Plymouth, judging from the block dipstick tube and carburetor linkage shaft on the head (although I do not recognize the fuel pump). The block number boss appears to have been ground down and a new # stamped that is almost illegible. When this big red wagon was new, it had the comfort-ride seat (upholstery & seat bottom missing), a heater/defroster (missing, factory holes punched out at firewall), dual sun visors (RH broken off & missing), dual extendable mirrors (RH partially missing), electric wipers (linkages + arms missing), radio (missing, but station call letters scratched into dash), stainless grille bars (in need of massaging), and no oil filter. The motor has been open for a good while, the manifolds are cracked from some sort of impact, the cab has holes in the roof where marker lights were installed (but a good floor & doors), the steering column is partially missing (never seen this kind of modification), and the spare tire & original carrier were lost years ago, according to the previous owner, who had started to fix the truck in the 90s then lost interest after partial disassembly, then got his son to dispose of it. I have no solid plans for this truck as I've got a few other projects ahead of it, so for now it's a wildlife refuge


-
Ask Don Coatney about that T5 adapter on eBay, it might be an interesting story...Langdon's also sells T5 adapters I reckon
-
I reckon they made changes in the rear main seal and internal bypass coolant passage in '51 or thereabouts, changed some of the head machining to boost CR through the 50s, but the block itself didn't change much...Dodge, Plymouth, DT or Industrial 23" blocks were mostly the same...good luck finding one that'll be usable
-
During some office cleanup, I found the '04 receipt for the new-style pump I put in the '48 (65 bucks!). I picked it up from Terrill Machine in DeLeon (same place I got my fuel pump repair & carb kits), though I don't know for sure if it's sourced from NAPA or the actual rebuild service
-
here's a little more info about Clem's... there was an ad on the TV the other day about this car museum... there was a re-run on The Day Tripper the other day that showed a decent eatin' joint down the road from the museum