JBNeal
-
Posts
7,190 -
Joined
-
Last visited
-
Days Won
81
Content Type
Links Directory
Profiles
Articles
Forums
Downloads
Store
Gallery
Blogs
Events
Everything posted by JBNeal
-

fuel flowing back down to the pump when sitting for a while
JBNeal replied to finmad's topic in Mopar Flathead Truck Forum
I tried this, then heard about this, so now I do this -
Adventures of Dolly Dodge Nov 2015
JBNeal replied to DollyDodge's topic in Mopar Flathead Truck Forum
the second spring argument again... according to the parts manual, there is a spring on the bell crank (14-14-1: 640 407) and a spring for the throttle return (14-06-1: 1088 169) that is routed to the floorboard...the assumption is that THIS is the original setup. I am assuming that the second spring was added as needed as part of some sort of service bulletin to address wear along the throttle linkage...after all, it is only a gdspring -
Water Pump Info
-
I had planned on doing the rework on The Money Pit in a manner similar to what you are doing here: remove front sheet metal & engine; send engine block to machine shop for rework; disassemble the bed and stack the panels outdoors to be finished last; cleanup & repair rear axle & suspension; tilt cab back to the rear of the frame to cleanup cab bottom (maybe with roll-on bedliner) and frame section; cleanup front frame & suspension; test rebuilt engine & transmission before installation; etc. etc. etc....this approach takes up less shop space and allows for parallel work to be done as weather allows. Powertrain work, sheet metal work and initial paint can be done in a smaller indoor space, the frame can be cleaned up outdoors as it does not have to be perfect (who's gonna see it when it's all put together?). The 500 gallon LPG tank that I reworked 4 yrs ago outdoors still looks as good as it did when I finished, so that has been my test case that has proven that this method works as long as things are kept clean. Painting was done with a foam roller, and the entire project cost less than $50. Final paint for the entire truck can be done in an adequately sized indoor space, taking up much less time inside the shop space, allowing other projects to occupy the shop as needed
-
additional information - Man in the High Tower
-
David Erb (Grey Beard) Passed Nov 6
JBNeal replied to Allan Parkhurst's topic in Recognitions and Remembrances
I have been swapping stories with Dave over the years before & after he dropped off of this forum. He sent me his notes on roller paint jobs, and we went back & forth on the specifics when I was refinishing my 500 gallon LPG tank a few summers ago...I had to scale back that job cuz at the halfway point, his methods were yielding such good results that the shine off of that tank in the summer sun was becoming a blinding nuisance to passersby, something he found amusing. I had not heard from him in a few months and began to wonder if he had moved on as he mentioned something about not getting any younger...his passing saddens me and he will be missed -
contact cement is used in fully adhered rubber roof systems
-
the original wiring diagram shows voltage connected to the horn, with the horn button acting as the ground contact switch and no relay involved. If you follow the path to ground from the horn button, continuity has to pass through at least one bearing, the steering gearbox case, the frame, and several bolt connections before getting to the transmission case where the battery was originally grounded. Over time, corrosion can increase the impedance at these locations, decreasing horn effectiveness, especially in the original 6V setup. I put together a modified wiring diagram that shows a separate ground wire that would have to be installed to a modified horn button that could bypass all of those connections with a clear path to ground. At some point I may get back to finalizing this horn button modification, but until then it's just pie in the sky
-
the larger openings would allow for more flow which can boost filtration rate and heat transfer...I think the gauge pressure would drop slightly at low RPMs but the increased flow would offset this; pressure at higher RPMs I believe would still be regulated as with the original pump
-
Updated Build Record Information Request
-
US War Dept Build Card info
-
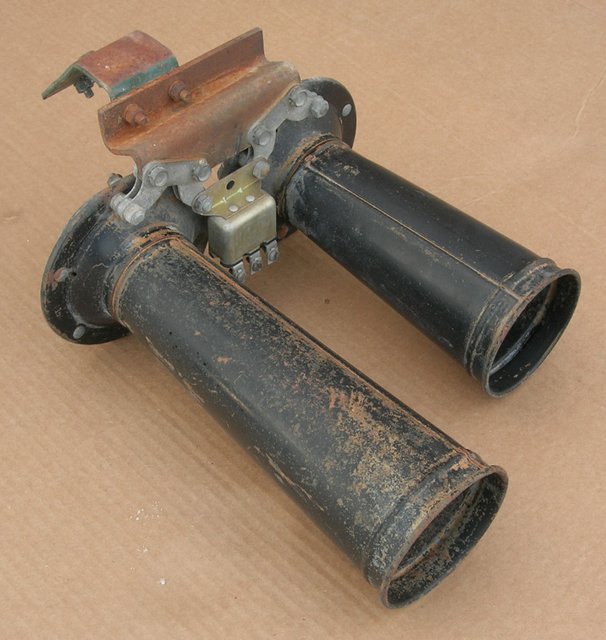
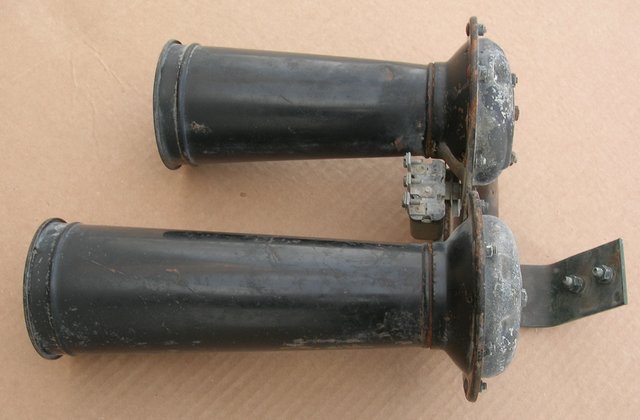
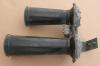
I have several of that horn on the left, but I don't know for sure where they came from (cain't get any of them to work either)...the horn on the right looks similar to the B-series horn, which can be had in a dual horn setup
-
The dual horns I snagged are similar to the set posted, but this one popped up on eBay back in '09 and it looks similar to a set I saw in a Bunn book

-
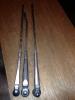
B-1 vacuum wiper arm on the left (sorta) ===>> <<=== B-1 electric wiper arm on the right additional information - electric and vacuum wiper motor comparison
-
additional information - Chrysler "Coming Home" Commercial
-
paint it any color ya want, a slammed S-10 is a rolling speed bump
-
additional information - bullseye halogen conversion
-
Sealer to use for gutters/drip rails?
JBNeal replied to RouteVanJoe's topic in Mopar Flathead Truck Forum
maybe they sweated some old lead wheel weights in there prior to paint -
The B&B carbs were plentiful on the 1/2 tons with the 218, as the Strombergs were standard on the 1-tons with the 230. The Stromberg setup has the fuel filter bowl that is outboard of the manifold heating, where as the B&B setup has the fuel filter bowl over the manifold heating. My '48 1/2 ton has a 230 in it with the B&B, and it seems to have better throttle response than the Stromberg in my '49 1-ton with its 230. I'm almost certain this is due to the vacuum advance in the 1/2 ton distributor; the 1-ton distributor only has a mechanical advance. My experience is that the B&B is more prone to fouling than the Stromberg...this has manifested each time I've had the trucks sit for an extended period, as the Stromberg seems to free up immediately whereas the B&B sputters for awhile before the fresh gas cleans out the passages. So either works as long as they are fairly clean & set properly
-
Sealer to use for gutters/drip rails?
JBNeal replied to RouteVanJoe's topic in Mopar Flathead Truck Forum
I would say to clean out all of the crud as best as you can, then apply a rust dissolver to stop the damage...but if you apply a seam sealer now, how would you do a full repair in the future with the sealer in place? -
Daily driver.........first impressions.
JBNeal replied to Jeff Balazs's topic in Mopar Flathead Truck Forum
about a year ago, I inherited another basket case, this time in the form of a '98 Subaru Outback with a blown head gasket & a lot of original rubber that was rotting. I put a lot of work into that car, and now it can be driven anywhere comfortably. But what I learned about that compact design is that working on that stuffed engine compartment can only be done if ya imagine ya are peeling an onion, cuz that's purty much how most everything has to be worked on: by removing items in a sequence to gain access. I didn't think it was possible, but the heads on that Subaru can be removed with the engine in the car...it can be done only after certain items are removed, and then the heads can only be removed from the car in a certain way (a lot of salty language sorta helps). I have removed the starters from the '48 & '49 more than once, and the '48 has the slot cut into the bolt heads to speed things up. I scoffed at the idea, but removing the floorboards is the easiest & fastest way to pull the starter. I think the last time I did this, it took about 5 minutes to pull the floorboards, then less than 10 minutes to pull the starter out from inside the cab. Of course I'm kindofa contortionist, so I can wiggle in & out of the cab floor fairly quickly. I don't know if this would help with a modified master cylinder setup, but floorboard removal for service is one of the most helpful things I have learned from this forum -
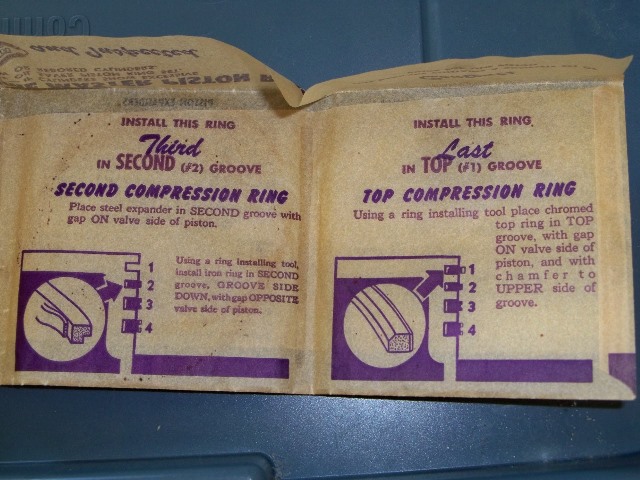
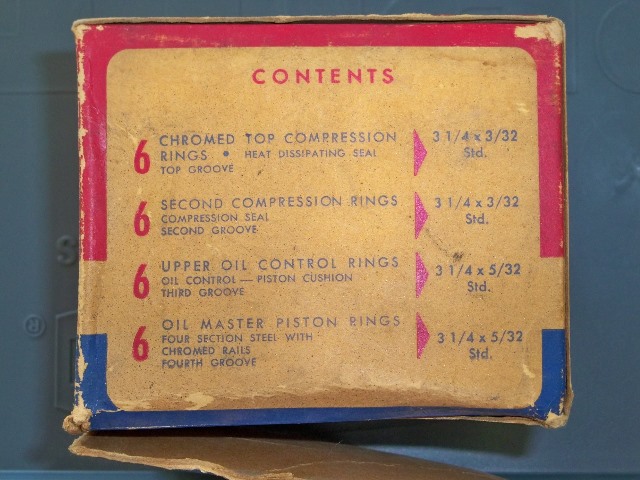
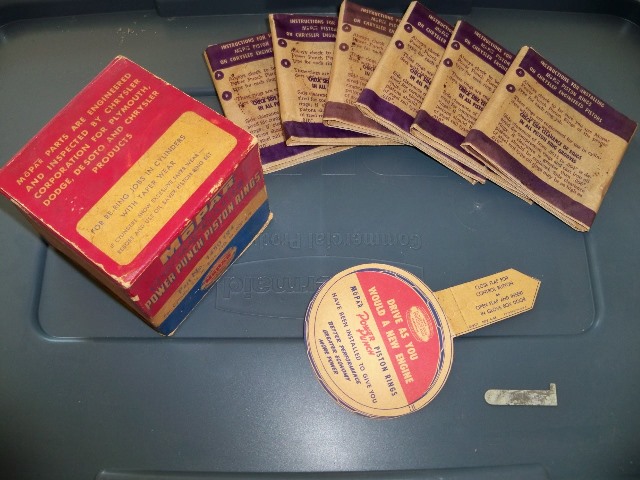
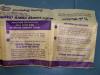
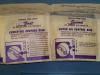
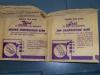
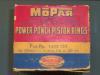
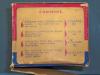
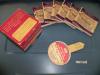
here's the envelopes for the rings:
-
NOSpart: 1450124 Piston Ring Set Chrome Master Ring Set purchased on eBay back in '03 for about 20 bucks...they were in pristine condition, so I put them in the '49 1-ton when I rebuilt that 230

-
Daily driver.........first impressions.
JBNeal replied to Jeff Balazs's topic in Mopar Flathead Truck Forum
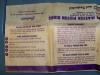
aside from the lower torque that can be applied to these, if'n the wrench strips out, then ya be really screwed -
How Many Pilot House Trucks Have Survived?
JBNeal replied to Bradley S.'s topic in Mopar Flathead Truck Forum
SURVIVOR: this'n popped up on FB