-
Posts
3,462 -
Joined
-
Last visited
-
Days Won
193
Content Type
Links Directory
Profiles
Articles
Forums
Downloads
Store
Gallery
Blogs
Events
Everything posted by keithb7
-
-
I like to use the Panorama lens option on my iphone. You get very close to the car and swing the camera left to right. It makes for some interesting fish-eye images. I think I'm a front bumper/fender, headlight, disproportionate-bulbous type.
-
I got the balls out. I used compressed air and a round magnet. The smaller one down under the circlip was very stubborn. Compressed air with a rubber nozzle tip, pointed down the inlet port, at the bottom of the main bowl, shot it up. The round magnet was down the accelerator pump barrel, waiting for its launch. I was not happy with the raw fuel stream from the accelerator pump. I replaced it with a new one. I spent extra time with aerosol carb cleaner spraying orifices everywhere. Little red straw did very well directing it exactly into every little port. Carb cleaner came out every one. Followed by compressed air. Looking great in there and the raw fuel shot from the accel pump looks perfect. Re-checked float. Bang on 5/64 . Anxious to drive it again. Will soon as the temps drop below 90. Maybe this evening.
-
Looky here what I found today! I went back into carb carb today. The two balls are the same size. You nailed it @harmony. This won’t do. I have two correct sized balls in the carb kit I recently purchased. They are going in now. Thank you harmony. It looks good on you!
-

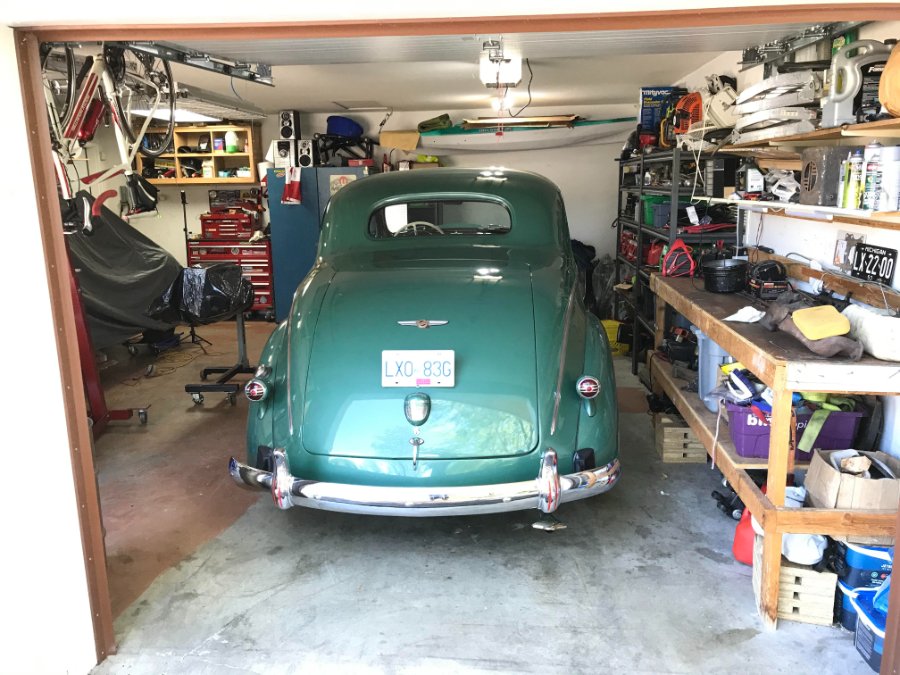
Nope...My Old Mopar Will Not Leave The Garage This Week!
keithb7 replied to keithb7's topic in Off Topic (OT)
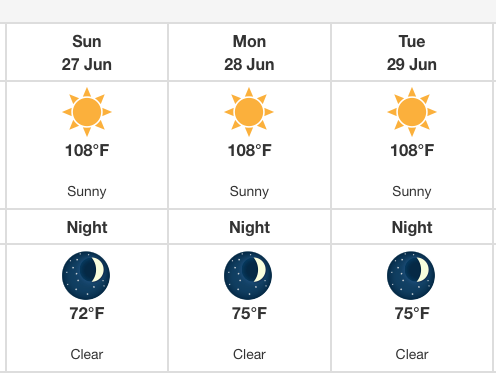
My house does not have AC! We have a boiler for in-floor heating. No forced air furnace ducts. Not a great investment to put AC in this type of house here normally. We see 108F in the summer. -15F or so happens in the winter too. Quite the swing. You like 4 seasons? Come on up! -
It's a pleasure vehicle. I suspect there will be little pleasure to be had while behind the wheel over the next week or so.
-
I suspect the Pony Express in 1875 was more reliable and quicker than most couriers today. We may well be at an all time low in terms of shipping value, and satisfaction. The big courier companies all suck right now. I have had some amazing results when I recently needed a very important part at work. I used CAP Logistics. I had a part picked up at 4 pm pacific time in Southern Arizona. They flew it quickly to Seattle. Then a driver personally drive it 5 hours north, across the Canada/USA border and into my town here in South Central BC. The driver was calling me at noon the very next day confirming it was delivered. 20 hours later. Unbelievable. Cost? Well, ahhem....You could have bought a running, half decent spare old Mopar car.
-
Another alternative that works real well too. In a garage with exposed roof joists one time I made it work. I got about a 1.5" solid steel round bar. About 3 feet long. I used built wood supports and drilled through them with a 1.5" hole saw. I used bolts to anchor it all to the supports across 3 joists. This spread the load. I made sure I was closer to the edge of the wall to support it even more. I found an old photo here. Showing the entire set up. These 1T or so lever/chain hoists work very well. Seen here I am installing a watercraft engine. Later I used the same set up to pick up a fully dressed Honda Prelude straight 4 engine. This is not ideal, I cannot calculate the math to reach the destruction point. If you stripped down the L6 engine a bit I'm pretty confident you could use a similar set up. My joists were 2x16 or so. You can see I double strapped the treated wood to support the round bar. Remove the head, waterpump, starter, bell housing flywheel, both manifolds and carb ect...You'd be fine. I cannot recommend this setup with a fully dressed L6 engine. Nor with less support structure for the hoist. User beware.
-
For some folks, finding an old, low priced assembled engine and tearing it apart is the entire goal. Its a great way to dive in head-first and get a great hands-on education. Getting a hoist and other large specialty tools may not be on the radar yet. Tearing it down is the main objective. This could be done on a shop floor. Not ideal, no. Yet the lights do come on and the gaps are closed as a person learns the hows and the whys of the entire engine. I did something similar. The end goal was not to rebuild the engine. It was to learn. I did purchase a micrometer set and a dial bore gauge. I aIready owned a dial indicator tool. I learned a ton. Now I can pretty-well blue print an engine, any time I want. The engine I tore apart is tucked away in the corner of my shop if I ever need a spare 25" long block. I gained the skills and confidence I wanted to actually rebuild the engine in my 1938 Plymouth. I am in the middle of it right now. I will rebuild the engine myself. Although the machine shop did all the machining work, exactly as I instructed, I will be measuring up everything again before re-assembly. To ensure everything is correct. I built a con-rod vise. I'll set my own ring gap and measure my bearing tolerances. The experience has been fantastic. I do recommend at a minimum, buying an engine stand. Chris you should be able to get something decent, used for $50 if you keep an eye out. This allows for a great working height. You can roll the engine around all directions as needed. It makes the entire experience much more enjoyable. Getting it up on the stand will be a PITA, without a hydraulic lift. I've seen people advertise hoists for rent for a day. Again on Facebook Marketplace. The hoist can go up in a truck bed, lay flat. Go there, get your engine. Get it home, put it safely on the stand at home. Then return the hoist. Not sure if you are a member of any car clubs in your area. That's another good place to ask around about borrowing or renting a hoist. If you where nearby, I'd let you use mine without hesitation. Only stipulation might be that I come with you to supervise. Lol. Well, help you out. It's fun. I love my tools...Makes me grin ear to ear when I look at this photo. Members here get it. Most average people probably think we're weird, odd ducks.
-
I have seen some folks mount the block on a stand with the bell housing bolted to the block. Yet then you can't get the flywheel bolted to the crank anyway. The bell housing has to come off. I'll mount the bell housing last while the assembled engine is dangling by chains off my hoist.
-
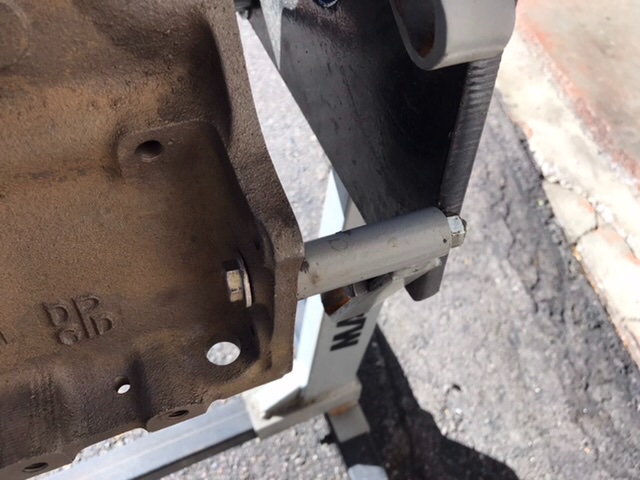
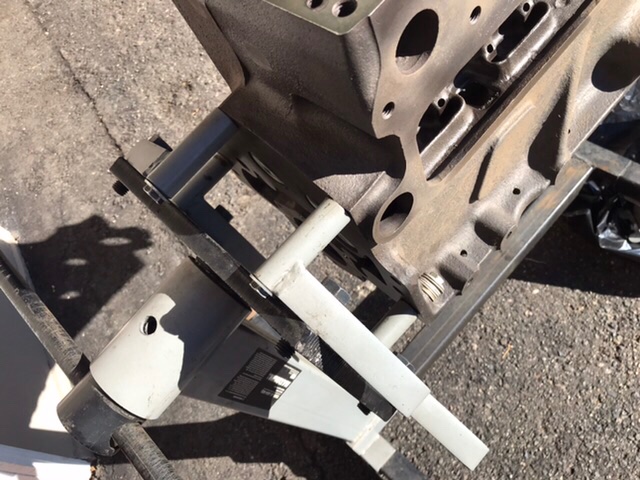
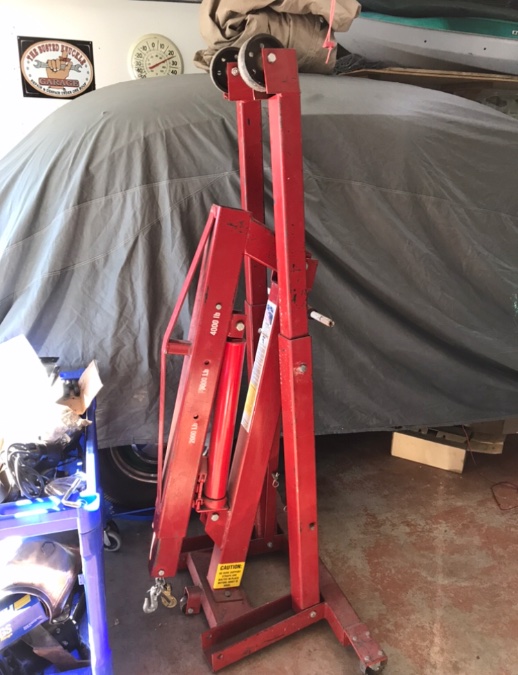
And here for all to see. My complete lack of progress on reassembly of my ‘38 Plymouth engine. I could pull a bolt out and let you know. Its sort of a trial and error thing. Pending the stand you end up using. Look around for used engine stands. Gotta be some on Facebook Market place. Buy a better quality one. Not Harbor Freight. Mine is rated for 1,000 lbs. paid $50. It unbolts and lays flat for easy storage too. I now own a 4,000 lb rated hoist too. Free gift from a good friend. Good times! Yes that’s my poor ‘38 behind the car cover.
-
I bought a 6V flooded acid battery 5 years ago. "Crown" brand at a local tractor supply. I have no idea if it's a half decent battery or not. I do know that I keep it in the car, disconnected all winter. I put .75A 6V to it every month for about a week. No issues. 5 years so far. I have no complaints.
-
Not possible! As beer input decreases, generally so does work output. Within the laws of diminishing returns of course. “Beer served, will decrease until morale improves.” Is NOT a sign you’ll see hung on a will in my shop.
-
On Father's day, my son hopped in my ‘38 Chrysler and we drove downtown to a car cruise. We enjoyed a beer on a sidewalk patio. We cruised the strip a bit. Headed to a riverside park. Met my wife and daughter-in-law there. They fired up a bbq. They cooked homemade burgers. We sat under a large shady tree had a beer and watched the world go by. A fantastic day. About 90F. Blue skies.
-
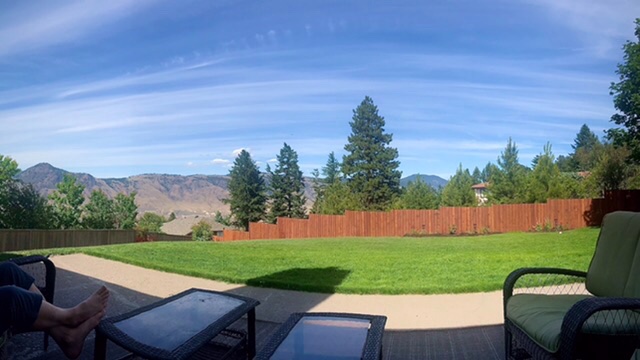
My hard working wife focused the back yard this spring. We worked together to build the new cedar fence. She’s been pampering the lawn. New top dressing with some nice black soil. New seed planted. Fertilizer and water on a regular schedule. She started new flower beds. They will be very lush in a few years. With a beer in hand, the view this father’s day, out my back yard is very nice.
-
N.A.V.Y. Lol. Too funny. Good acronym. That A/C work sounds like a real, uncomfortable PITA. You’re a good man for helping out a friend. I’m careful and only go so far. Some people get themselves into these positions by making multiple bad decisions. I put up a little defense sometimes about bailing people out in these scenarios. Depends on the situation. Good friends, family, yes. Good things, mojo comes back to you. My wife’s, son’s cars and my mother-in-law’s cars are all added to my list of responsibilities. I turned in my company truck last week. I asked to change roles in the company. I took on a M-F, desk job that I can walk away from every night and weekend. I had to buy a little commuter car for year round travel to work. Its only about 4 miles to work. I’m not flashing up my Dodge Cummins diesel truck for that commute. As much as I would enjoy the daily drive in my ‘38 Plym sedan, the winter roads and de-icing agents would eat it. In little time. I bought a 2006 Mazda 3 wagon. Great shape. Low miles. Parts readily available and cheap. Many are being scrapped and parted out weekly. Peppy. Cheap and the A/C works! She’s a little bomber. Surely there will be some blood letting over the next few years with it.
-
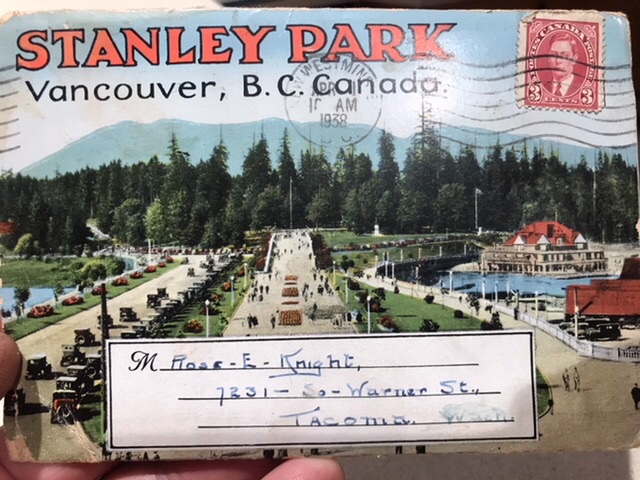
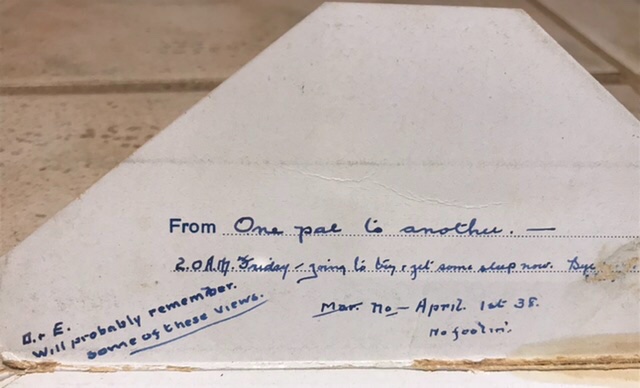
In the glovebox of my 1938 Chrysler. This is a post card set from 1938. Posted and signed “No Foolin’ , April 1 1938”. Mailed from Vancouver BC to Tacoma Washington. Post cars of Stanley Park, in downtown Vancouver. My car was sold, new in Vancouver BC by Begg Motors in 1938. It would have very like driven many of the various roads shown in the post cards. Driven its maiden year, in 1938. I found this postcard set in a used/antique/junk store in Tacoma, when I was visiting there. Bought it for $2. I had to. I grew up in the outlying areas of Vancouver BC thru the 80’s and early 90’s. I have spent countless days at Stanley Park. We still go there now and again.
-
My ‘38 Plymouth. Inspection sticker in the lower right corner of its windshield. Last inspection 1979.
-
Made me laugh. I’m in the same situation with my ‘38 Plymouth. Who cares is right? It does not matter. Quite honestly its been some of the best money I’ve ever spent on my own education and personal enjoyment.
-
Putting money into an honest hobby that you enjoy? Everyone here is guilty. Congrats on getting the engine running! Great work. Have you ever had that much fun and satisfaction by putting the cash you spent on the car, into the bank account? You mentioned about chasing small things. Gremlins to track down. Yes there will likely be lots of those. I find that part of car ownership very fun and challenging. Troubleshooting and finding all the little things that need addressing. It's stimulating and rewarding. The more you do it, the better a mechanic you'll become. I've been picking up a lot of little things to address in my recently acquired '38 Chrysler. Way more than I expected. Yet I am enjoying the challenge very much. I figure, I've owned 3 flathead Mopars now. All in various stages of repair. Every one of them has challenged me further in different ways. I'm slowly becoming more of a specialist for these old cars. Like many folks here on this site. I have no desire to change to a different manufacturer at this point. I plan on honing my Mopar skills further. This thread is really heating up. Great progress. Keep going! More pics and updates are certainly welcome here. We're standing by...
-
-
-
I’m getting close to that point.
-
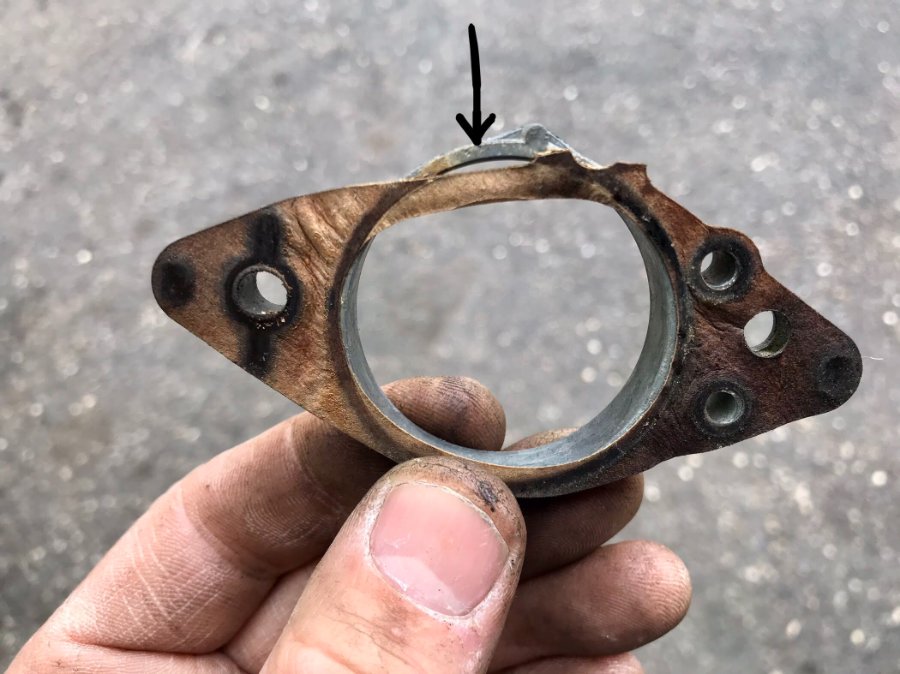
Good work there @Crazyred, digging in and getting it done. I went through some similar issues with my '38. I'll share some of my thoughts to give you some ideas to check. Here's how my tiny brain grasps the sujecct matter: When you rebuilt the carb did you soak it somehow, in a cleaner with all the plugs, balls and screws out? At the base of the carb is there an adaptor? There are vacuum passages in there. Mounting gaskets, spacer plates, adaptors, heat shields, etc, have recesses cut away and must be lined up to prevent blocking of the vacuum passages. This passage allows vacuum to sort of get up and around the main throttle valve when it is closed. Via an internal tunnel bored into the carb body. A tiny hole or two, can be seen in the carb wall, right near where the throttle valve contacts the carb wall. Right below the throttle valve, when it is fully closed. This little port, allows fuel to enter into the intake manifold below the throttle valve. This happens at idle when the throttle valve is fully closed. I think you physically adjust how much fuel/air enters into the intake when the main throttle valve is fully closed, by opening and closing the air/fuel mixture screw. This adjustment only tweaks A/F mixture at idle, and just a tad, a hair off idle. As you slowly open up the main throttle valve, the low pressure point (vacuum) travels farther up past this tiny fuel inlet port. The engine really starts sucking in air now. It wants more and will take all you will allow it, until it blows up. Yet we maintain control of air and fuel intake via the carburetor. An engine won't run on air alone of course. So we mix fuel in with it. As precisely as we can. Within the limitations of a carburetor. As the main throttle valve opens, the fuel now enters the carb higher up the throttle body. Possibly 2 different inlets now. Larger openings called jets, allow way more fuel in, compared to the tiny port at idle. These jets are precision drilled holes that allow a specific amount of fuel in. As you open the throttle, linkage connected to the accelerator pump gives it a good squirt of raw fuel. It may have its own inlet, or may force the raw fuel out through the main fuel intake. You may see this happening up high in the intake, further down below the choke. The carb intake necks-down just below the area, speeding up the air flow. Creating more vacuum up in this area. Also atomizing the raw liquid fuel. The top of the fuel bowl is vented to atmospheric pressure. The carb venturi is well below atmospheric pressure. This phenomena causes fuel to flow in the carb through the main jet now. All the parts of the carb, from the intake down, have to be sealed up air tight. All the sandwiched layers, plates, adaptors, etc must have proper gaskets so air cannot enter the carb via any other way, except through the controlled ports. If air enters via some other opening, we then loose control of the incoming air. This takes away vacuum pressure from the ports where we need it. At the idle air mixture screw for example. You twist and turn the idle A/F mixture screw and nothing happens, until you close it all the way and the engine may stumble. That's a good sign of a vacuum leak elsewhere. When you tweak the other screw on your carb, the idle speed screw, you are locking open the main throttle valve. Just moving it slightly and holding it there. As you open that valve, vacuum travels further up into the carb and starts drawing fuel in from the main jet. Some carbs may have an intermediate jet. Its main use is to deliver fuel in the zone between idle and the main jet delivery. If the car runs at higher idle as you turn up the idle speed screw, yet won't at low idle, that is another sign you have an issue with the jetting or internal passages drilled in the carb. Something may be plugged up with foreign material, or you may have a vacuum leak. The stumble showing in your vacuum gauge. I agree with what others have said. I think you have valve sealing issues. Intake valve sealing issues. The intake valve is supposed to be 100% closed and sealed when combustion occurs. This little controlled explosion, will push exhaust gasses out of the cylinder any where it can. An unsealed intake valve would allow gasses to travel back into the intake manifold. Forcing your needle to move in the the opposite direction. This happens quickly of course, with each cylinder that may have a valve leak. The vacuum gauge needle flutters as shown. Have you completed a compression test yet? Both wet and dry? What are the results? Here's an example of a vacuum leak I found at the carb base mounting area. You can also see two vacuum ports, drilled holes, at the right side of this adaptor plate.
-
1 step at a time. Controlled adjustments and tweaks. Reassembly and testing after each step. This allowed me to feel the improvements, or not. The engine miss has finally been alleviated. I took the distributor out again today. Took the breaker plate out removed and cleaned everything up. Must have taken .010” or more off the points to get them closer to closing square. I set the gap at .018”, I rechecked every connection on the breaker plate. Inspected every little thing. Cleaned up the light oil under the distributor cap. Not sure what that’s all about. Will keep an eye on it. Test drove it and experienced excellent results. Tonight is the best its ran since I took ownership. Between the carb air leak, incorrect float level, incorrect fuel pump, internal carb issues addressed, fuel regulator removed, timing set again and again trying different settings, air fuel mixture screw adjusted, dwell tweaked, distributor parts & under cap cleaned, coil wire replaced, she’s feeling really good. I still plan to perform a valve set on this coming Sat morning. I’ll keep burning MMO indefinitely and monitor cylinder #2 psi. Finally, maybe I’ll sleep past 5AM in the morning. Lol. New points are on order. Have been for some time. I'm on the e-bay never-ever waiting plan.


