Leaderboard


Popular Content
Showing content with the highest reputation on 03/31/2025 in all areas
-
That only works on pilot shaft bushings 🤣 Hoping you have the right parts, this feature of a bolt pattern that only goes on one way ... in your case could be so the timing marks are in exact position. I have seen the same "feature" when tightening a torque converter to a flex plate ... the bolt pattern only allows one way ... probably for balancing in that case .... I dunno Just sucks because you can only see 1 bolt at a time and have to start it, then rotate engine to next bolt ... see it does not match and spin the engine back and remove the bolt and then start over ... you eventually get it right. Just one of those things a mechanic have to work through. .... Nice the mechanic left a puller for you. I'm thinking you will need a puller for the job, but should be pretty easy from there. Seems like you can see the bolt pattern and just be sure they line up this time. A professional Dodge flathead 6 mechanic should have caught this .... not many of those running around as mobile mechanics .... Live and learn.1 point
-
Did you try both sides of the pulley?1 point
-
Damn now I gotta pack my banana hammock1 point
-
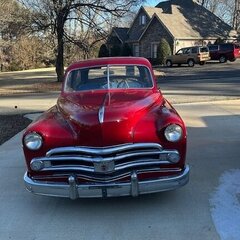
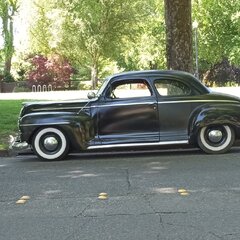
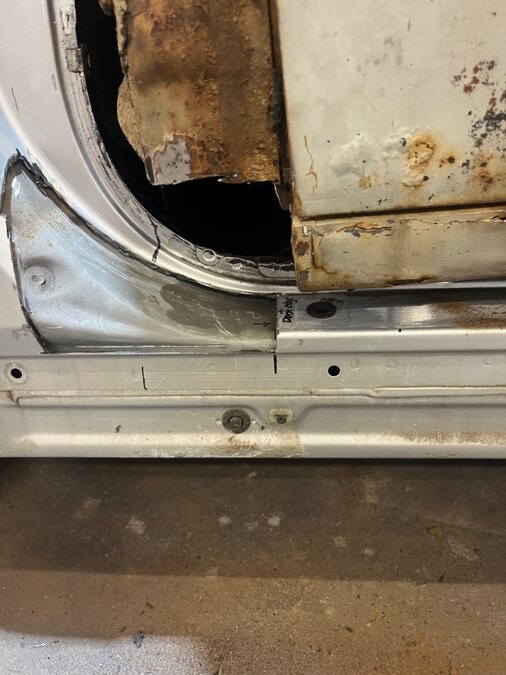
The youngster, who really knew his Japanese cars, felt I could chop more of the Lexus outer sill away and rebuild with new sheet metal welded deeper into the actual frame core below the outer sill. I was going to rebuild the Plymouth sill on top of it anyway, so why not get another 1/2"? Ugh. More cutting. The attached pic shows the outer skin of the Lexus sill and the Plymouth outer rocker since removed. Some of that rocker was solid bondo! Oddly, they had spanned rust out areas with tin foil and filled it up! There is more space at the wheels than the pix reveal. The circumference of the Lexus tires is actually quite a bit less than the old Plymouth treads. Plus, the PO had fitted extra wide racing wheels in the rear that could not even be removed without jacking the body up to expose the top of the fender opening. None the less, I will see how she rolls before too much more lowering. The stance, especially the second pic, is deceptive because I could not get very far away within the shop. So it appears like it has more rake than it actually does. That 1/2 degree translates to about 1/2" over the length of the car. An old hot rod rule of thumb was somewhere around 1 degree. Yes, I have a fishing trip planned for Northern Idaho, but I will have to earn it by completing my yard work before I go! Thanks for your comments guys!
 1 point
 -
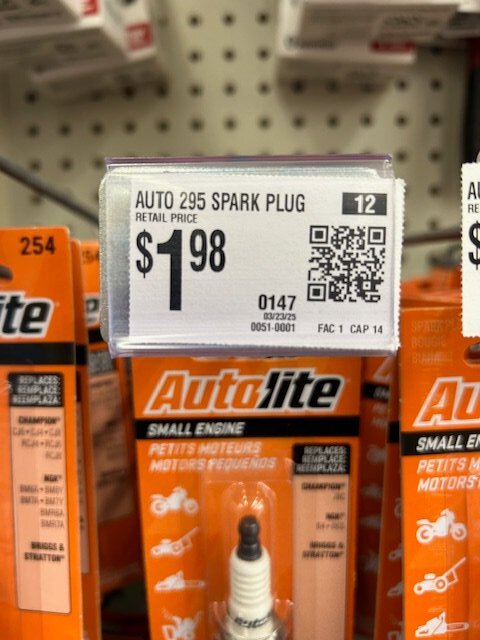
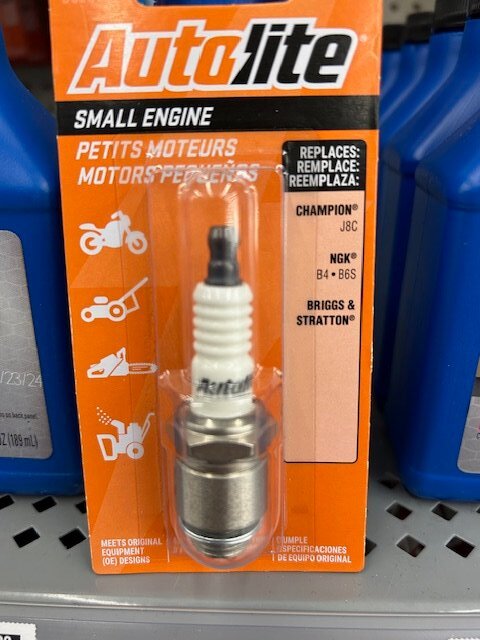
I know alot ow owners ask what plug to purchase for their old MoPar flathead engines. A friend of mine who also owns a 1939 Desoto which is a driver car and not an AACA show car let me know about these plugs. He also uses these in his engine without an issues. Walmart back in the auto section has a rack of various small engine plugs. They only charge $1.98 per plug versus these same plugs that are listed on Ebay and they are selling these same plugs for $8-12 each. You also save on shipping if you purchase at your local walmart. When looking at the package you will also note that they are a replacement plug for Champion J8 plugs that were also used in our MoPars. From some of my early cars catalogs the original Champion plug that was used is the J8C, but the J8 replaced the J8C at some point in time. These Autolite 295 Plugs do not have the black body and do not have the original hash markings, but the body is not chrome plated and give you the BLING look But when you can purchase 6 plugs for a little less than $12 plus tax these are a great buy. I keep six in my tool box in the trunk of my 39 Desoto as spares. Also of note that the older Autolite A9 plugs are getting harder to find, but when at a swap meet look at the end label on the autolite box and look for this number: A00-12405-A these are the A9 14m 3/8 reach. Just passing along information to the members. Refer to the attached pictures. Rich hartung desoto1939@aol.com
 1 point
 -
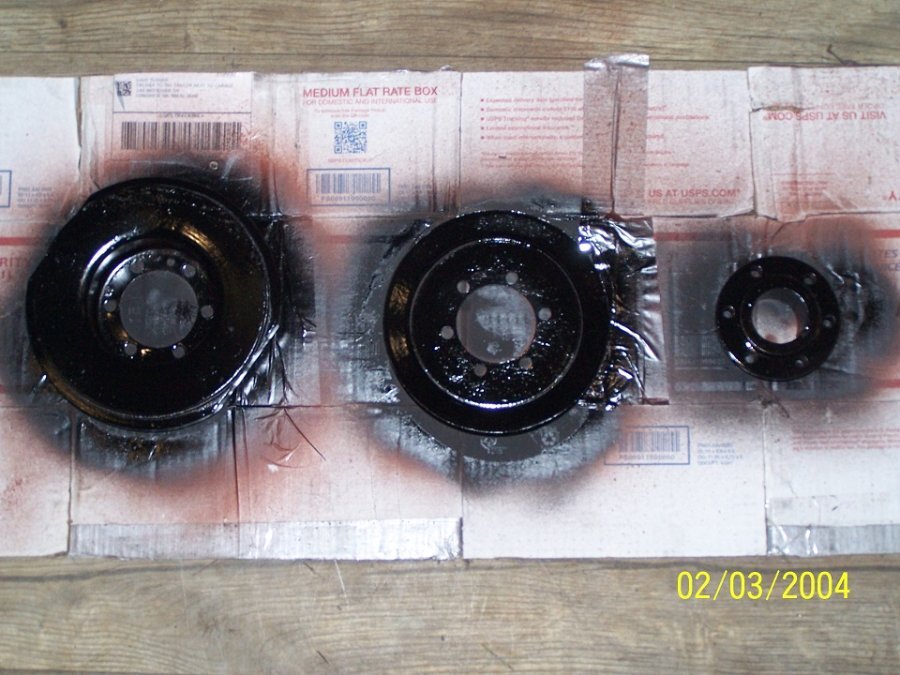
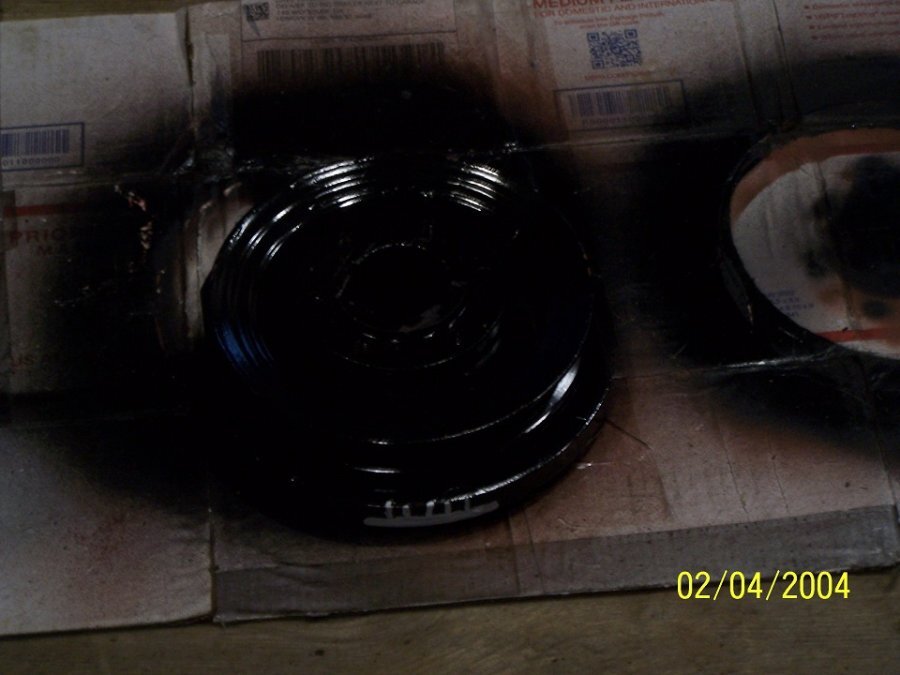
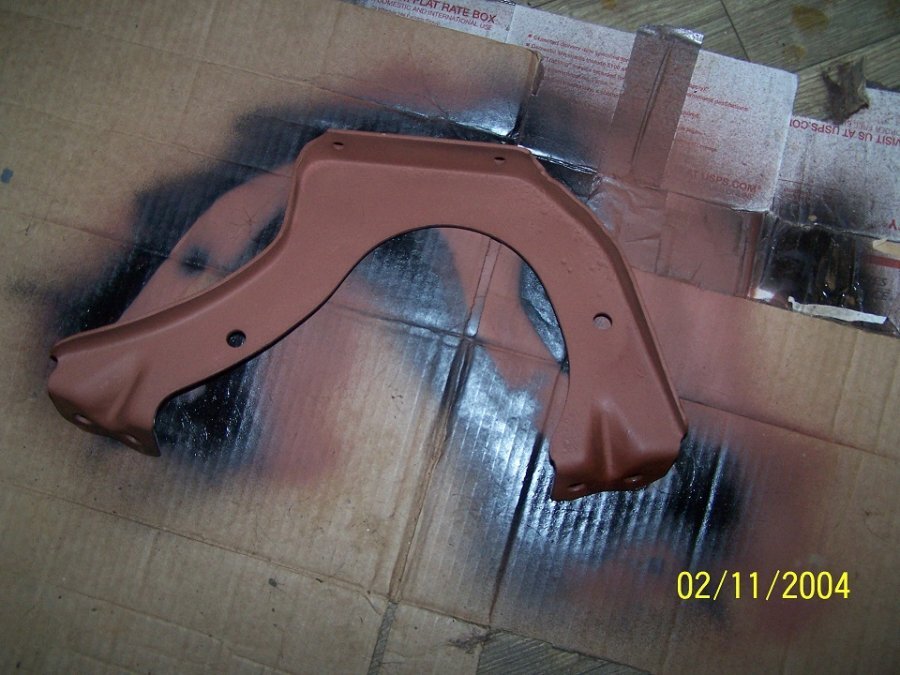
Got my hands on some "new" parts. First Pic is engine compartment as left by the mechanic. Fourth pic is new timing marks


 1 point
 -
You install the arm one slot wrong...you'll figure it out pretty quick🤣1 point
-
IF and IF I rememebr right, center the box and the link goes "down"-ish.1 point
-
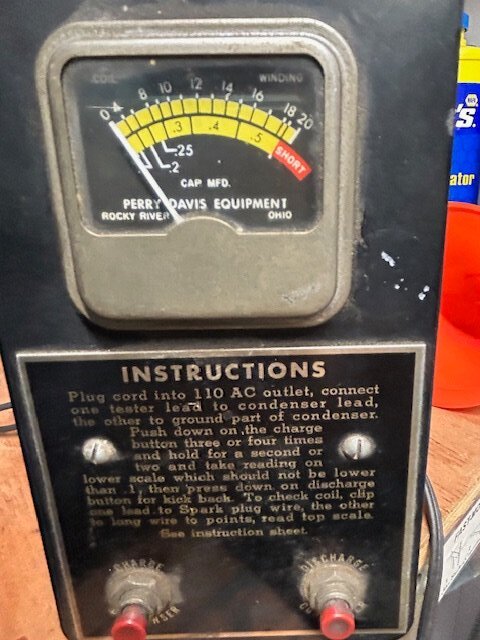
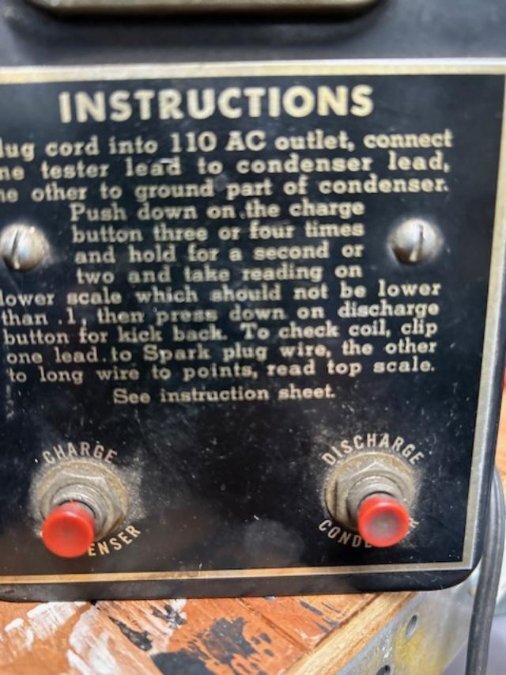
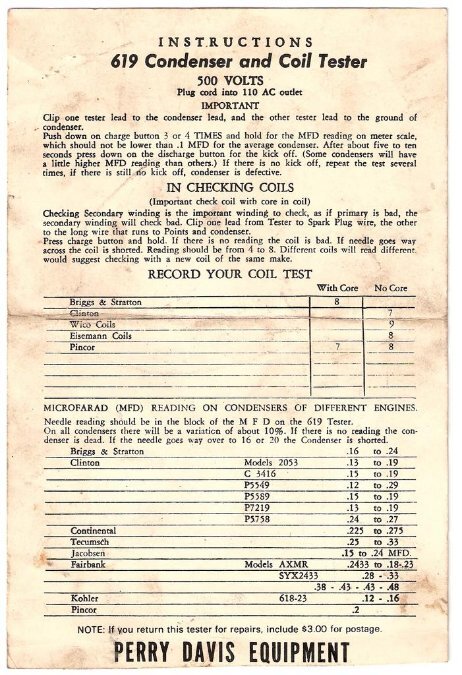
I went to a local swap meet held by the South Jersey AACA club on Sunday. There were a lot of venders. I was able to come home with three great purchases. 1st found a Perry Davis Coil and Condenser testing. I know how to work the condenser testing part. But, i can read the instructions on the front of the tester. I have a question regarding the testing of the coil You plug the tester into an electrical outlet. Connect one lead to a spark plug and the other lead to the wire coming from the coil which would be my postive wire going to the distributor. Then i assume you should get a reading on the upper scale on the tool. When testing a condenser you have to press the charge button on the left get the reading for the MF, Micro Ferrets reading then discharge the condenser. But when testing the coil do I have to do the same process or not and also does the ignition switch need to be turned on so that the current is now completing the circuit from the coil through the distributor to the spark plugs. I want to make sure I have this setup correctly and then do not want to destroy any of the electrical parts and the original coil that is in the firewall. I have never done this test so trying to figure out how to properly perform the test safely. I purchased the tool for $10. Not a lot of money for a diagnostic tool. refer to the attached pictures of the tool and the instructions on the tool. Any help is appreciated. After getting the tool to work I will post pictures of the readings that I get on my 39 Desoto. Did a search and found an instruction sheet on the coil tester. Hook up the two leads and then depress the charge button to get your reading on the scale. But nothing stating to turn on ignition and or to depress the discharge button. What is everyones opinion.

 1 point
 -
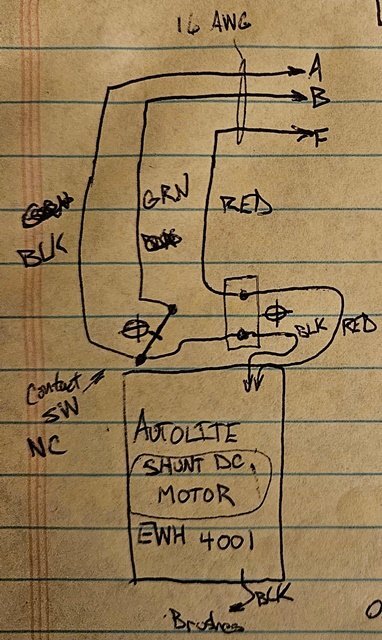
I did some work on the Autolite EWH-4001 wiper motor awhile back, but had to put that on the backburner until I had some spare time to put together a complete article. In the meantime, I dug up my notes to see if there were any revelations that could be helpful. This wiper motor is considered a shunt DC motor, read up on that topic on the internets for some fancy splainin as to what is going on there, it's interesting material. The shop manual schematic only shows the wiring from the wiper motor assembly to the wiper switch. I sketched up what the wiper motor assembly wiring looks like; this may or may not help with diagnosing problems. The wiper switch itself has a 8-amp circuit breaker, that's the contact contraption on the back side of the switch. I had a switch with very dirty circuit breaker contacts, so I cleaned them like breaker points on a voltage regulator, and that helped, but not entirely, so I switched to another similar switch that was in better shape and that kinda fixed some functionality problems with the 1st wiper motor I was rejuvenating. That's about where my work needs to pick back up.
 1 point
 -
I talk to him constantly...he dropped his old 285.6534 #. Communicate to him thru his email or ebay. Email...seaplym@hotmail. Ebay name...seaplym1 point